
KISS 24A ESC Firmware Update to v1.02


Info: This article was written in collaboration with Daniel and Jona! Thank you so much!
Do you want to become a guest writer? Then just contact me!
![]()
Inhaltsverzeichnis
KISS24A ESC Firmware Update to v1.02
In order to flash Kiss24a ESCs over the KissFC, a bootloader must be installed first. This is active as of version 1.02, which means that only ESCs with a firmware older than v1.02 must be subjected to this procedure.
This guide shows how firmware version 1.02 is installed on the ESCs to flash future firmware via the KissFC.
What is required?
- Putty, Arduino IDE or an other Serial Monitor
- STM Flash Loader (v2.8 oder höher)
- Flyduino Hex Generator (Homepage)
- USB FTDI Adapter
- LiPo
Connect ESC to the FTDI adapter
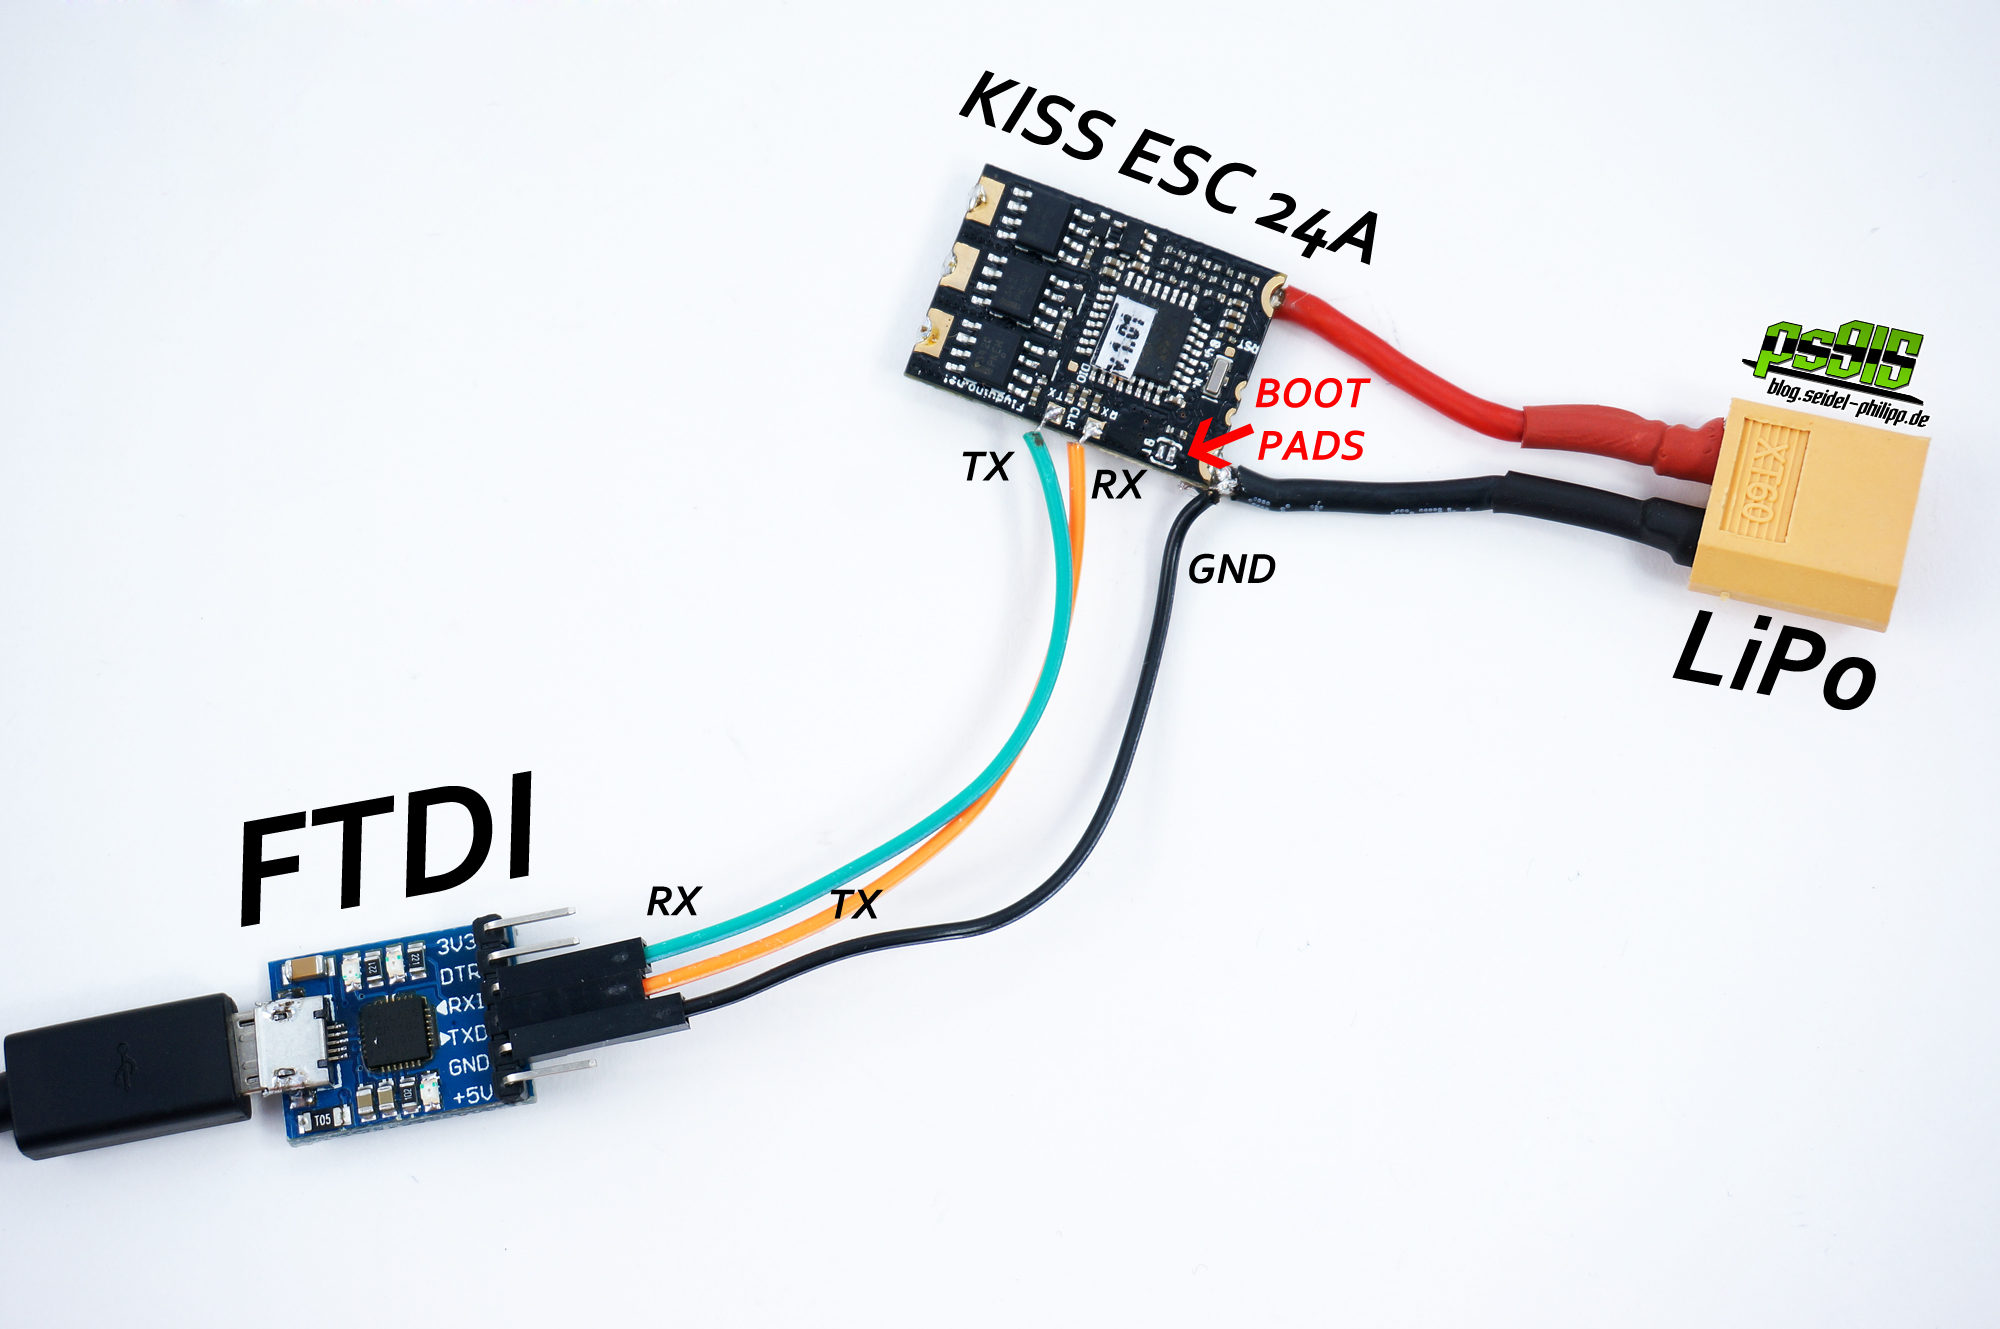
Connect the ESC to the USB-FTDI-Adapter as shown above.
Note:
FTDI RX -> KISS 24A TX
FTDI TX -> KISS 24A RX
FTDI GND -> KISS 24A GND
Read out KISS ESC serial number
Each ESC is individual and has its own serial number. Because of this, it is necessary that each ESC is individually flashed in the flash process from v1.00 or v1.01 to v1.02.
In order to create an individual file, which can only be used to flashed the associated ESC, this serial number must be triggered in advance.
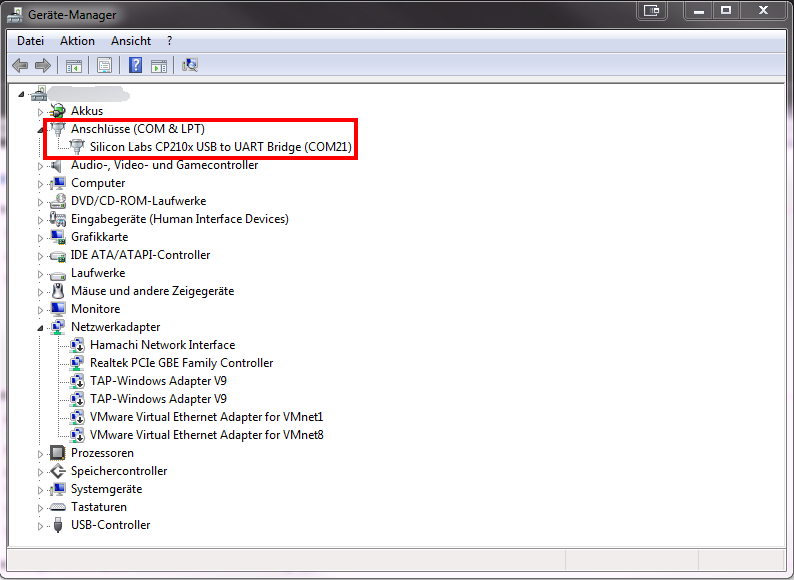
Connects the ESC via the XT60 connector with the Lipo and then plug the FTDI adapter into the PC. Then find the correct COM port via the device manager.

Start „Putty“ and select the „Serial“ tab. Under Serial Line, select the appropriate COM port and enter „115200“ as „Baudrate“.
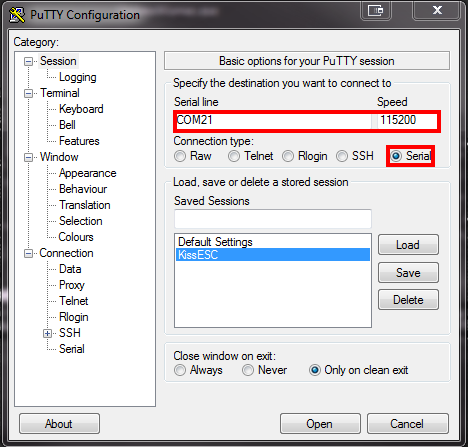
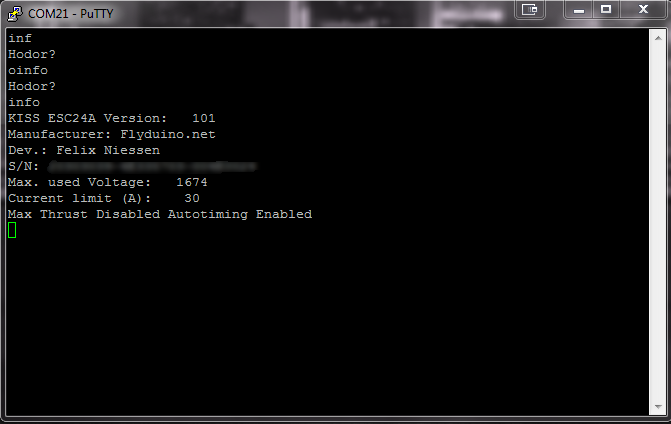
Click on „Open“ and wait briefly. Enter the word „info“ (without quotes) and confirm the entry with Enter to determine the serial number (S/N) of this ESC.
Generate new Firmware online
Now open the „Hex Generator“ page and enter the found serial number in the „Serial Number 1“ field.
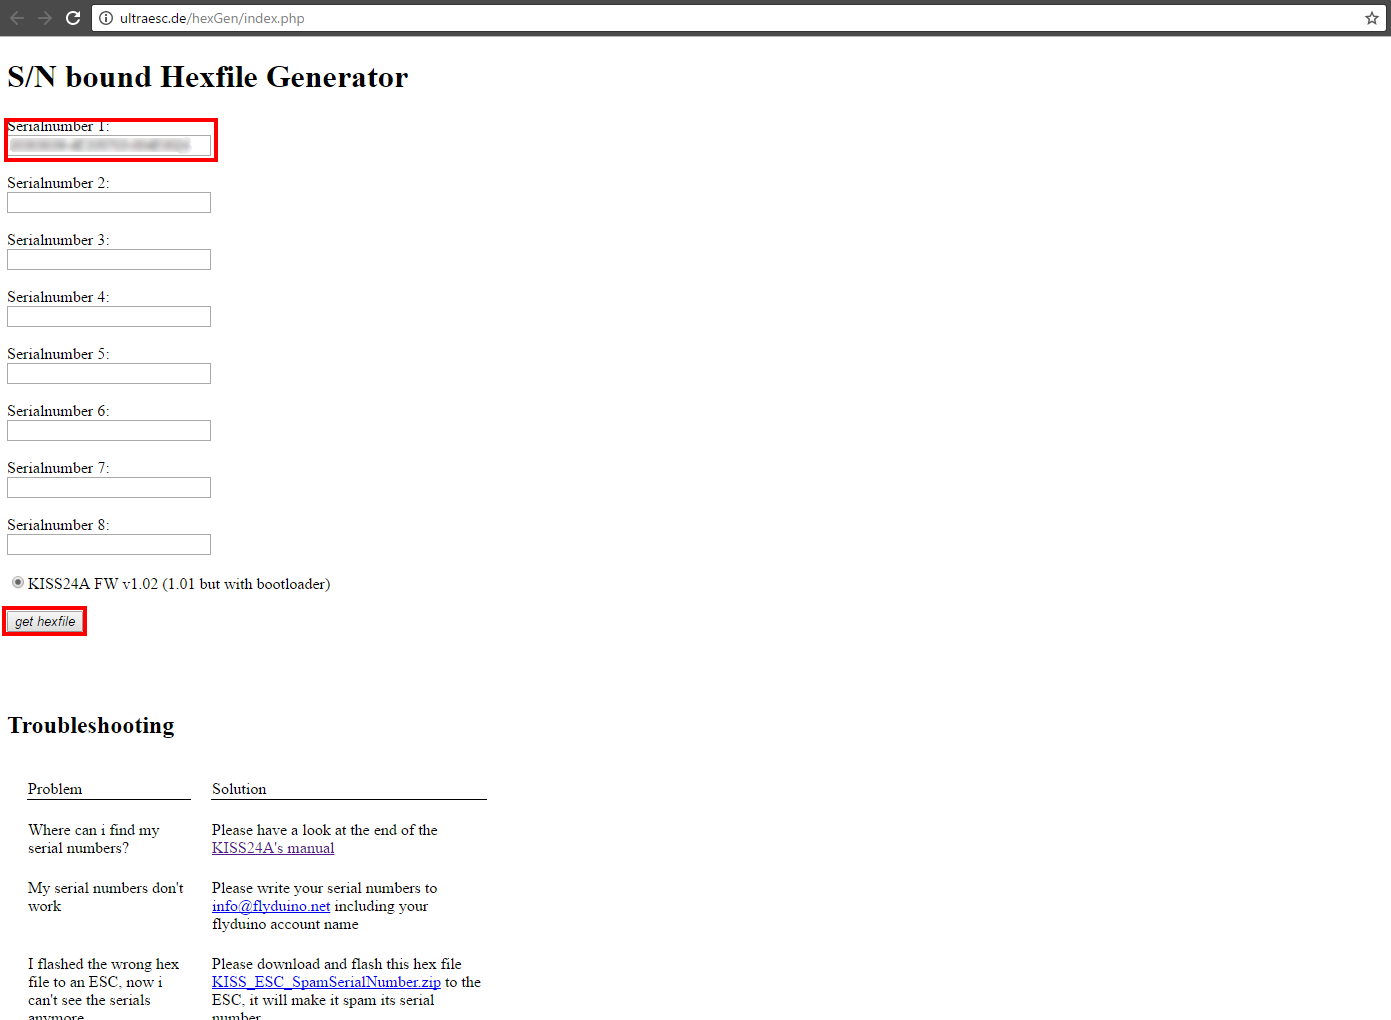
Now click on „get hexfile“ and download the file. The best way to do this is to use this file to assign it to the ESC, because …
The downloaded .hex file works exclusively with this ESC!
Now you can disconnect the USB FTDI adapter from the PC and remove the Lipo from the ESC.
Bridge Bootloader Pads
Next you have to connect the two solder Boot Pads „BT“ with a drop of solder. This is the bootloader, which only allows the ESC to be flashed. This you don’t need at future flashing process anymore.
Now energize the ESC with the help of the Lipo and connect the whole to the PC using the USB-FTDI-adapter.
Flash ESC
animated GIF of following procedure
Start the „STM Flash Loader“ and select again the appropriate COM port and the „Baudrate 57600“.
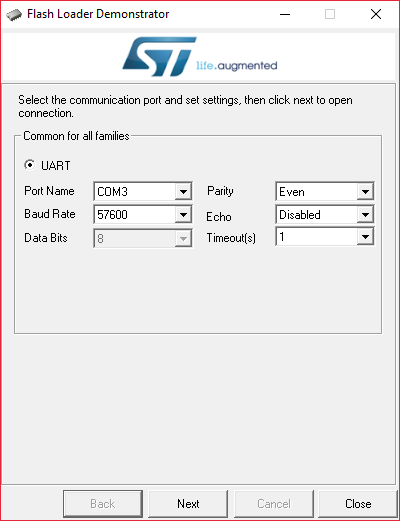
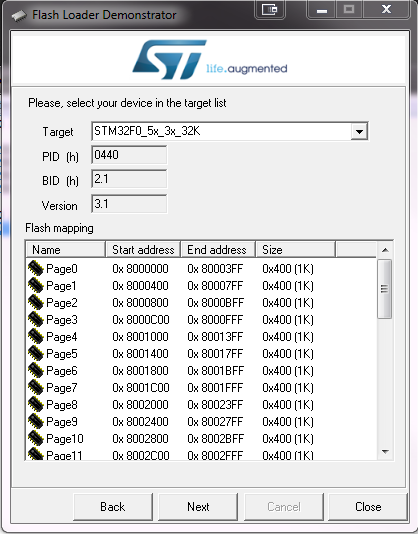
Click on „Next“. The device should be recognized automatically. If this is not the case, simply select „STM32F0_5x_3x_32K“ and click again on „Next“ to confirm the entry.
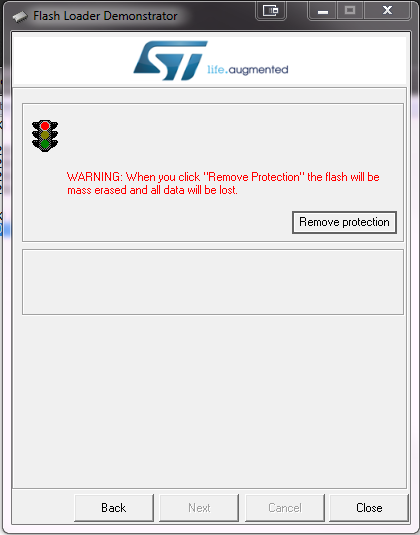
In the window that follows you must click „Remove protection“ to flash the complete ESC and erase everything
In the „Download to device“ tab, choose your pre-generated .hex file.
Also, select „Global Erase“ (all files of the previous version will be deleted, thus ensuring that there are no complications) and „Verify after download“ (Confirming that the Flash operation was successful).
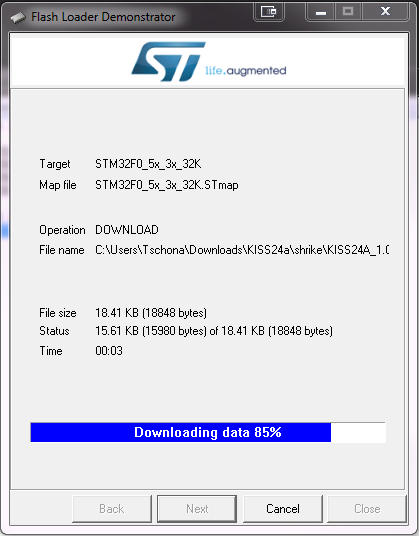
Click „Next“ to start the flash process.
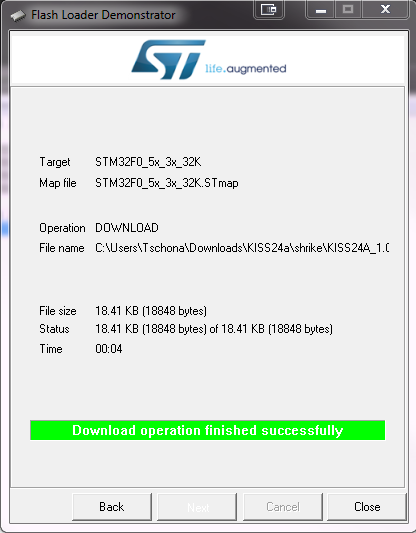
After a few seconds the process is completed and you should see the following picture:
Exit the „STM Flash Loader“, disconnect the USB connection to the ESC and unplug the LiPo. Solder the cabling from the ESC and remove the bridge on the boot pads.
Congratulations, you have successfully flashed your first ESC to version 1.02.
You must repeat these steps for the remaining ESCs.
Once you have completed this, you can now flash your ESCs over the KISS Gui.

5 Responses
[…] Vorheriger Beitrag KISS 24A ESC Firmware Update to v1.02 […]
[…] Updating KISS ESC24A from v1.00/1.01 to v1.02 in English http://blog.seidel-philipp.de/kiss-24a-esc-firmware-update-to-v1-02/ […]
[…] Nächster Beitrag KISS 24A ESC Firmware Update to v1.02 […]
[…] Great read on Philipp seidel blog. […]
[…] KISS 24A ESC Firmware Update to v1.02 […]