
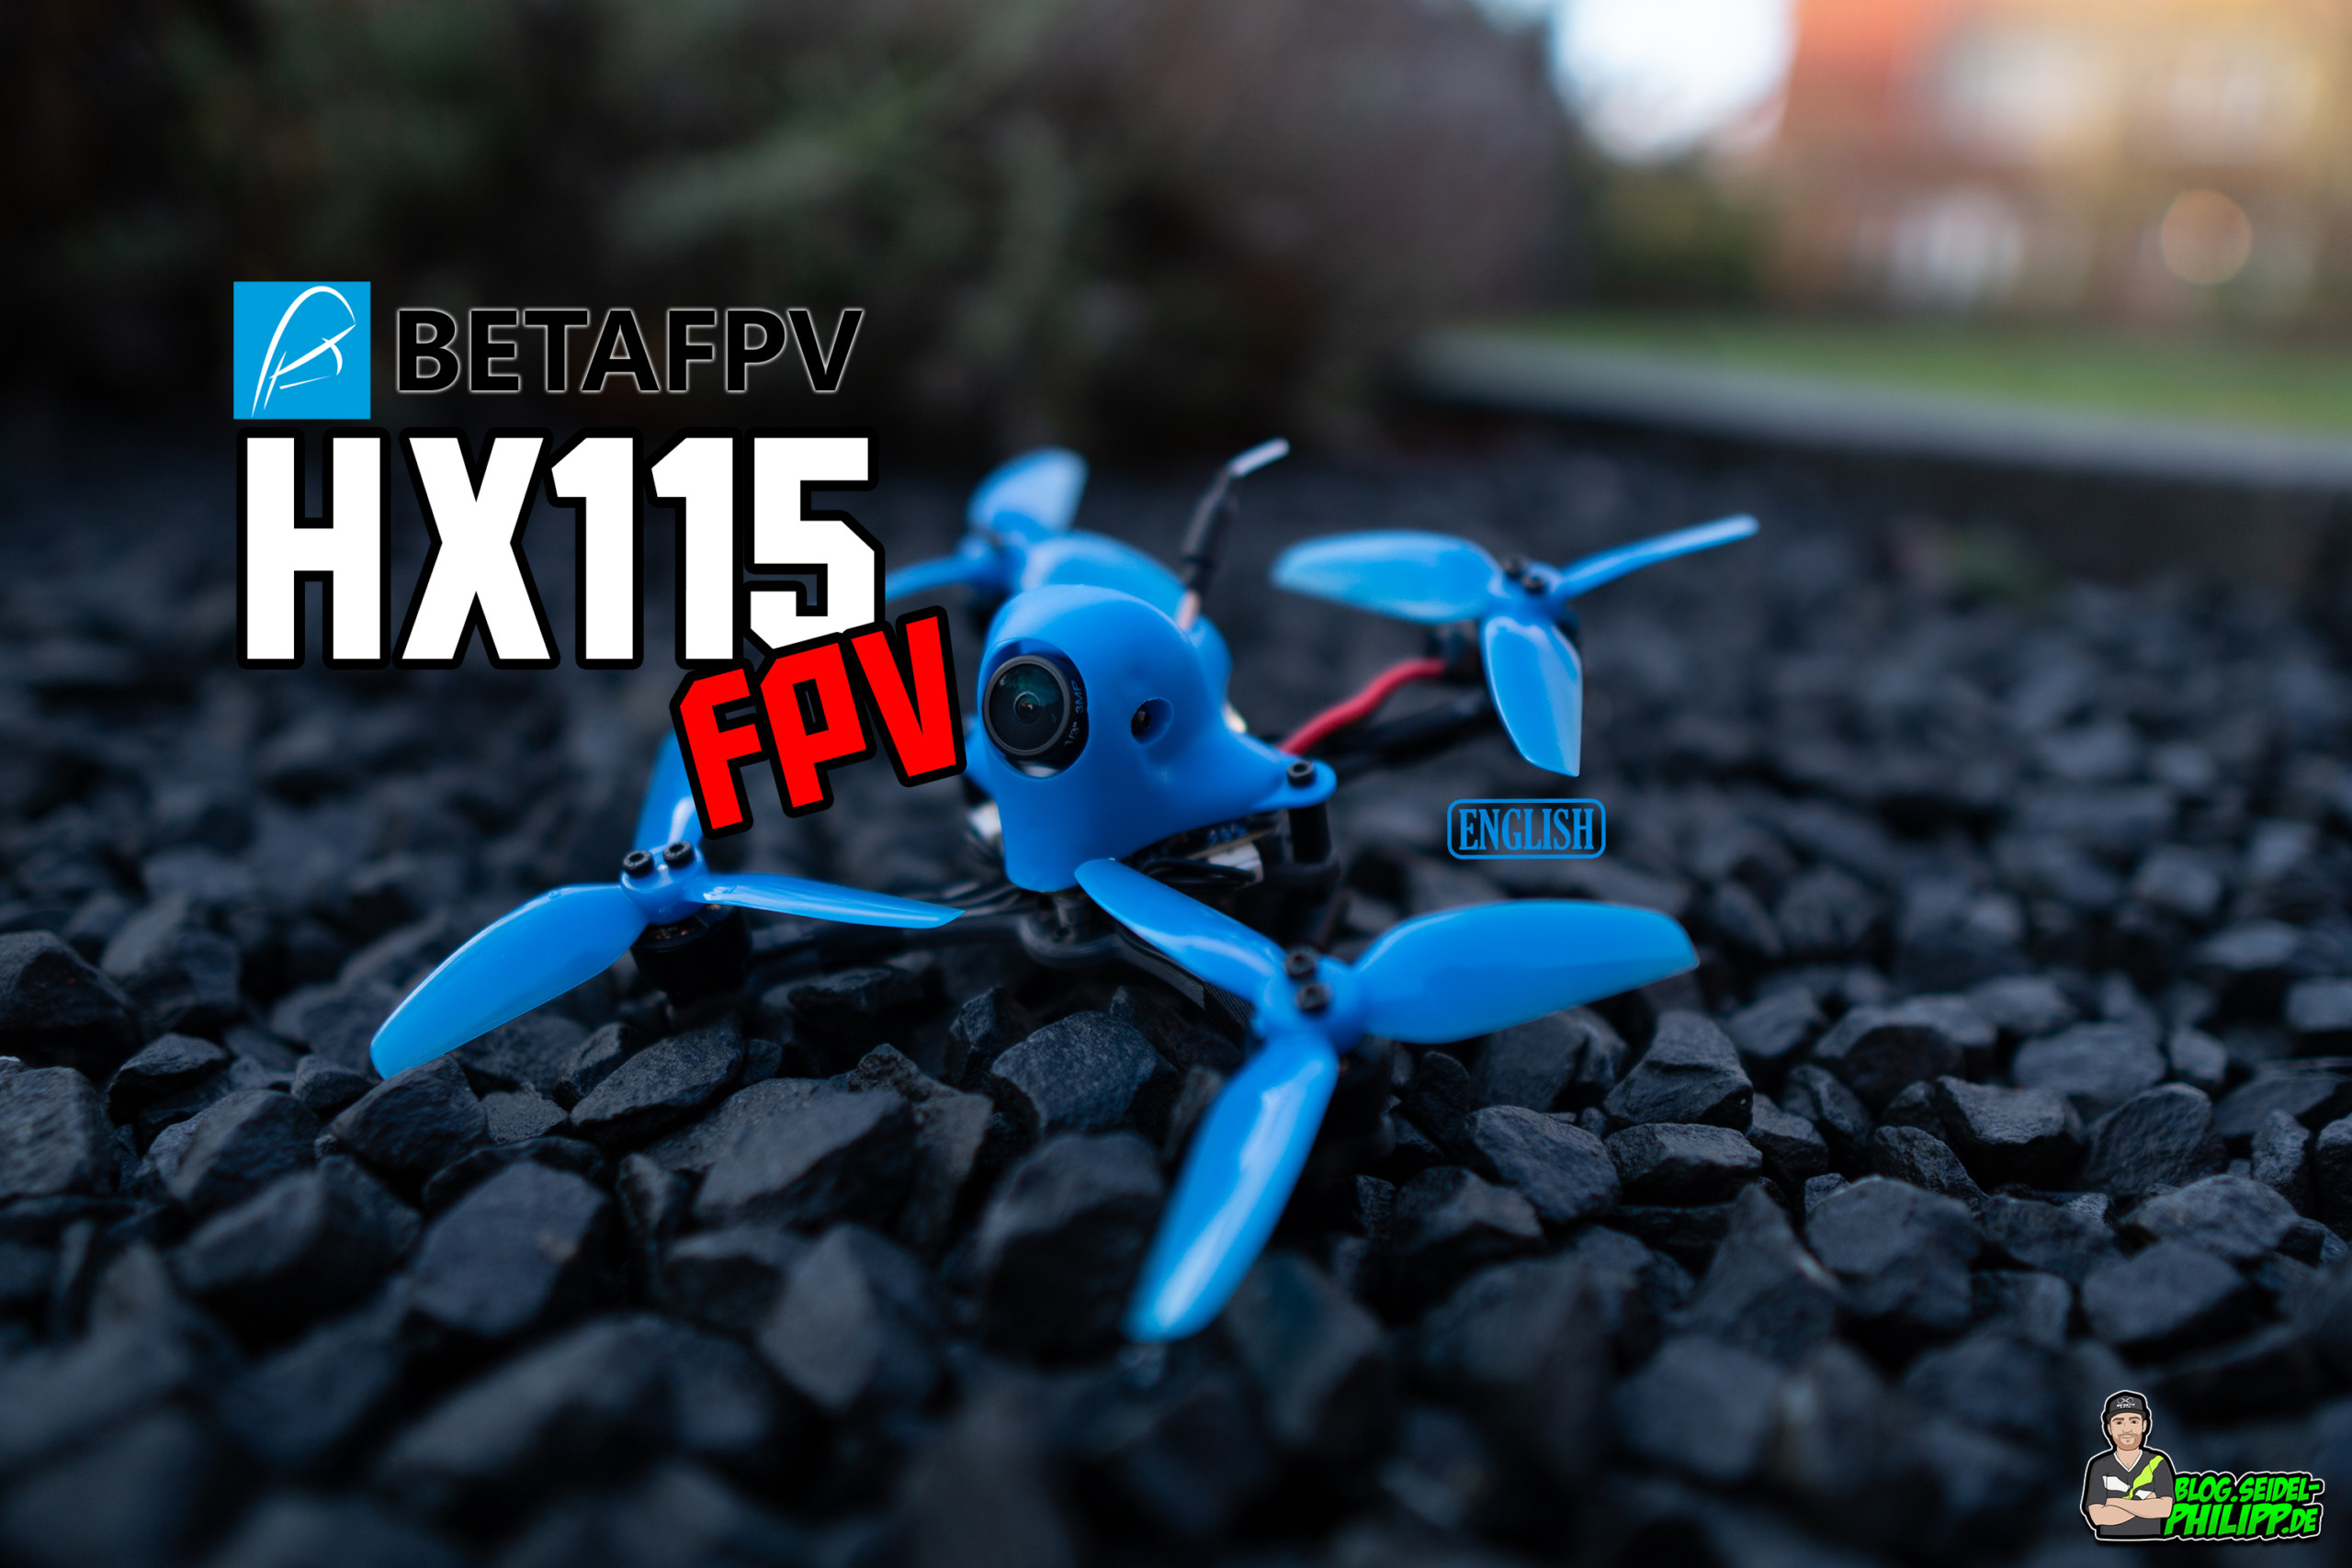
Betafpv HX115 FPV Mini Quad (english version)

![]()
Inhaltsverzeichnis
Where to buy the HX115?
The Betafpv HX115 is available in two versions. The version presented here is the FPV version, which compared to the HD version (takes videos in FullHD 1018p) cheaper and a few grams lighter.
FPV Version:
- Amazon.de: Crossfire version
- Amazon.de: FrSky LBT version
- FPV24.com: Crossfire version
- FPV24.com: FrSky LBT version
- Betafpv.com: Frsky FCC, Frsky LBT, DSMX, Flysky, Futaba, TBS Crossfire, PNP
HD Version:
- Amazon.de: Crossfire version
- Amazon.de: FrSky LBT version
- FPV24.com: Crossfire version
- FPV24.com: FrSky LBT version
- Betafpv.com: Frsky FCC, Frsky LBT, DSMX, Flysky, Futaba, TBS Crossfire, PNP
recommended remote control for beginners:
Specs
- Weight: 66.6g (without battery)
- FC&ESC:Toothpick F4 2-4S 12A AIO FC
- Motors: 1105 5000KV Brushless Motors
- Props: HQ 3020 2-Blade Props / HQ 3030 3-Blade Props
- Camera: Caddx Kangaroo
- VTX: A01 25-200mW 5.8G VTX
- Frame: HX115 T700 carbon fiber frame
- Canopy: Canopy for HX115
- Receiver Option: Frsky XM+ / DSMX / Futaba S-FHSS / Flysky / TBS Crossfire
- Battery: 450mAh 4S battery / 450mAh 3S battery (NOT included)
- Flight time: 3-5mins
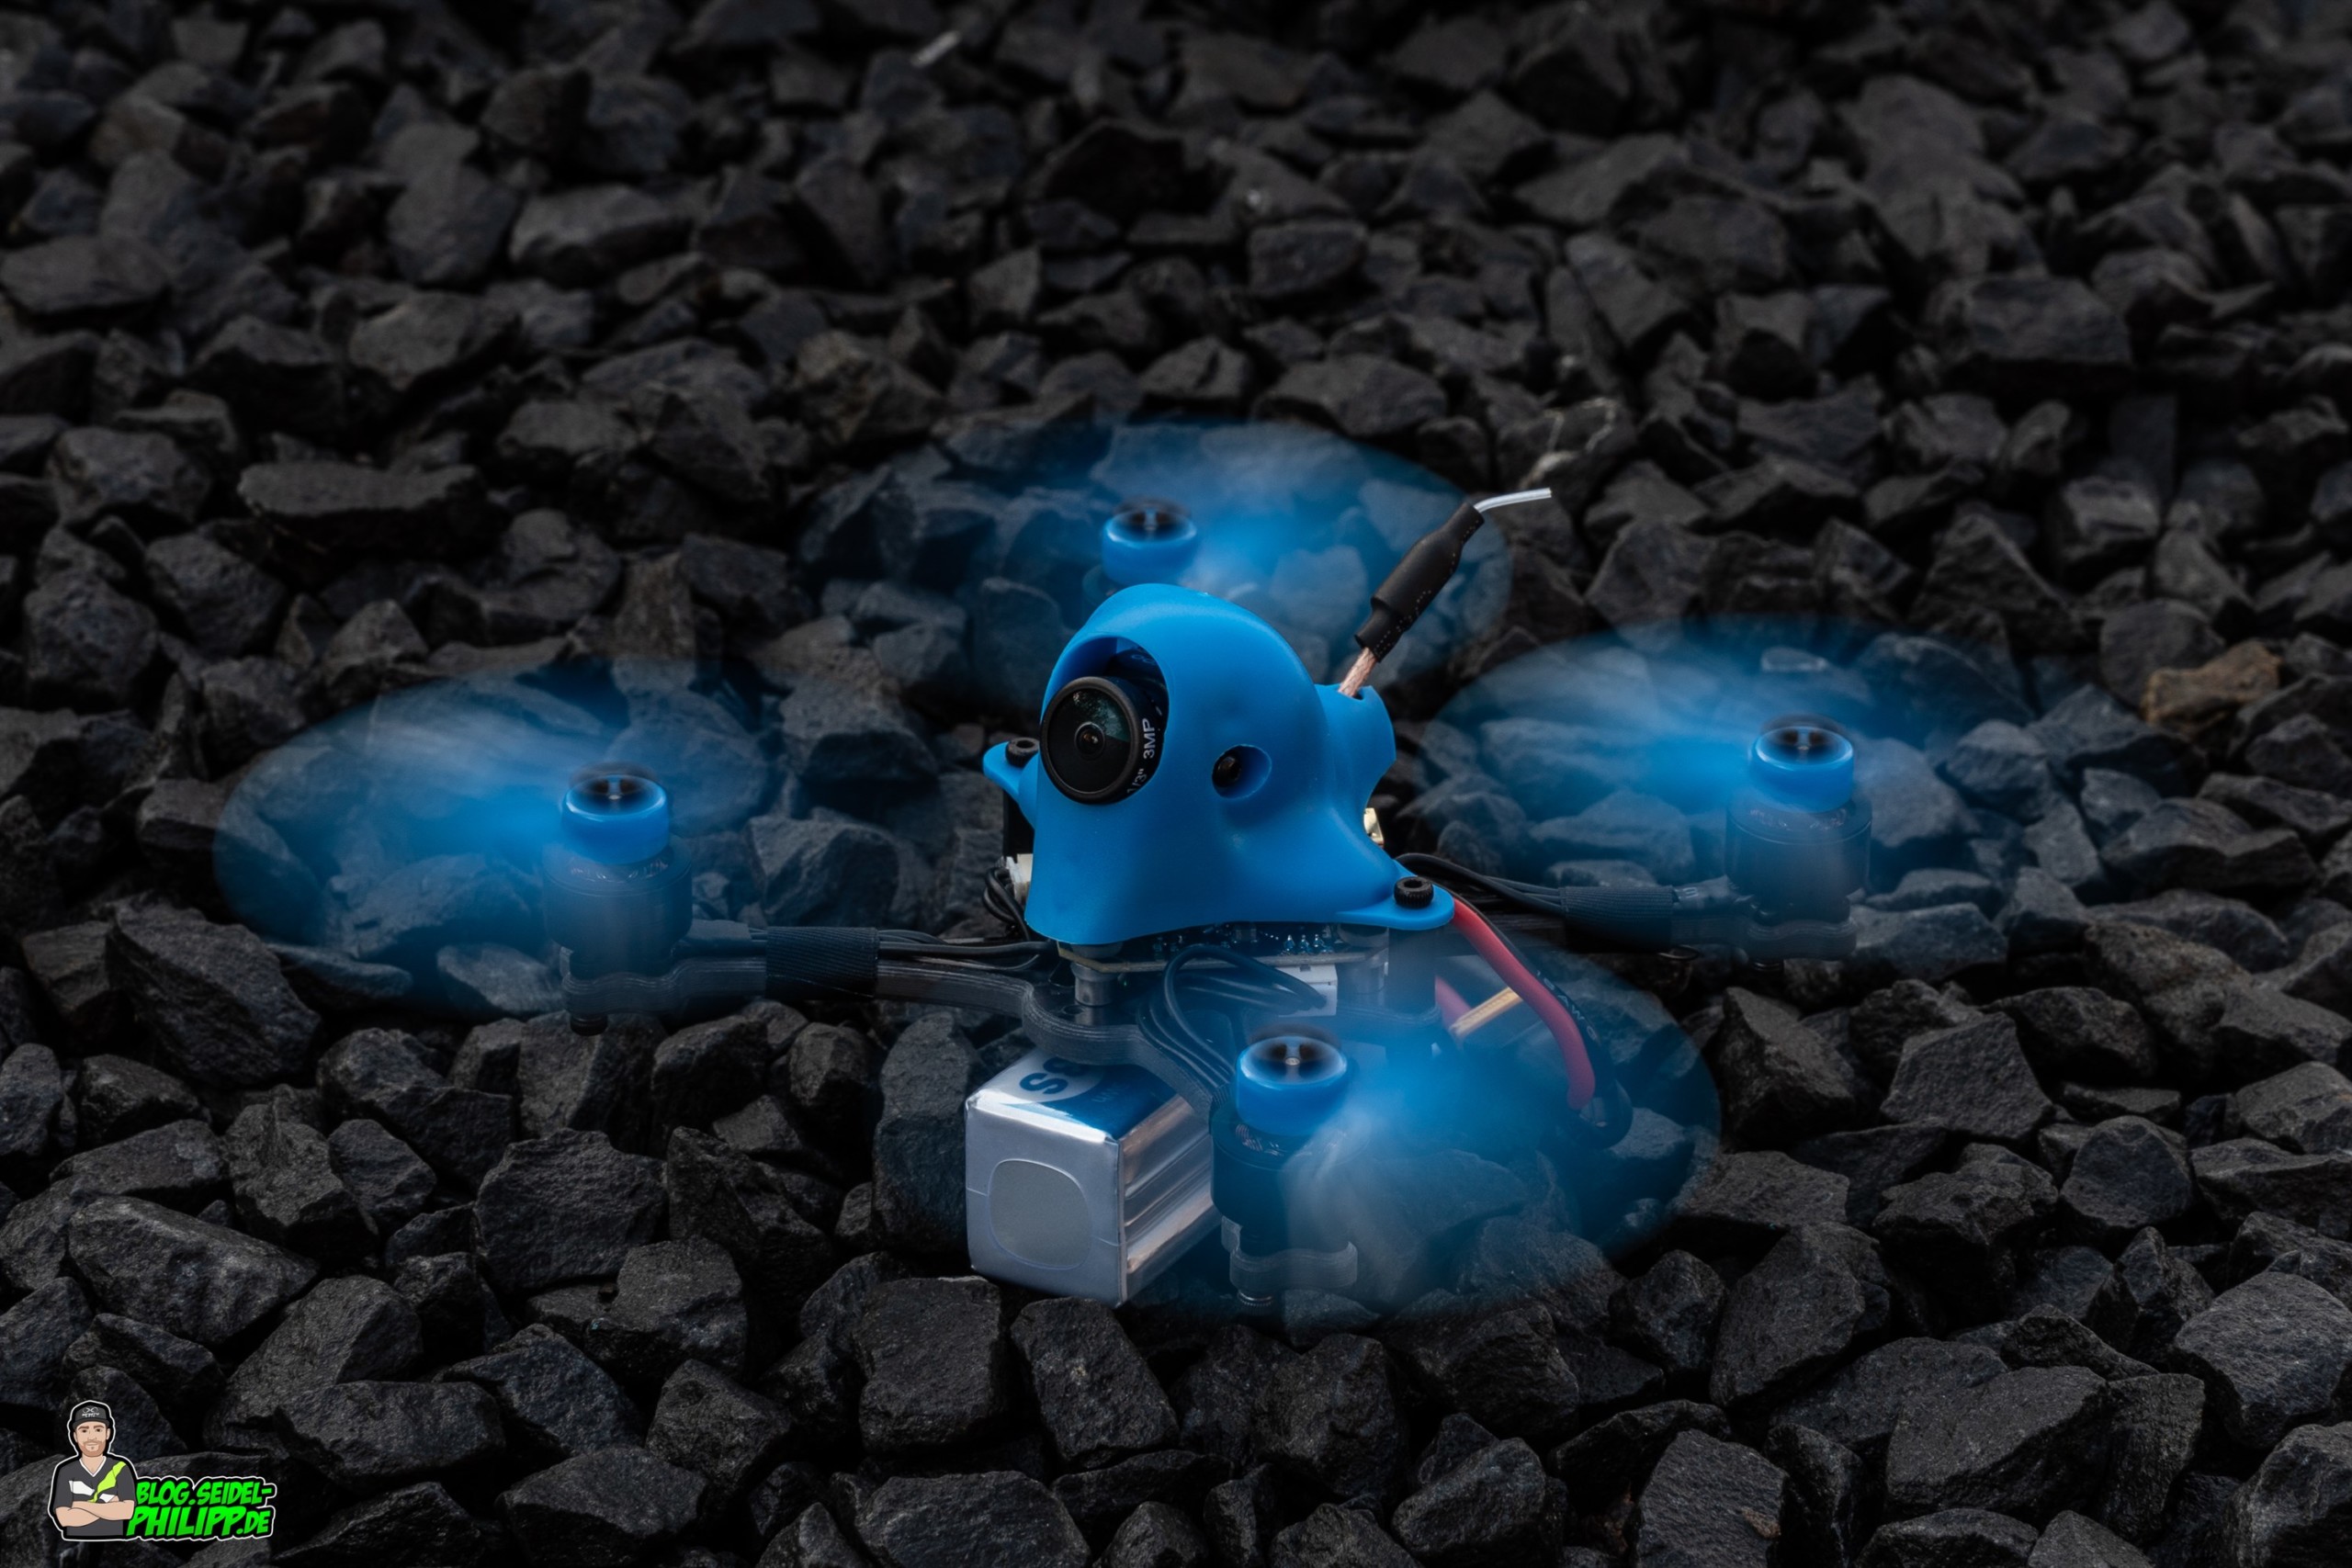
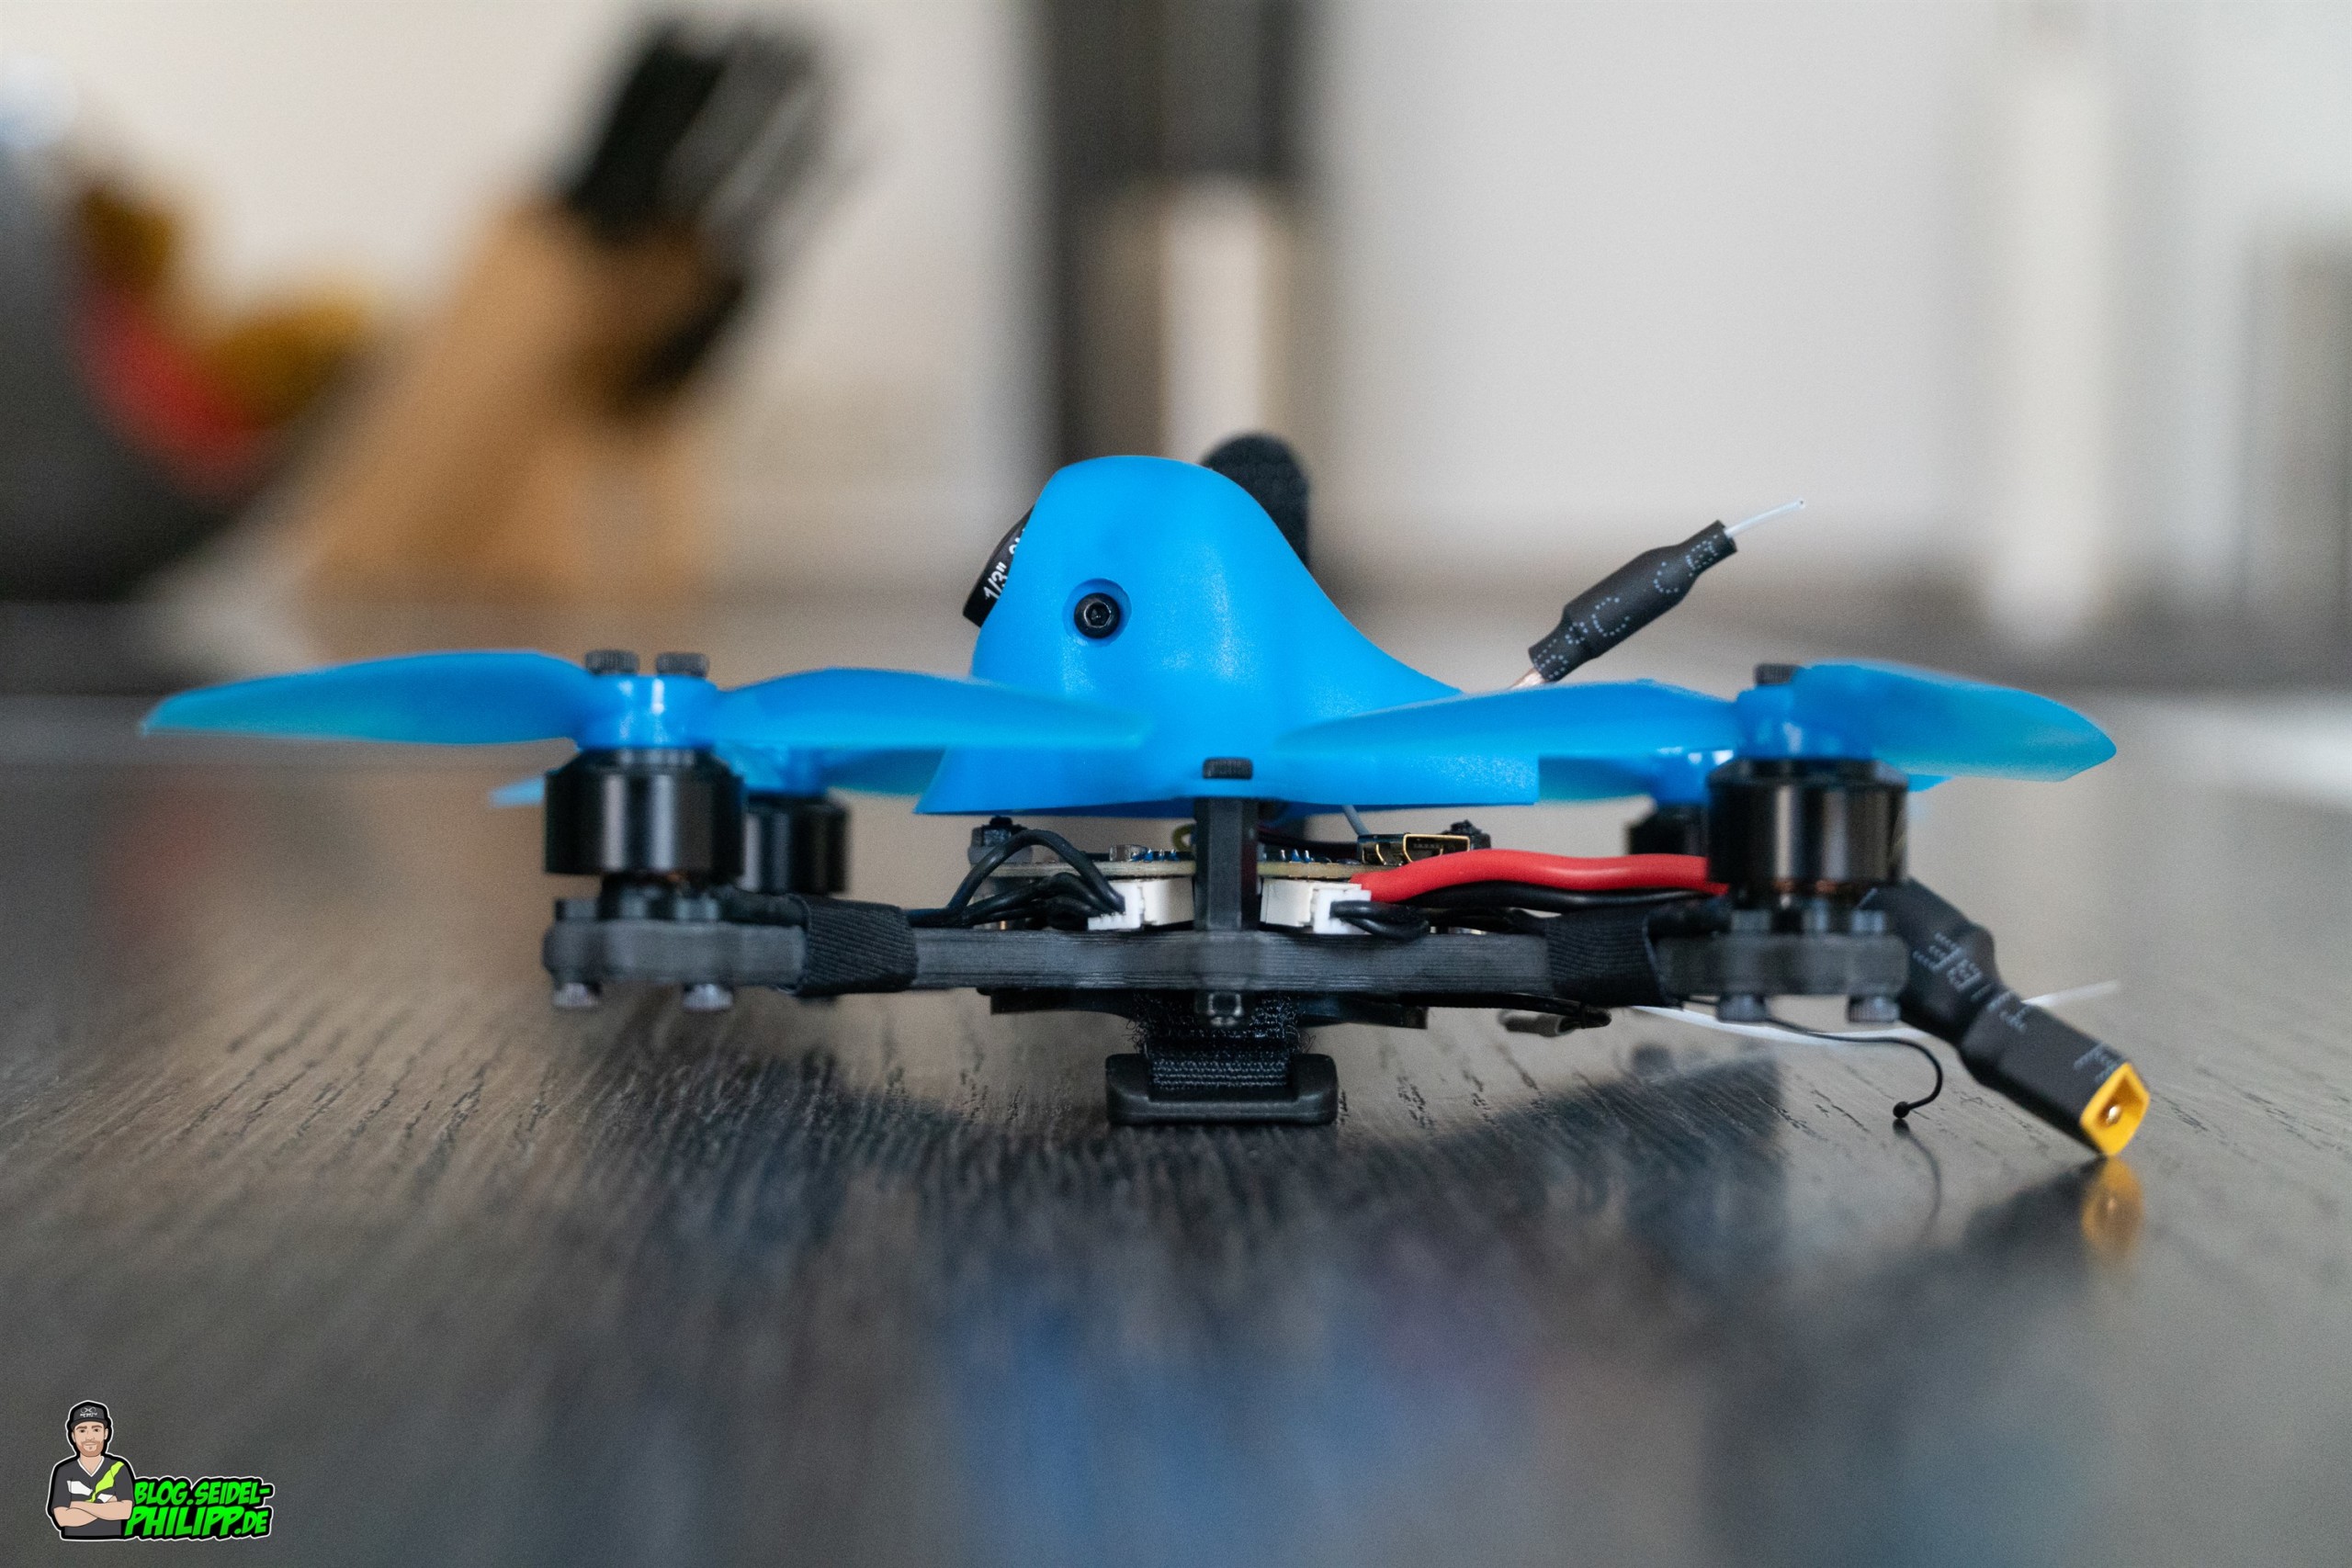
Frame

Carbon
The arms are 6mm wide and 4.2mm thick. This makes the frame very stiff. The edges of the frame are all chamfered. Overall it looks like high-quality.
Canopy
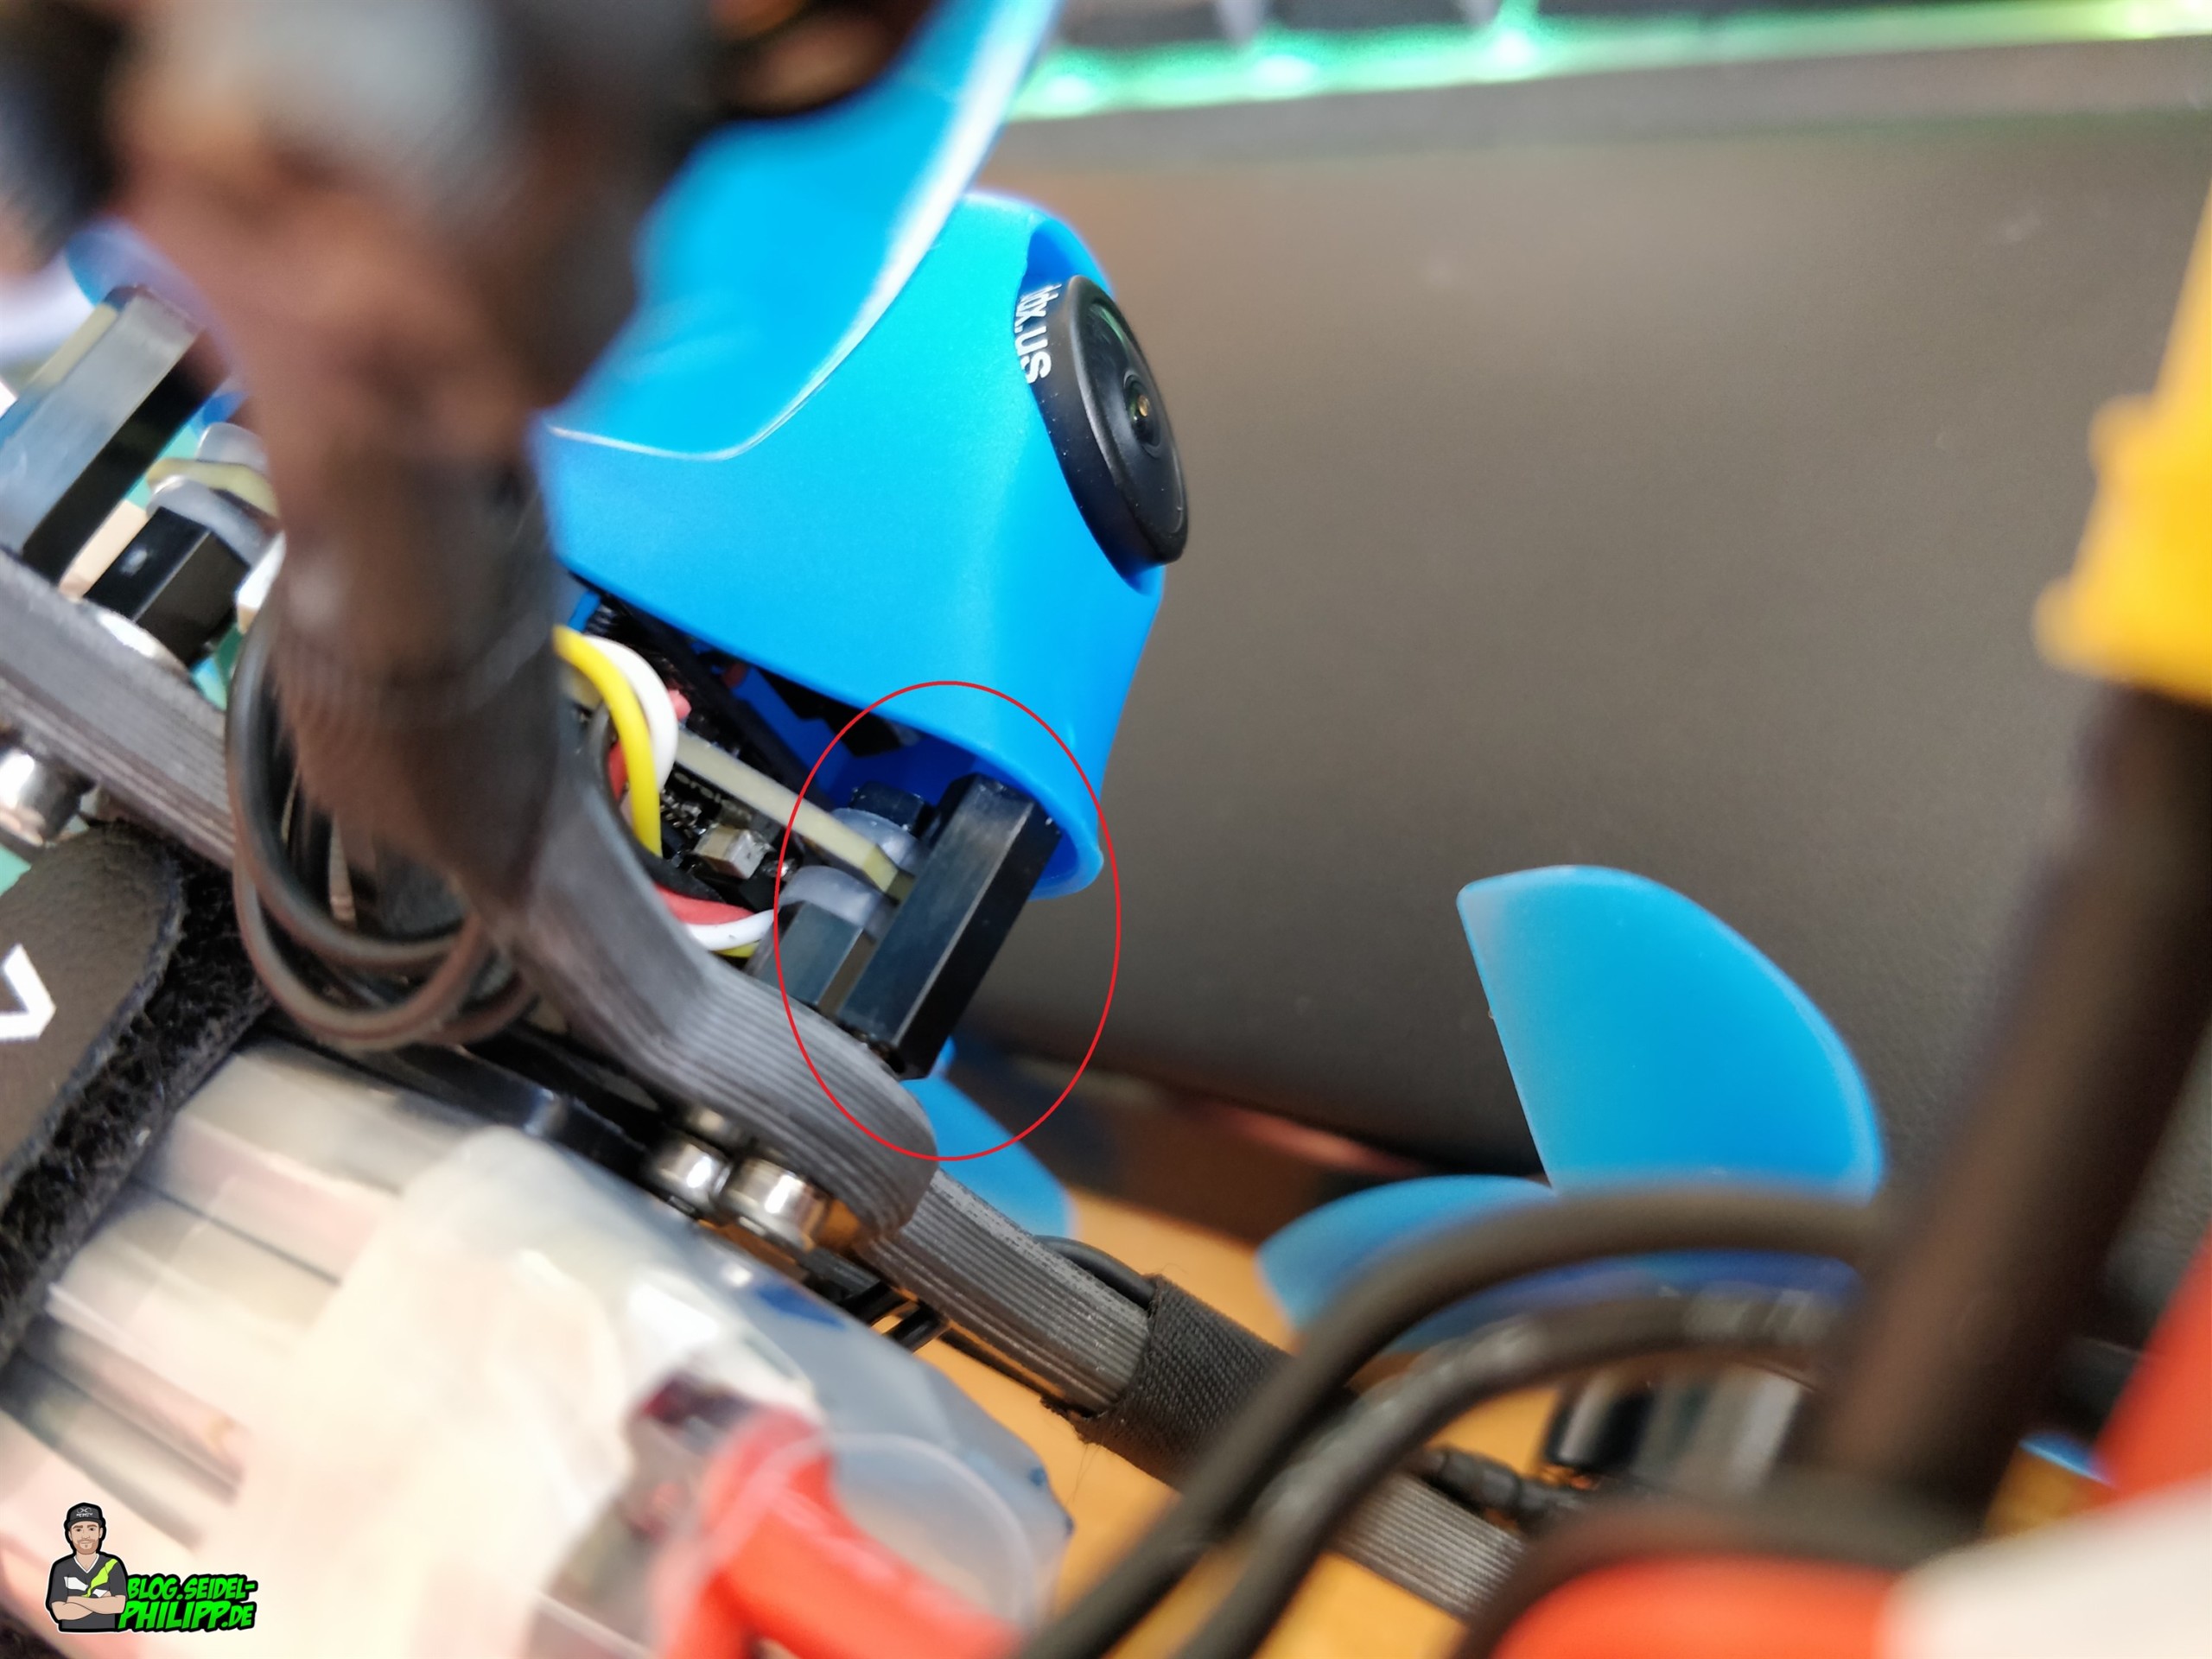
The canopy is flexible but a little too big. There is still plenty of space under the canopy. Unfortunately, the canopy is only attached to two standoffs. The front standoff is missing unlike the HD version of the HX155. This makes the canopy more susceptible to frontal crashes and bends backwards.
With a metal screw, I carefully made a thread in the screw holes of the canopy. Then I just screwed in a matching nylon spacer and fixed from below with a metal screw. As a result, the canopy has clearly gained in stability, since it is now attached over three points.
Batterypad
On the bottom there is a recess in the frame itself where the receiver is located. A silicone battery pad is glued over it. However, in the version with Crossfire receiver, the receiver does not completely disappear in the recess, with the result that the battery constantly presses on the receiver. I would recommend storing the receiver under the canopy so that in the event of a crash the battery can not damage the receiver.
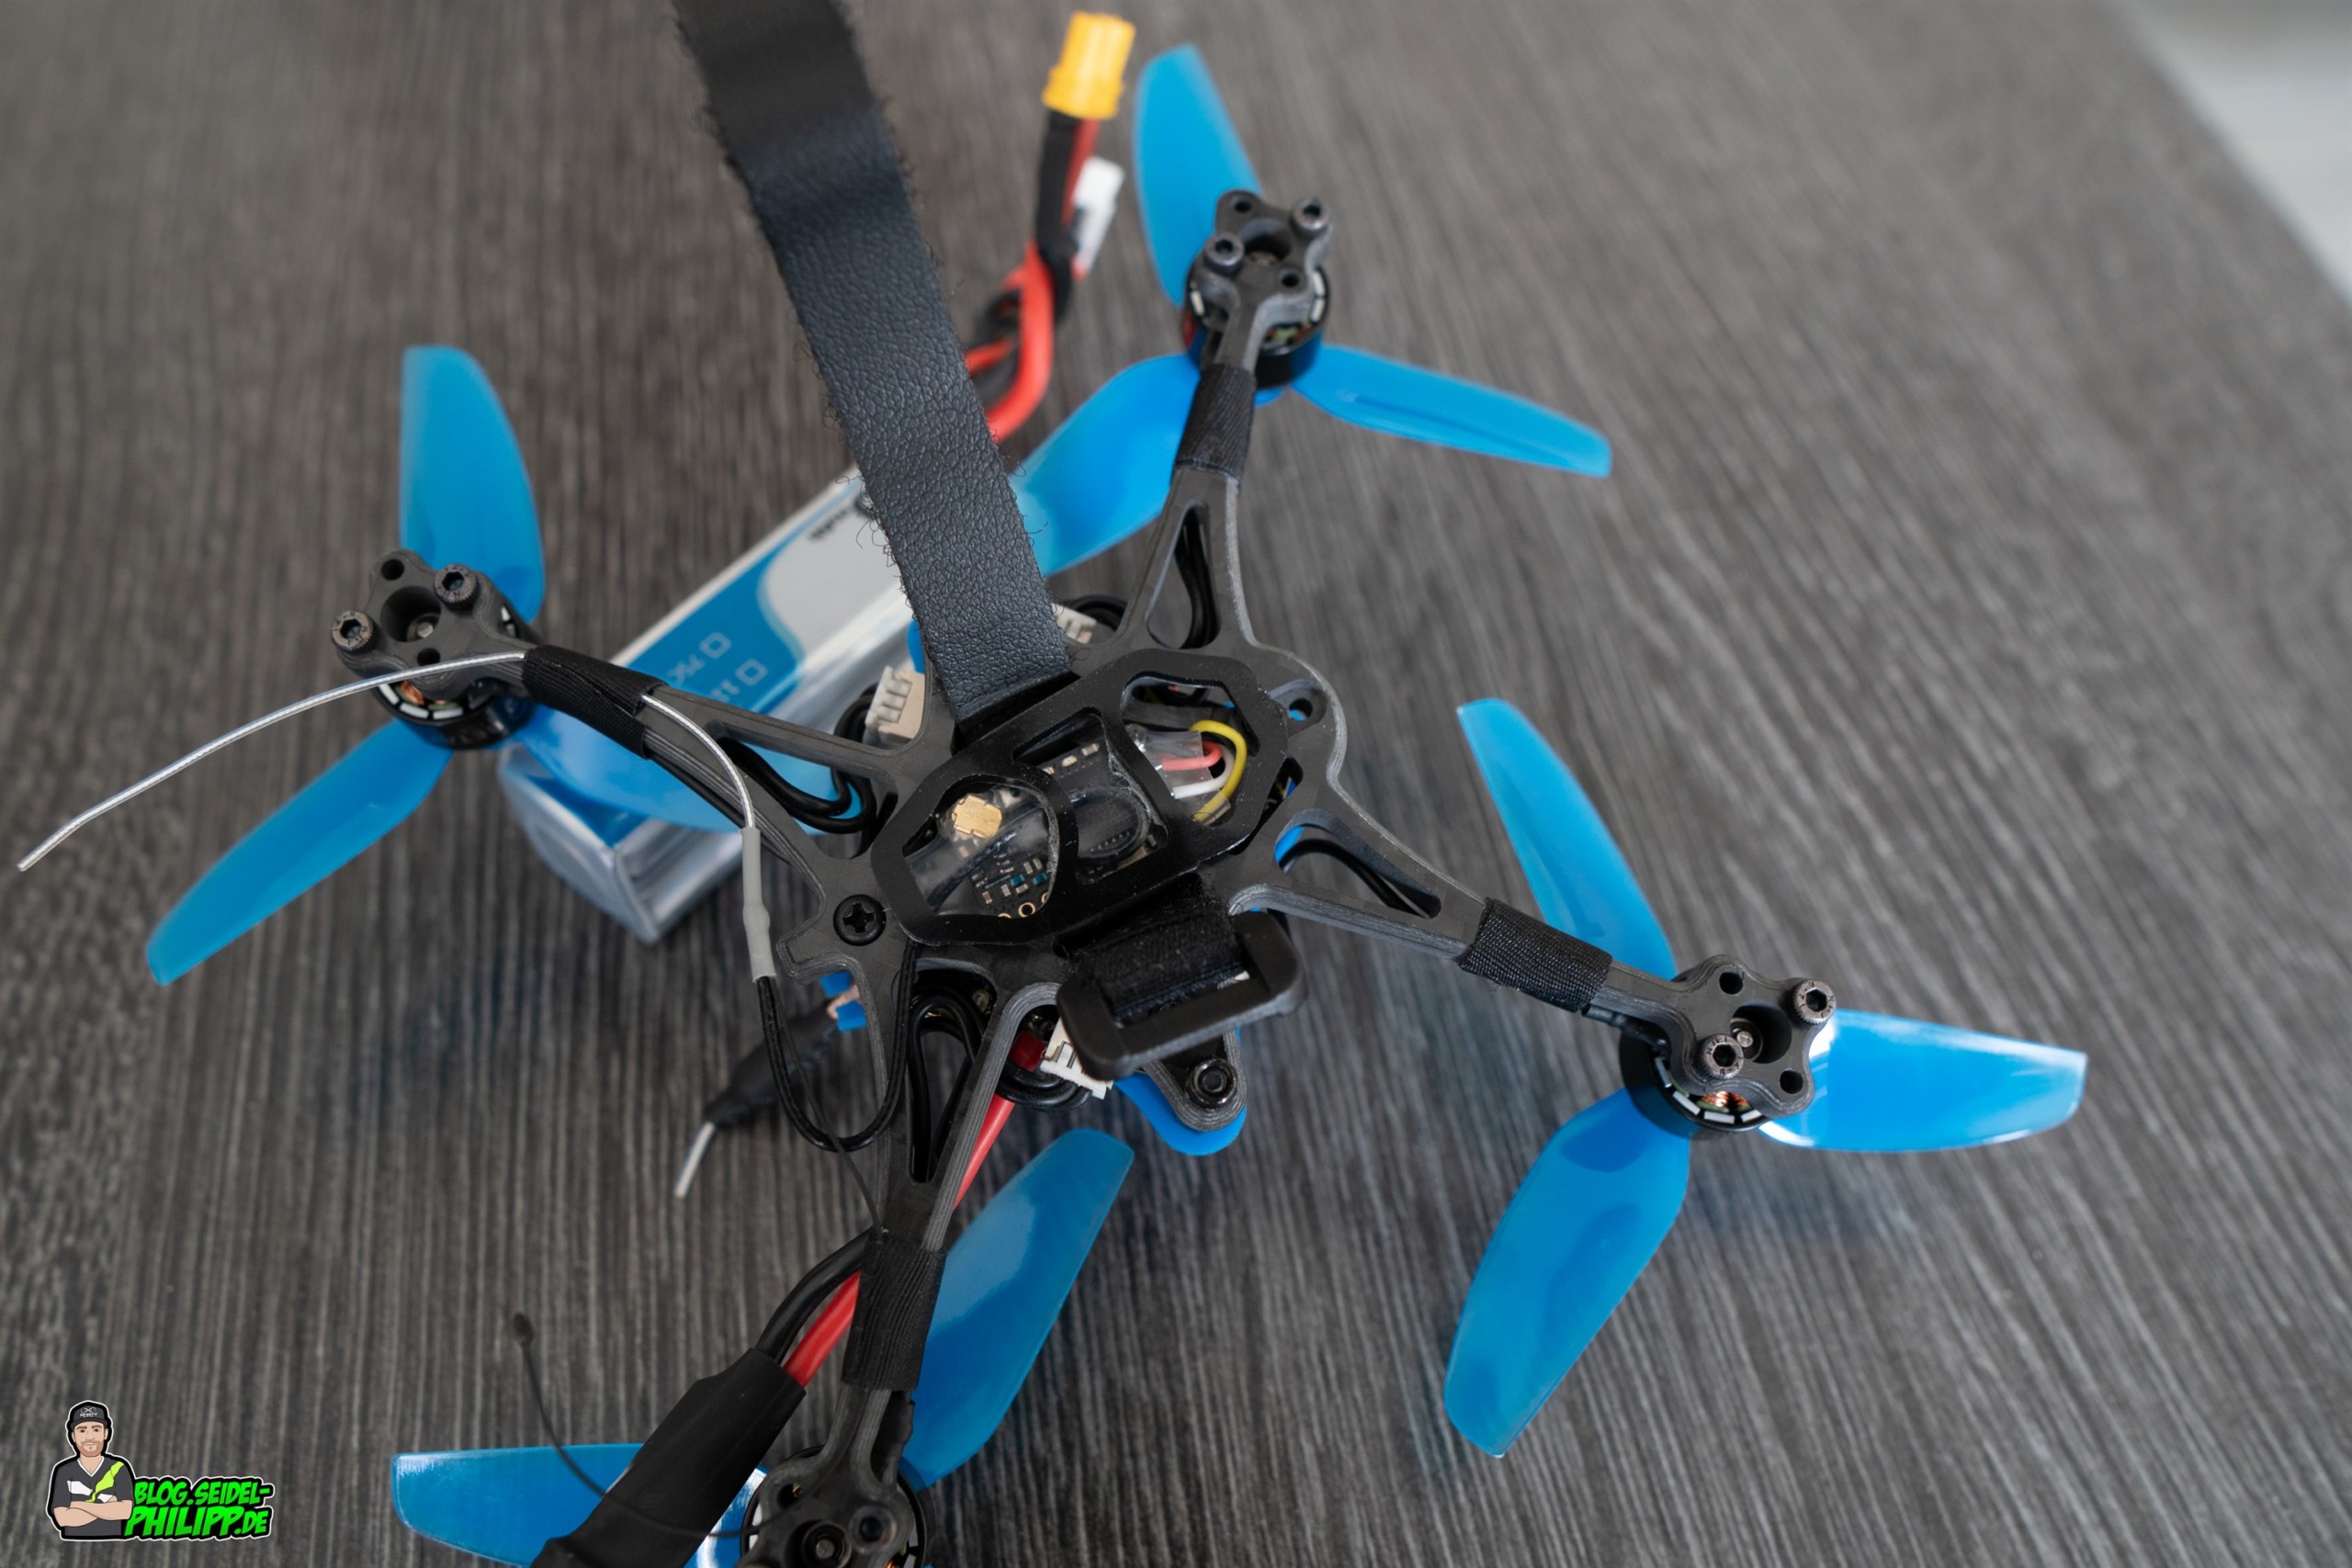
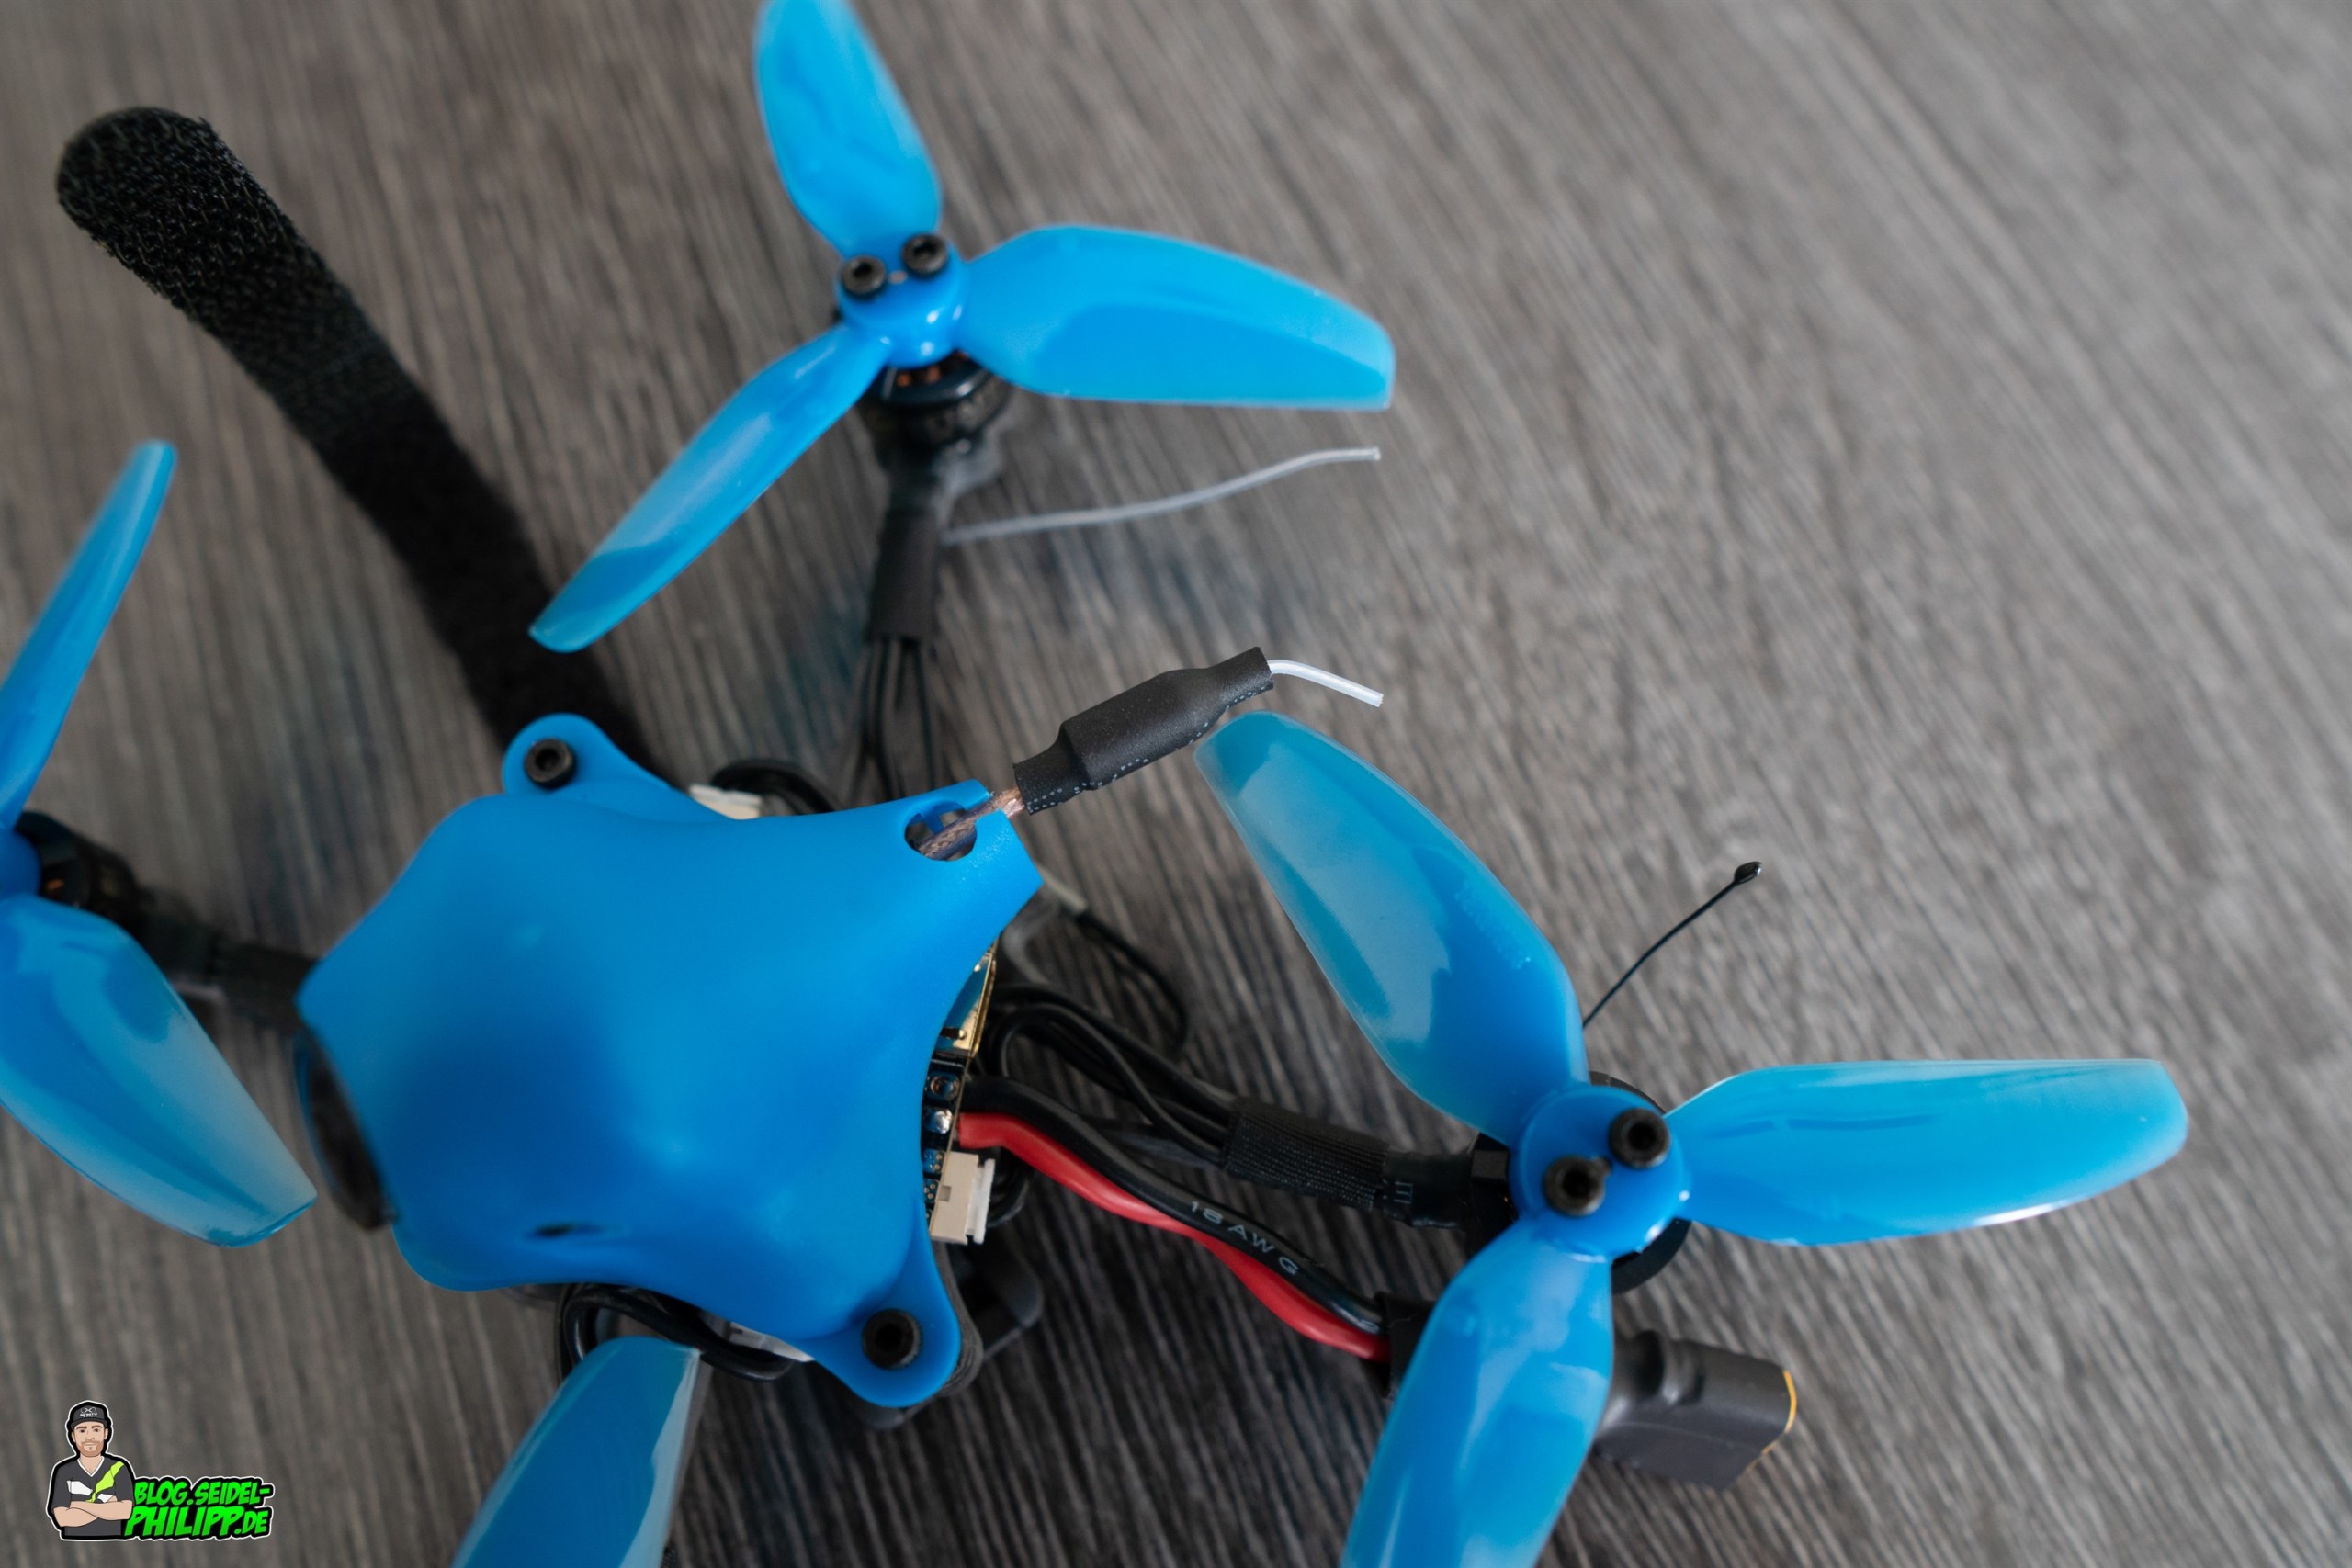
Antennas
The installed Crossfire antennas are unfortunately far too long and can easily be damaged by the propellers. I recommend to relocate the antennas before the first flight. Either use two cable ties or use the Immortal-T antenna and attach it under the arm.

I decided to use an Immortal-T antenna mounted with zipties to one of the rear arms

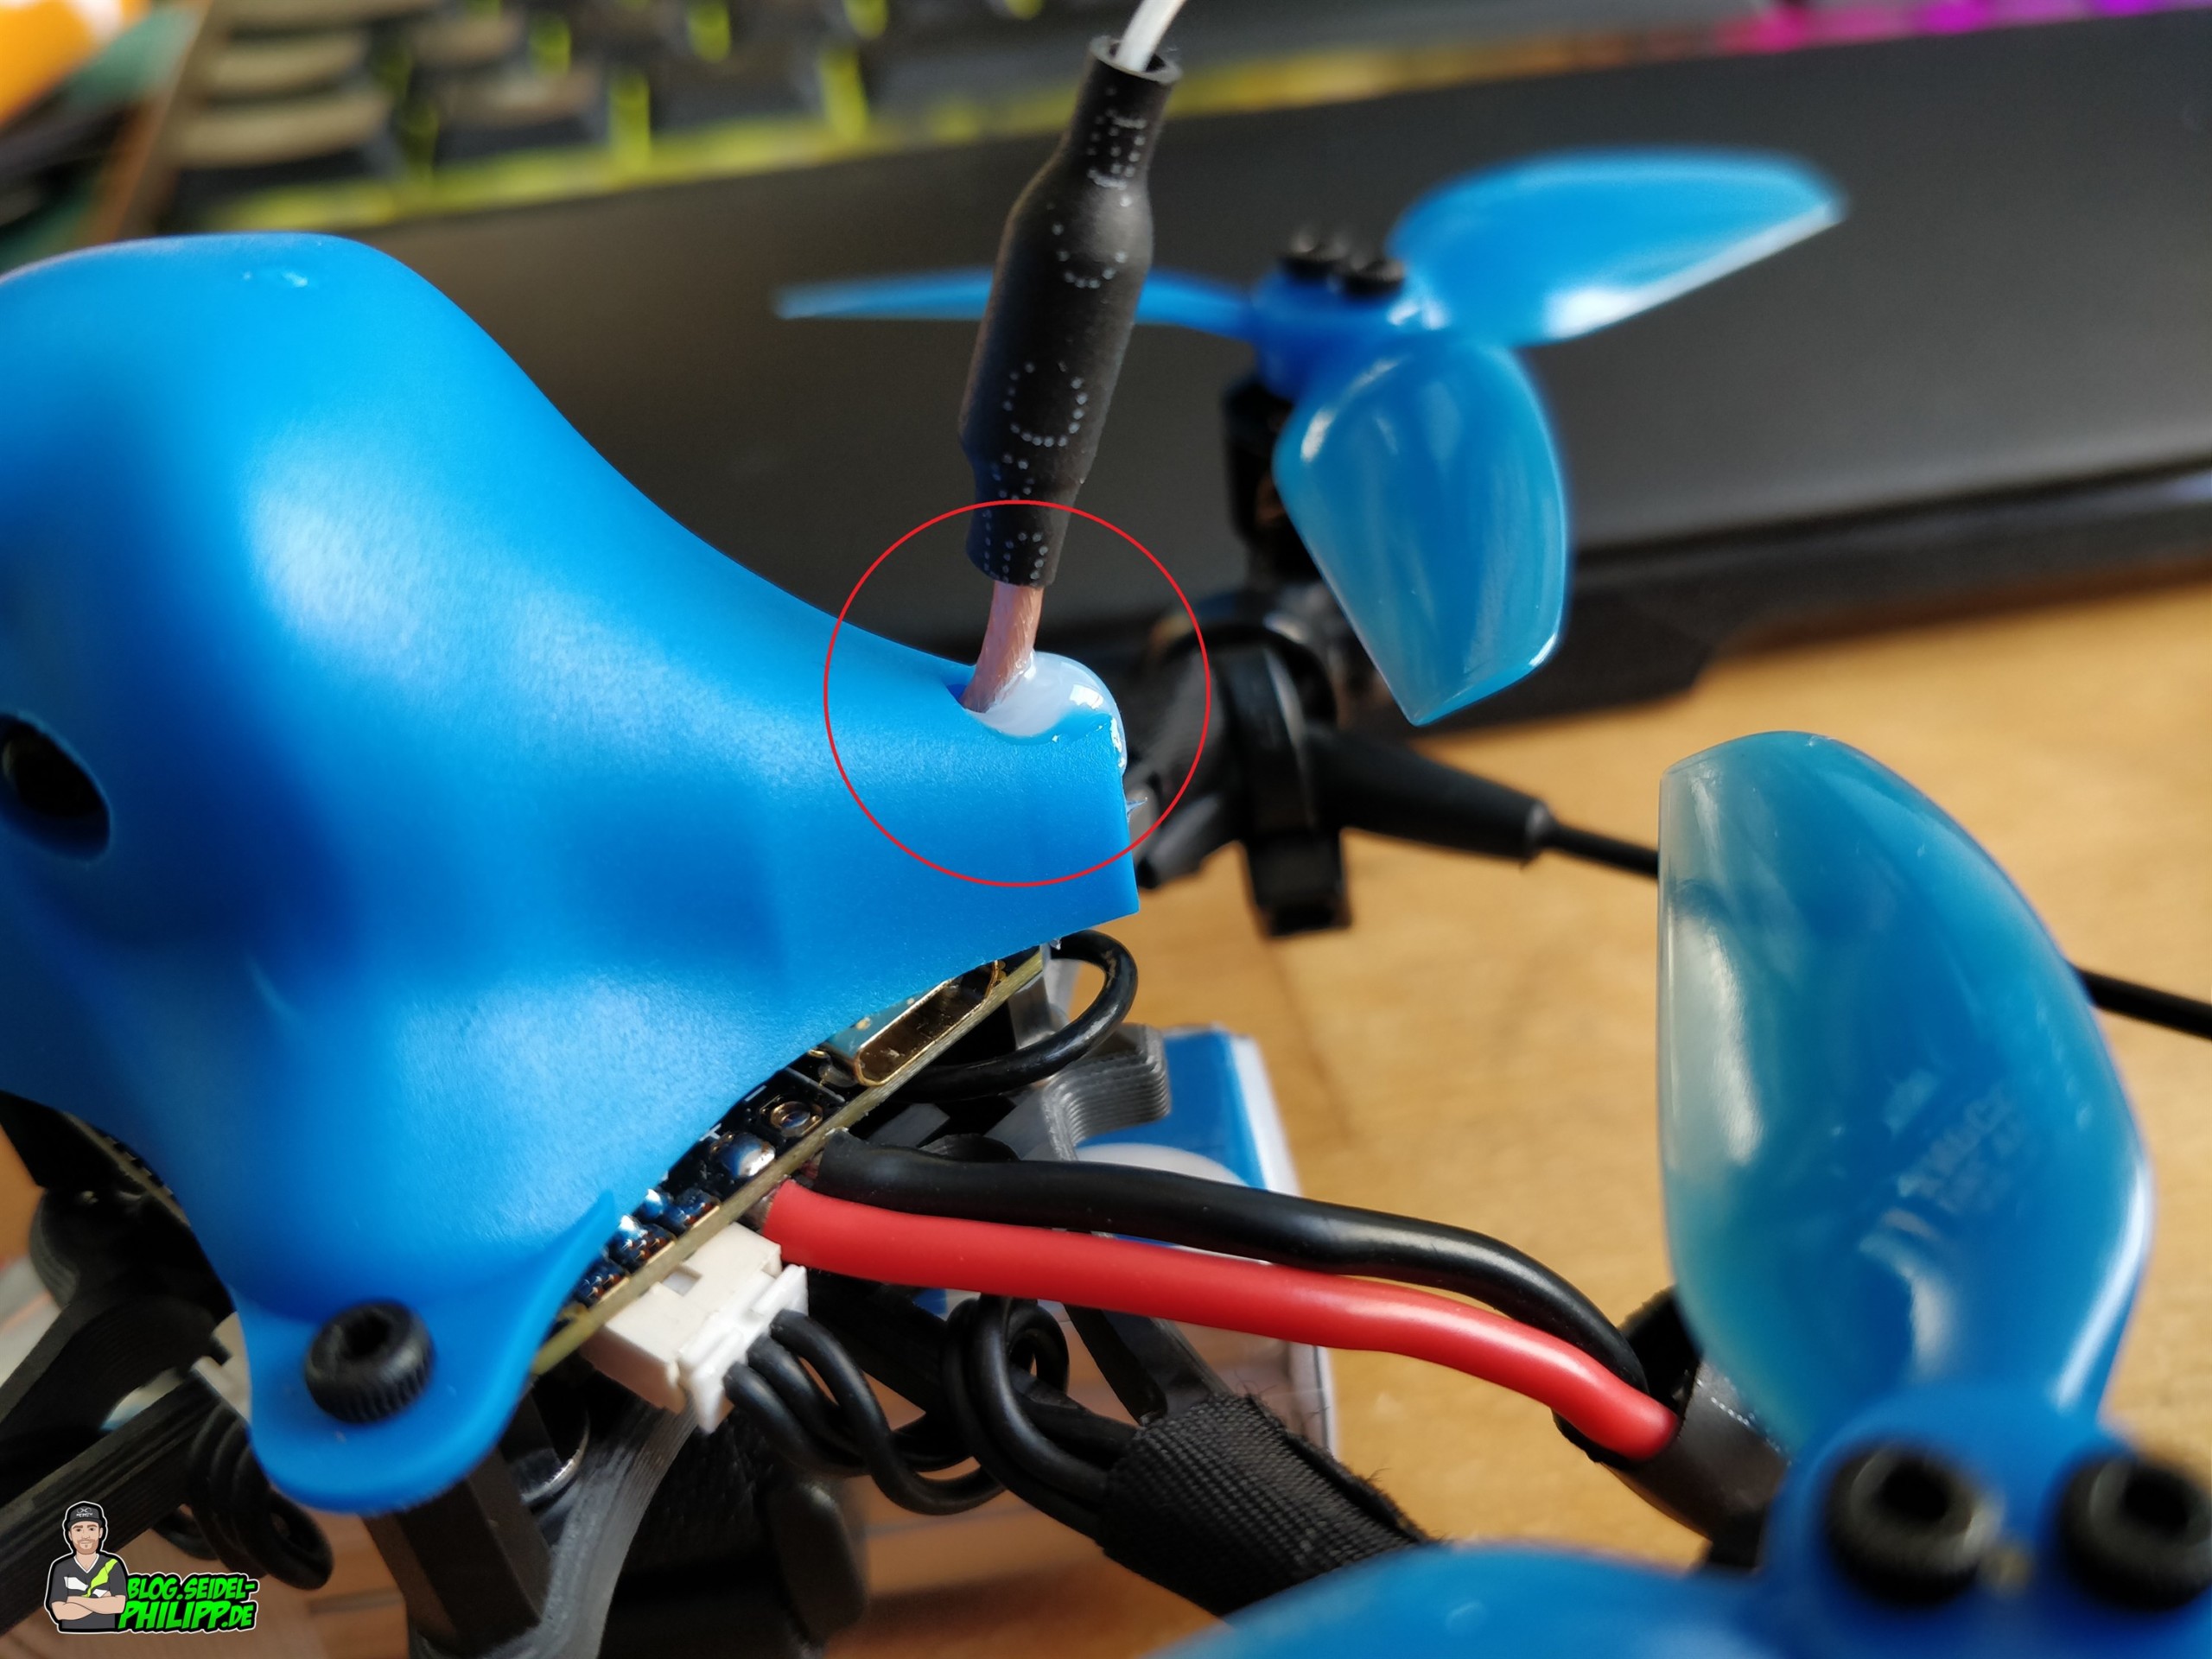
Likewise, the FPV antenna can also be damaged when it slips through the slot.
Here, however, a drop of hot glue is sufficient to close the slot and thus prevents the antenna from slipping through the slot.
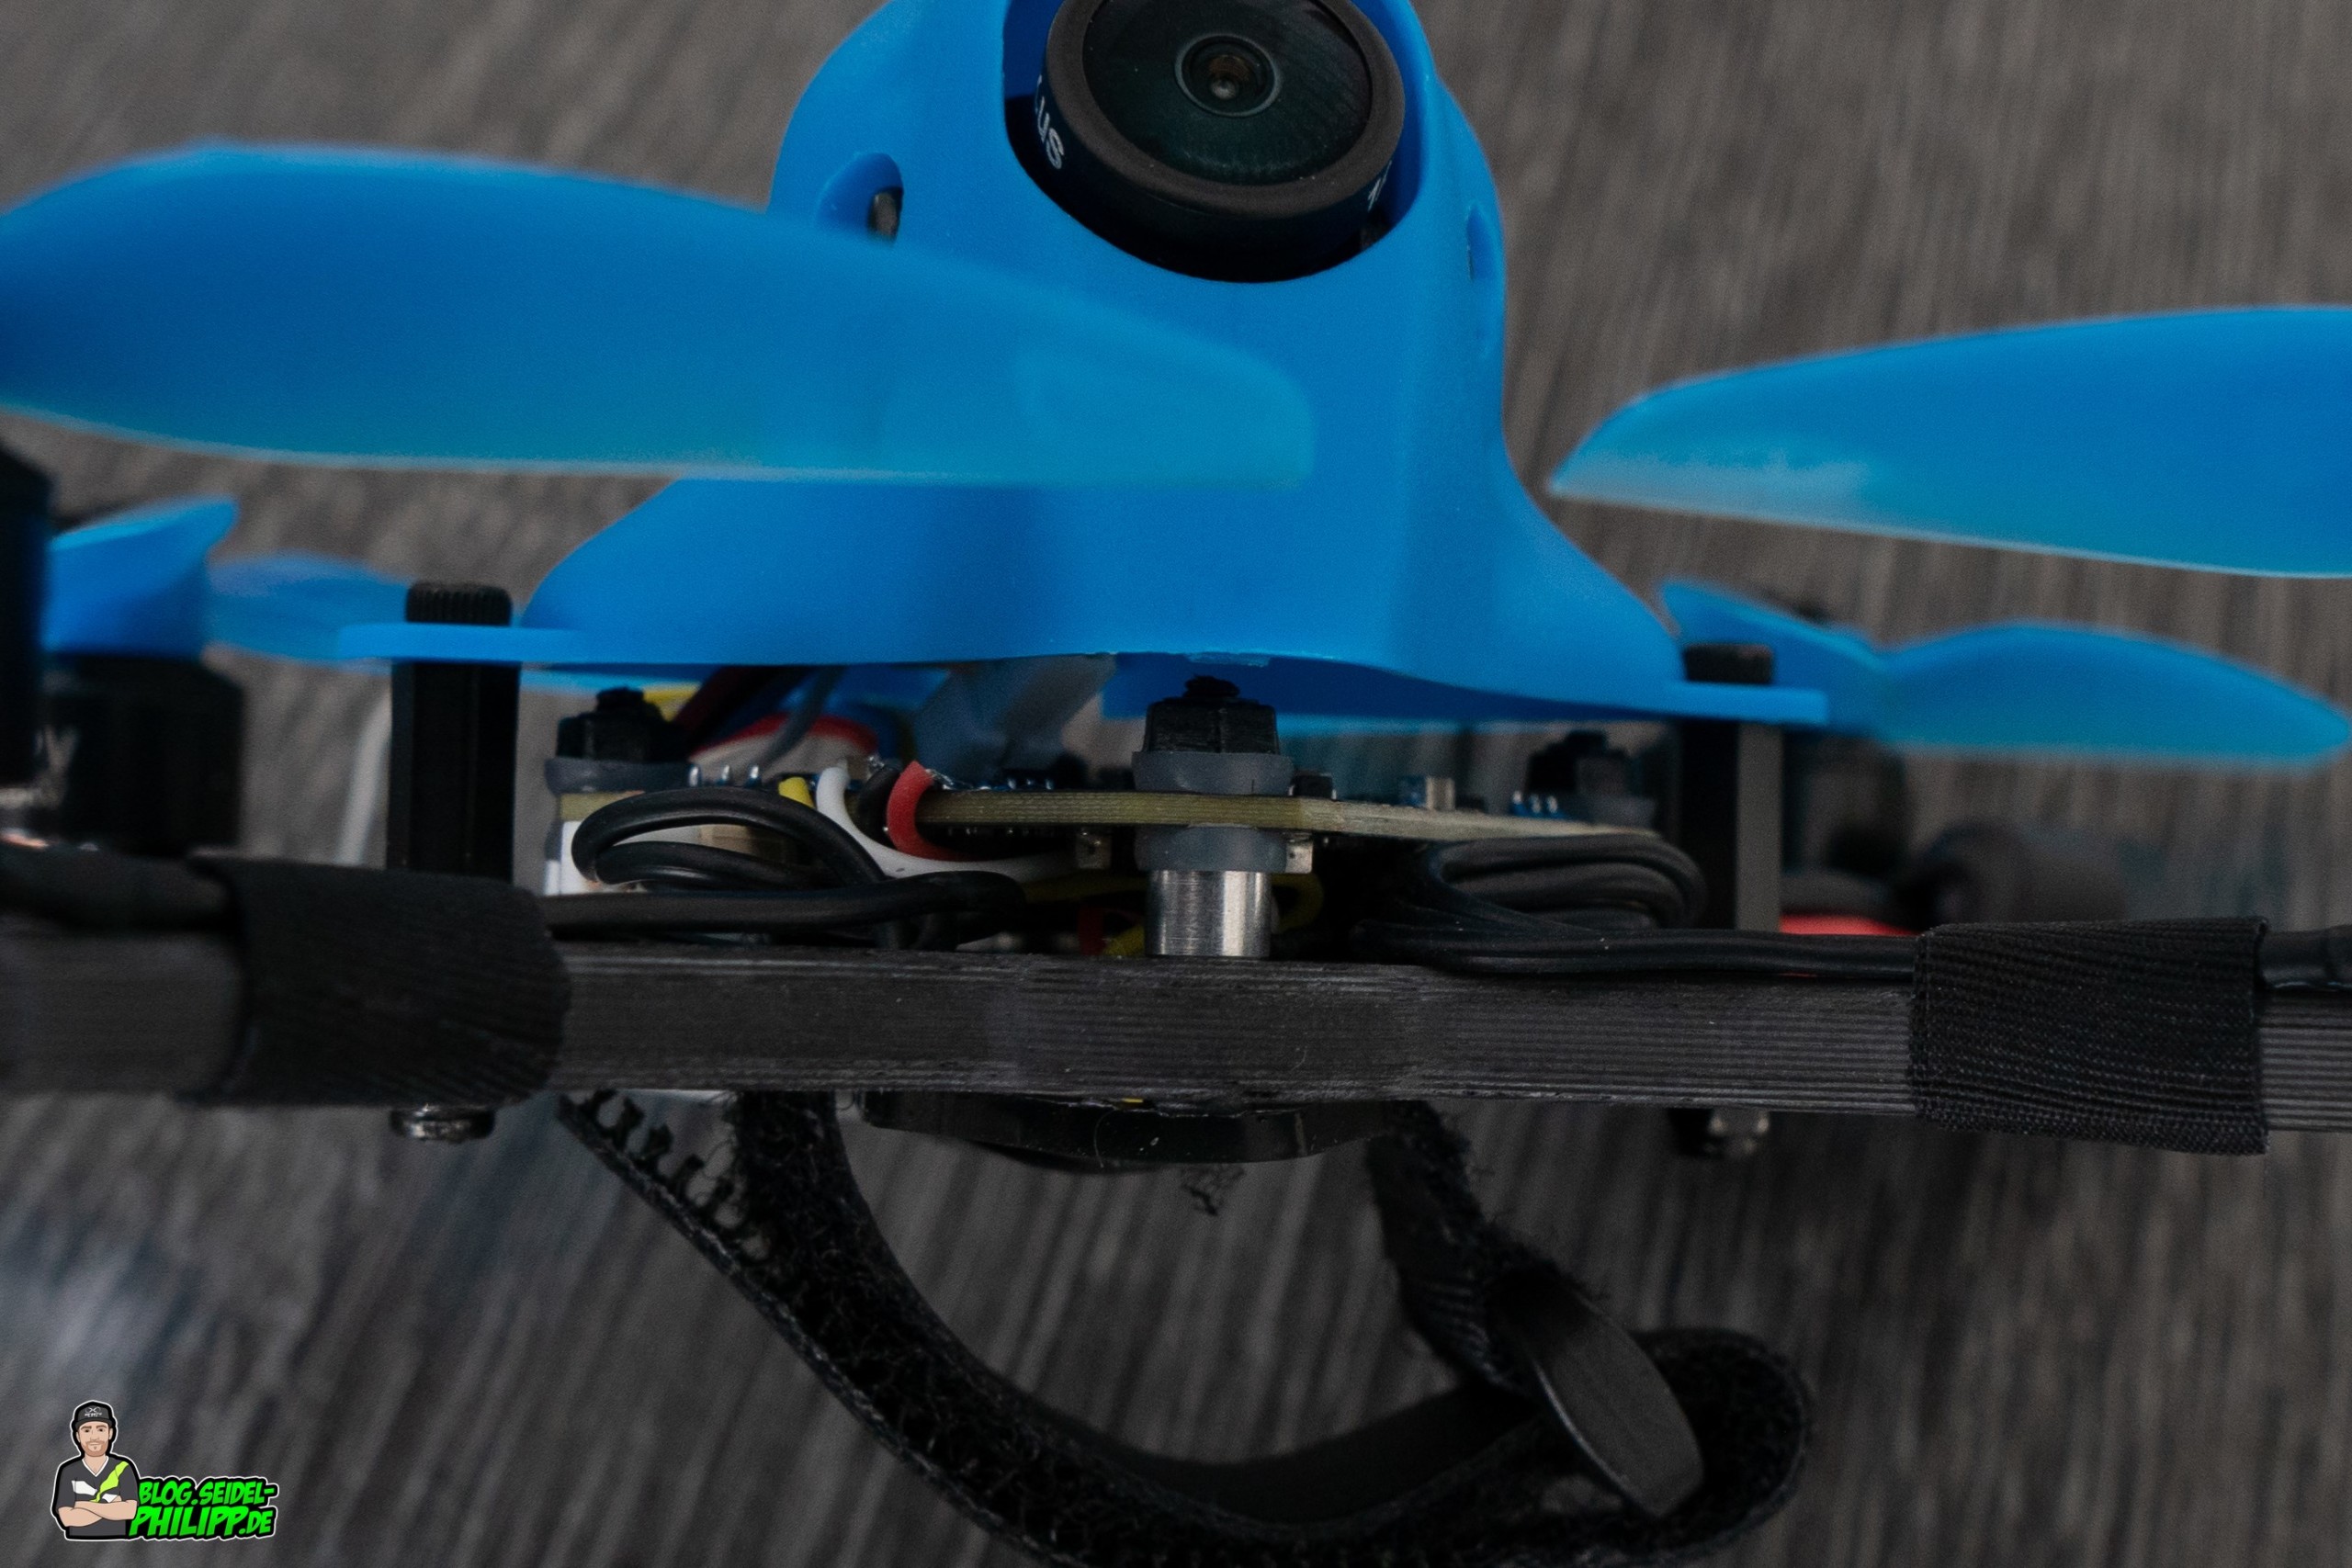
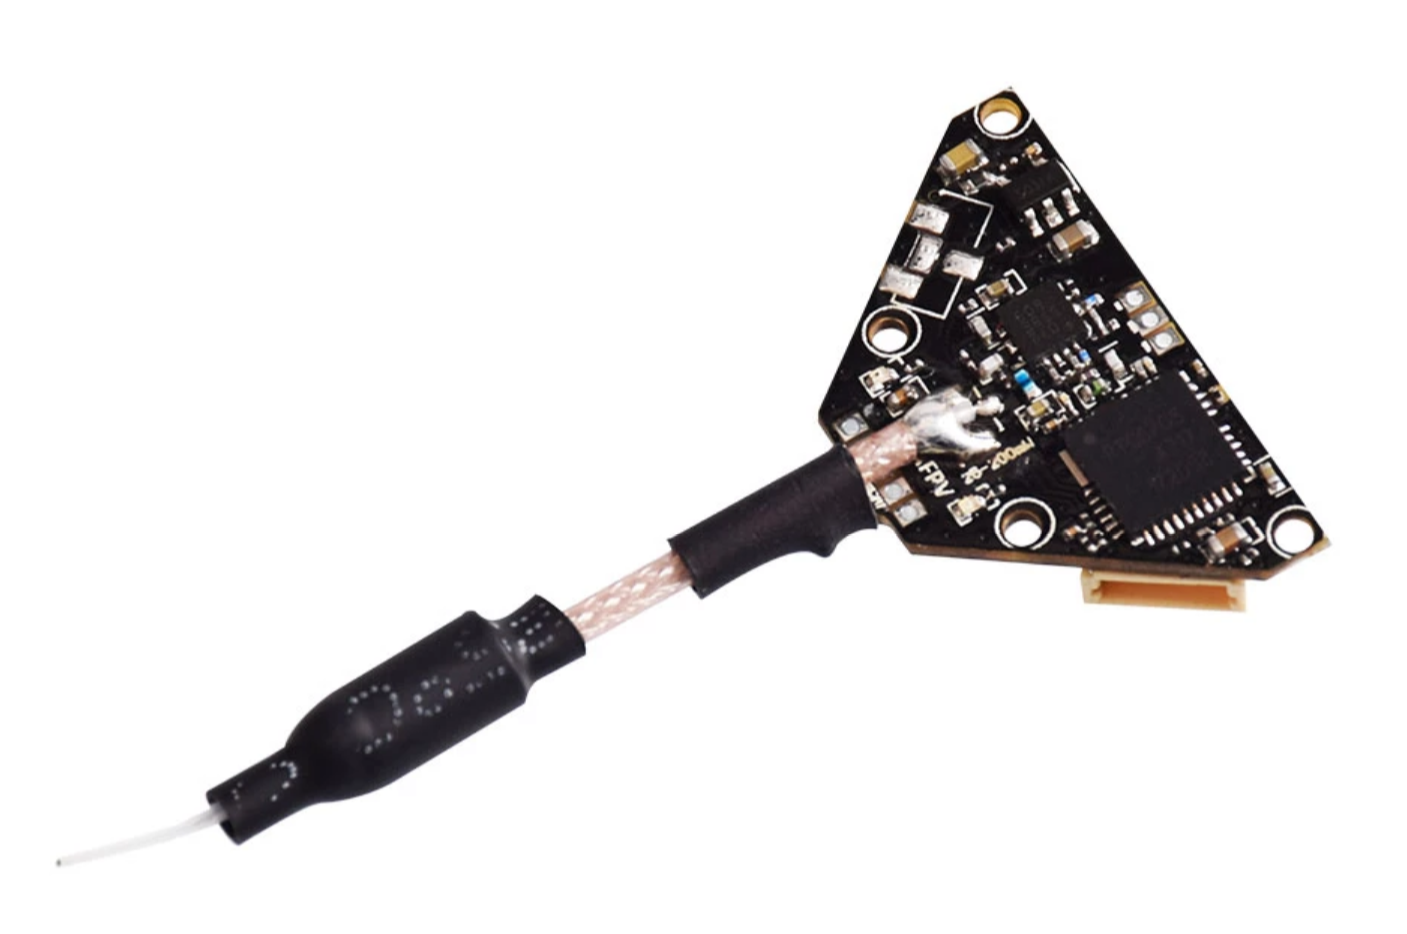
Flight control and ESCs
The flight control and the ESCs are installed on one single board. Its a F4 flight control flashed with the Betaflight Target MAMBAF411 (MATEKF411).
The motors are connected via a 3pin plug with the ESC board, which is an easy way (without soldering) to swap out motors.
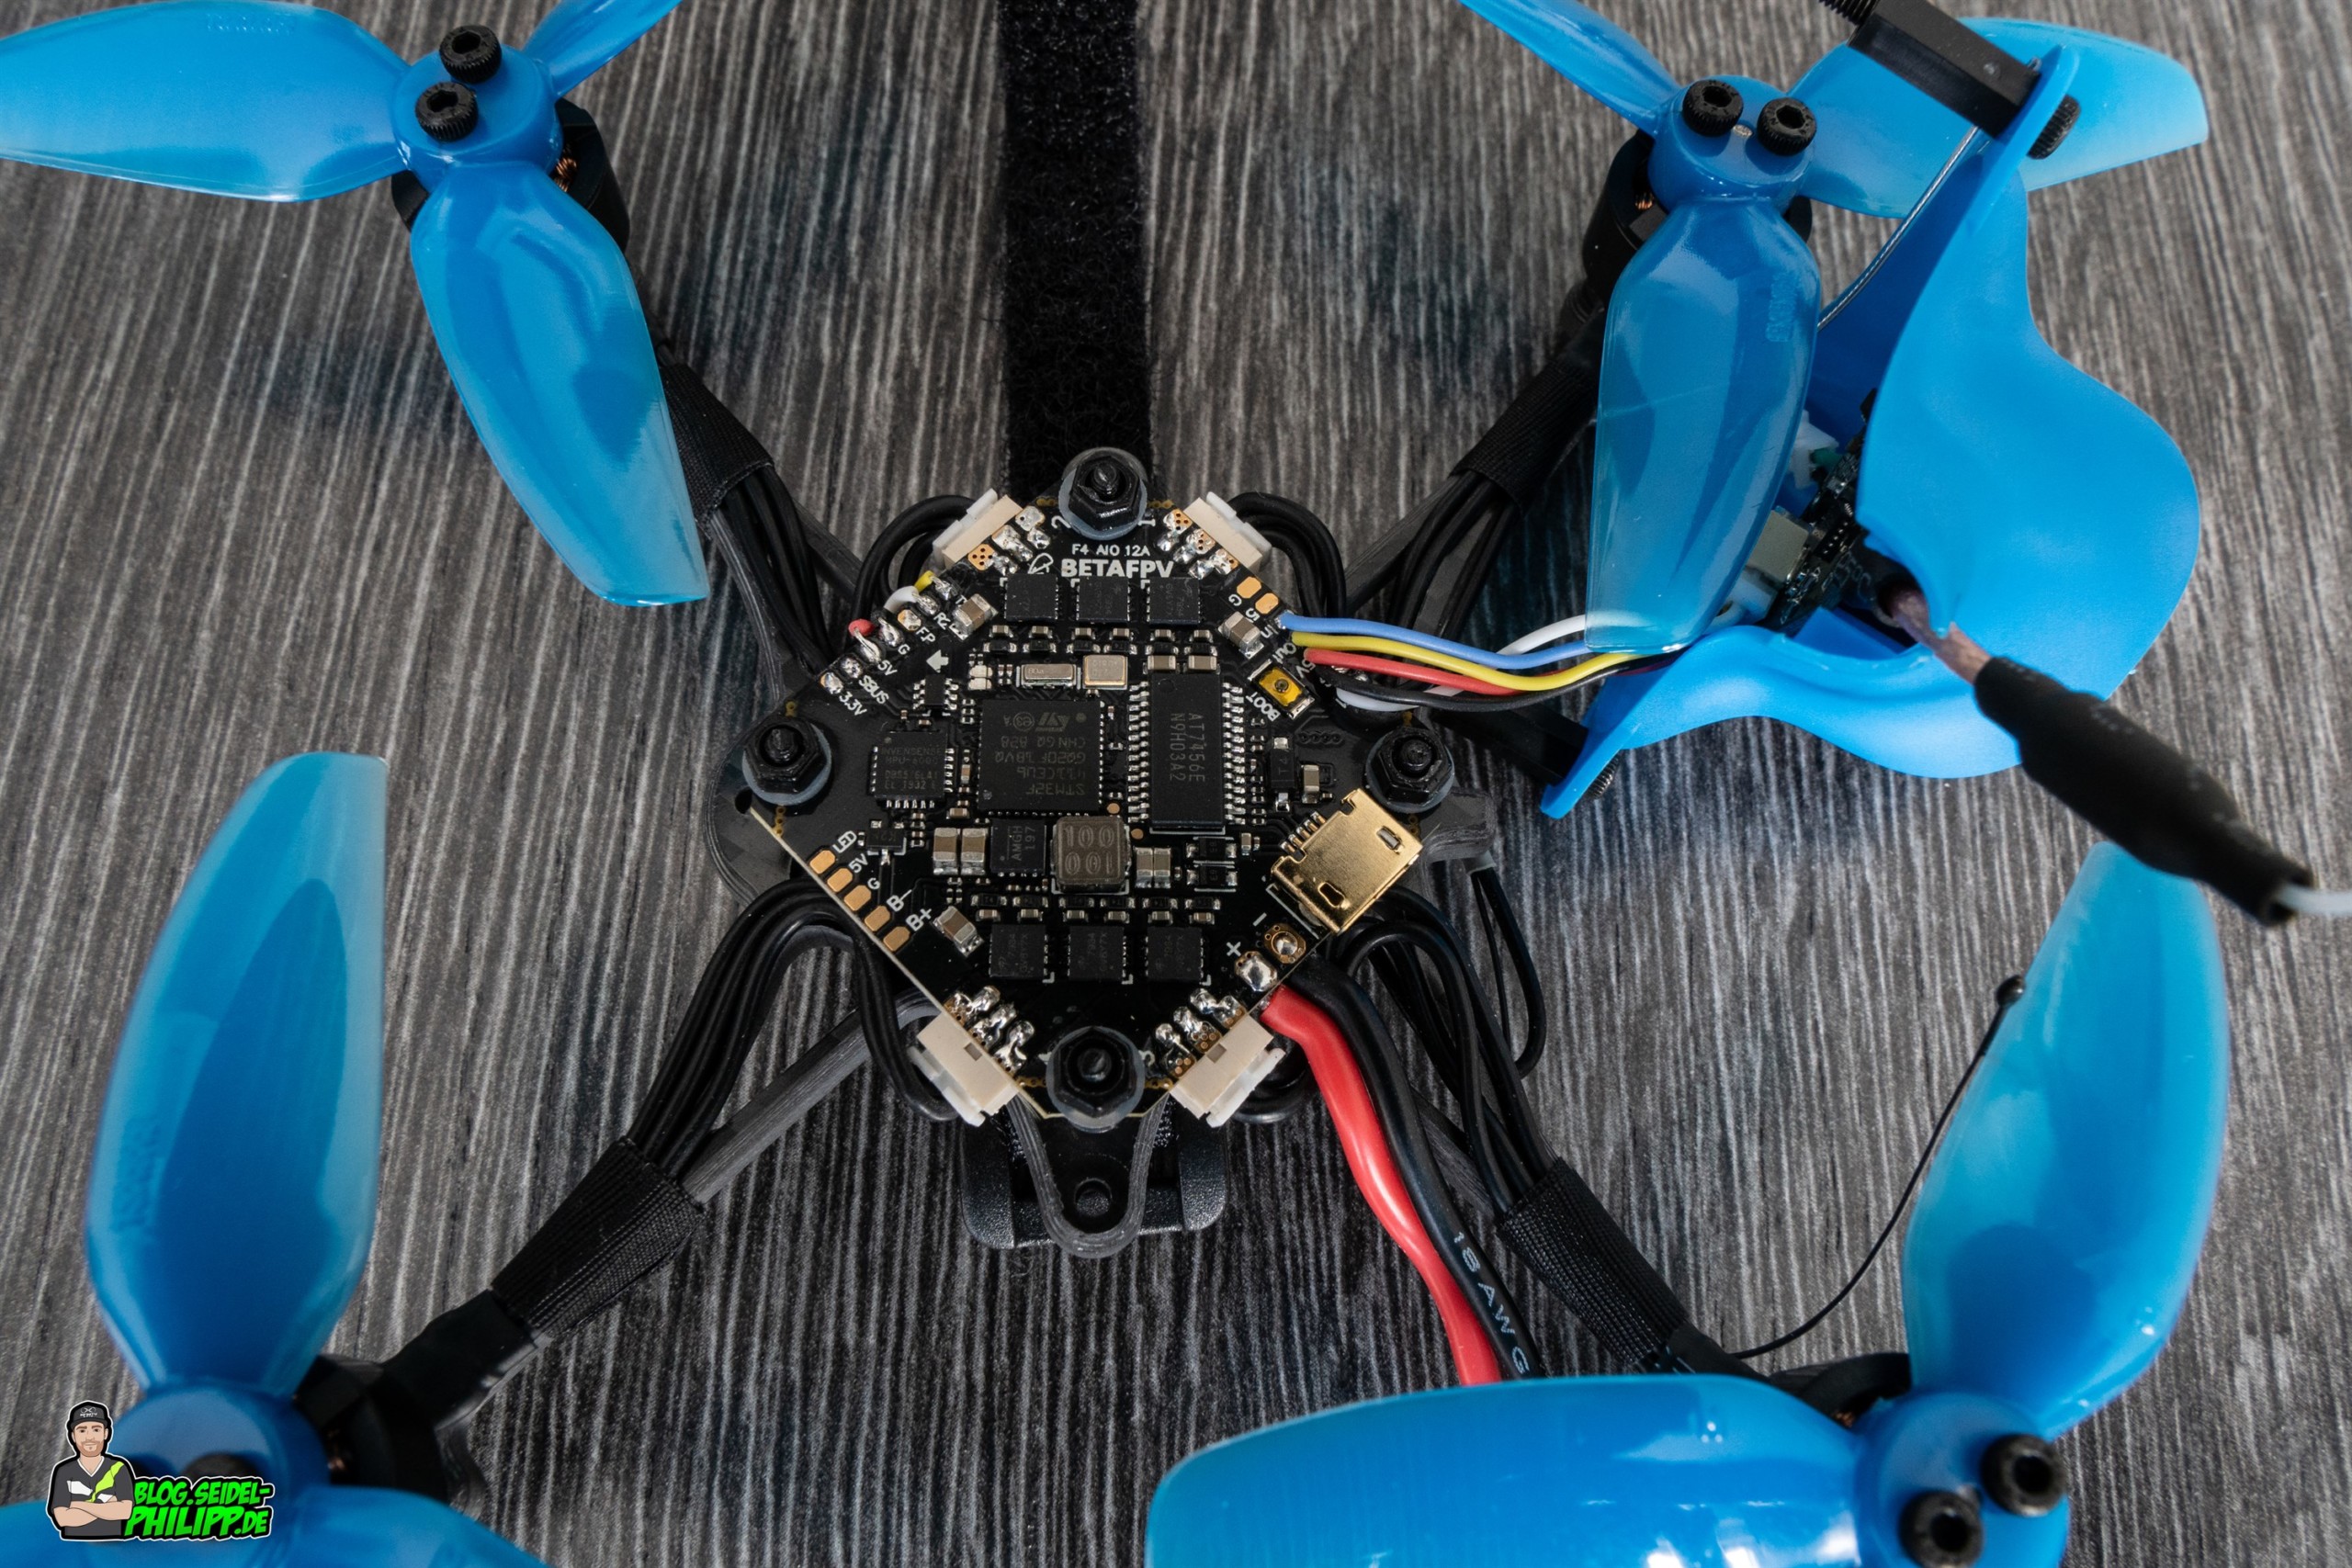
The BLHeli_S ESC is capable from 2 to 4S and provides 12A. Be sure to use the correct propeller / LiPo combination do not damage the ESC.

Softmount
The flight control is softmounted in 4 places.
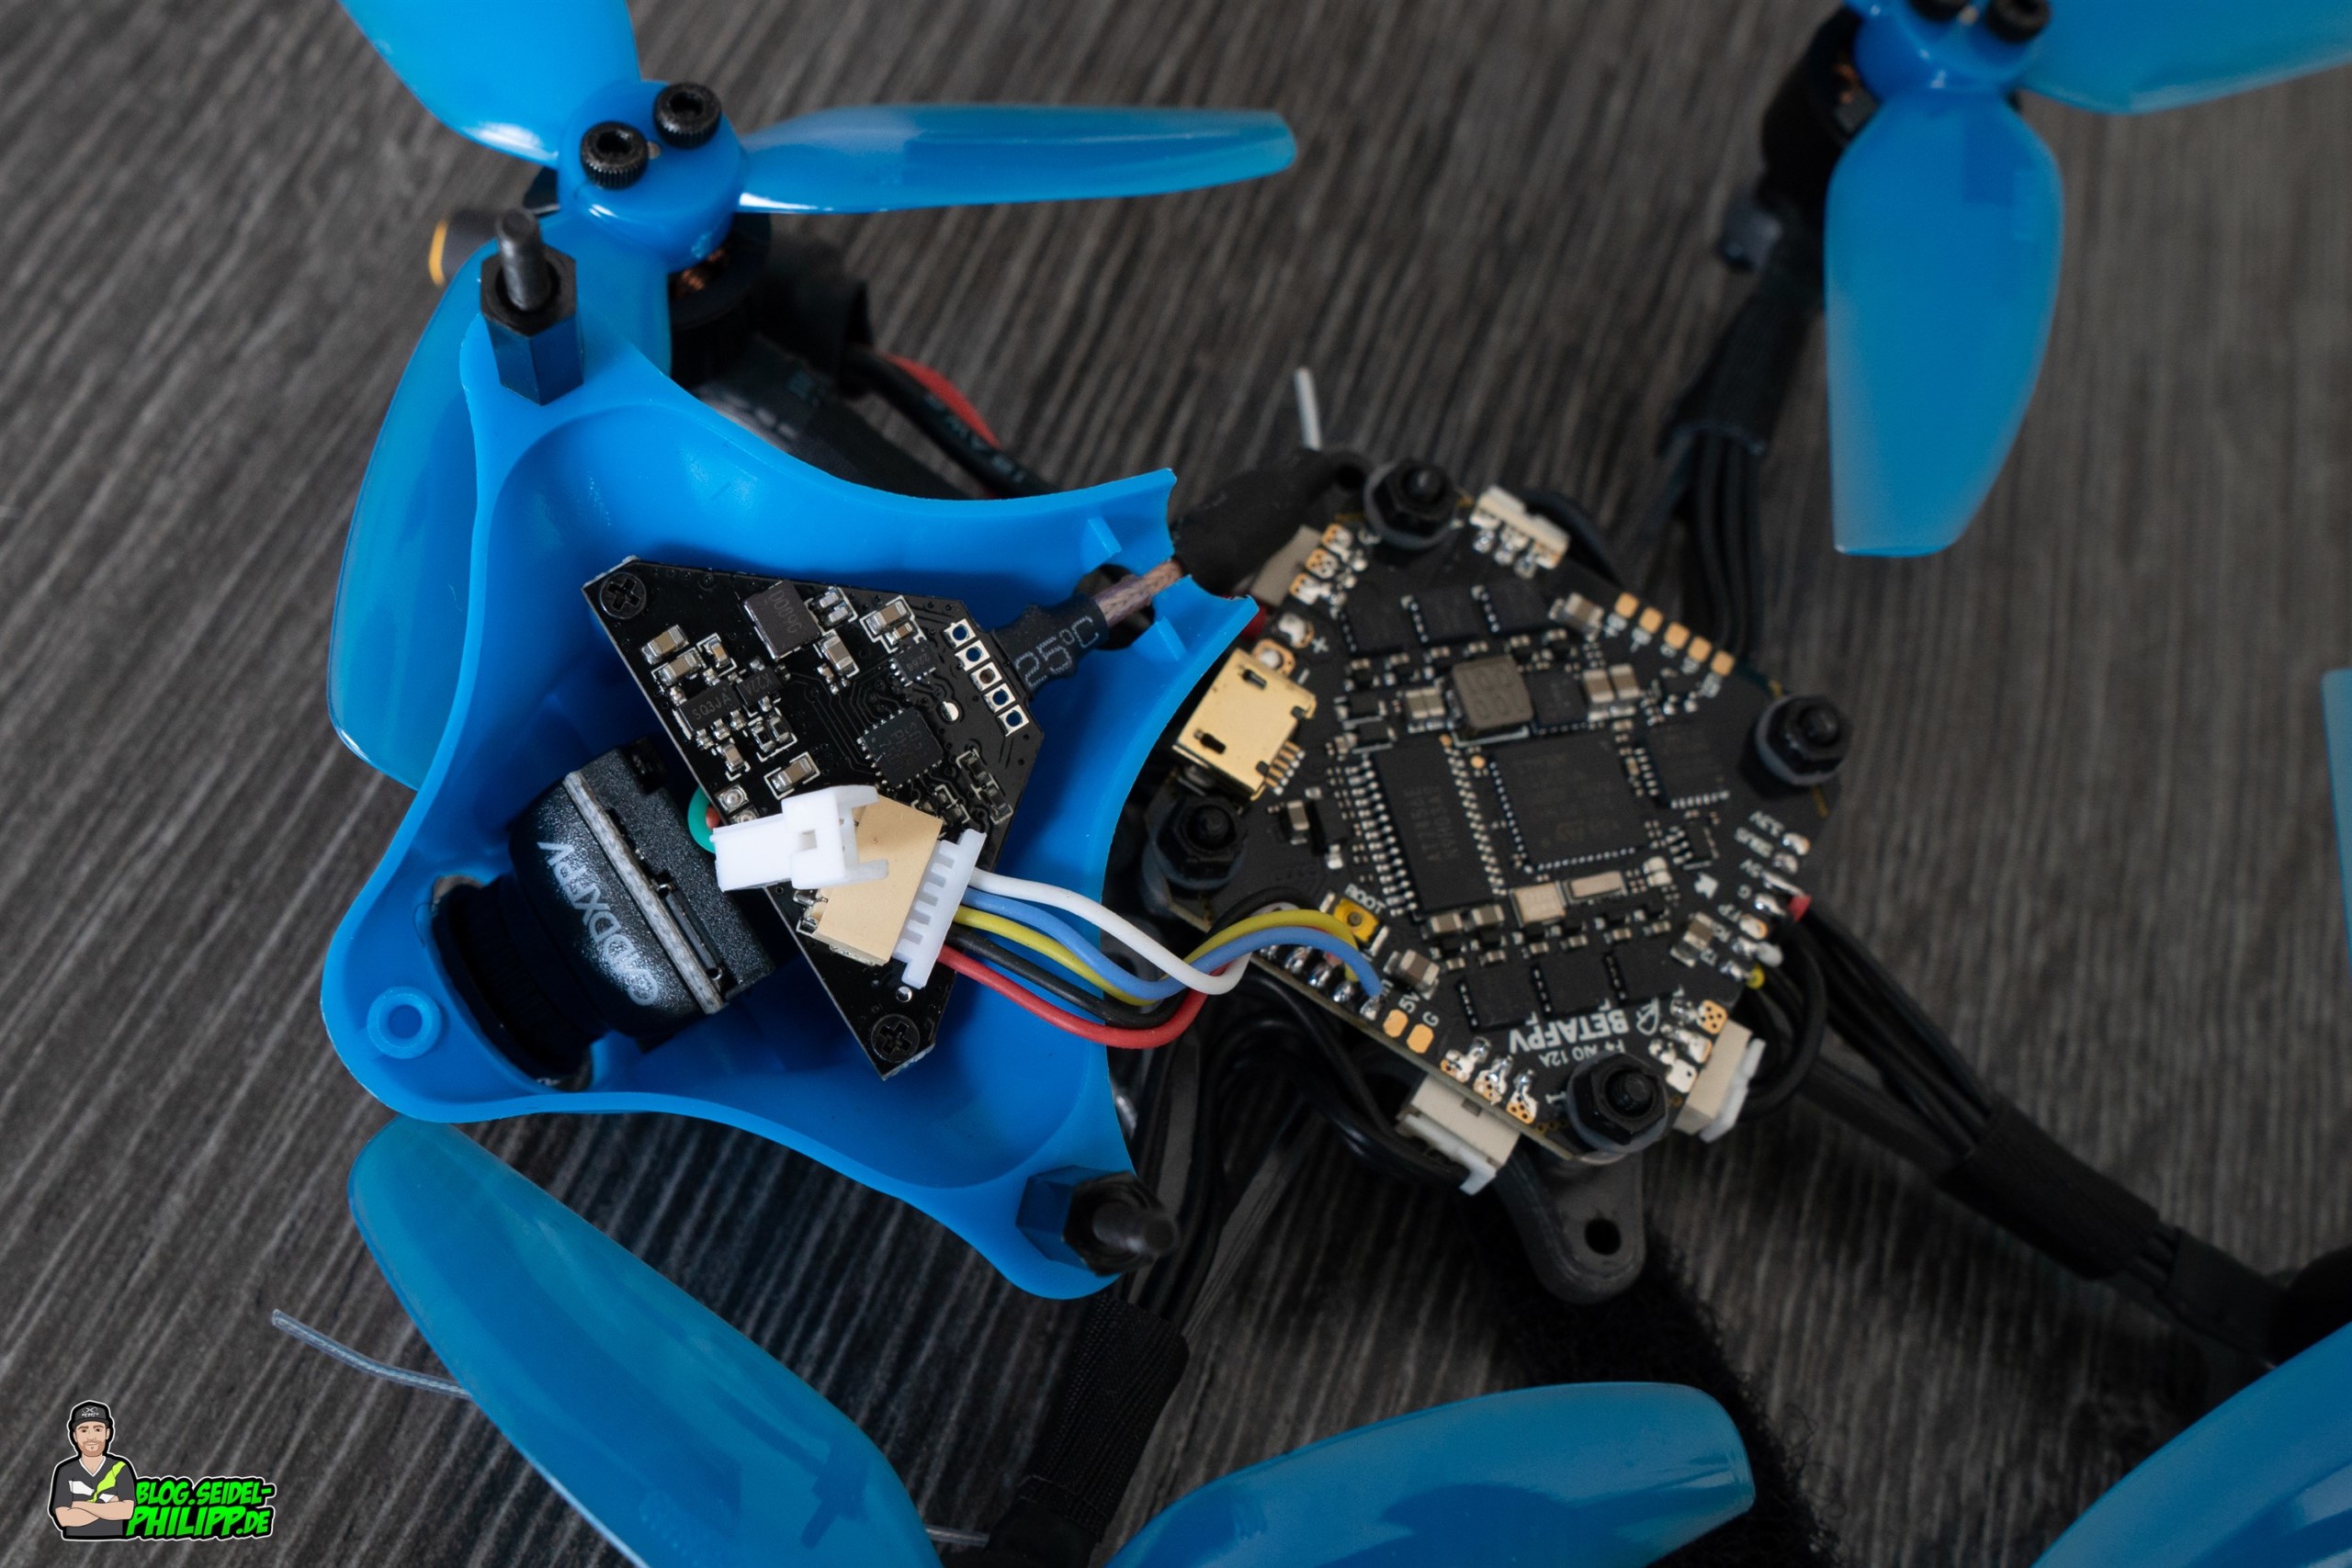
FPV camera and VTX (video transmitter)
Camera and video transmitter are bolted to the canopy and connected to the flight control with a 5-pin cable.
FPV Camera
In the FPV Version, they used the Caddx Kangaroo camera. It offers a good and sharp picture. (DVR follows)
VTX – Video transmitter
The video transmitter has 48 channels and has a transmitting power of 25mW and 200mW. It also has SmartAudio and Pitmode on board.
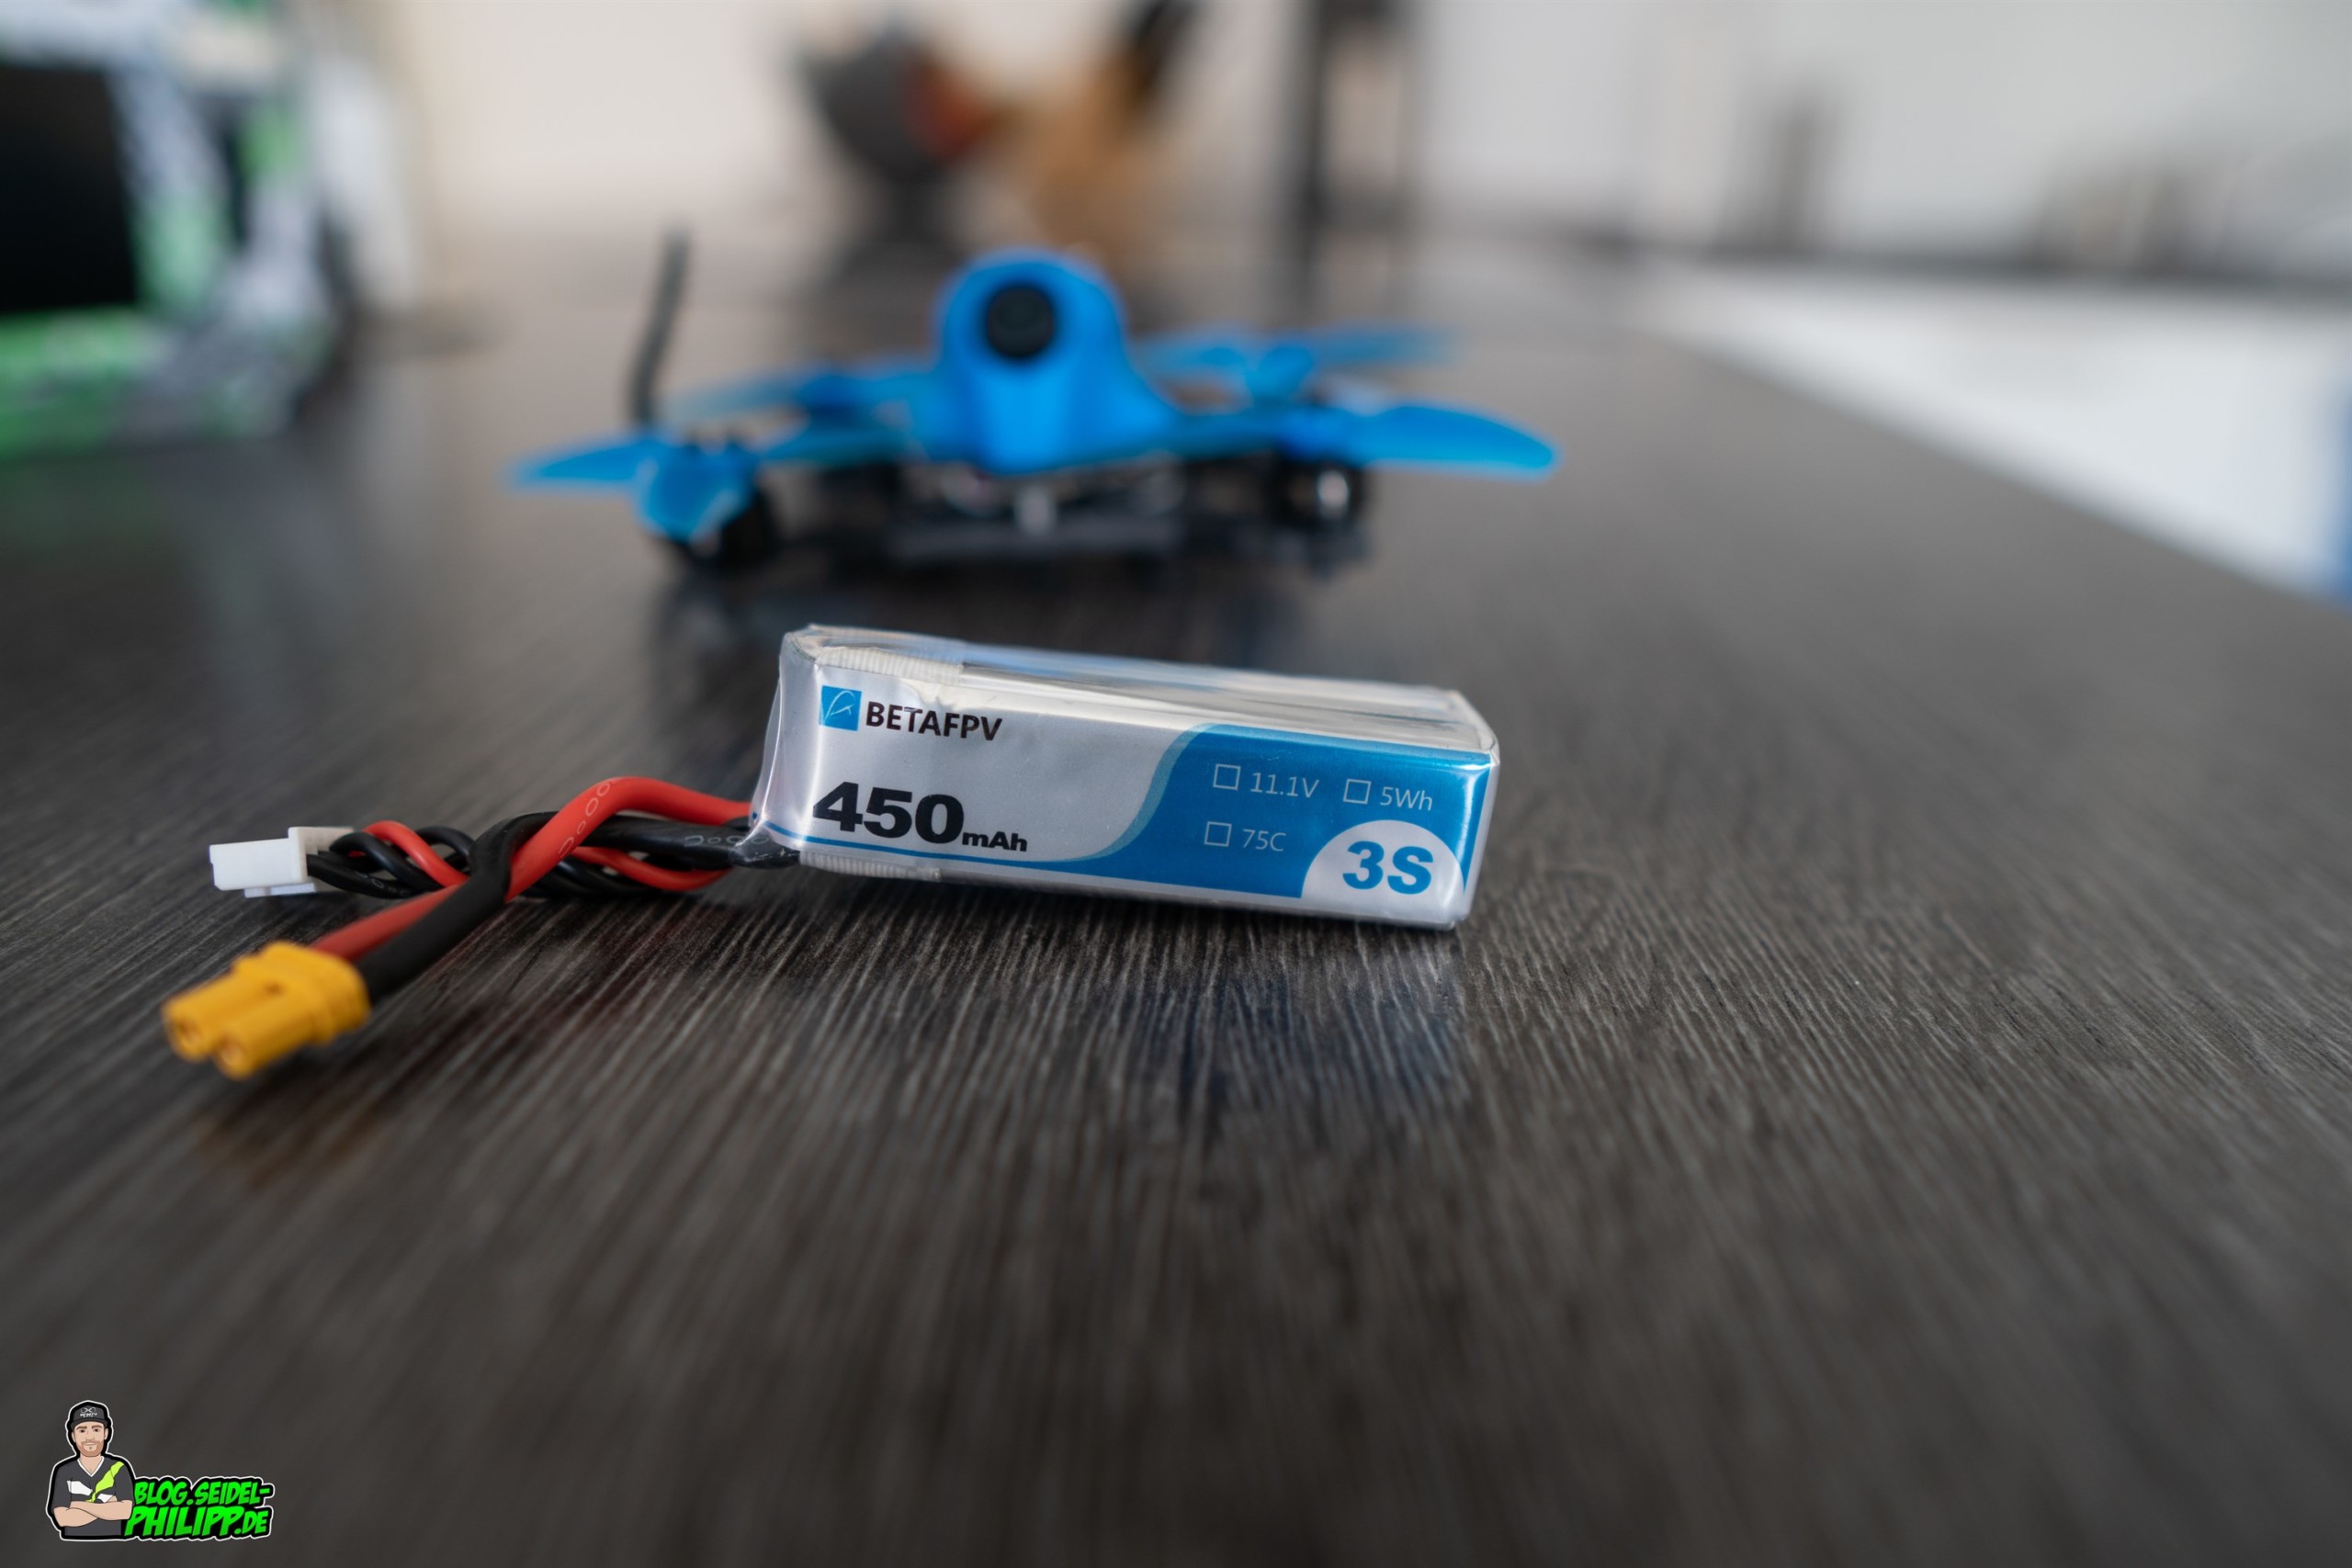
Battery
I use a 3S 450mAh battery with XT30 connection. For my taste, the balancer cable is a little too long here. They could have saved some grams, if it were shorter.
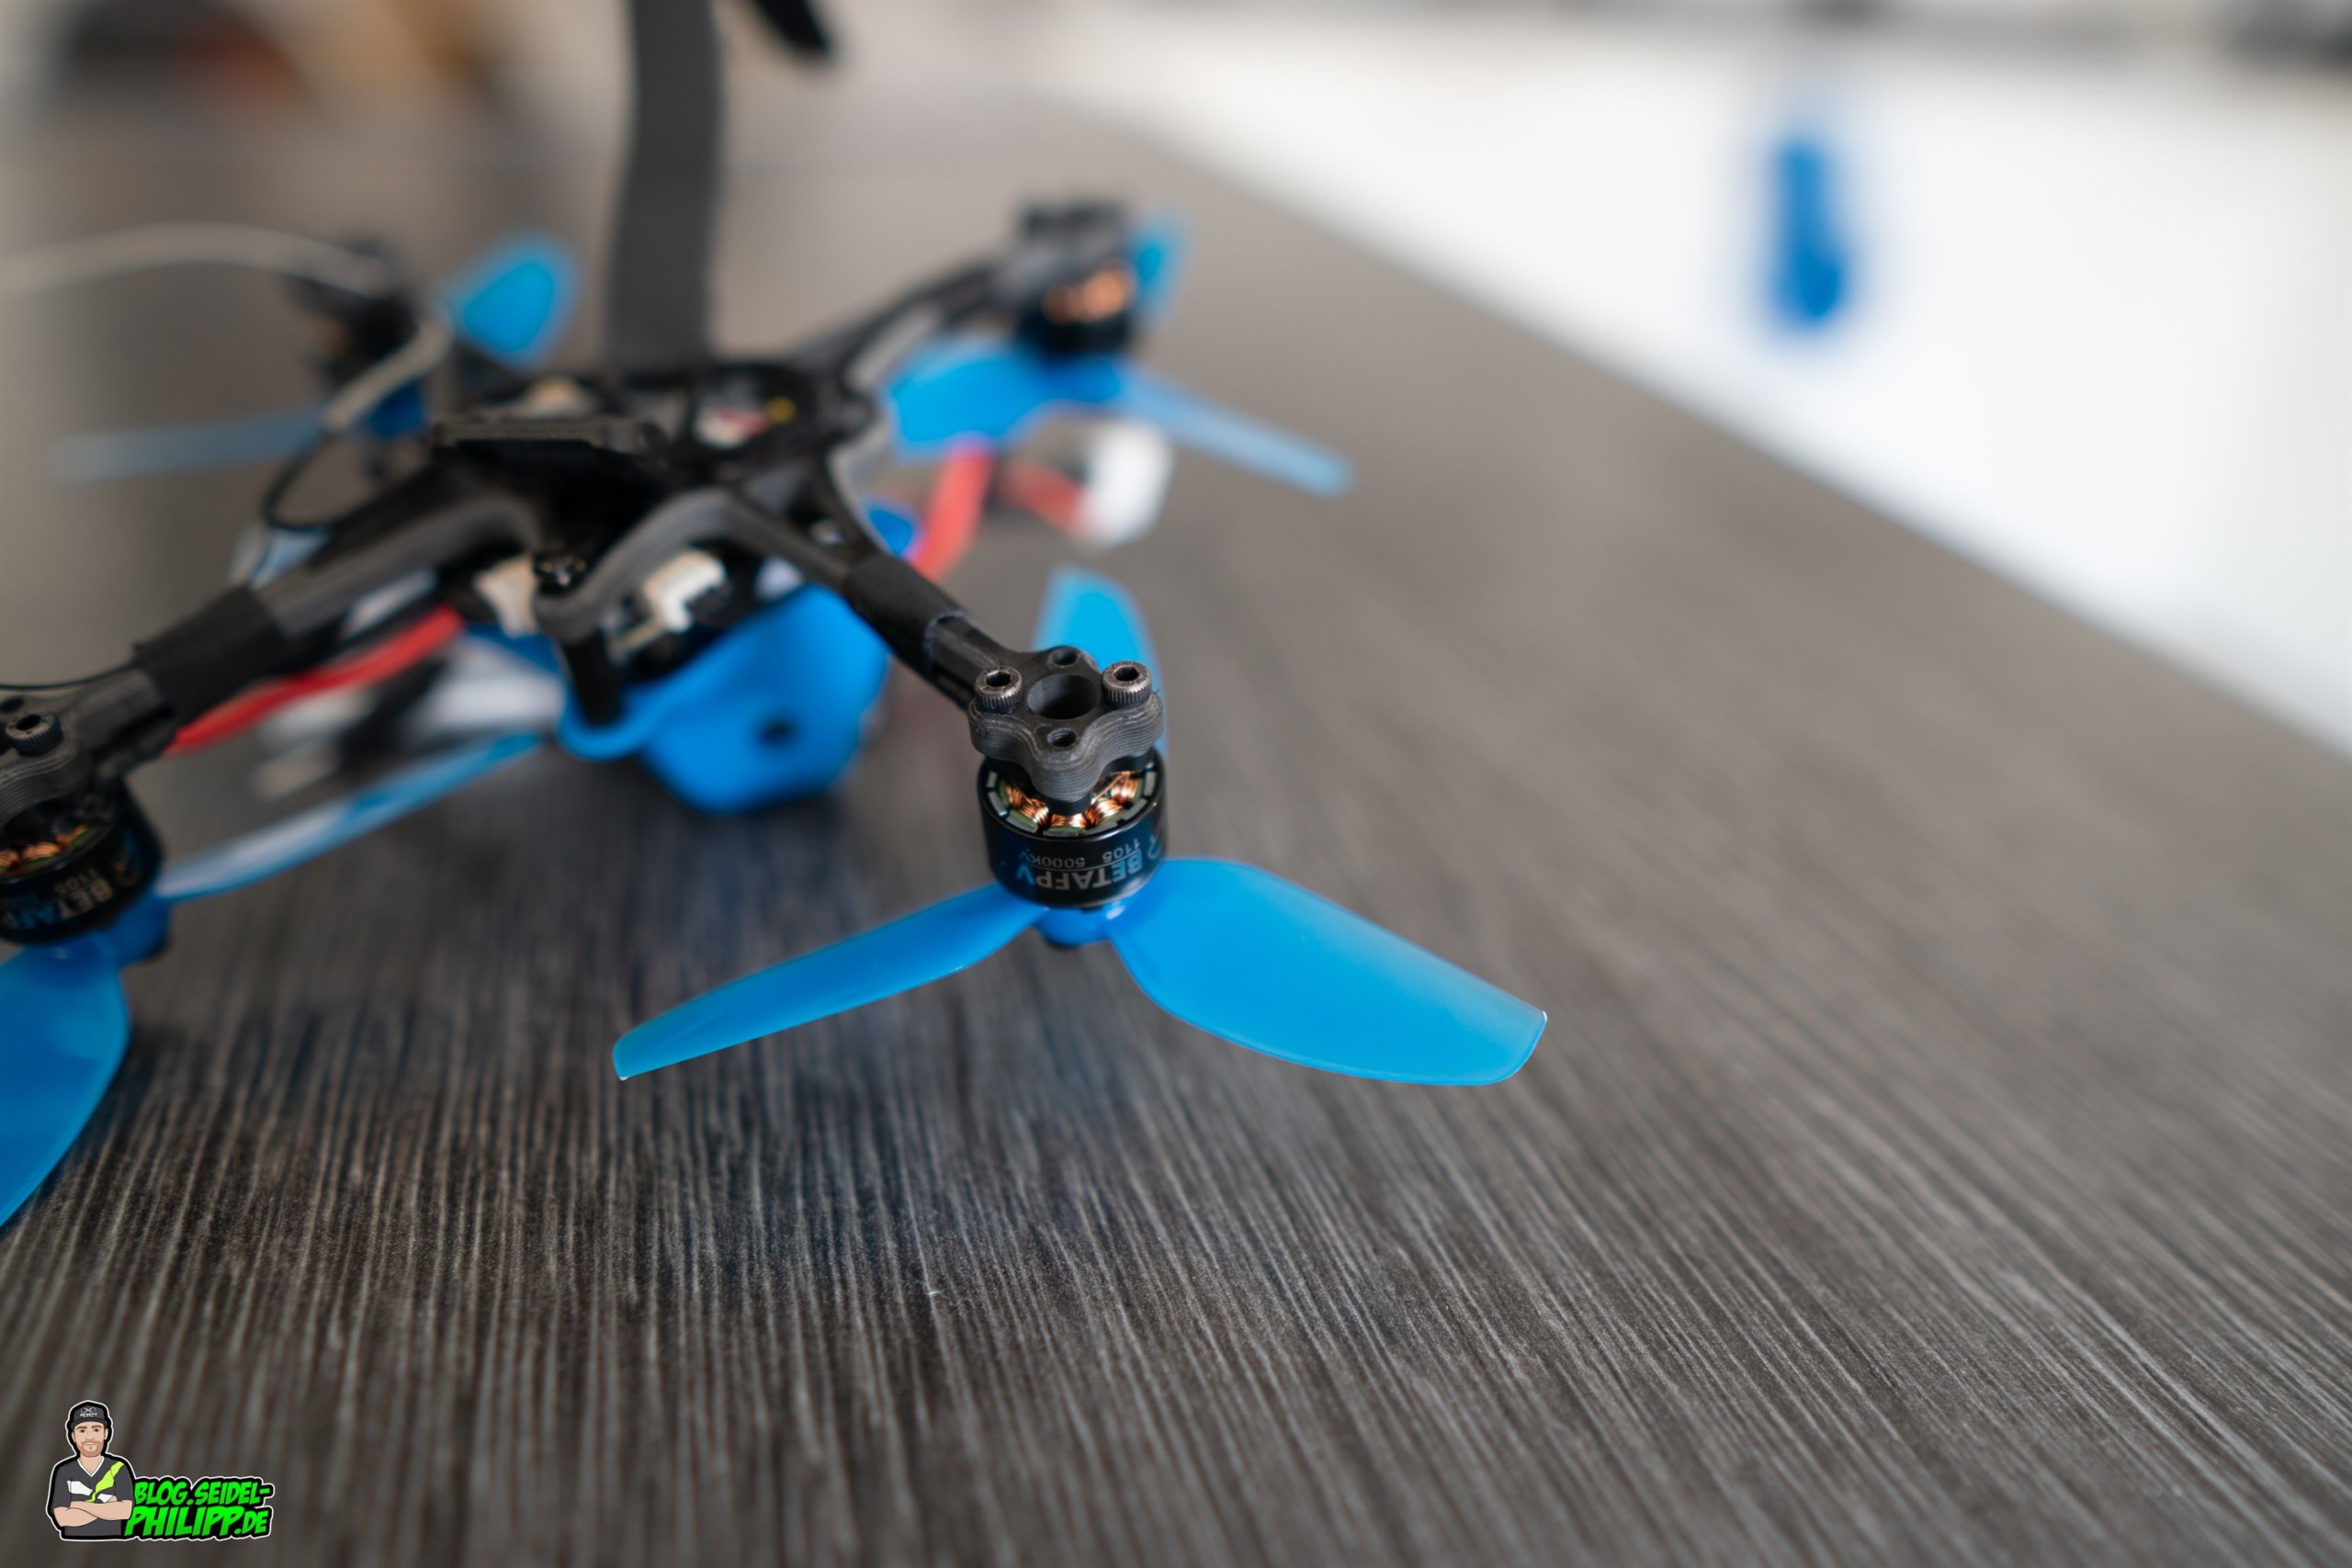
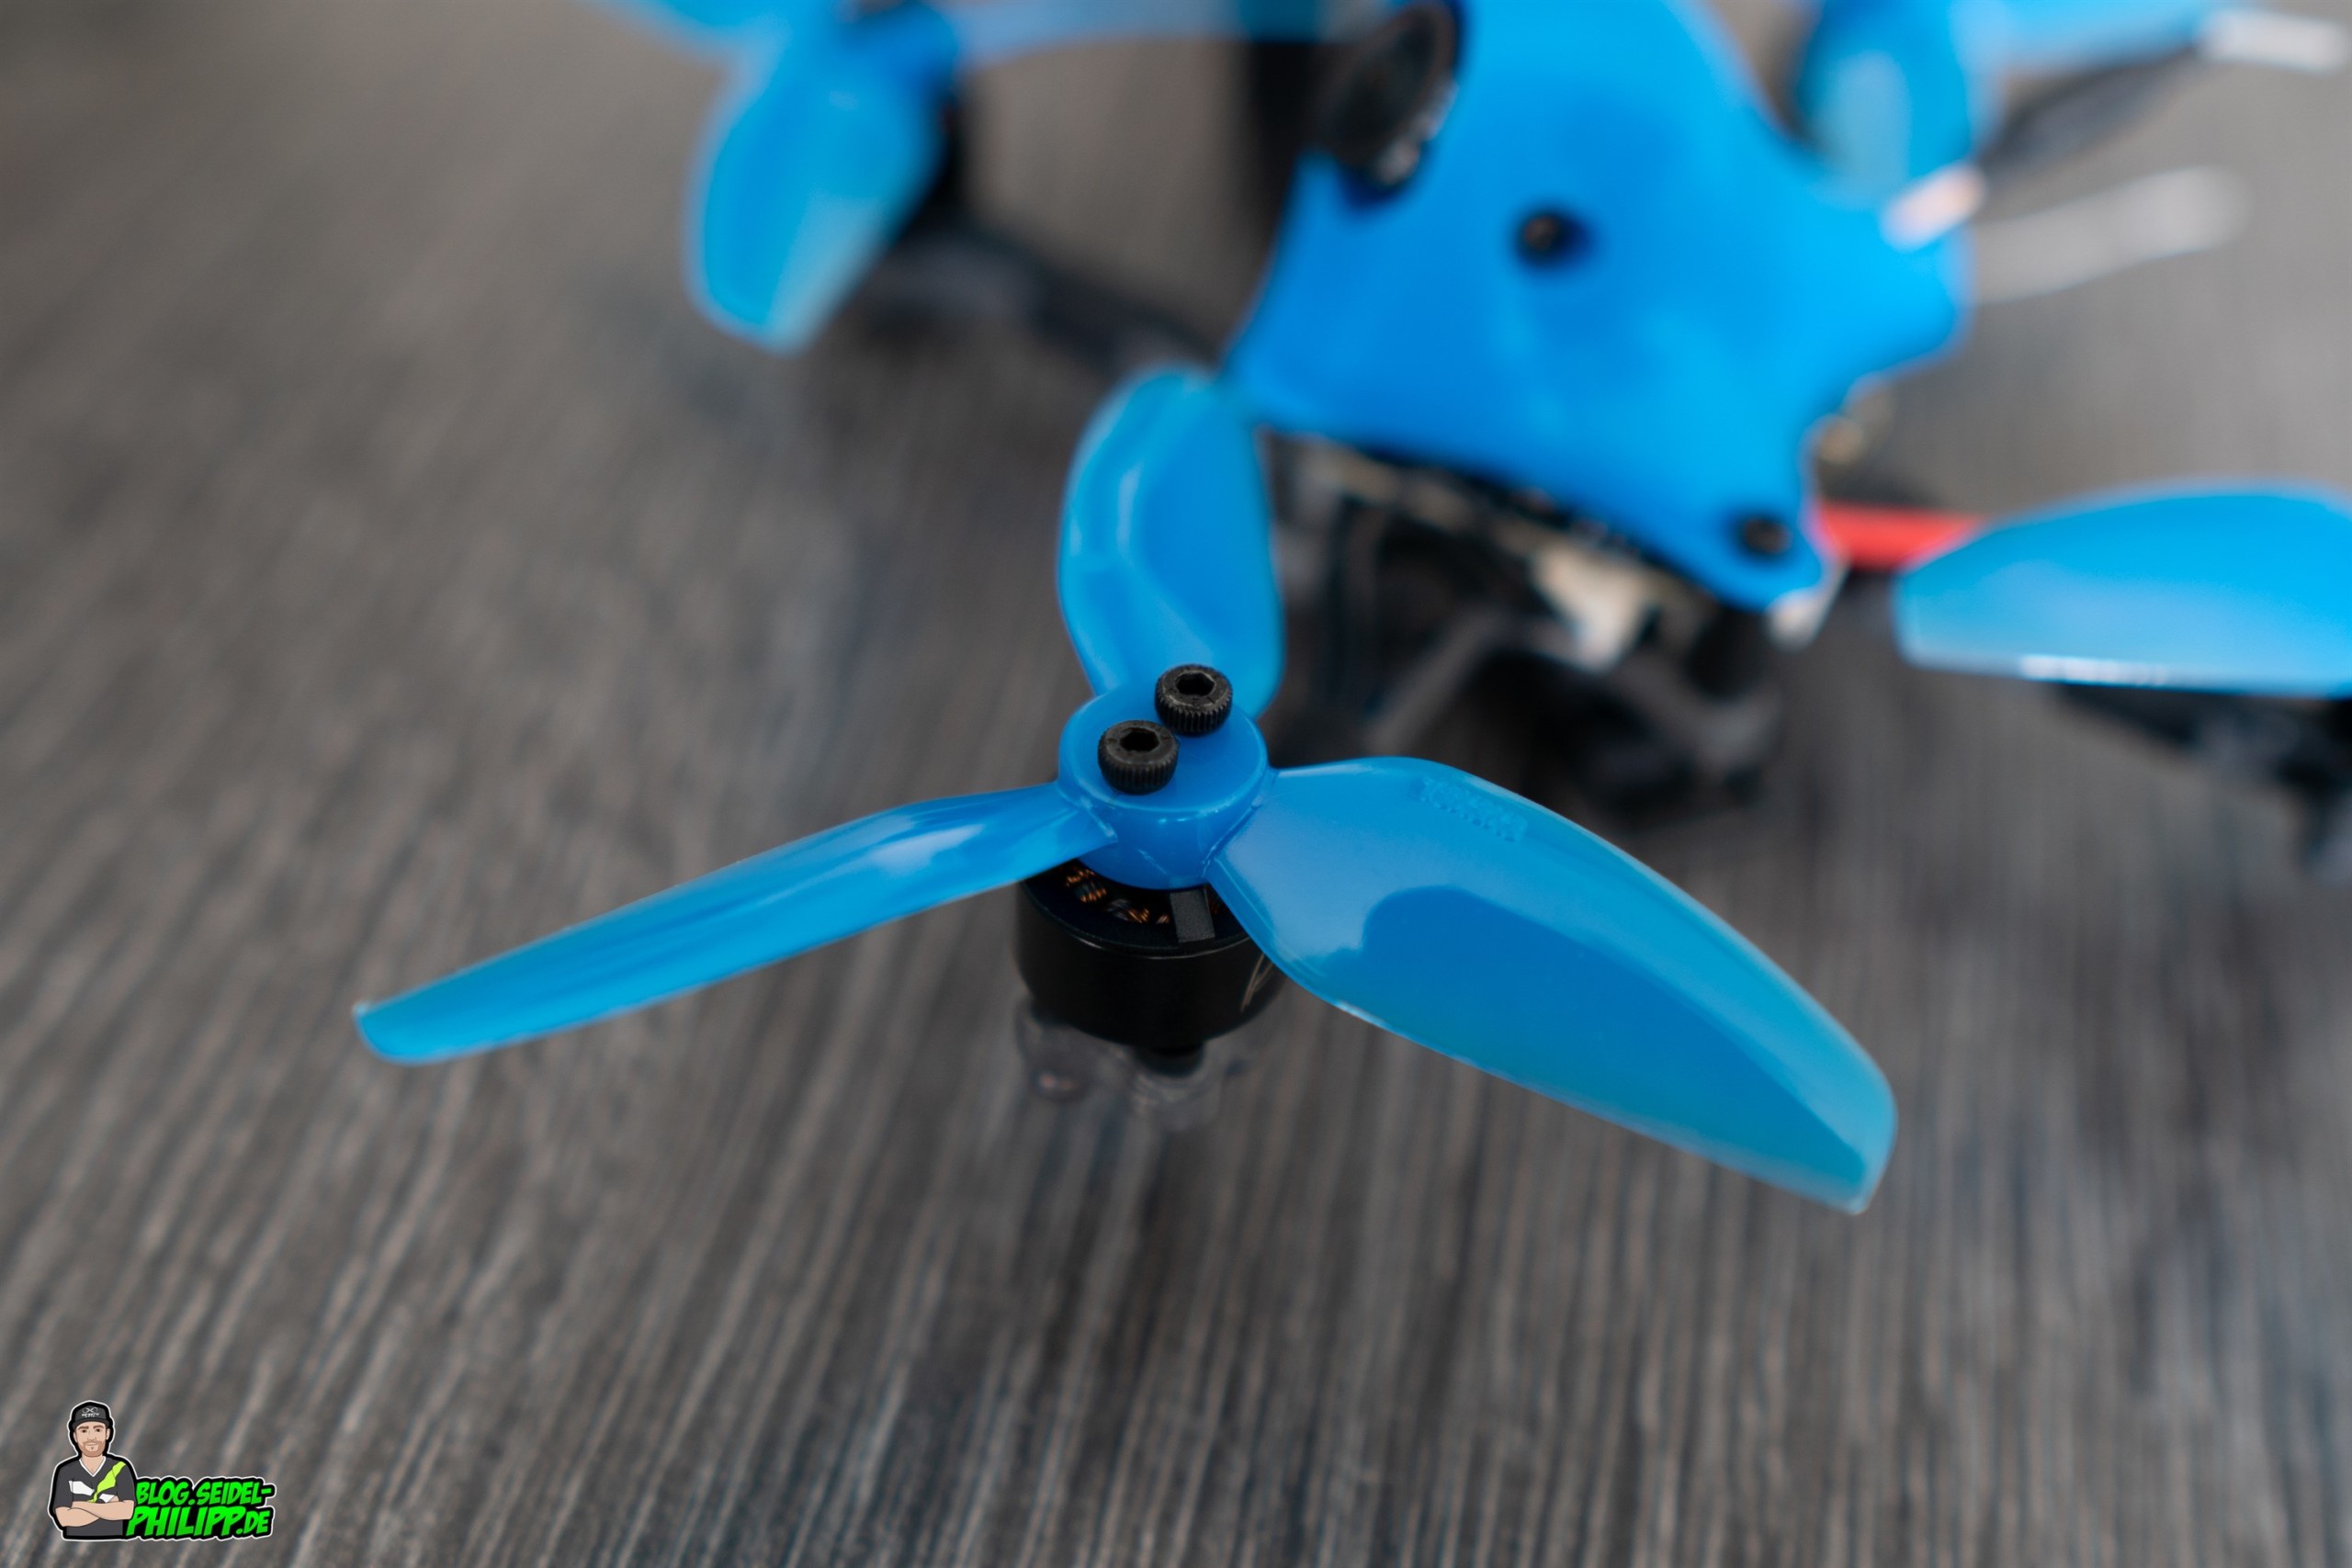
Motors and propellers
The motors are BetaFPV 1105 5000KV. To save weight, all motors are only attached with 2 screws, which is completely sufficient in my opinion.

Propellers
Since I fly 3S I use the three-blade HQ3030 propeller. If you want to fly 4S please use the two-blade HQ3020 propellers.
HX115 Configuration
Below is a short list of the settings I have made for the copter in addition to the default settings.
Betaflight 4.1.x
If you want to use Betaflight 4.1.1, you will find the various DIFF files here.
Betaflight
Below is the configuration for the stock firmware: Betaflight / MATEKF411 (MK41) 3.5.6
Here is the setting for different flight modes and turtle mode
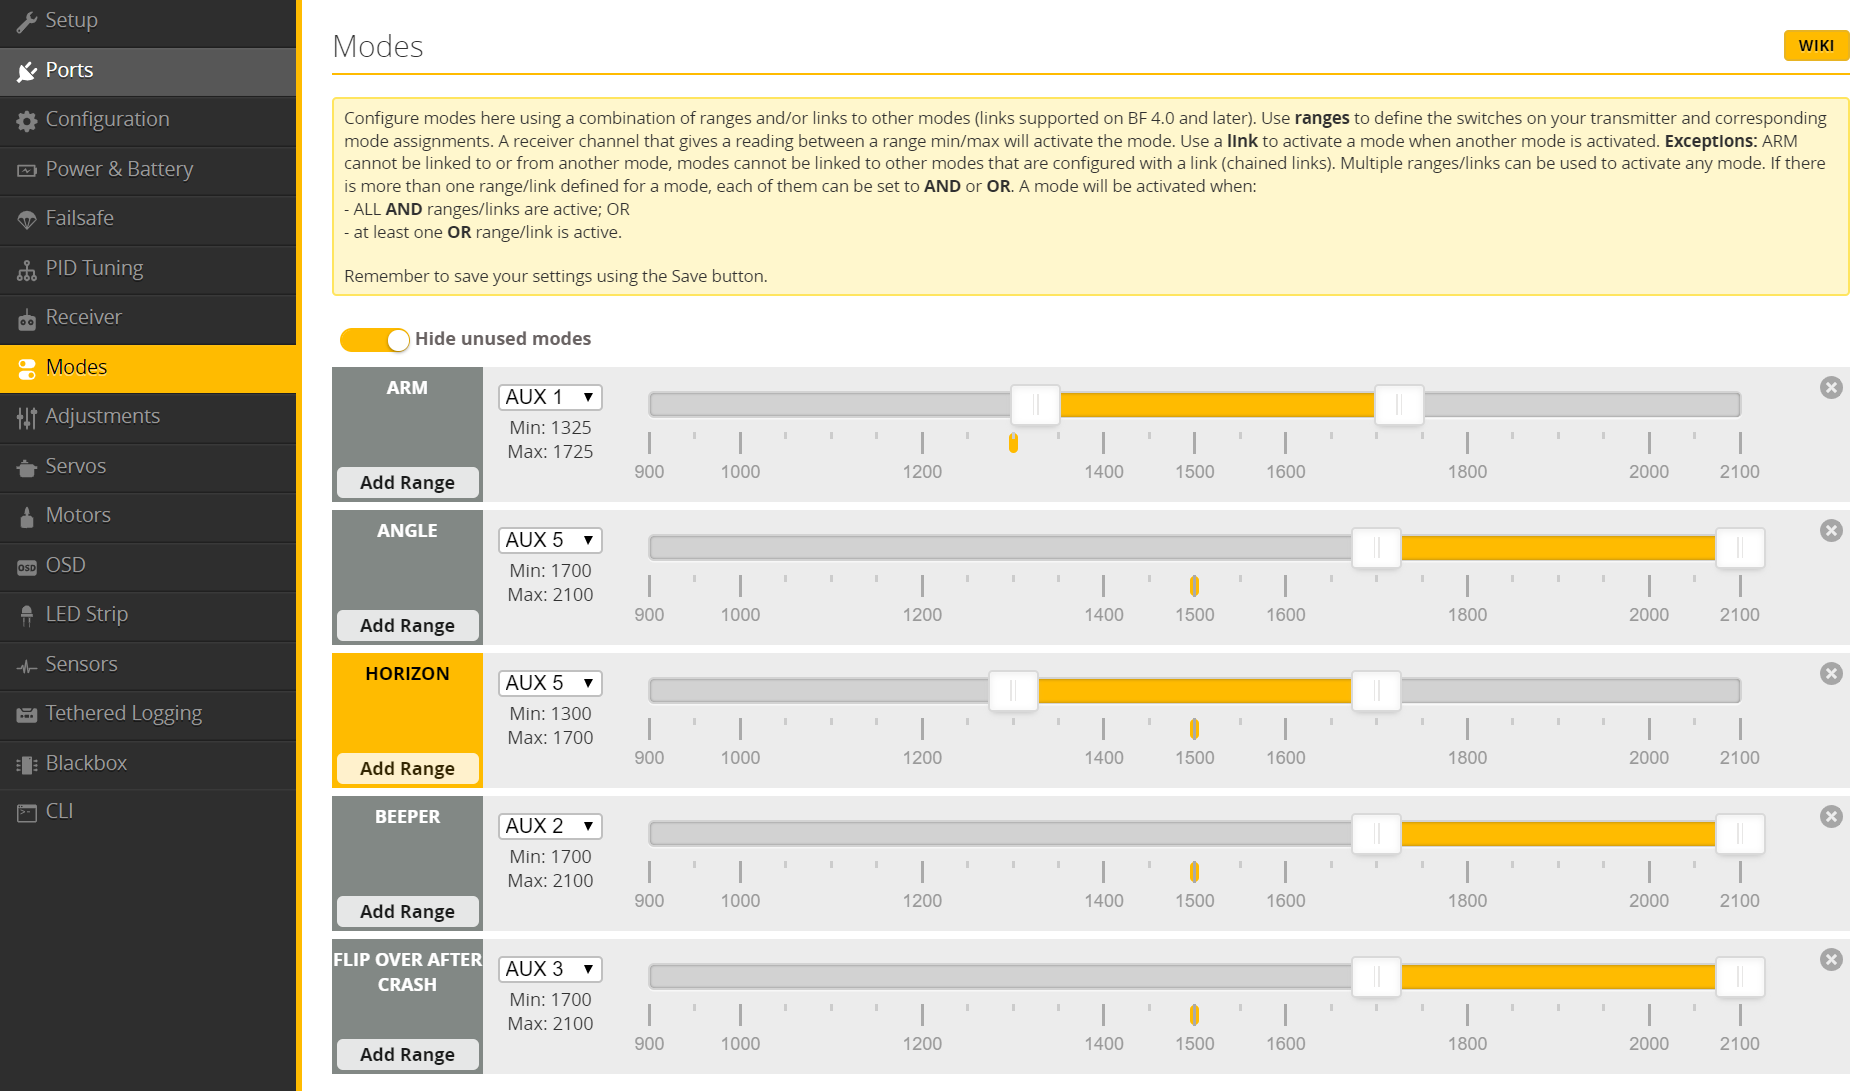
To display RSSI in the OSD, set the „RSSI Channel“ to „AUX 4“ in the „Receiver“ tab
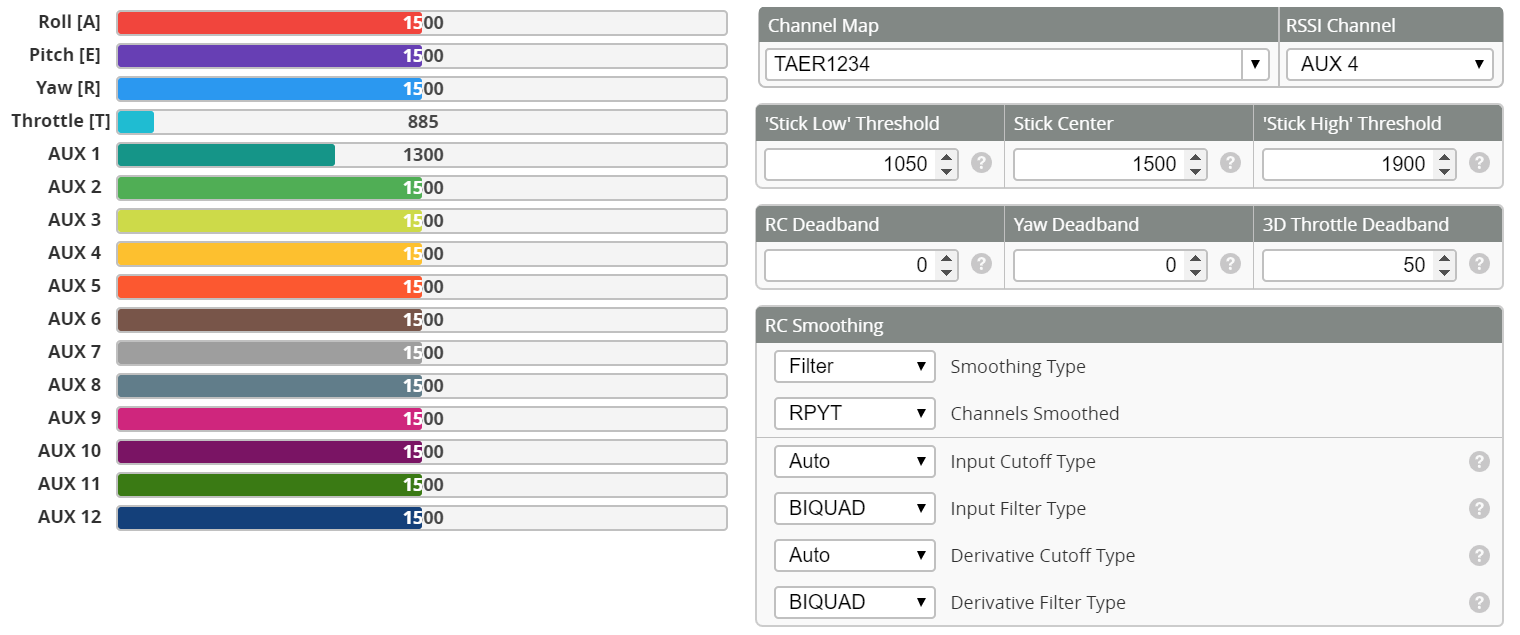
Afterwards you can activate your RSSI in the OSD in the „OSD“ tab.

Crossfire Setup
If we want to use 3 modes, RSSI, buzzer and turtle mode, we set the NanoRX to 12 channels. Telemetry on ON!
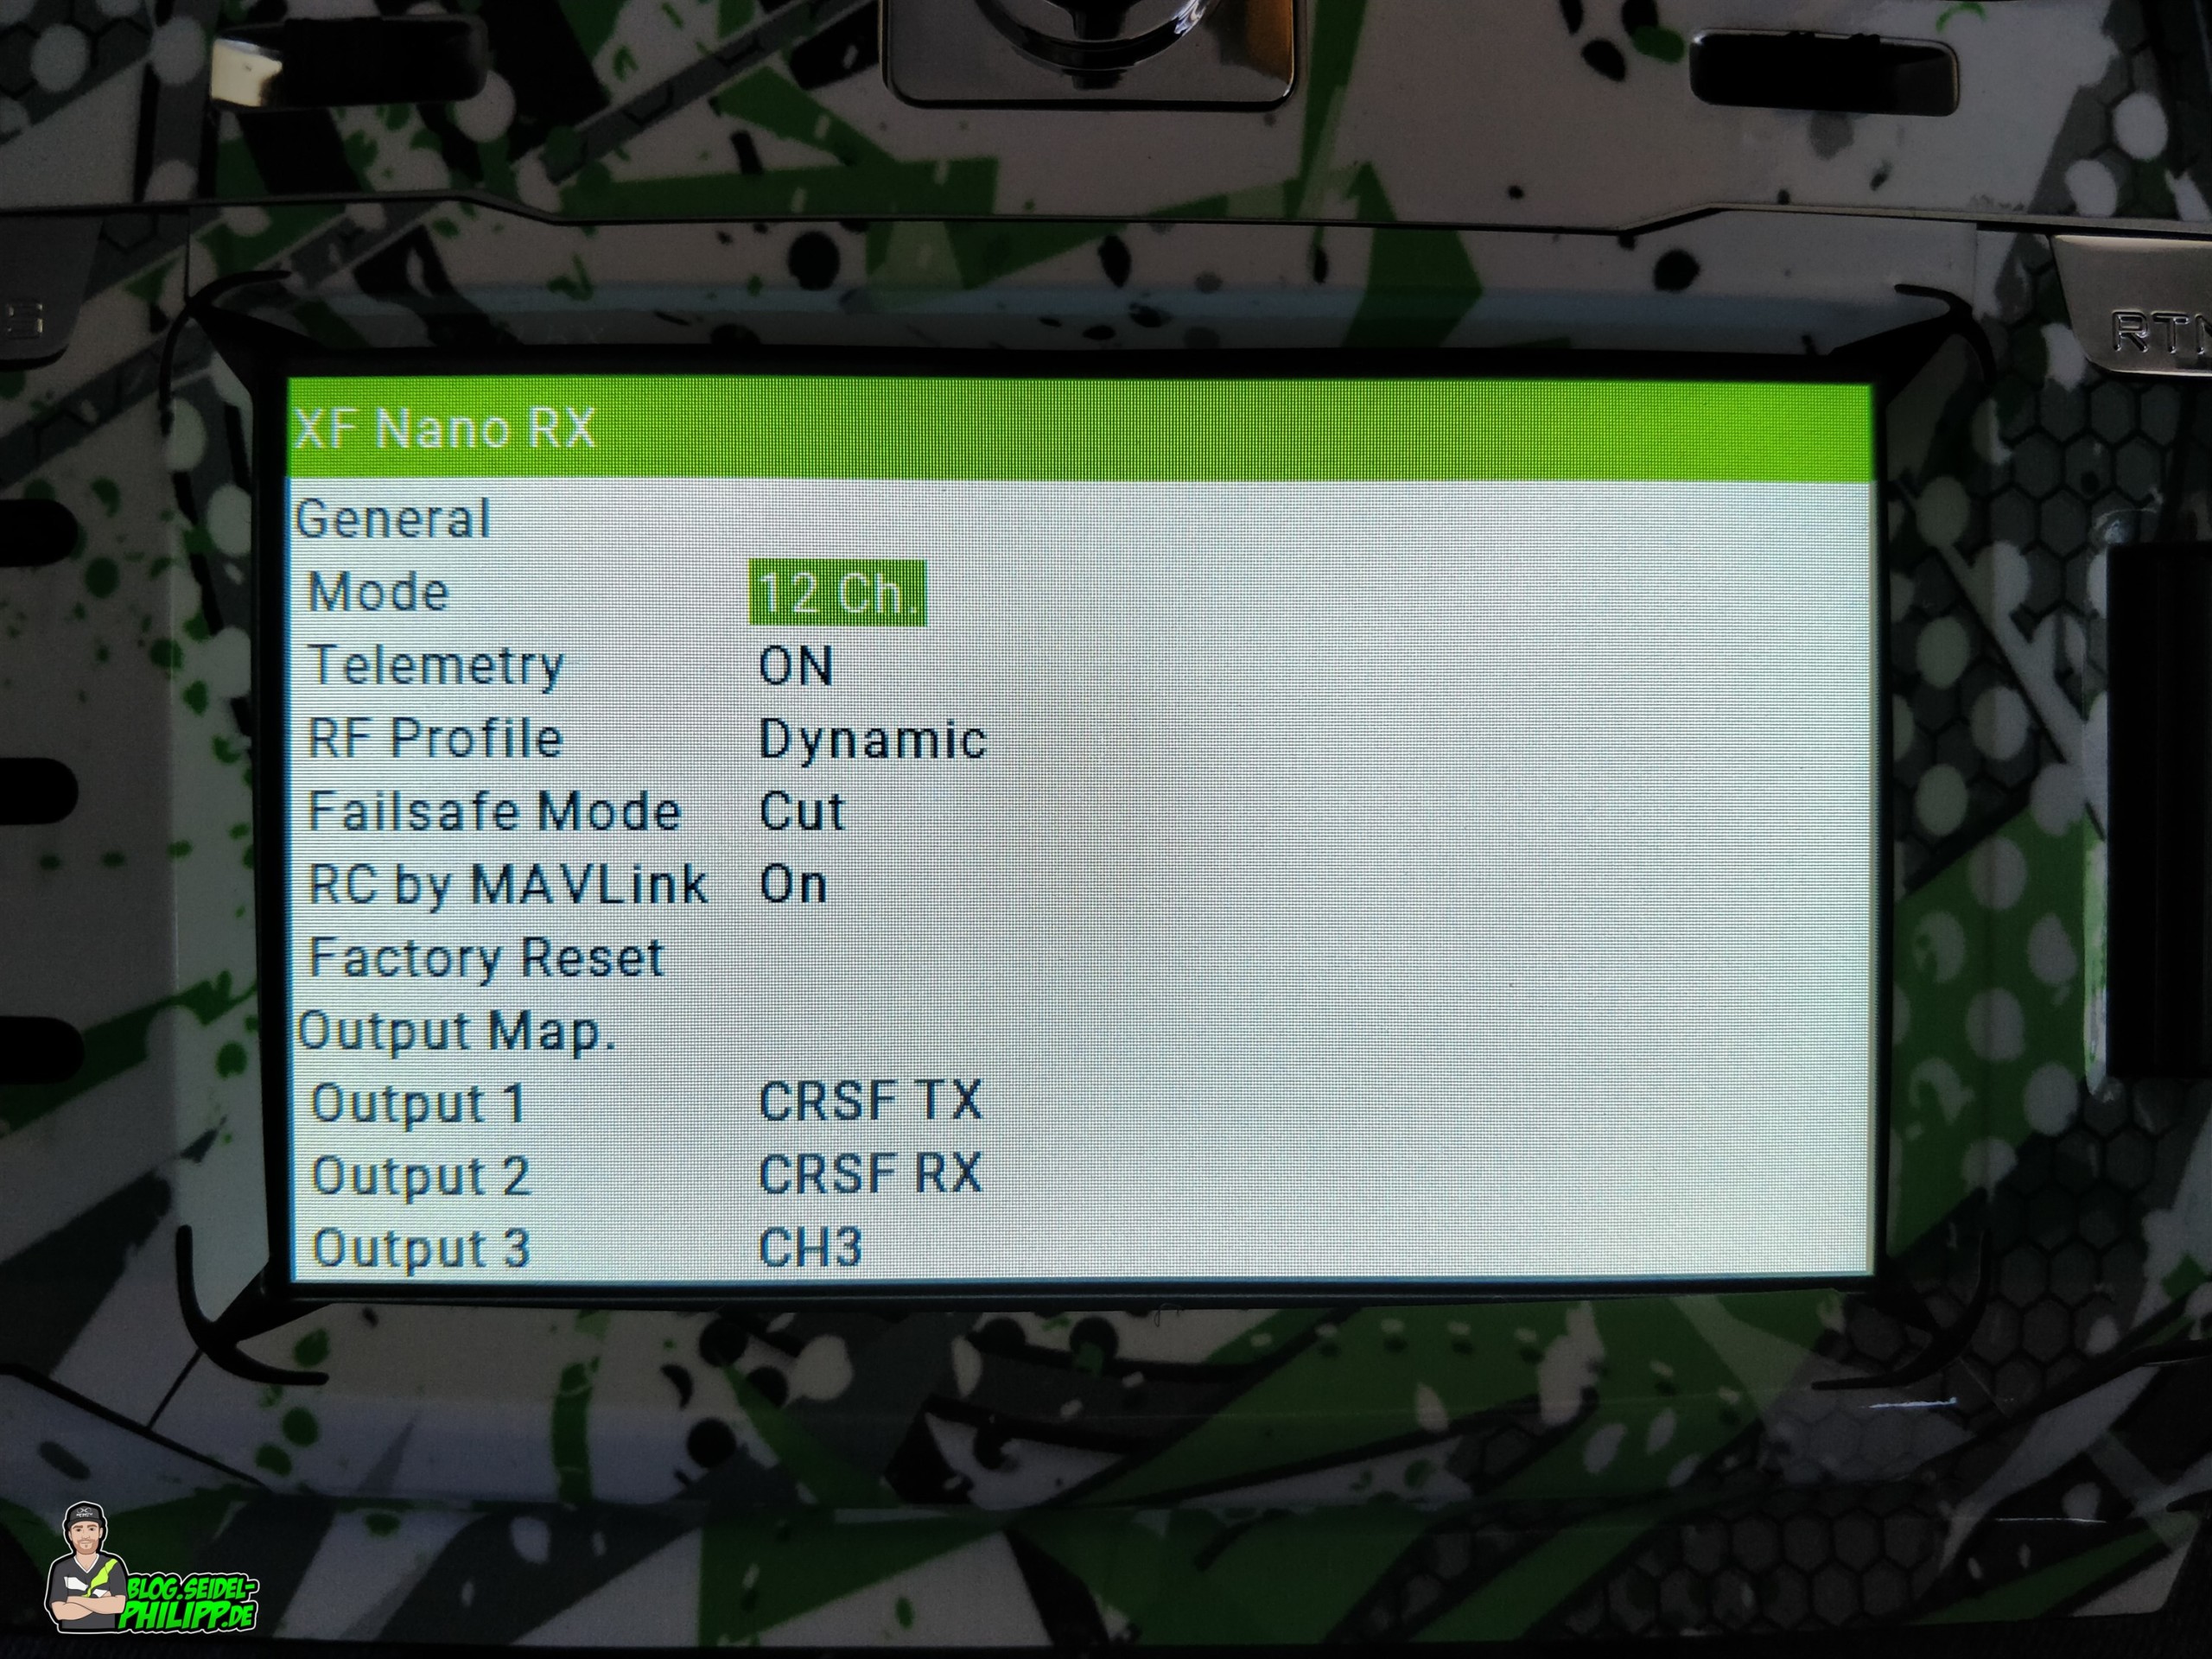
Configure the output map as follows:
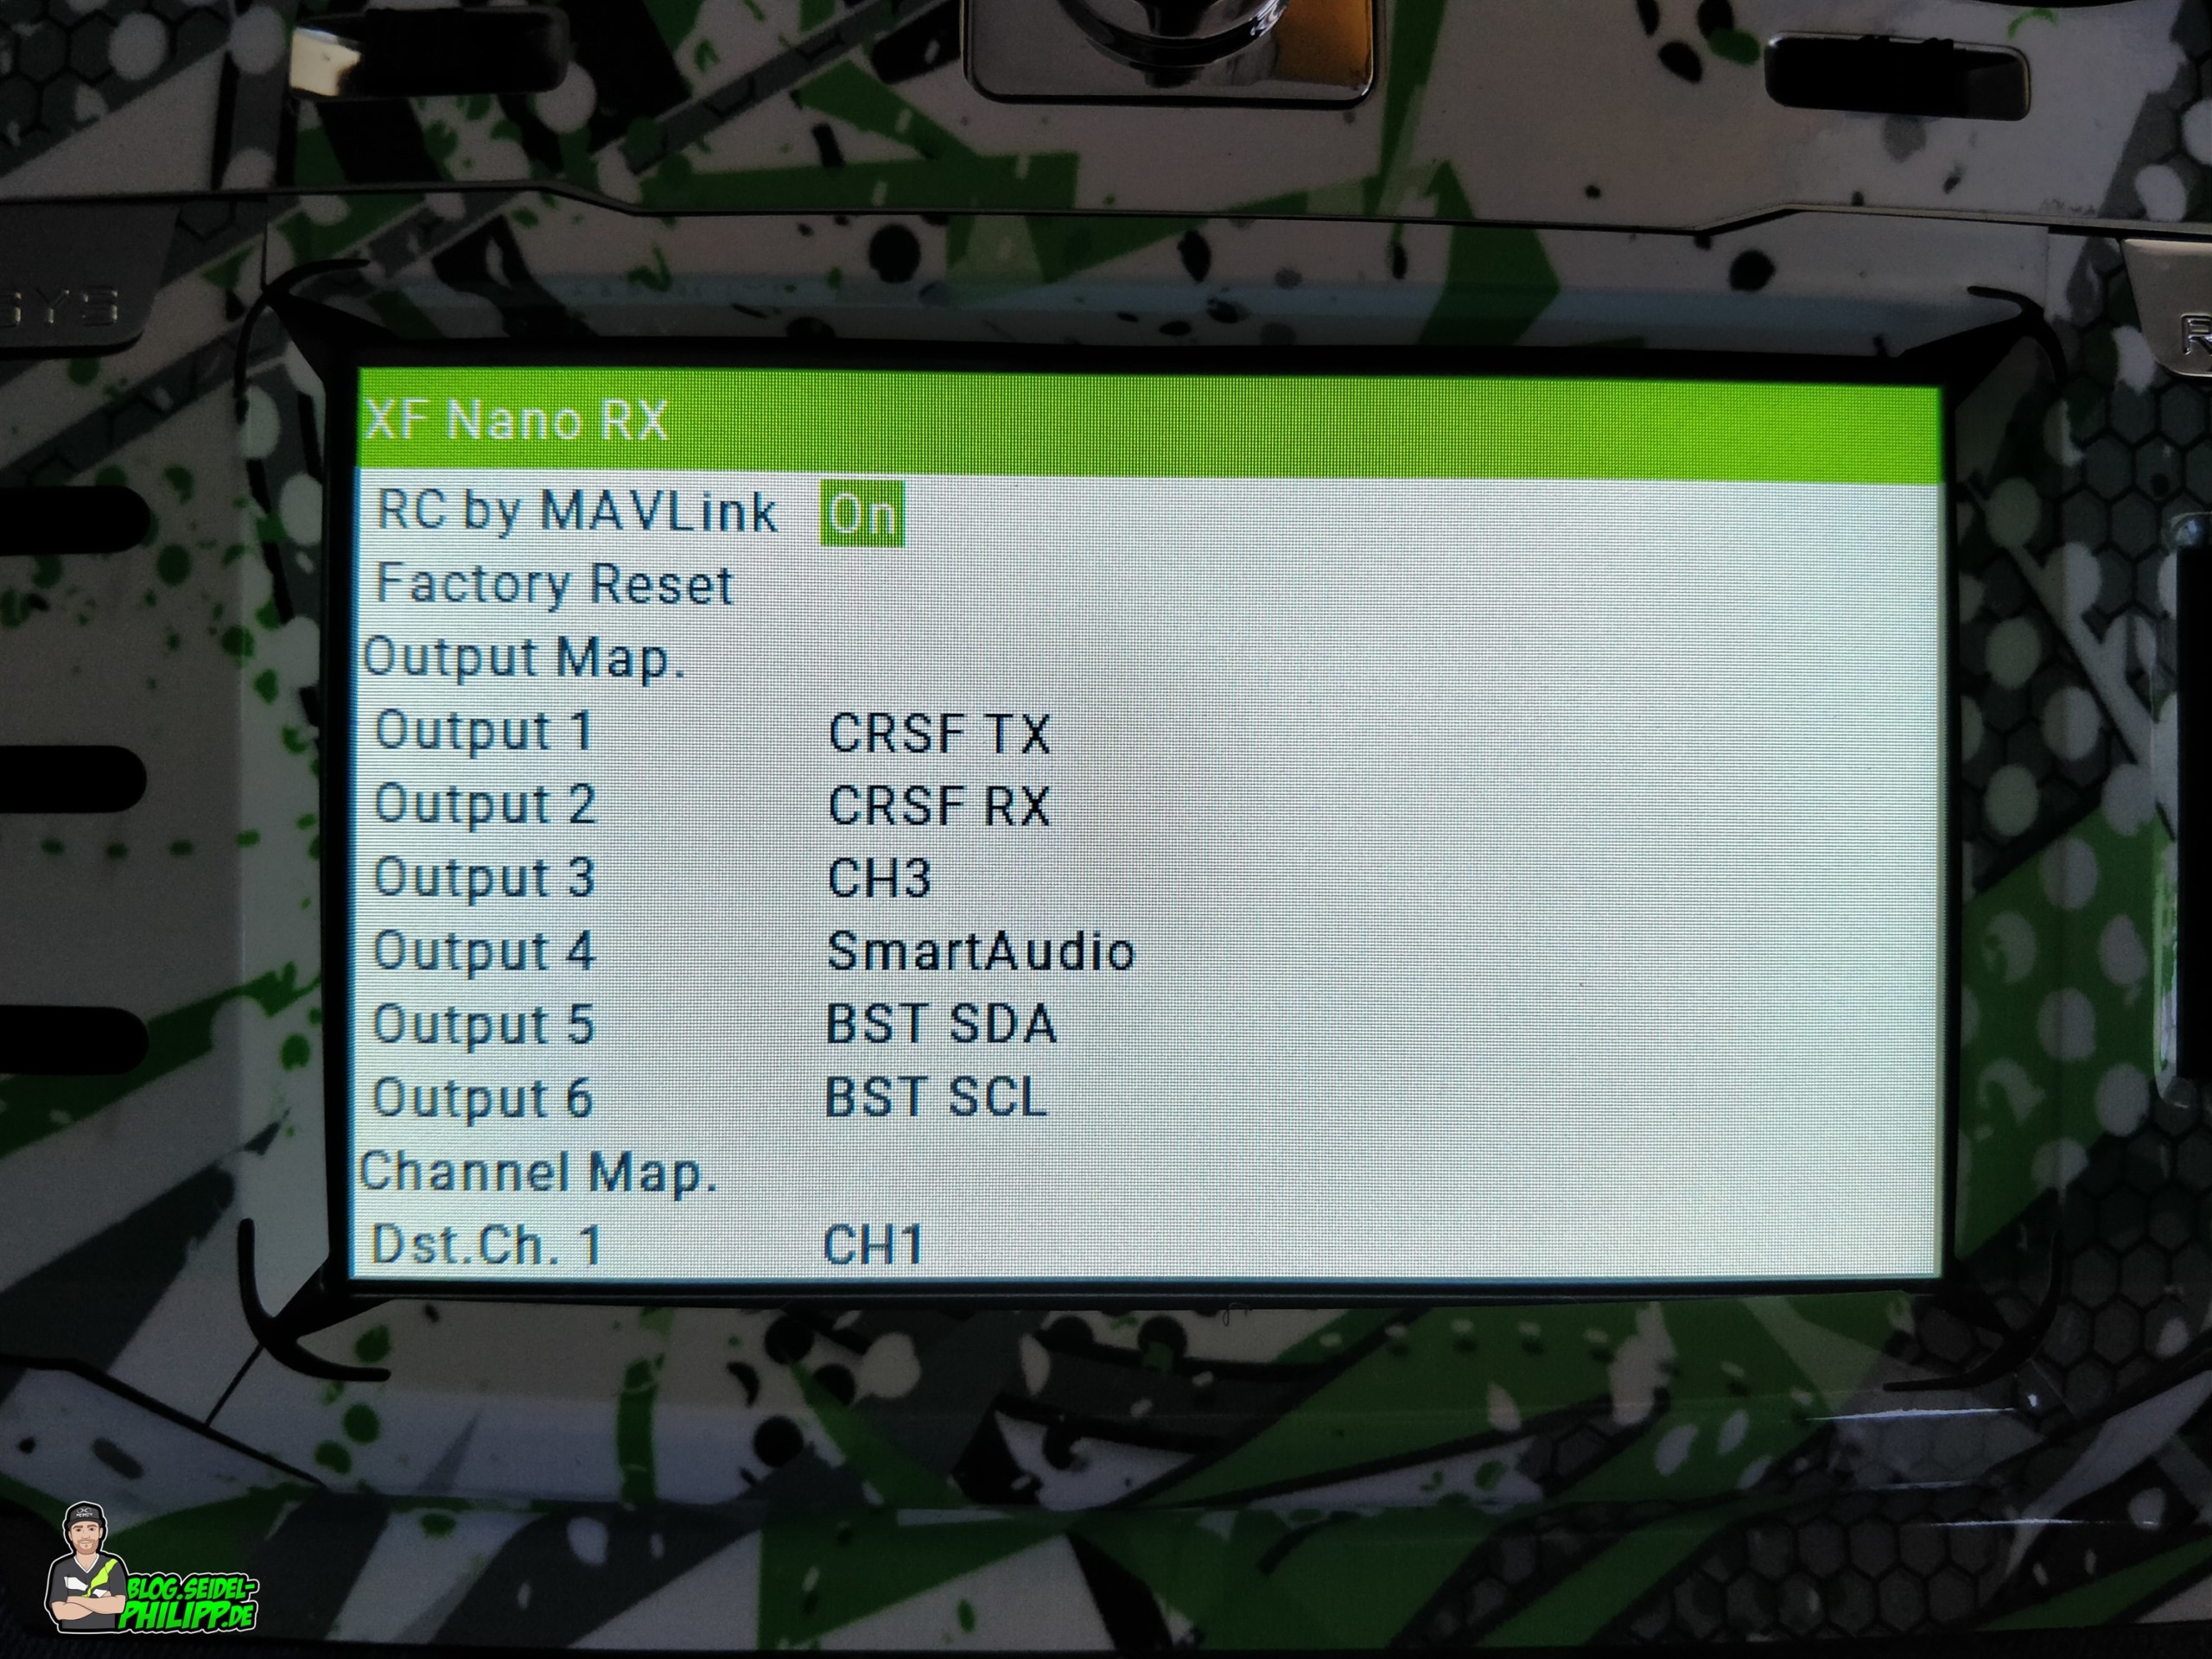
The Channel Map will also be configured as followed. On channel 8 (AUX4 in Betaflight) we send LQ back to the drone.

OpenTX Setup
On the „Inputs“ Page, we have assigned the individual sticks. However, this should be set by default when creating the model. For the sake of completeness, I added it anyway.

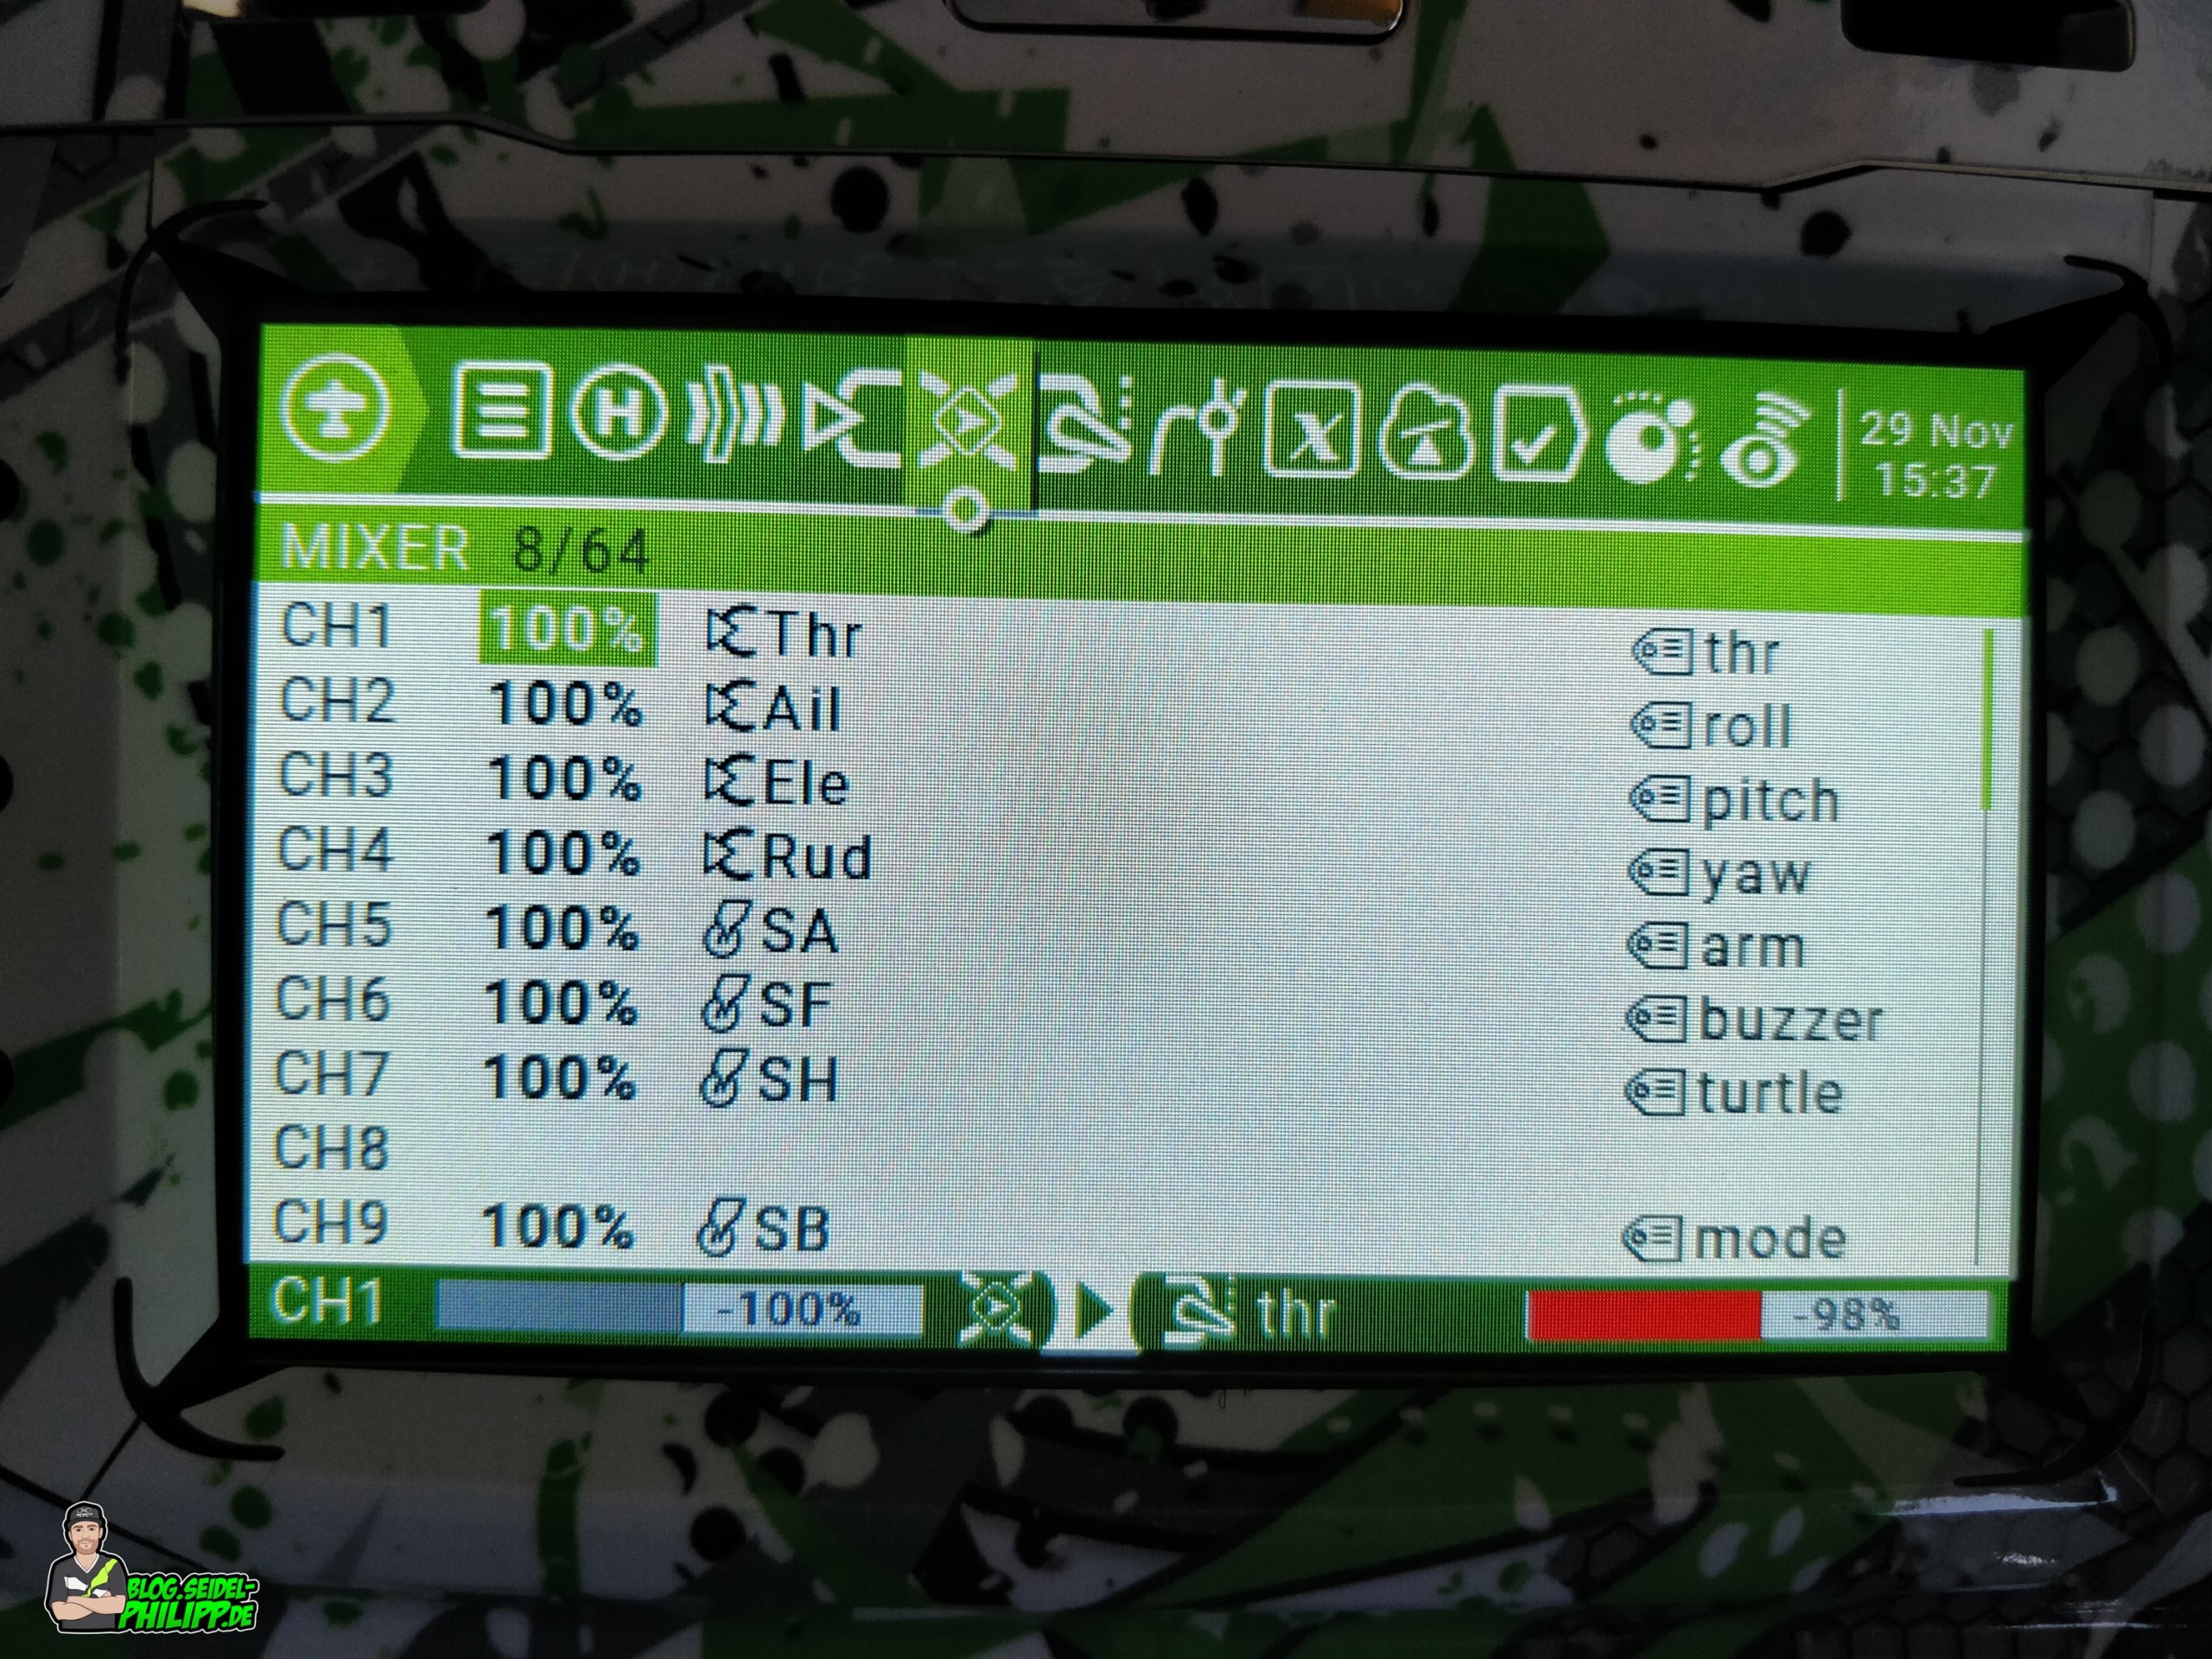
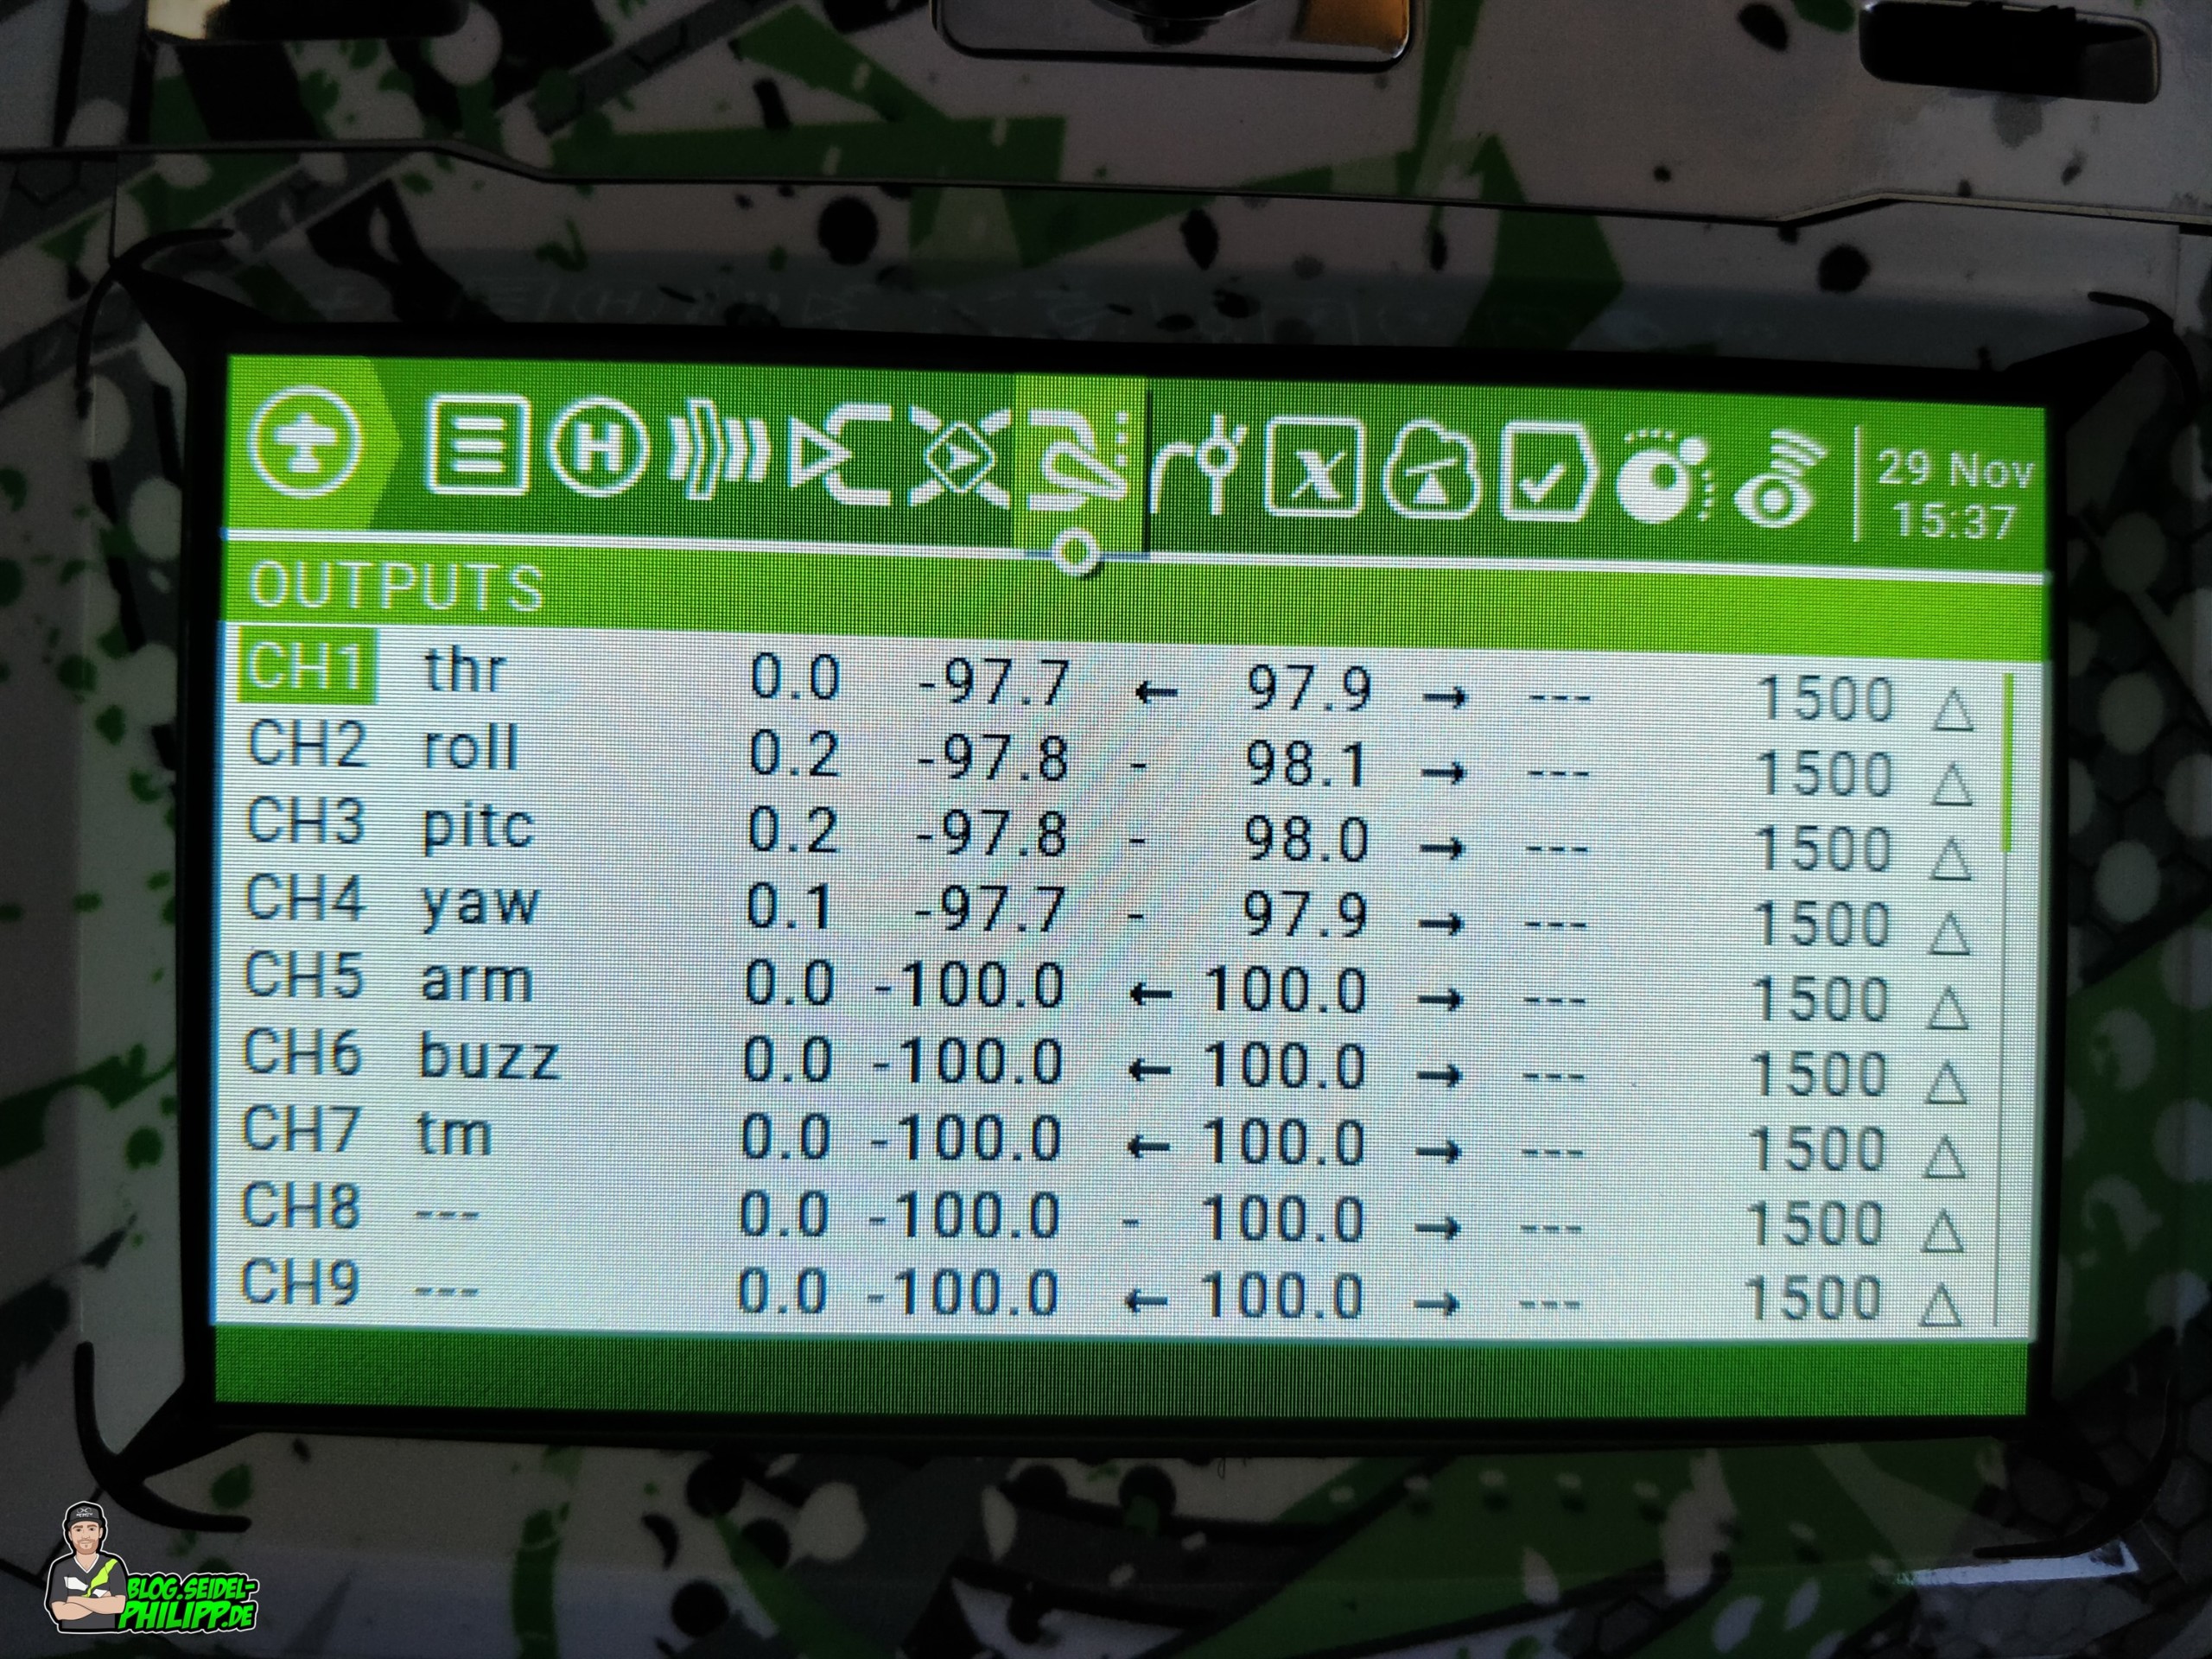
On the page „MIXER“ you can see which channels I have assigned which function.
- Channel 1 to 4: Control (the two sticks of your remote control)
- Channel 5: Arming (3 position switch)
- Channel 6: Buzzer (2 positions switch)
- Channel 7: Turtle Mode (2 positions switch)
- Channel 8: nothing, because the NanoRX sends LQ on this channel
- Channel 9: Flight mode switch (3 position switch)
On the next page you can see that I have set channels 1-4 by subtrim to send exactly 1000us, 1500us and 2000us to the copter when I move the sticks to the minimum, the middle or the maximum.
DVR
Due to the weather, DVR recordings will follow soon. The article will be adapted accordingly.
Conclusion
If you’re looking for a small indoor copter in the rainy season, the HX115 is the perfect choice. As a negative point I feel the very poorly laid antennas of the receiver. This could have been made better at the factory.
|
|
|

1 Response
[…] Nächster Beitrag Betafpv HX115 FPV Mini Quad (english version) […]