
FrSky Taranis X-Lite Remote Control

![]()
Inhaltsverzeichnis
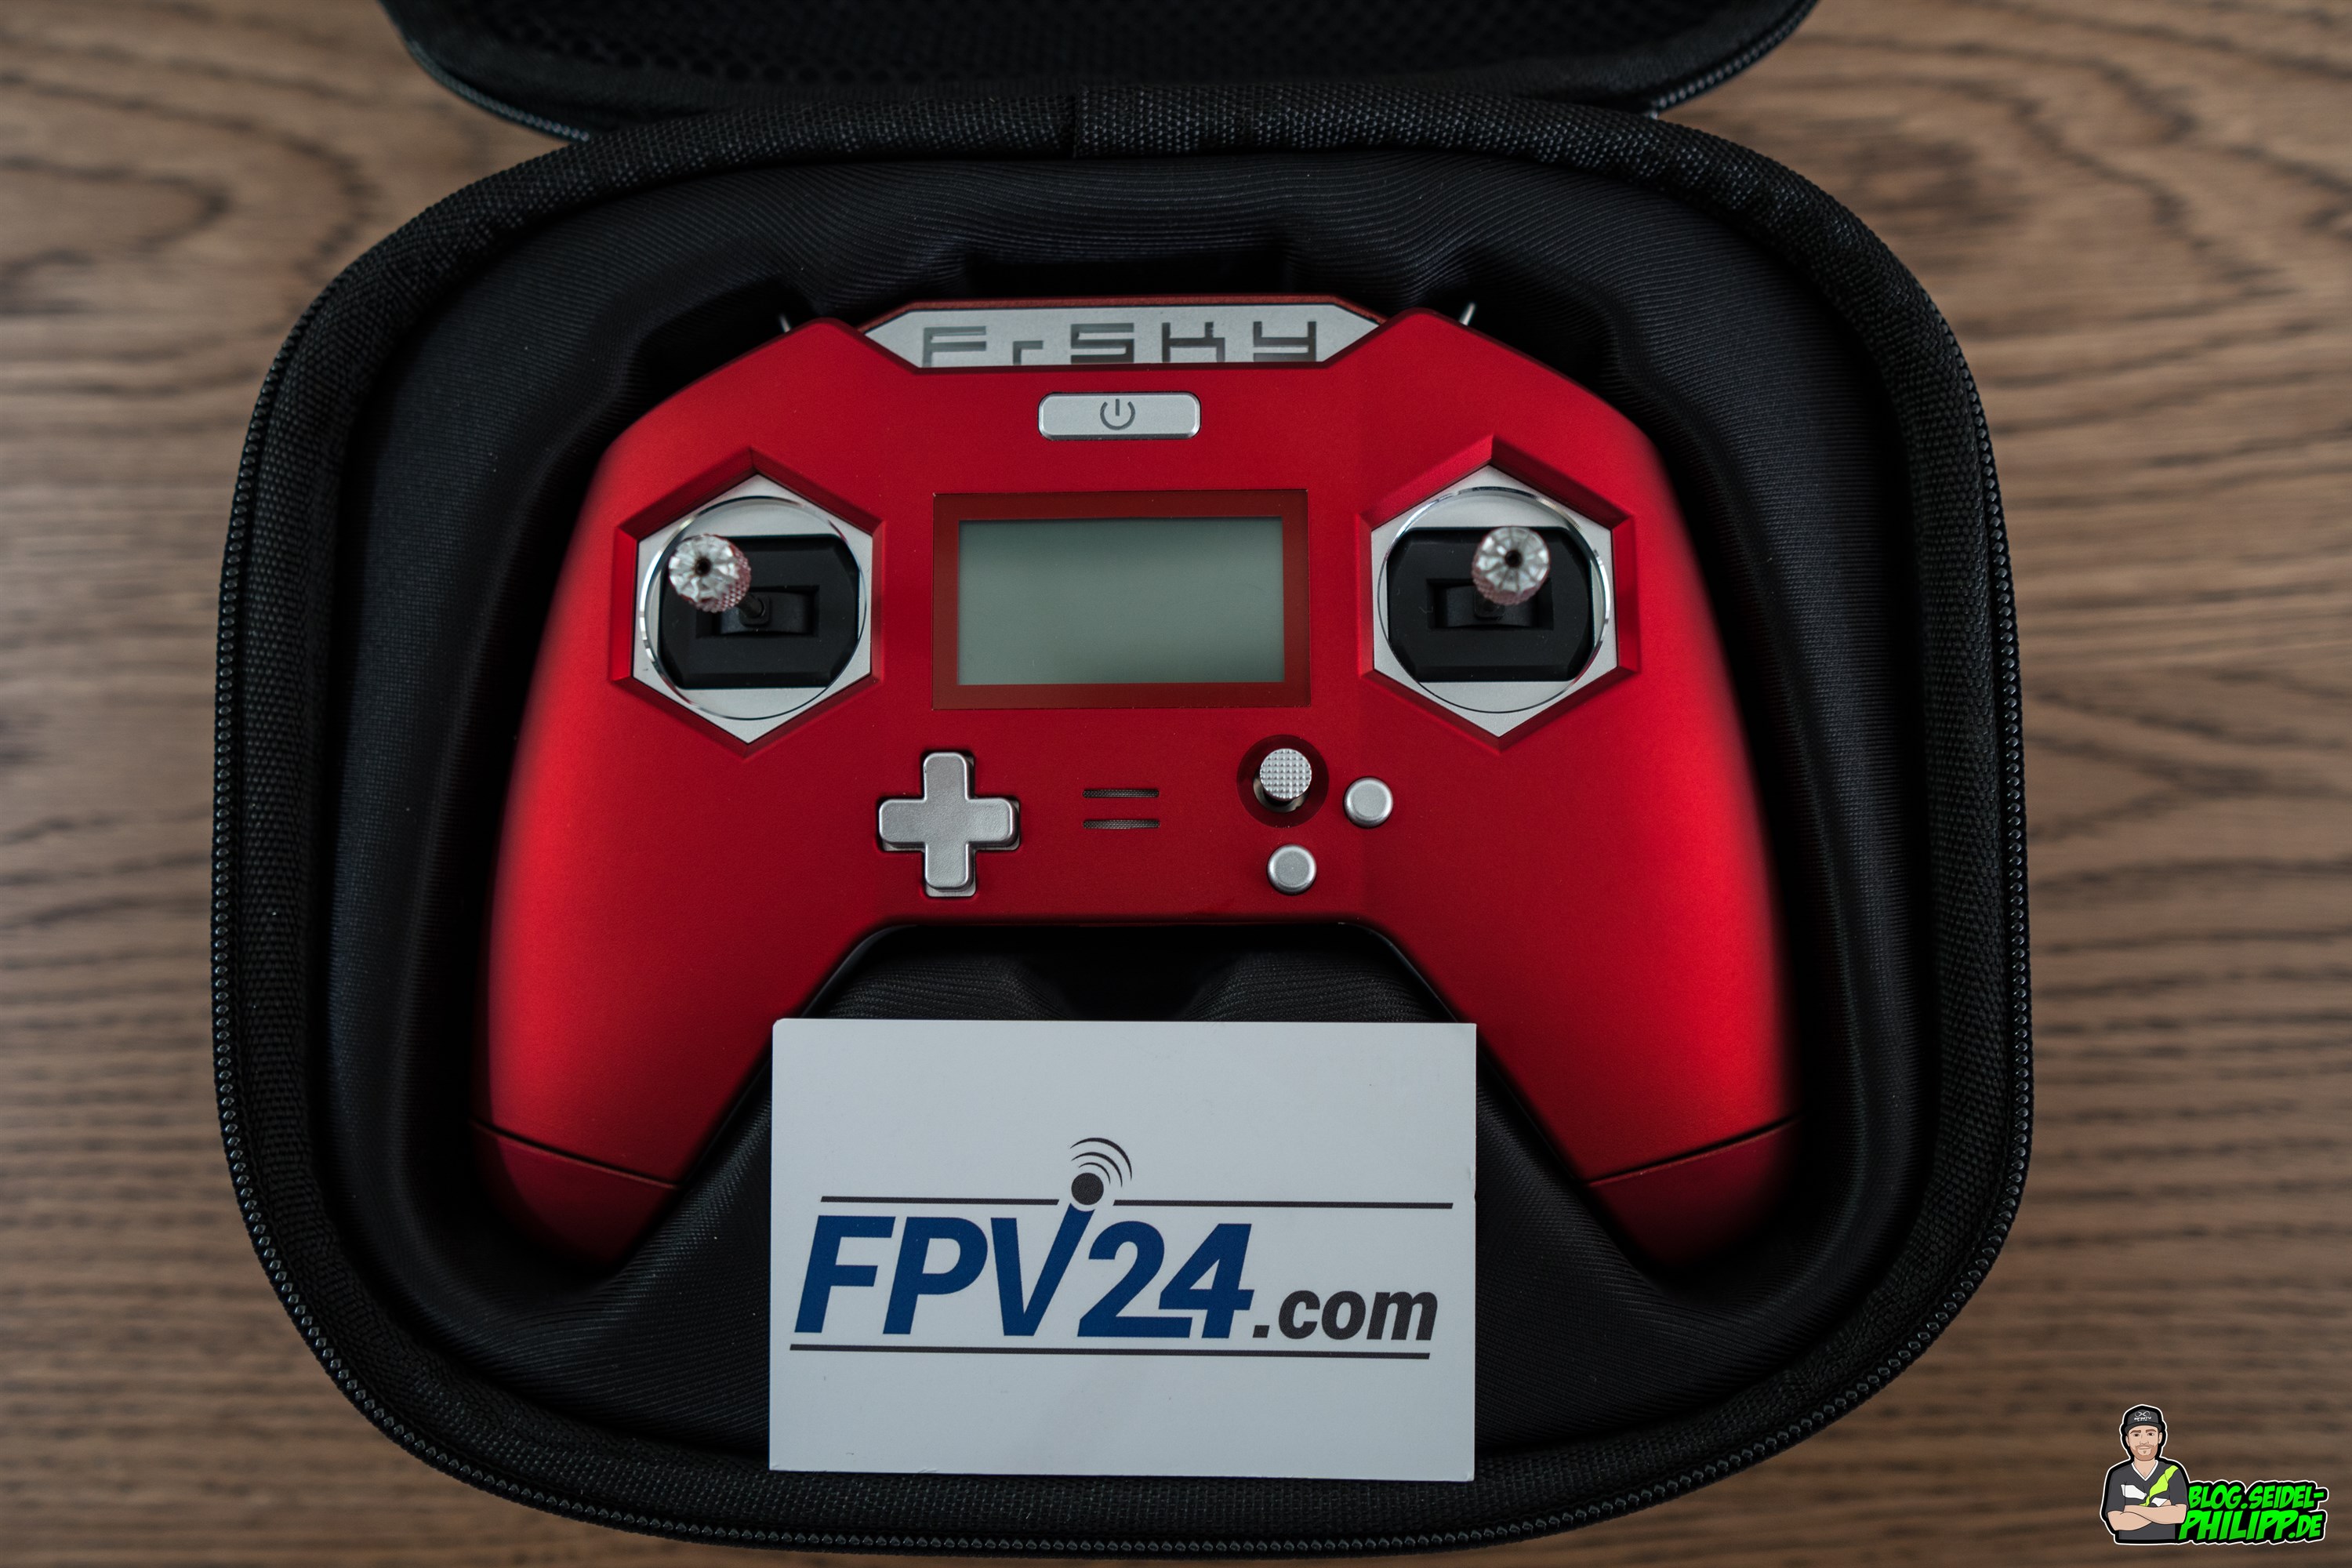
This remote control was kindly provided by FPV24.com. Many thanks for the support!
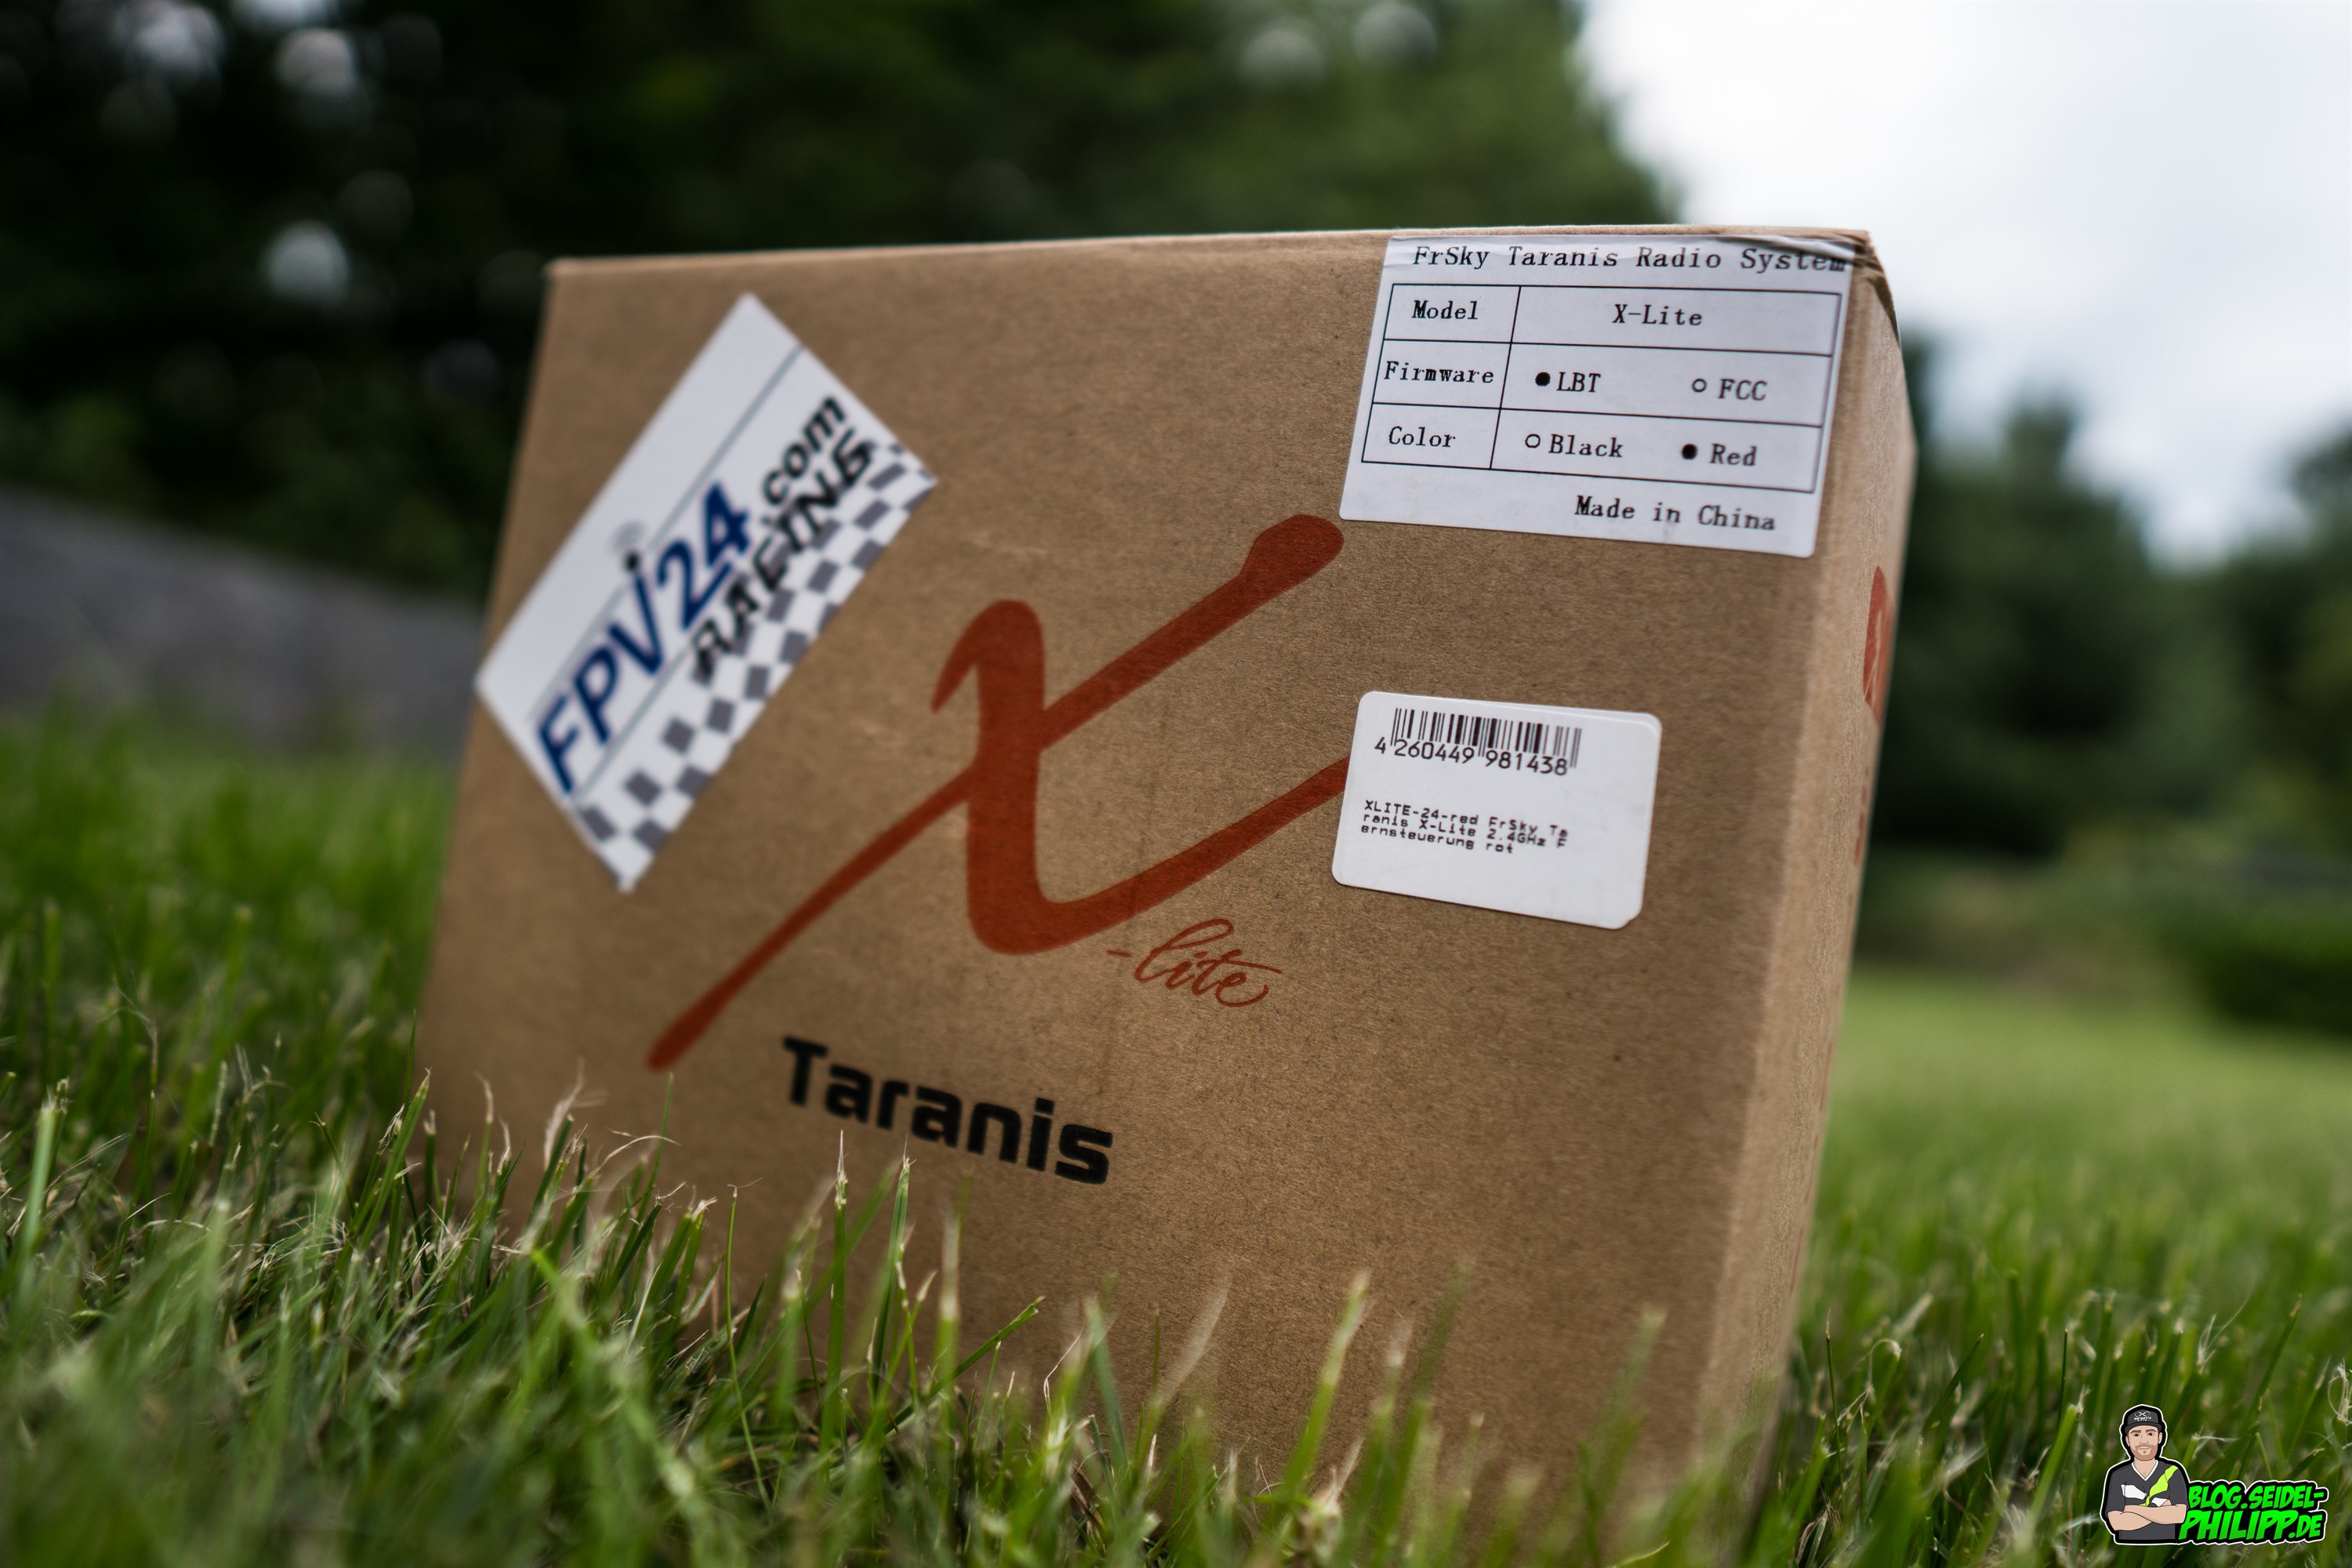
Where to get
You will receive the EU / LBT version in black or red at FPV24.com:
The NON-EU version you get here:
Batteries
What’s in the box?
Included with FPV24.com is:
- FrSky Taranis X-Lite remote control
- carrying bag
- external 2.4GHz antenna
- screws for gimbal settings
- cover caps for gimbal screws
- Sticker Set
- Protective caps for gimbal
- manual
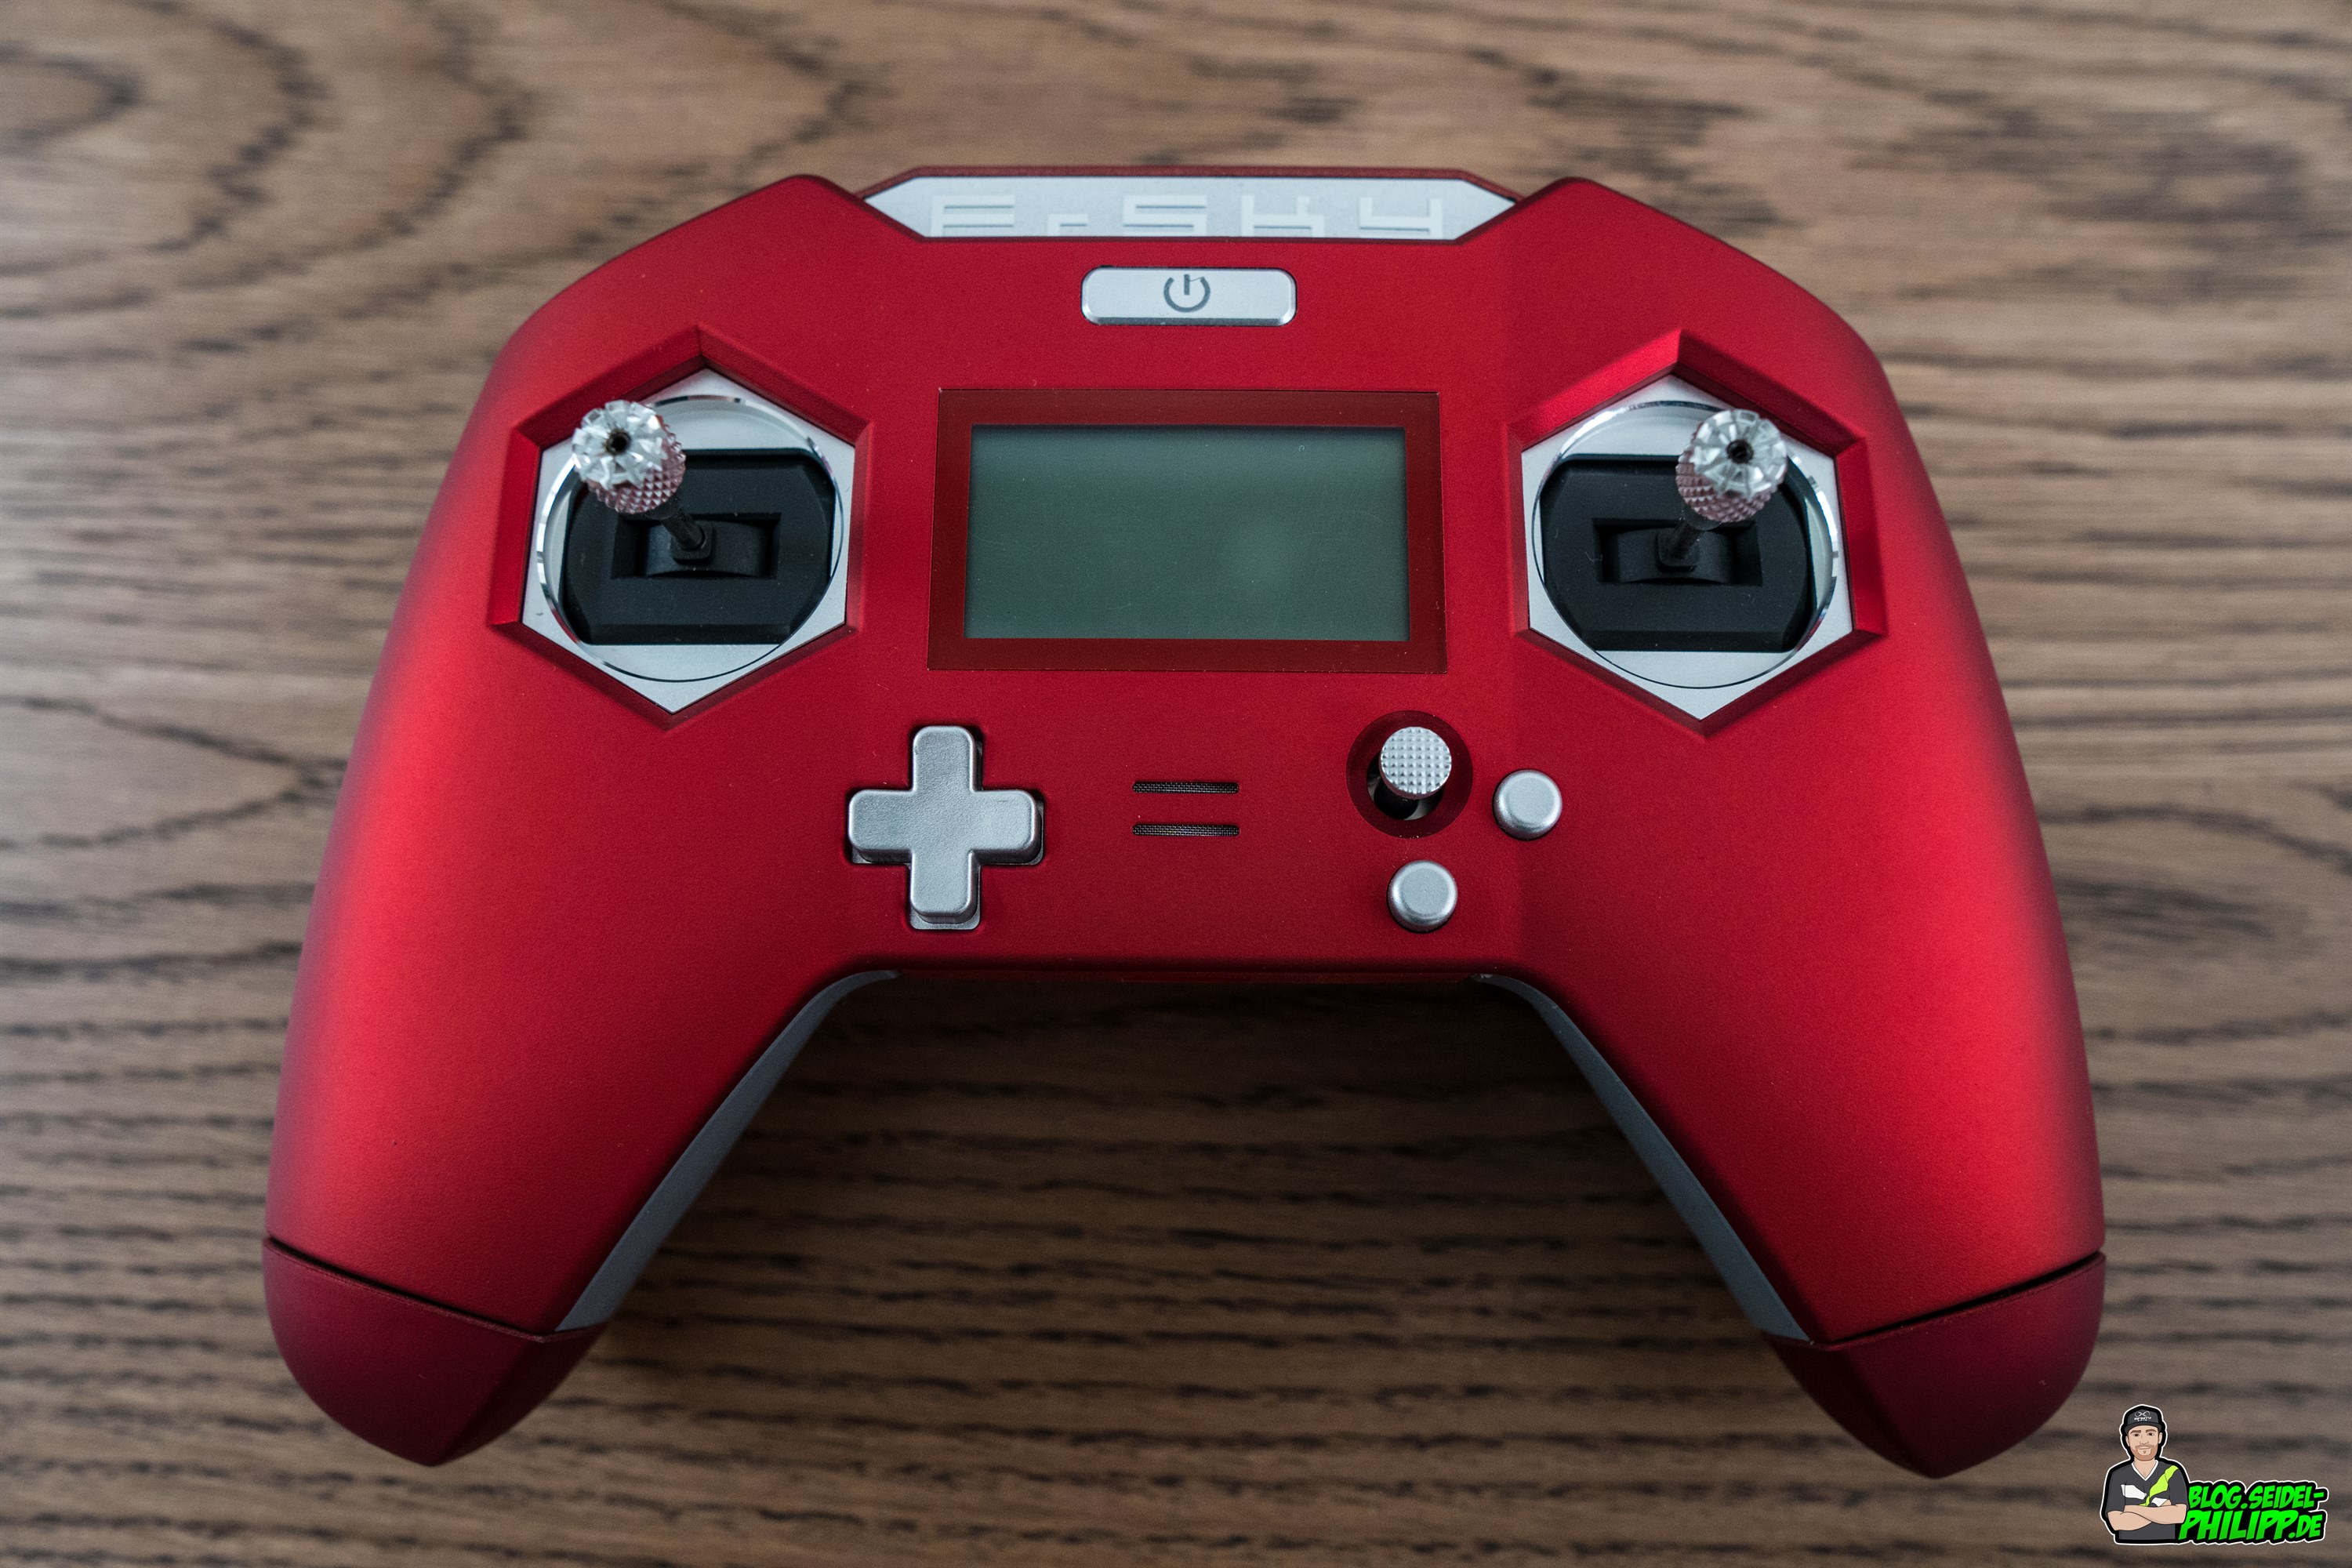
FrSky Taranis X-Lite
The X-Lite is available in two different colors. I have chosen the red version. The paint is burgundy and relatively dull. The handles are rubberized and feel good.

Ergonomics
Personally, I always wanted to have a compact remote control with OpenTX. The TBS Tango was promising at that time, but unfortunately not small, and not OpenTX capable.
For me as a „thumb“ flyer and medium-sized hands, the X-Lite sits really well in the hand.

The Stickways are in contrast to my QX7, however, much smaller. If this affects the style of flight, will show.
For people who fly with thumb and pointing fingers (pincher), the short stickway is better than if it is too long. Whether a „Pincher“ can fly with it, I can not answer, but after i have a feeling, there no big problems.
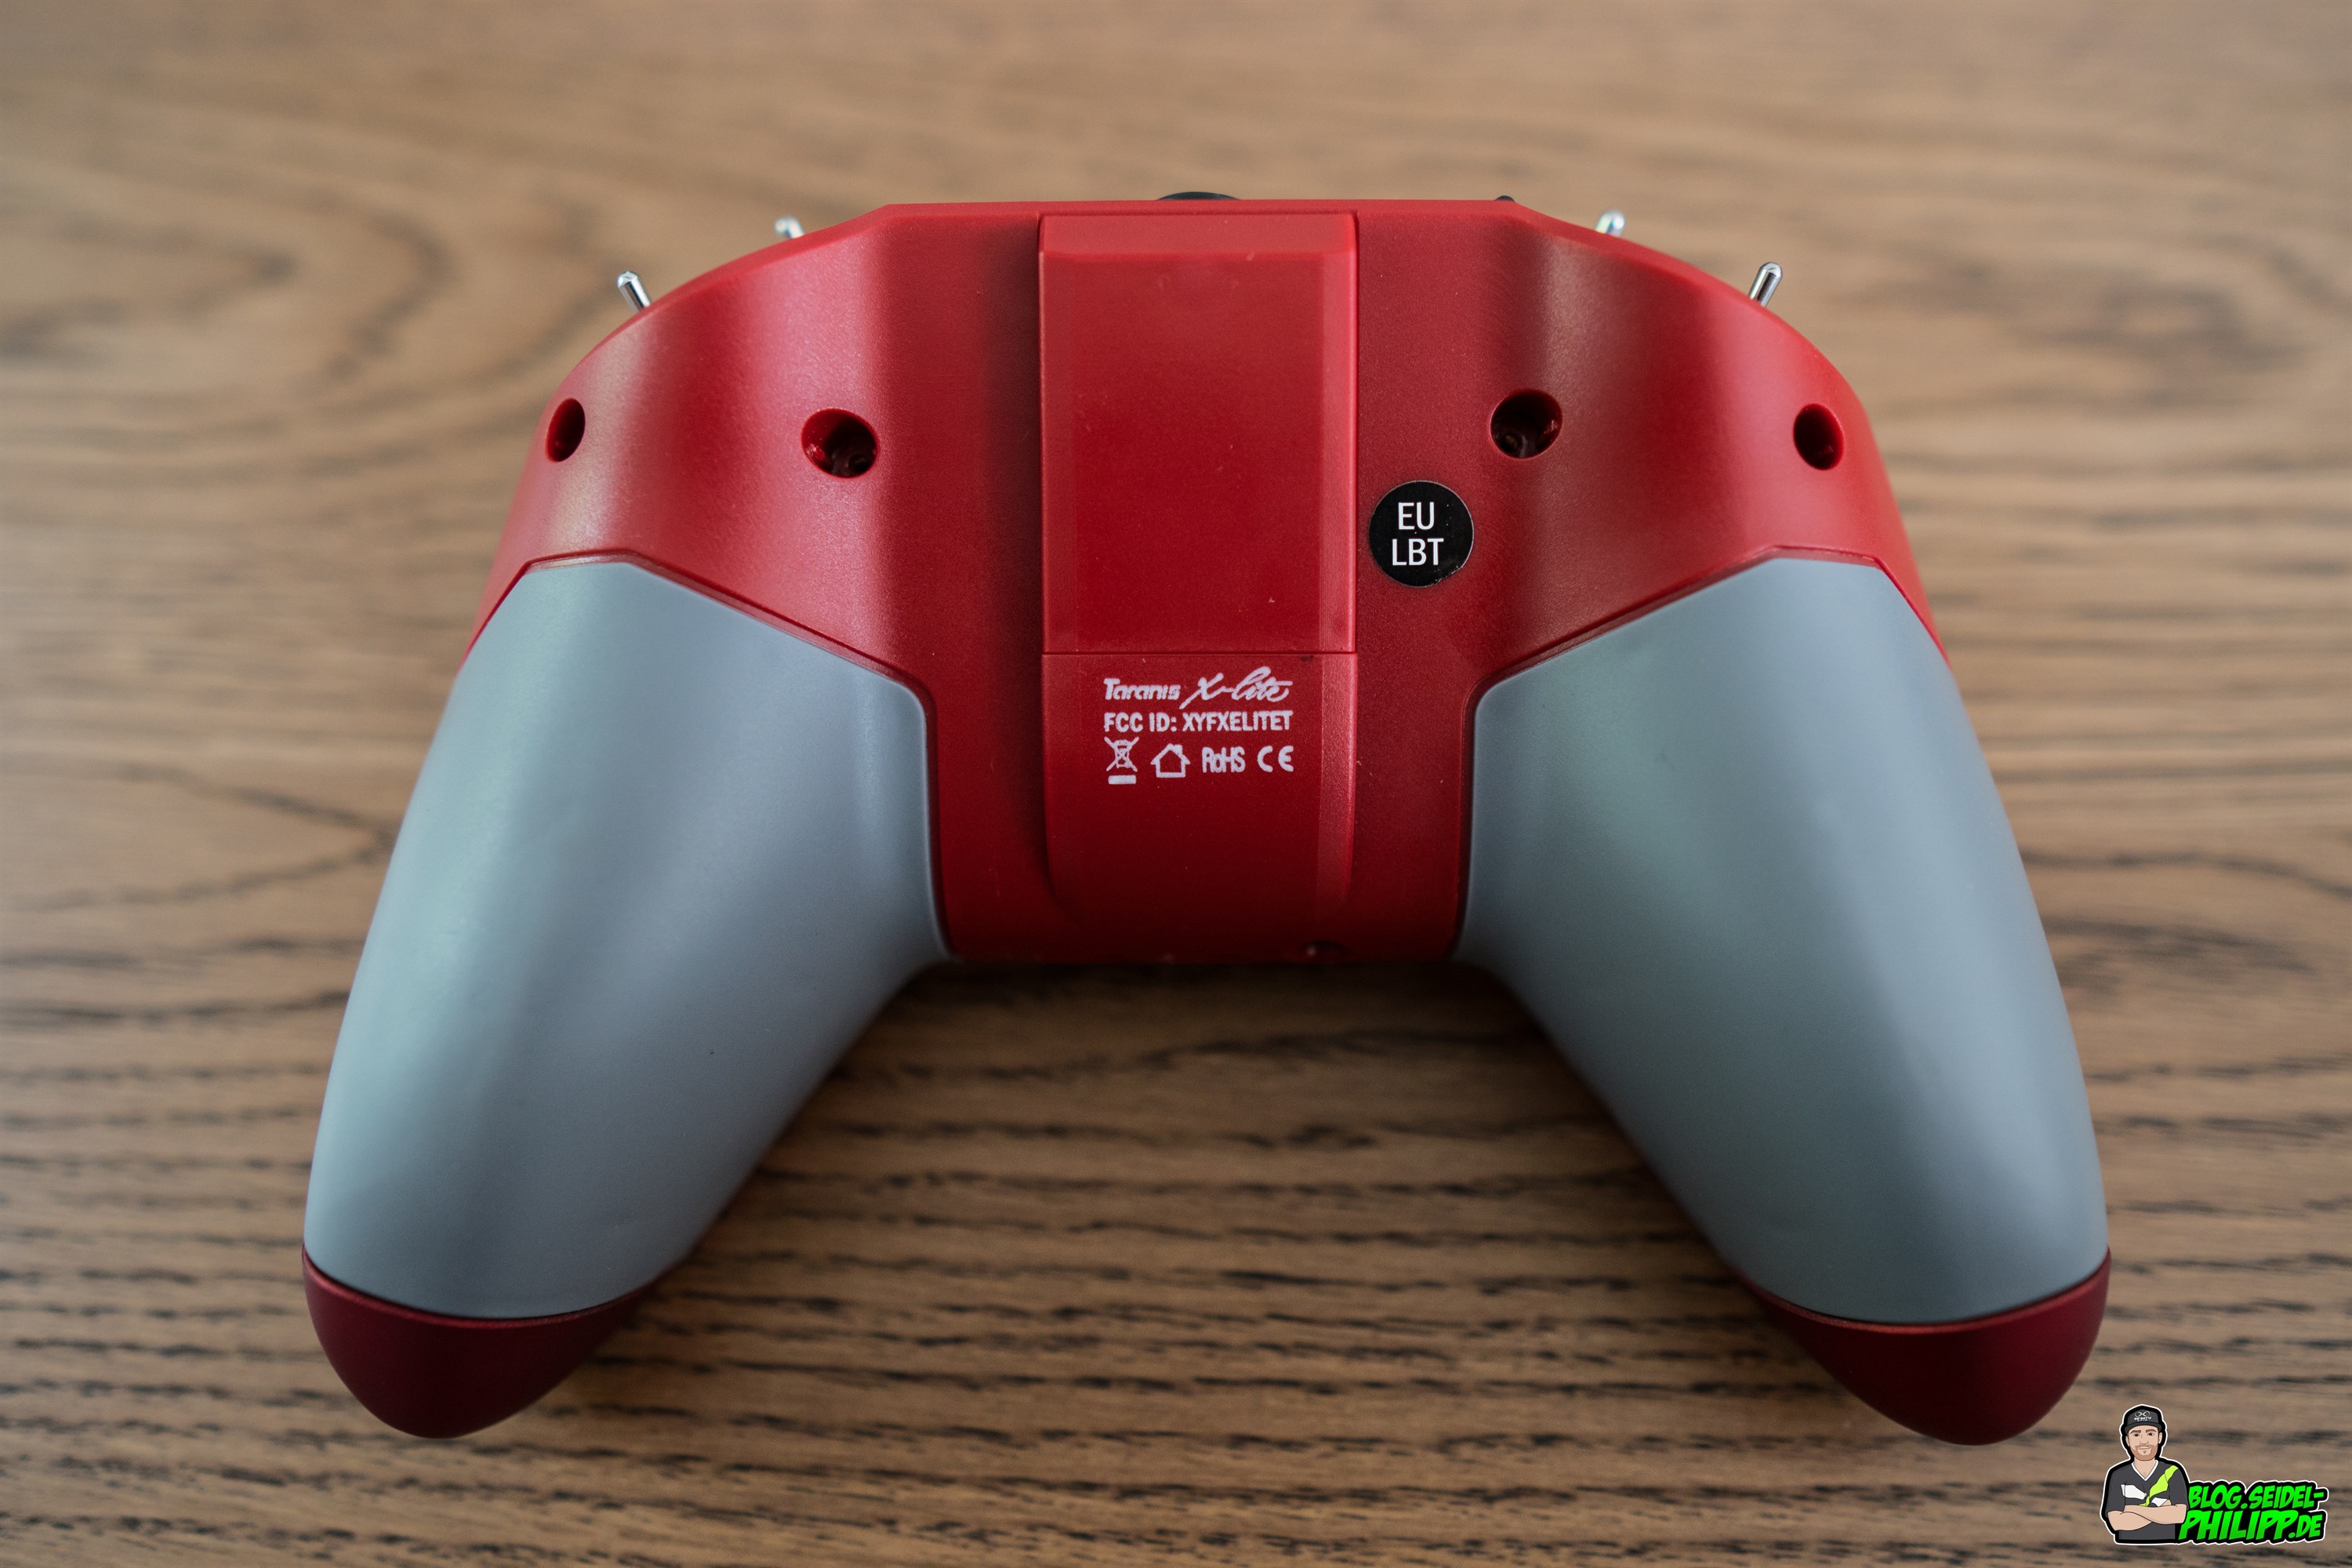
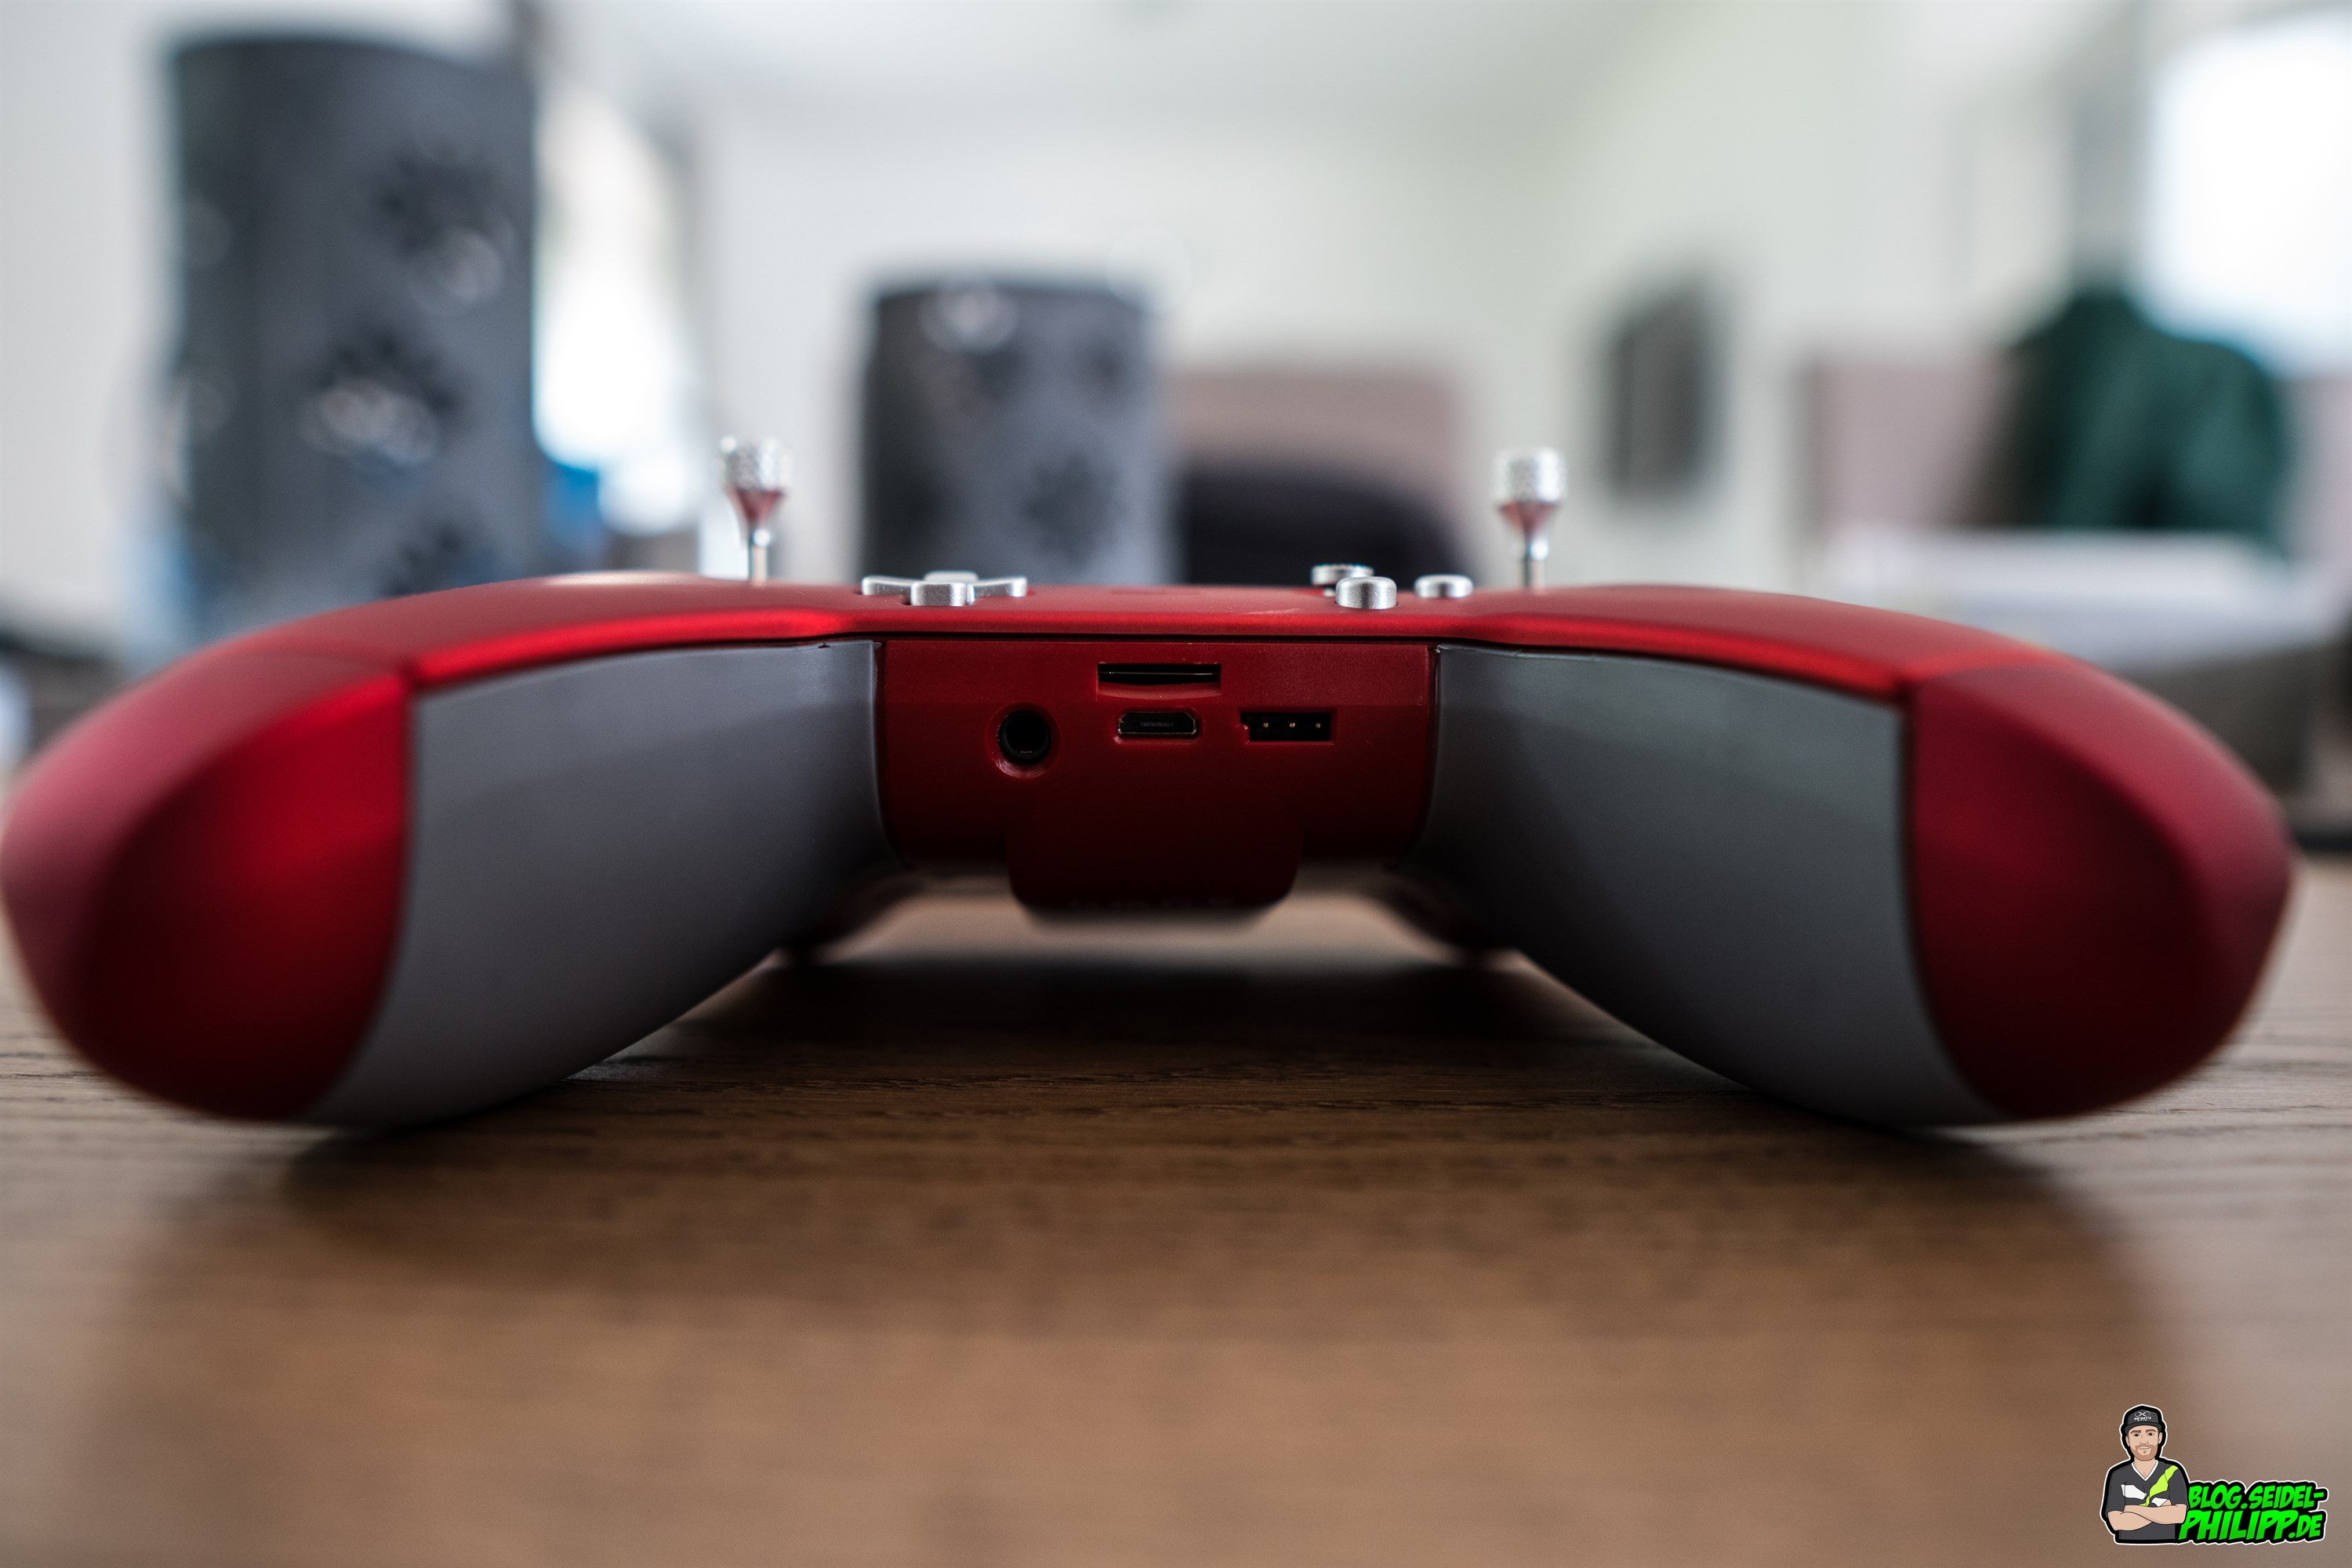
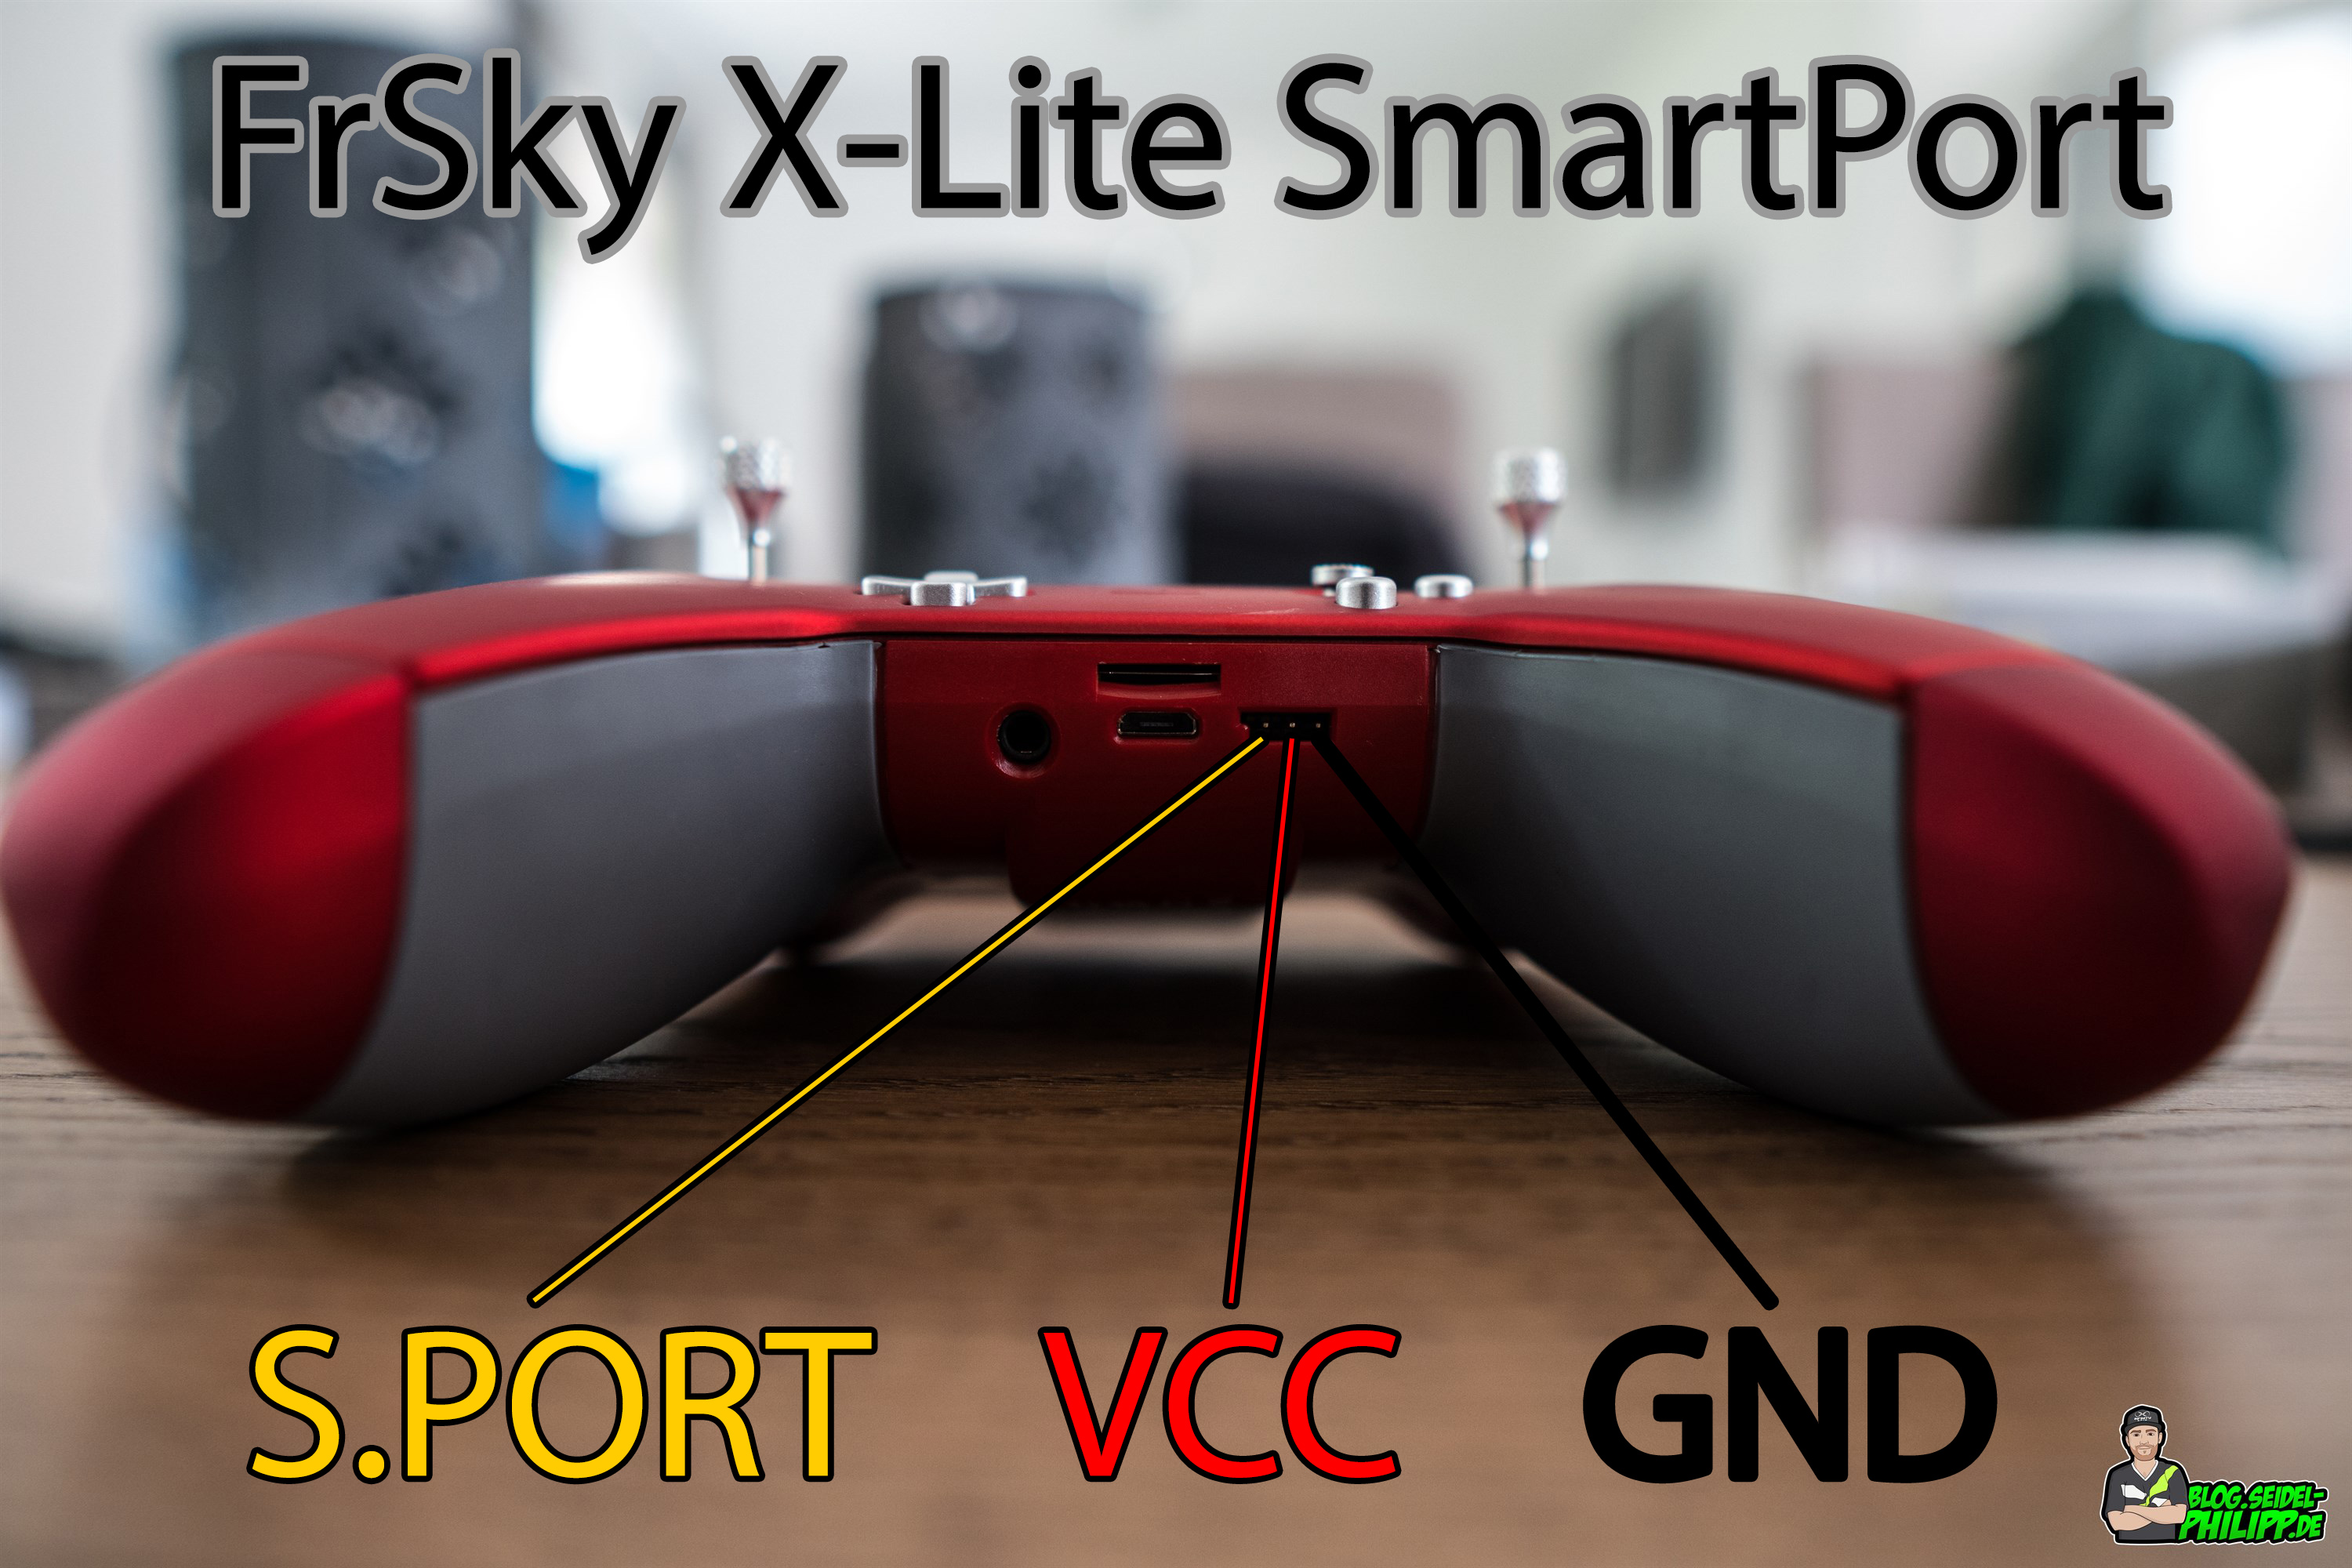
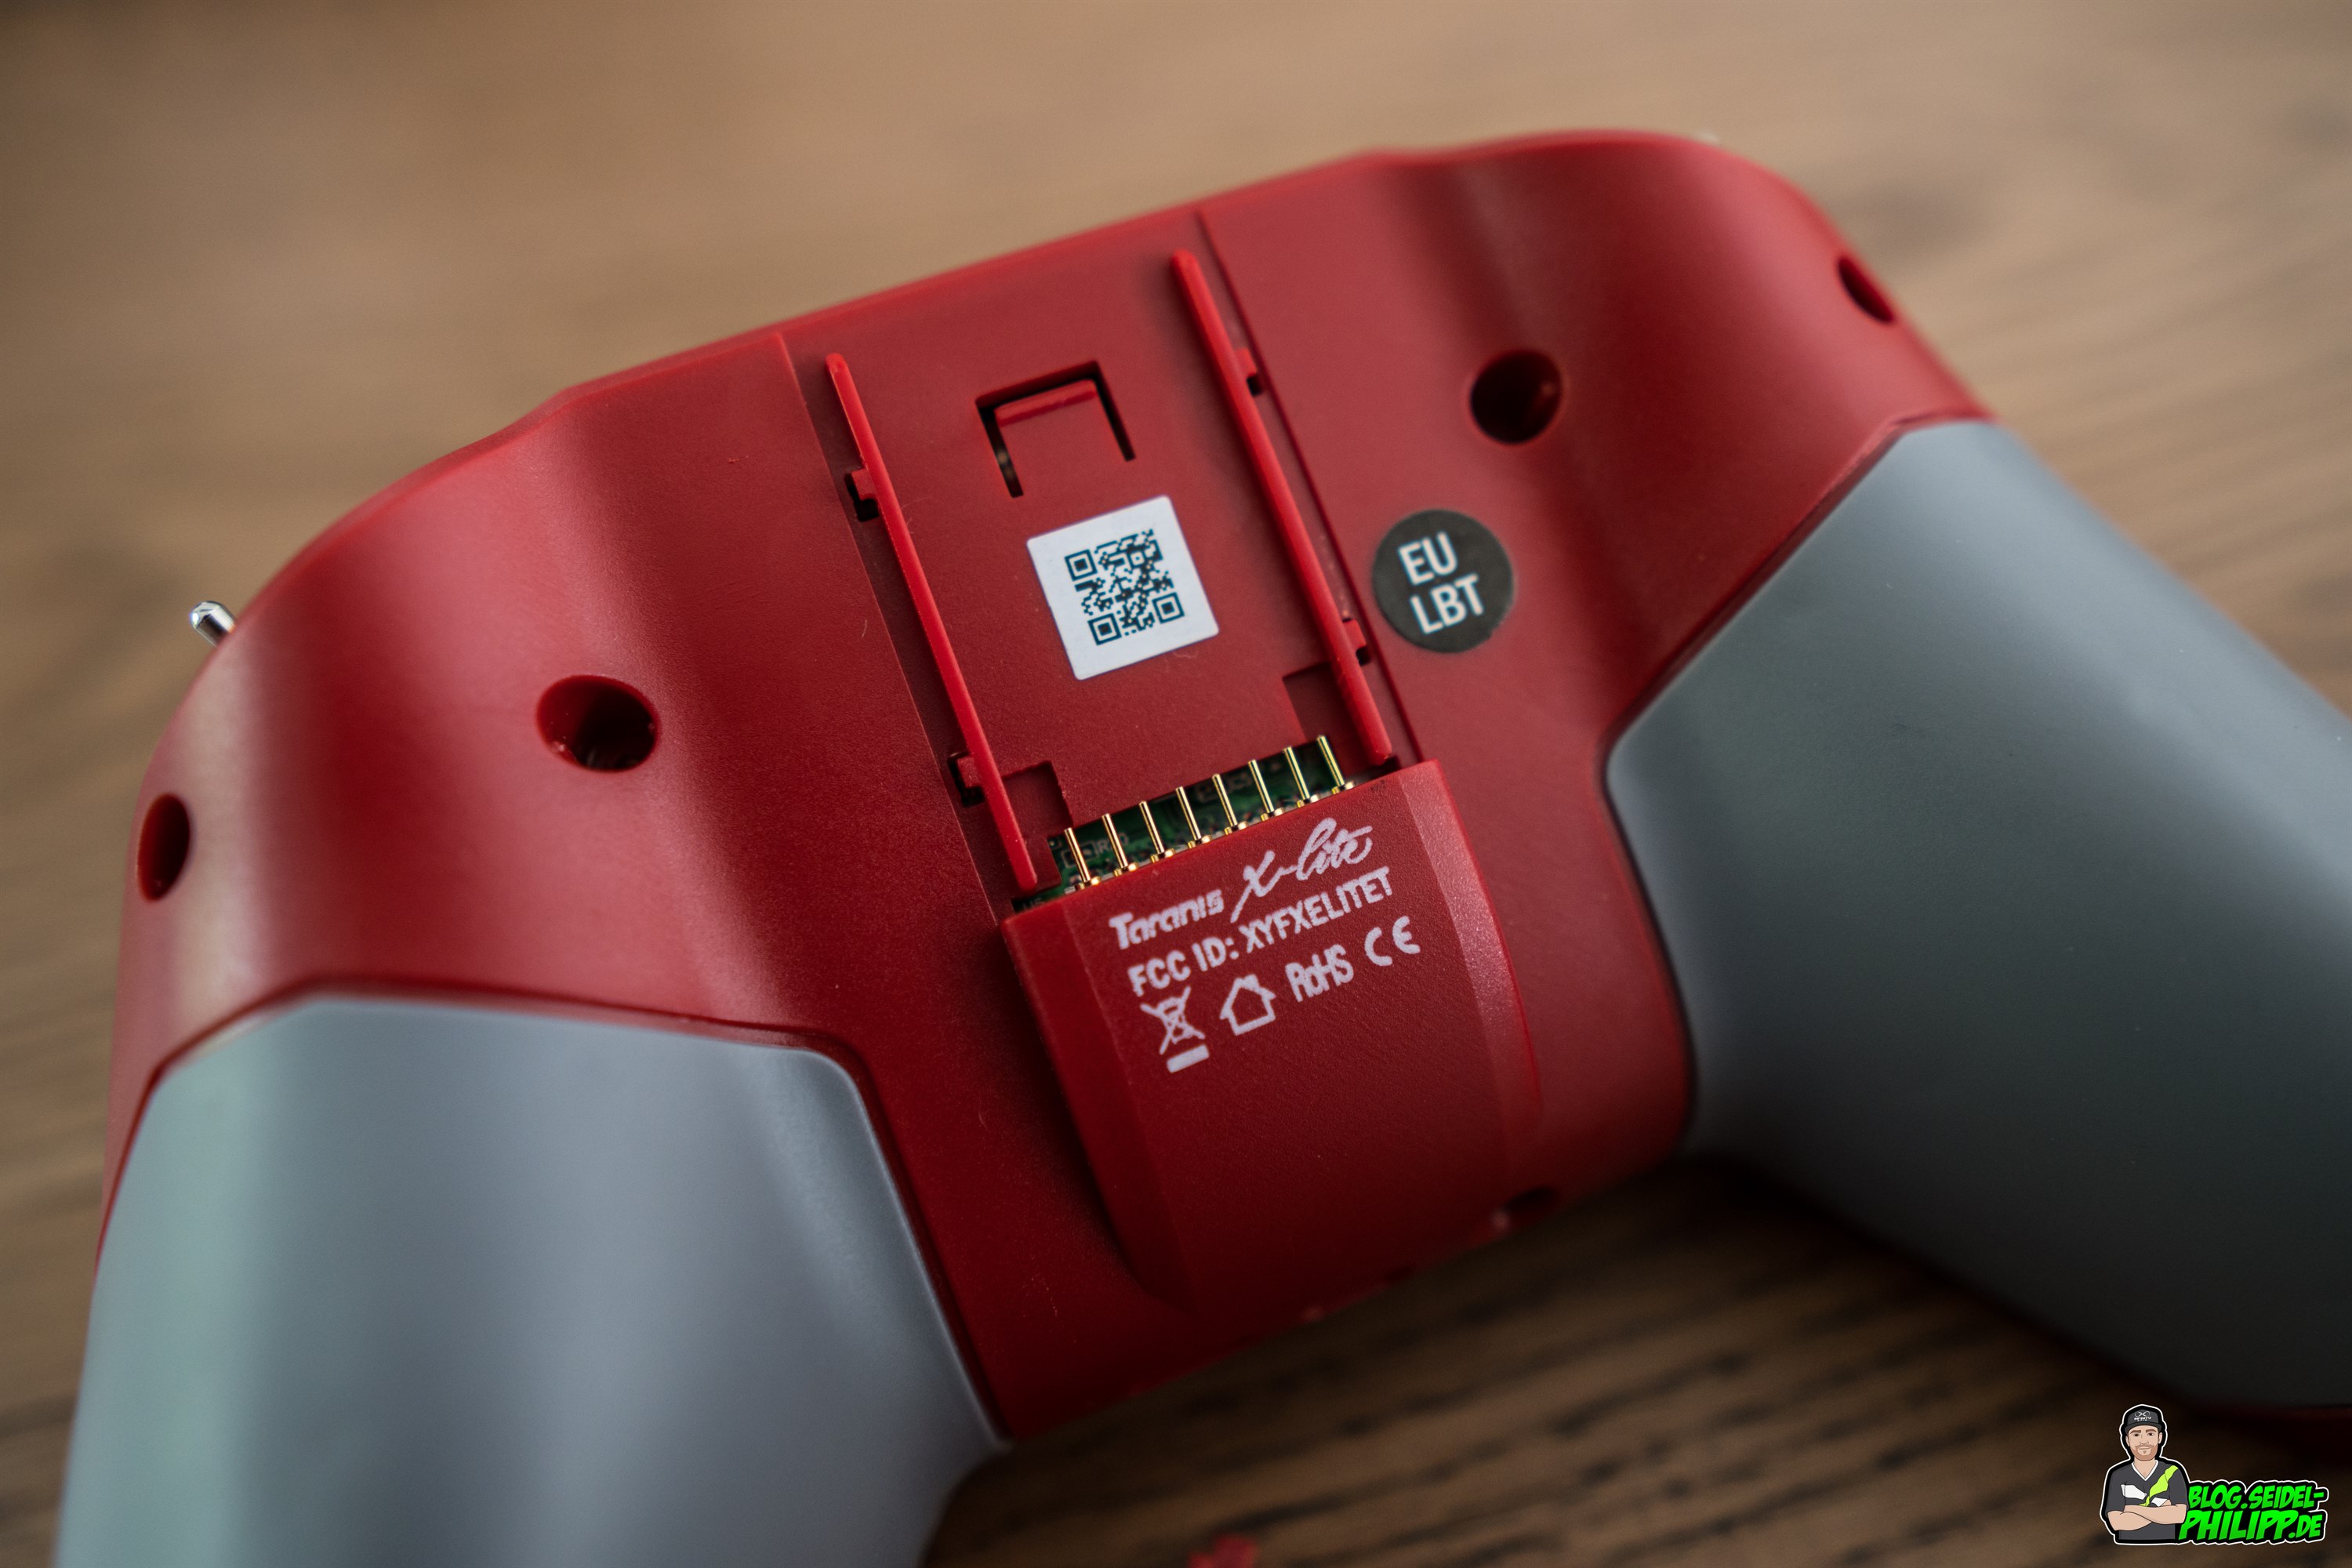
Connections
On the inside of the Remote are a number of connections.
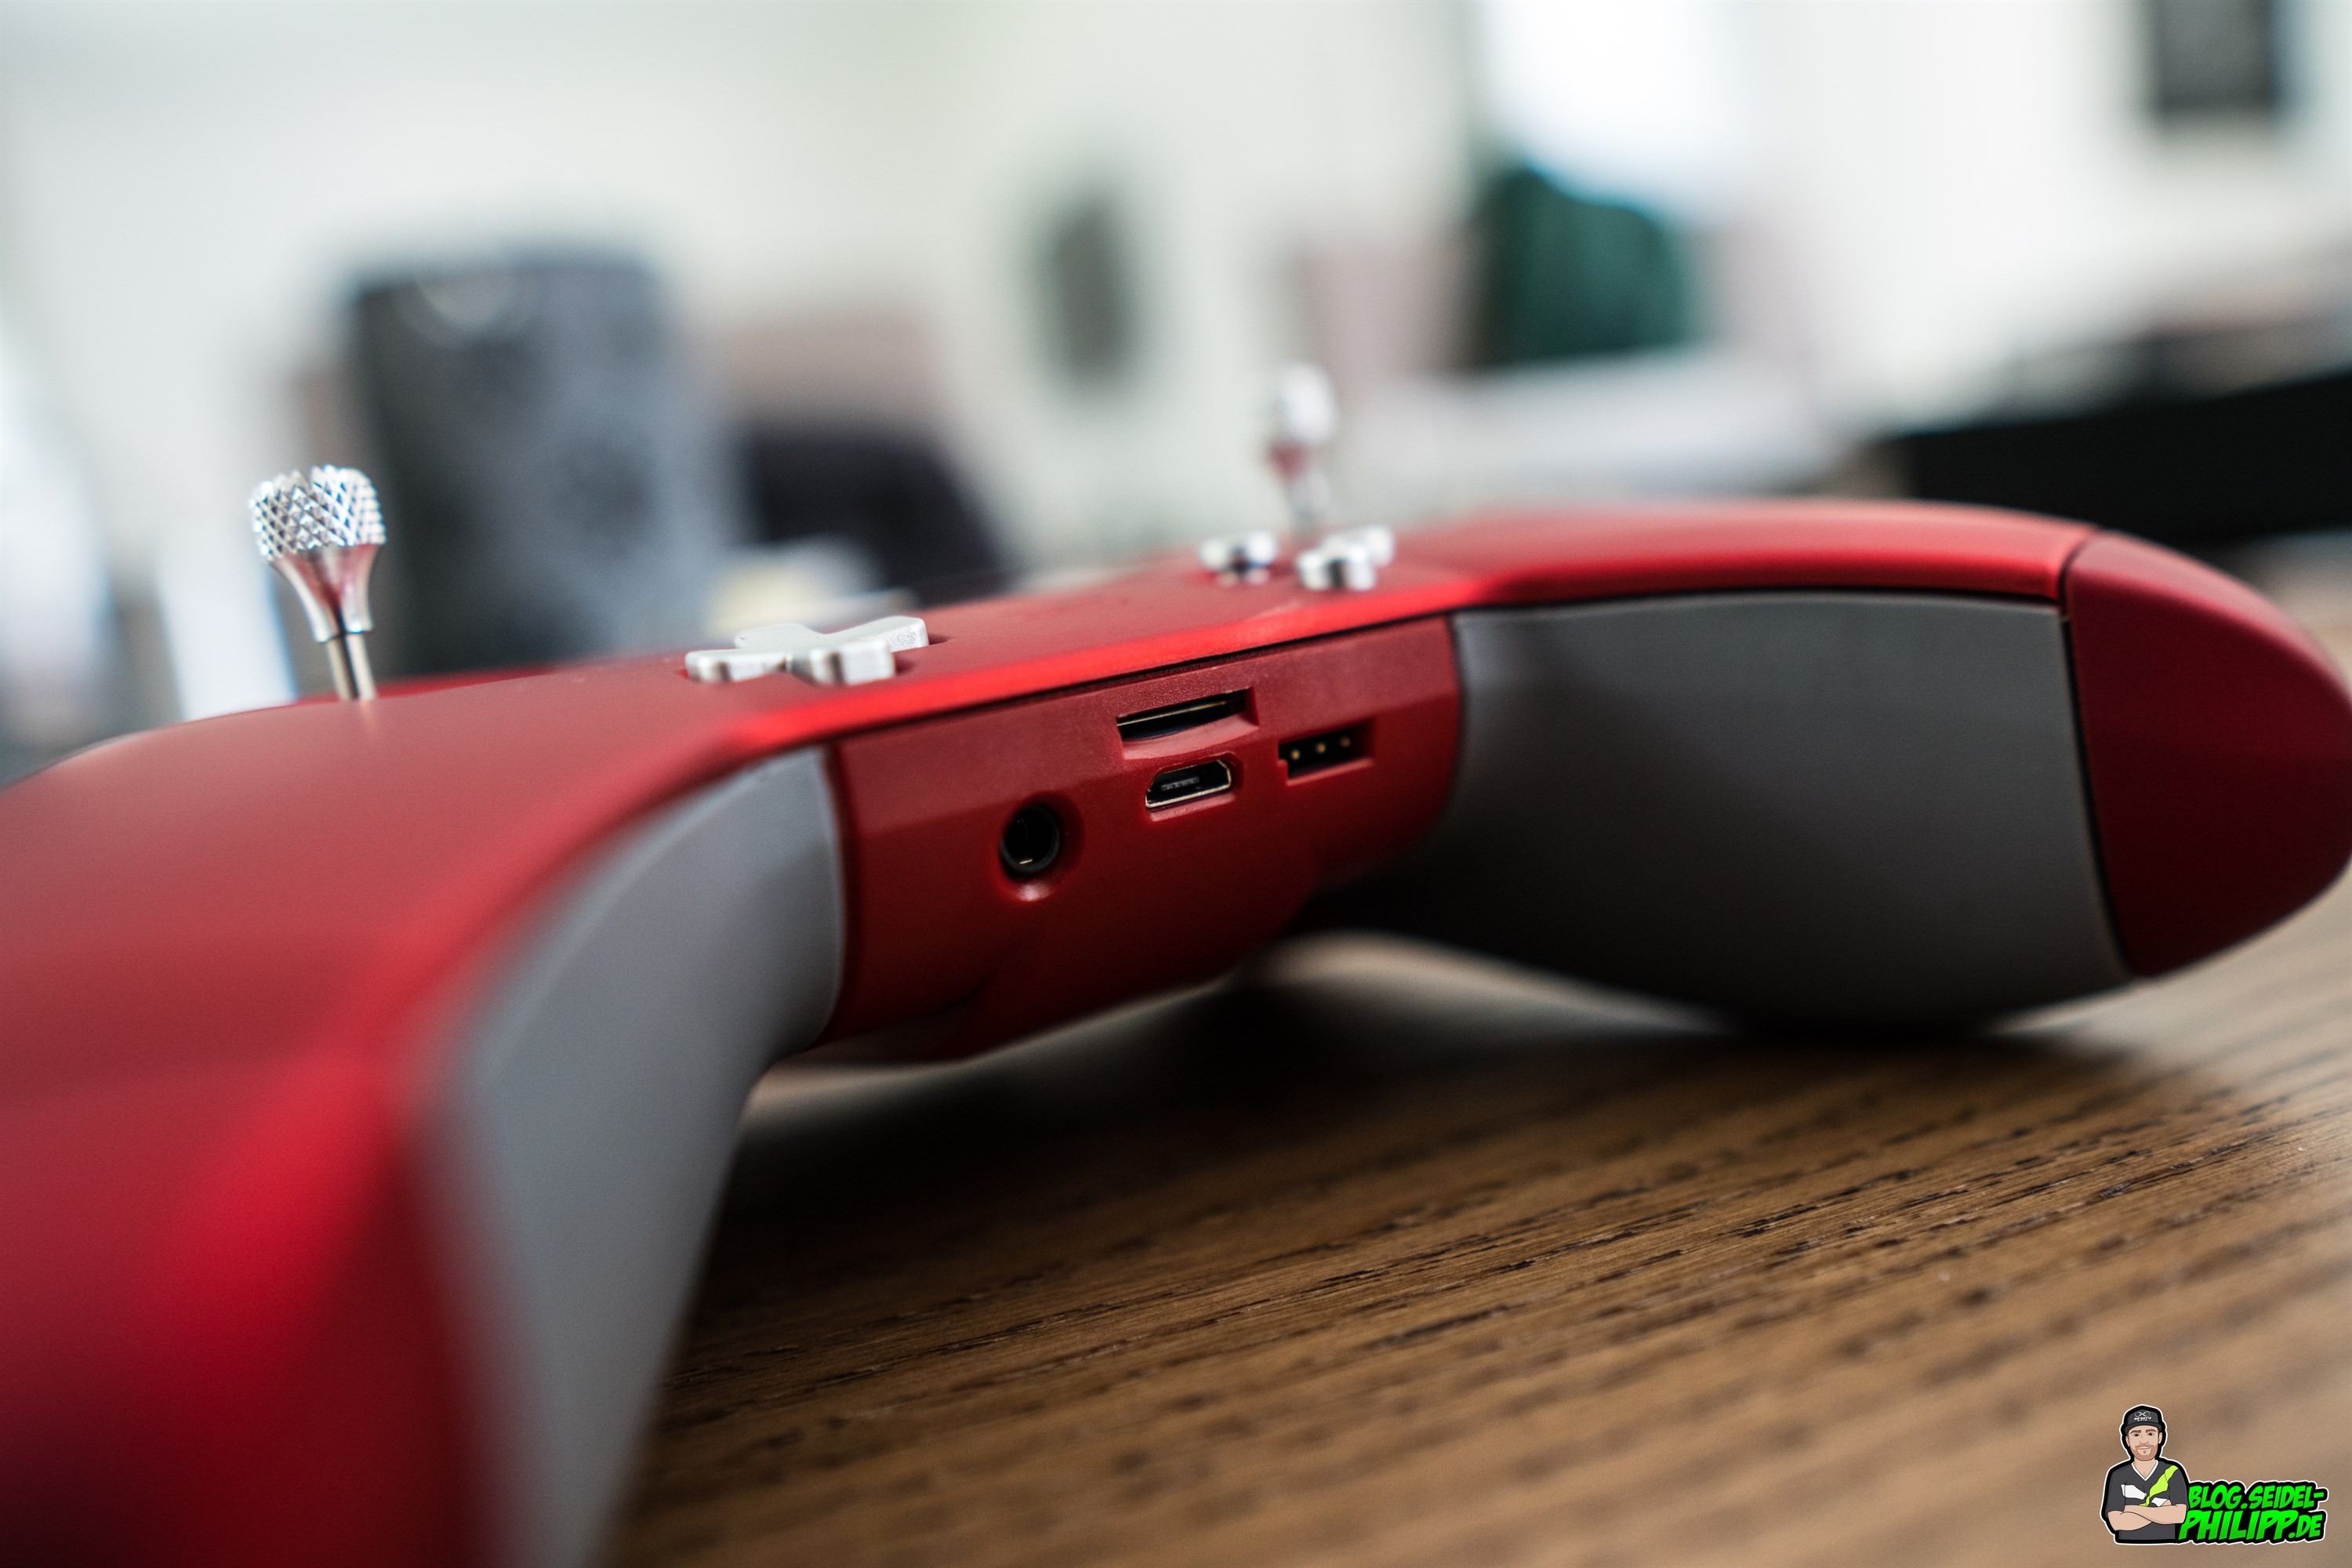
On the far left is a 3.5mm headphone output. Right next to it is the MicroUSB port. Above the USB port is the MiroSD card slot. On the right side is the usual S.Port port, over which you can flash receivers.
Gimbals
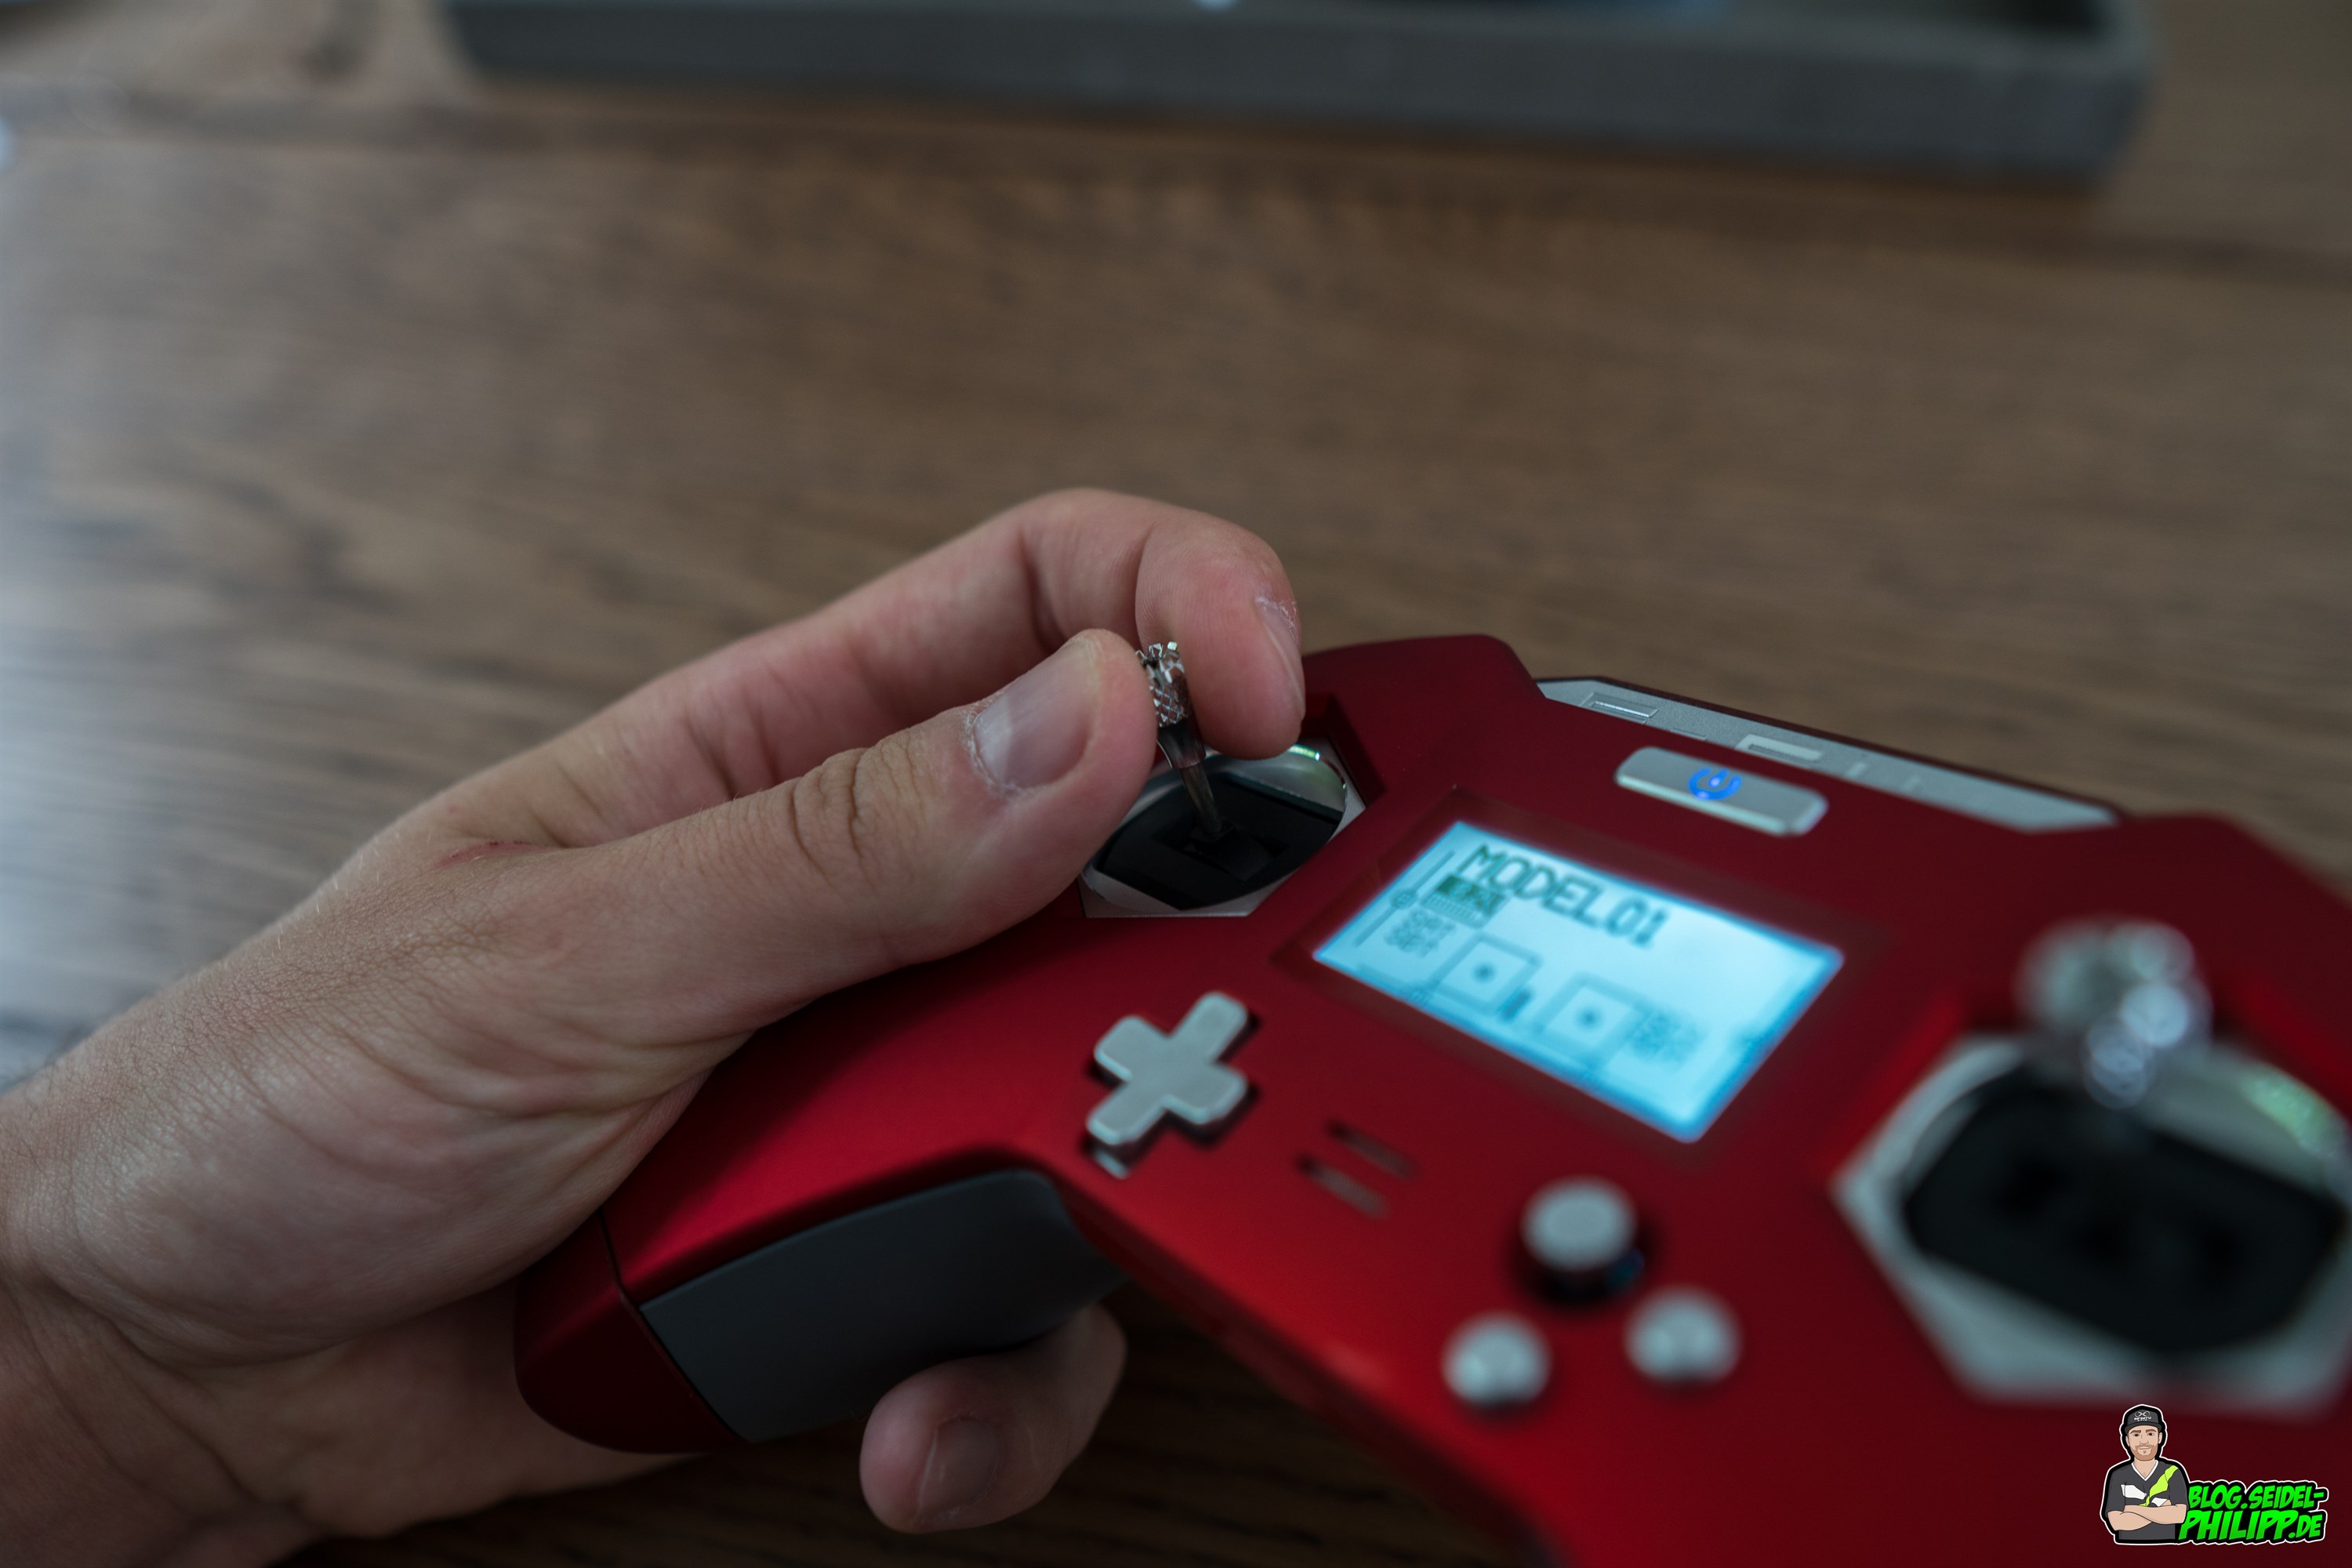
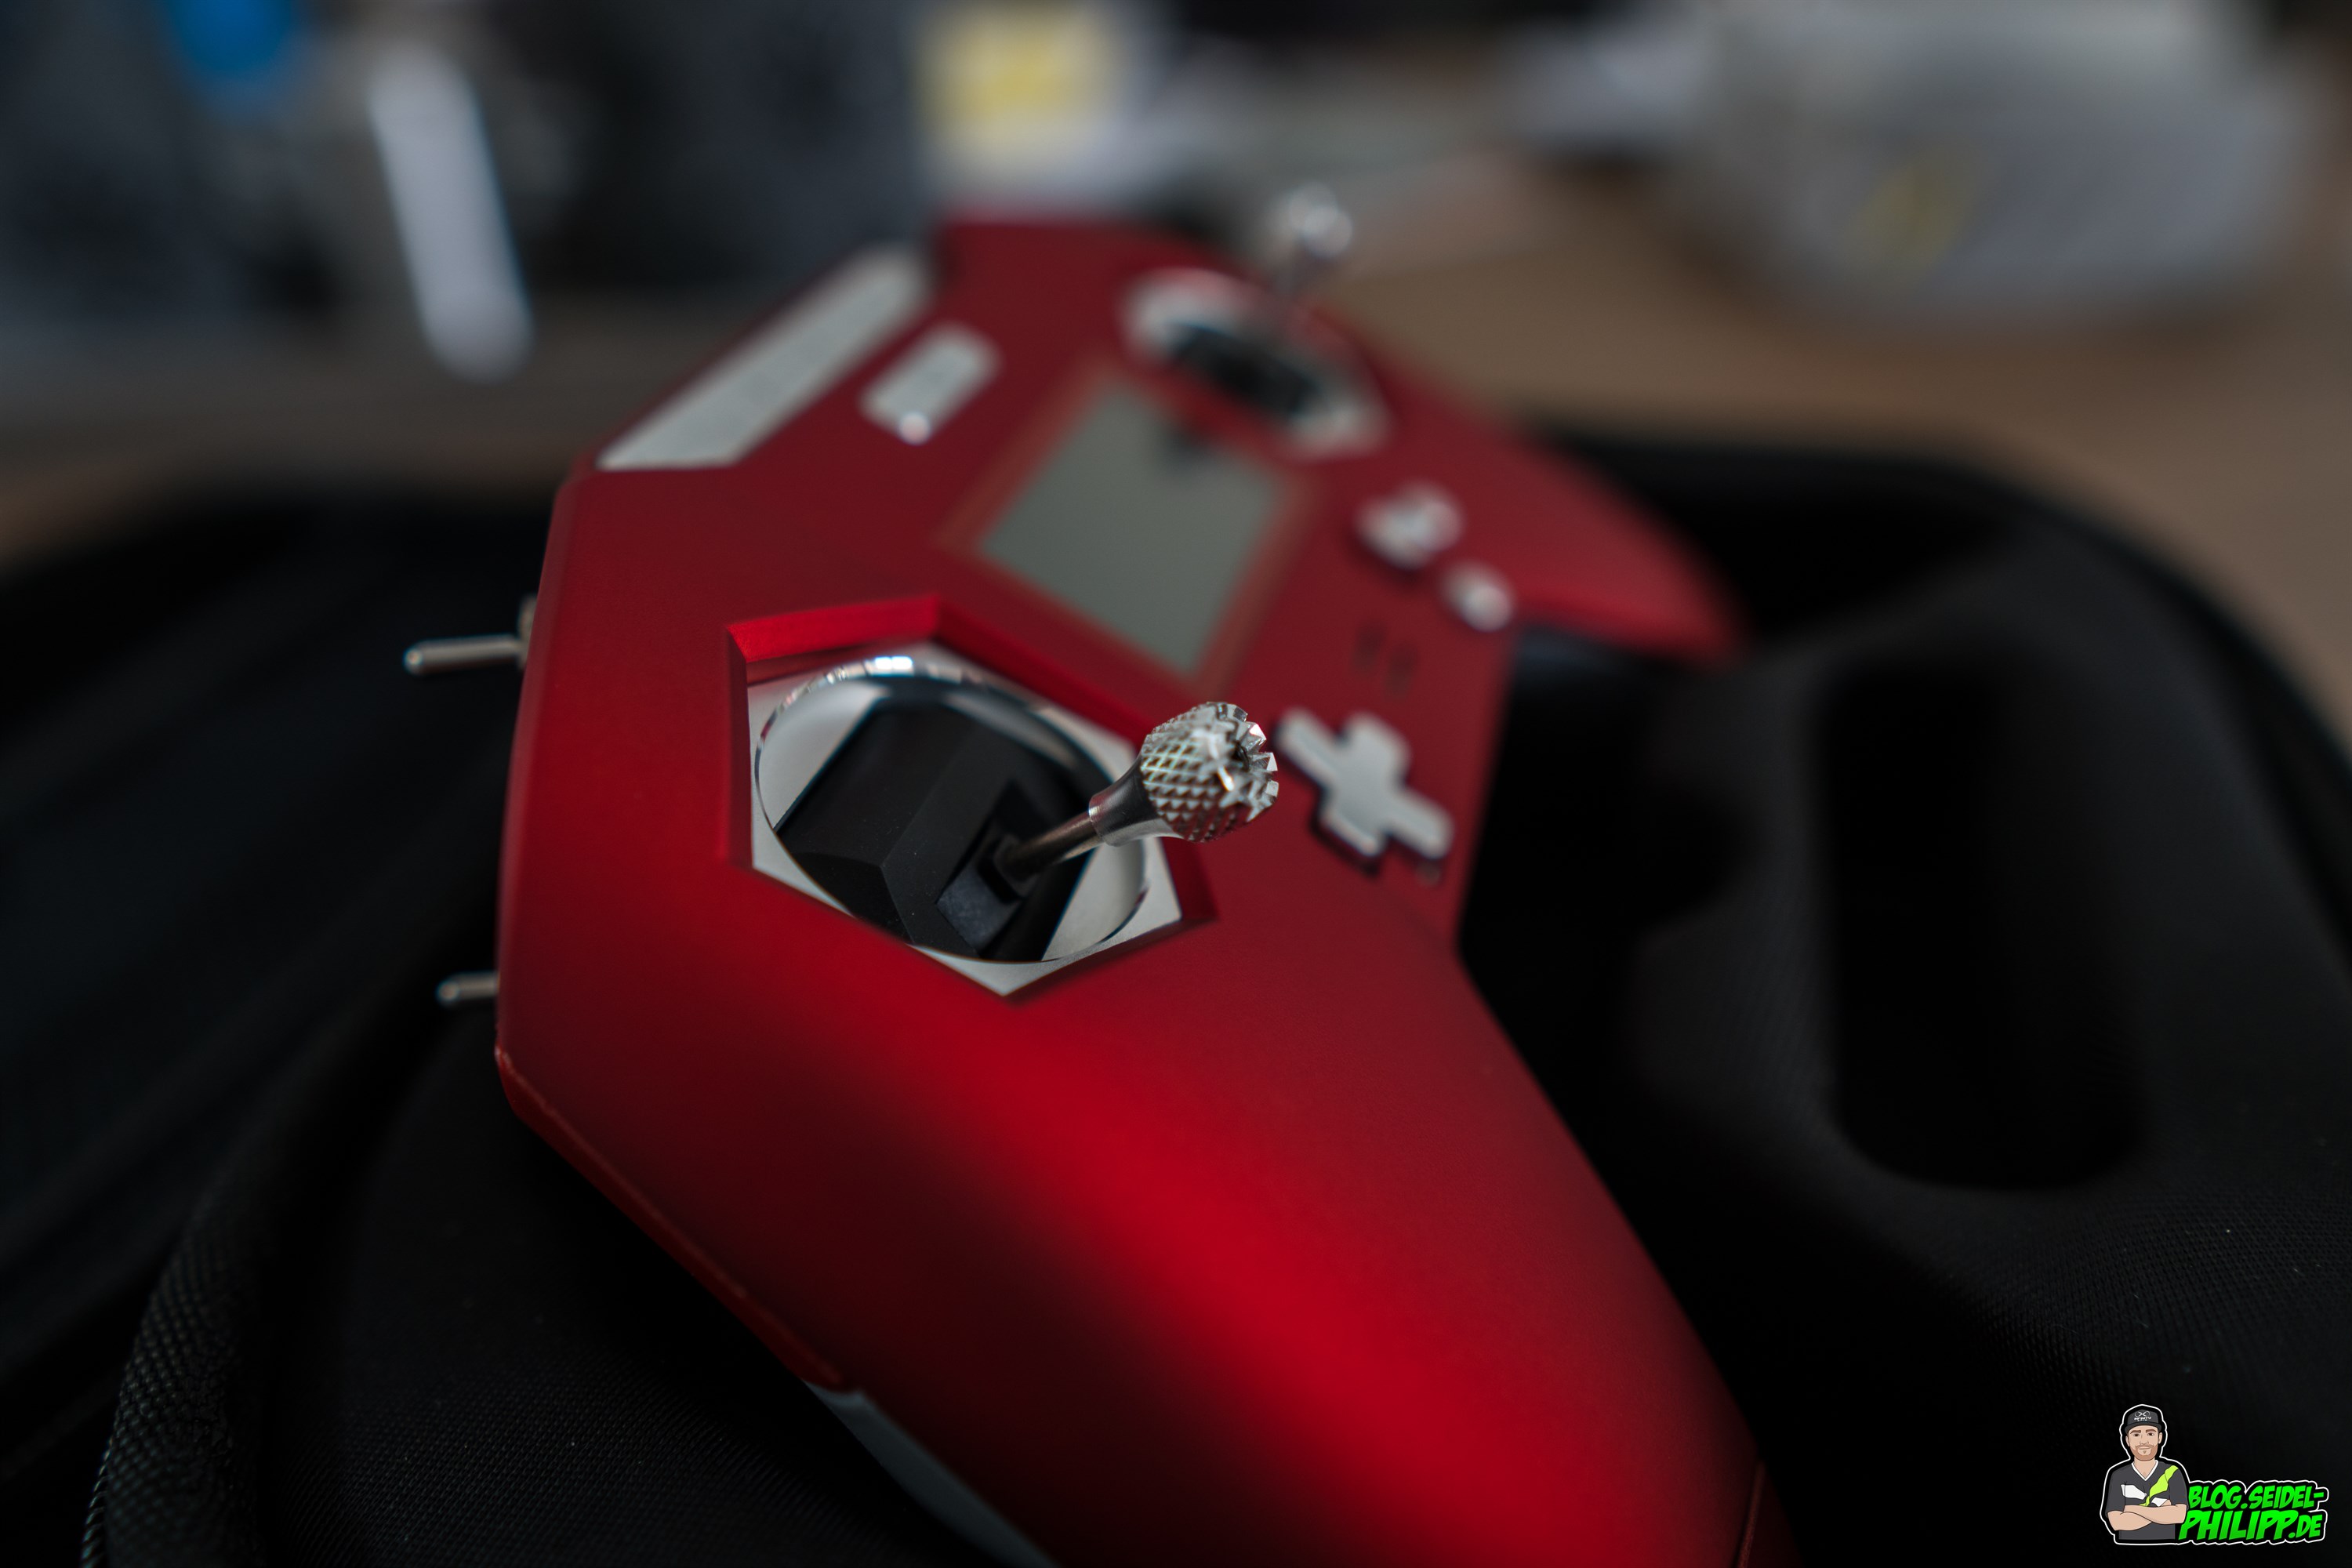
The Hall-Gimblas are well-made, but as already mentioned they have a smaller stick-way than „normal“ gimbals like the X9D or QX7. The stick-ends are made of aluminum and have agood grip.
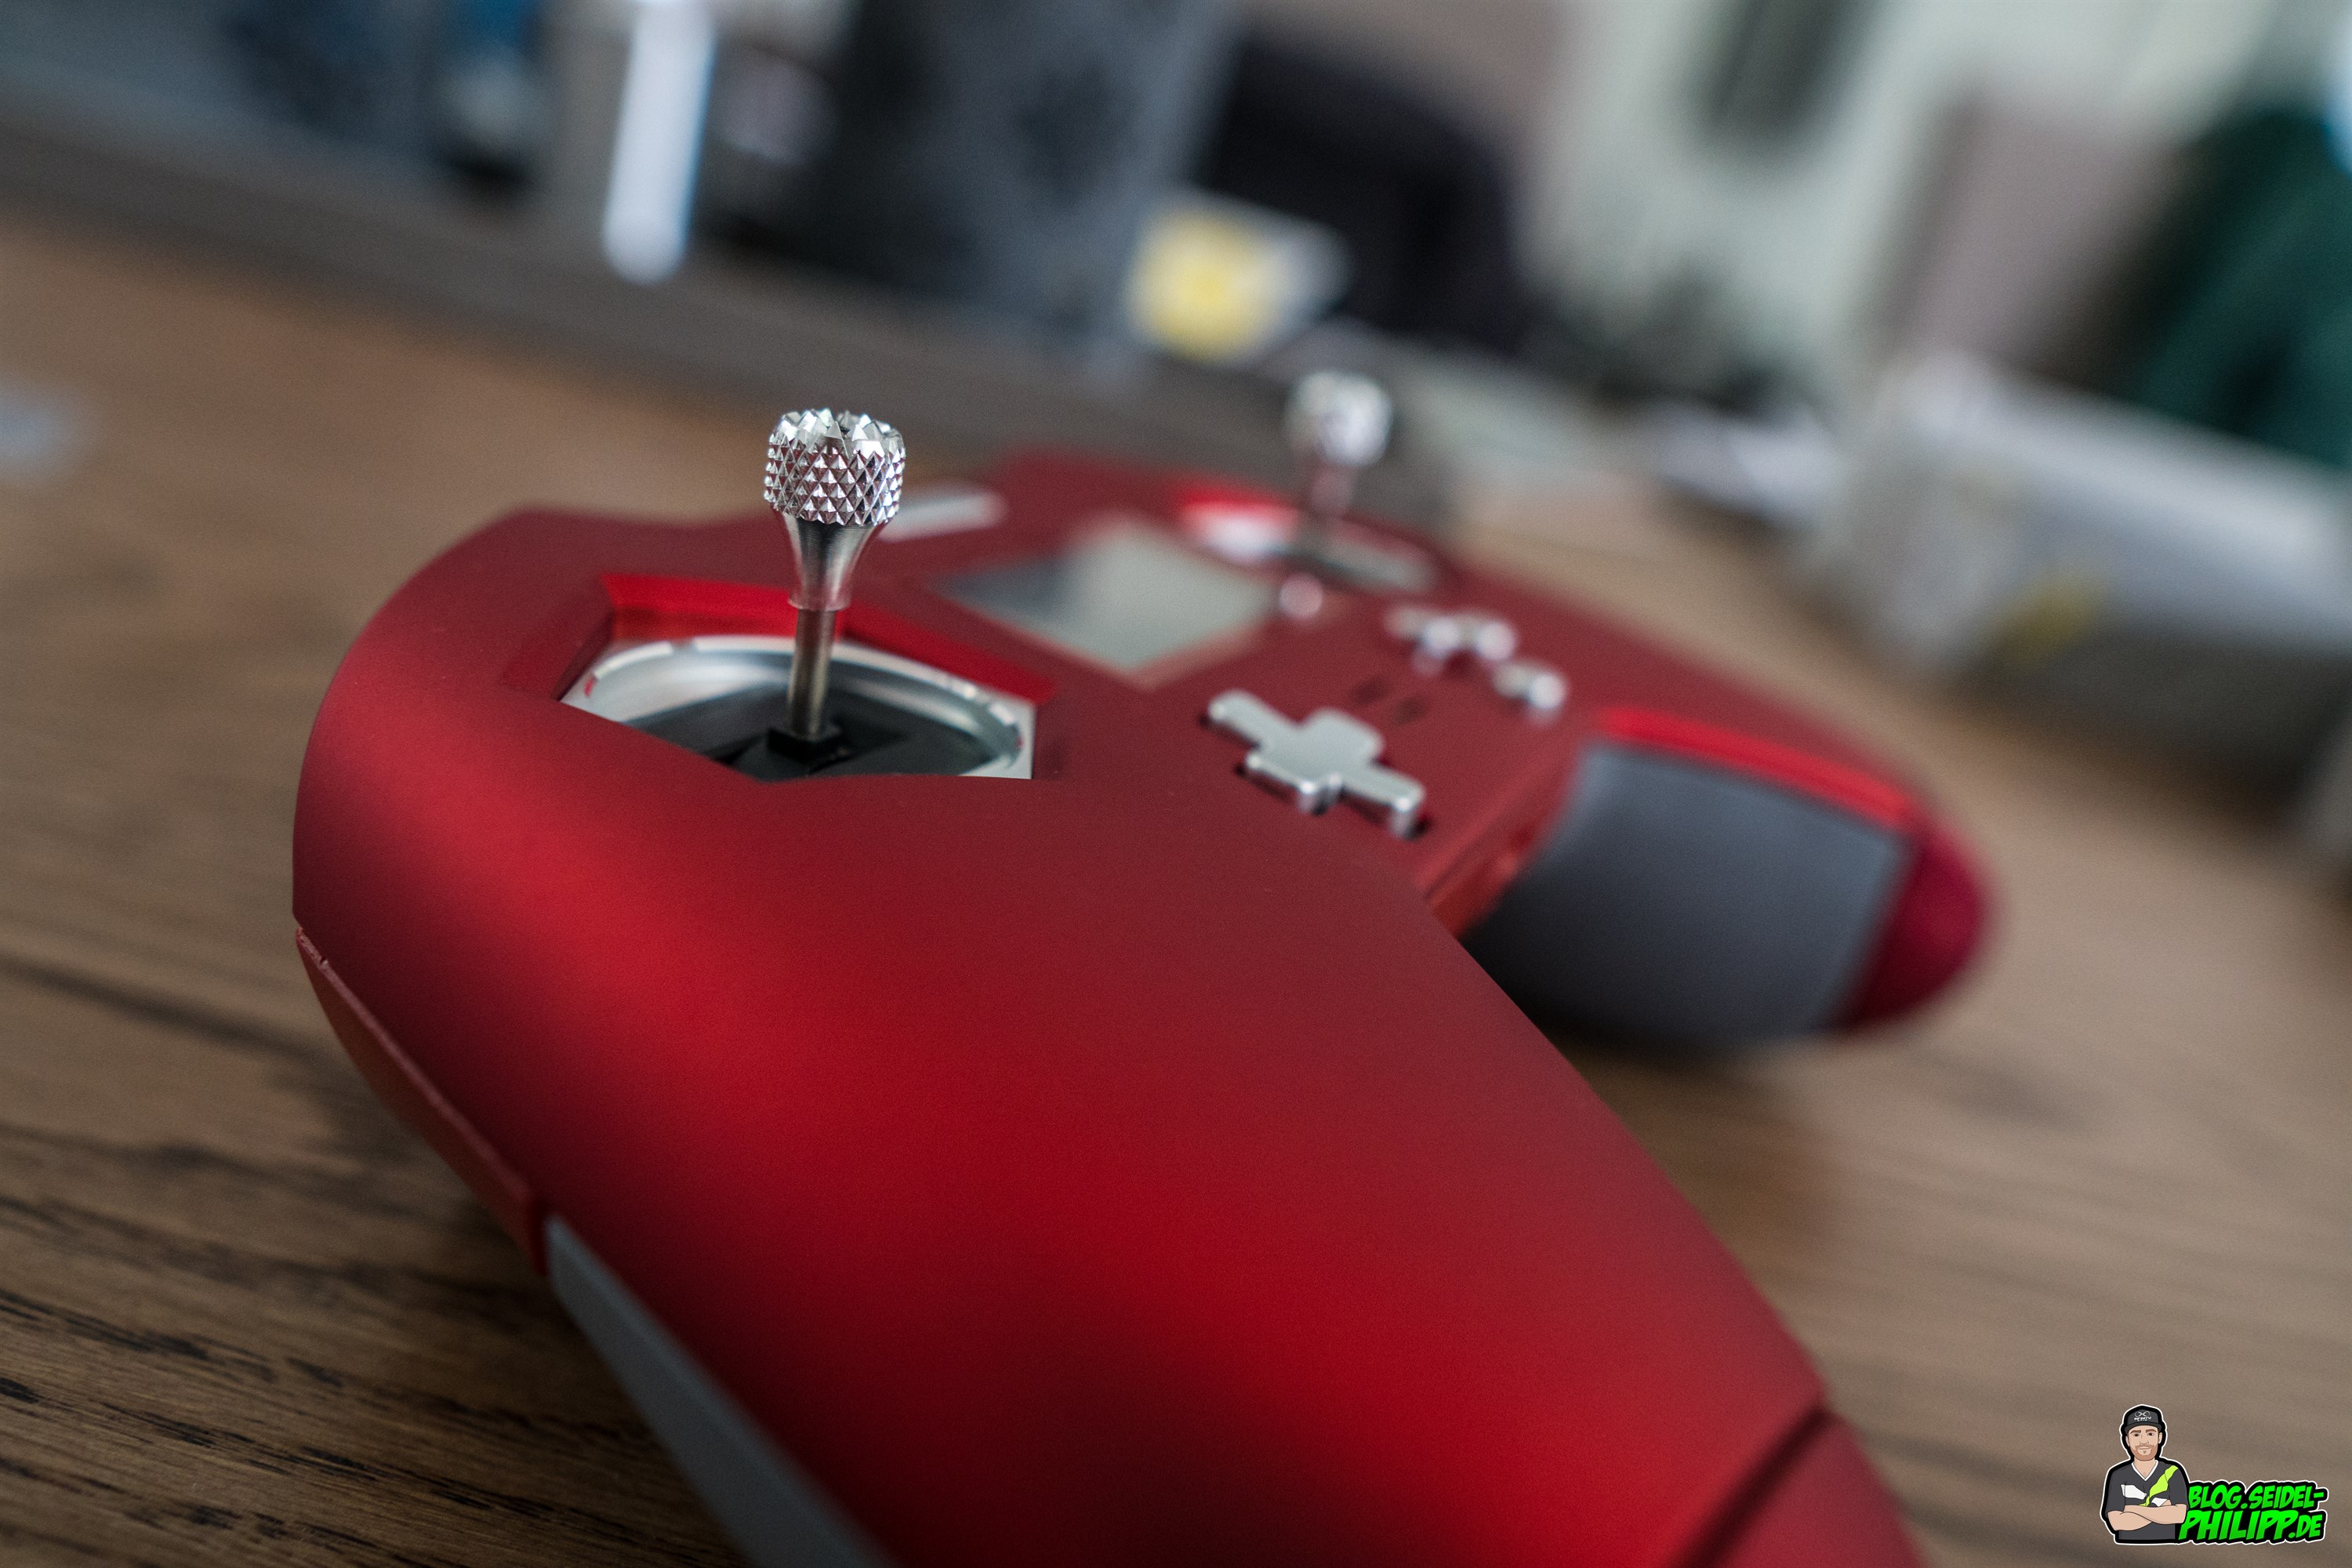
As a gimbal protection, two plastic caps included.
If you have problems getting throttle warning at the first start, it’s because of a wrong calibration. Perform the calibration again and apply very little pressure on the gimbals when you reach the edges of the gimbal.

Mit dem Laden des Videos akzeptieren Sie die Datenschutzerklärung von YouTube.
Mehr erfahren
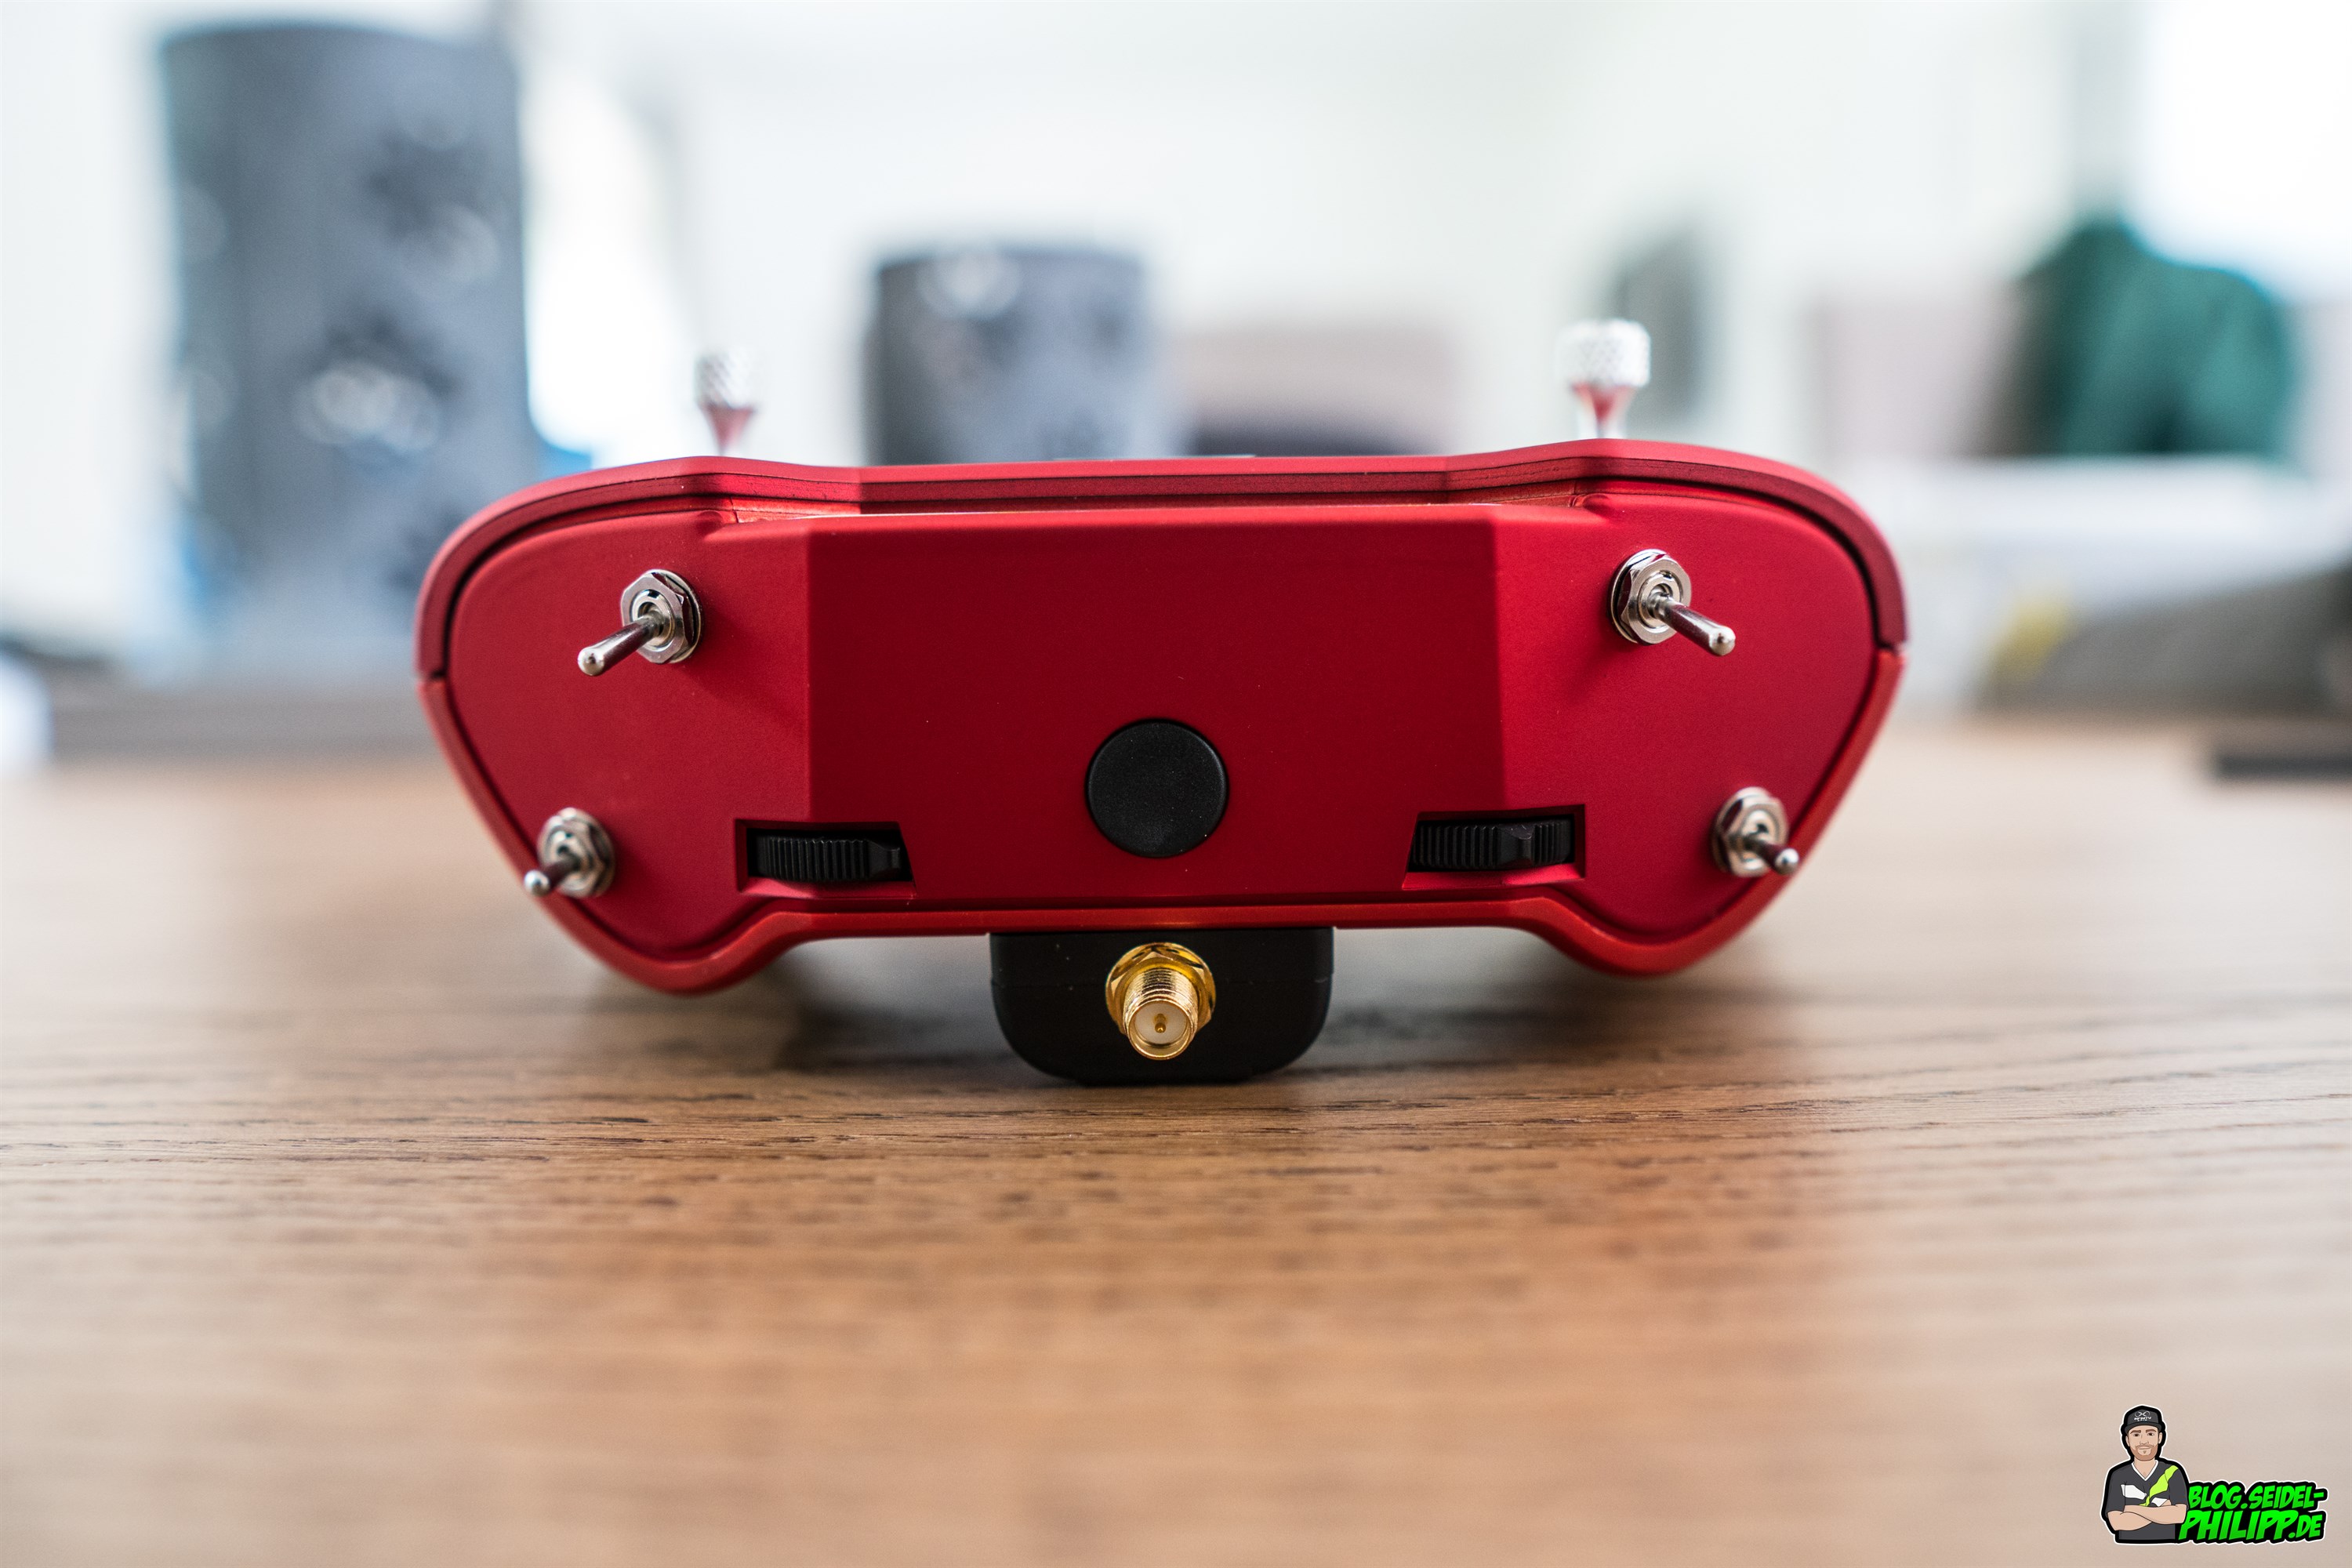
Switches
On the top of the X-Lite there are a total of 4 switches.

- top left – SA (long three-way switch)
- top right- SB (long three-way switch)
- bottom left – SC (short two-way switch)
- bottom right-SD (short two-way switch)
Likewise, two rotary wheels are installed without center position over which, for example, a colored LED or a gimbal / servo can be controlled.
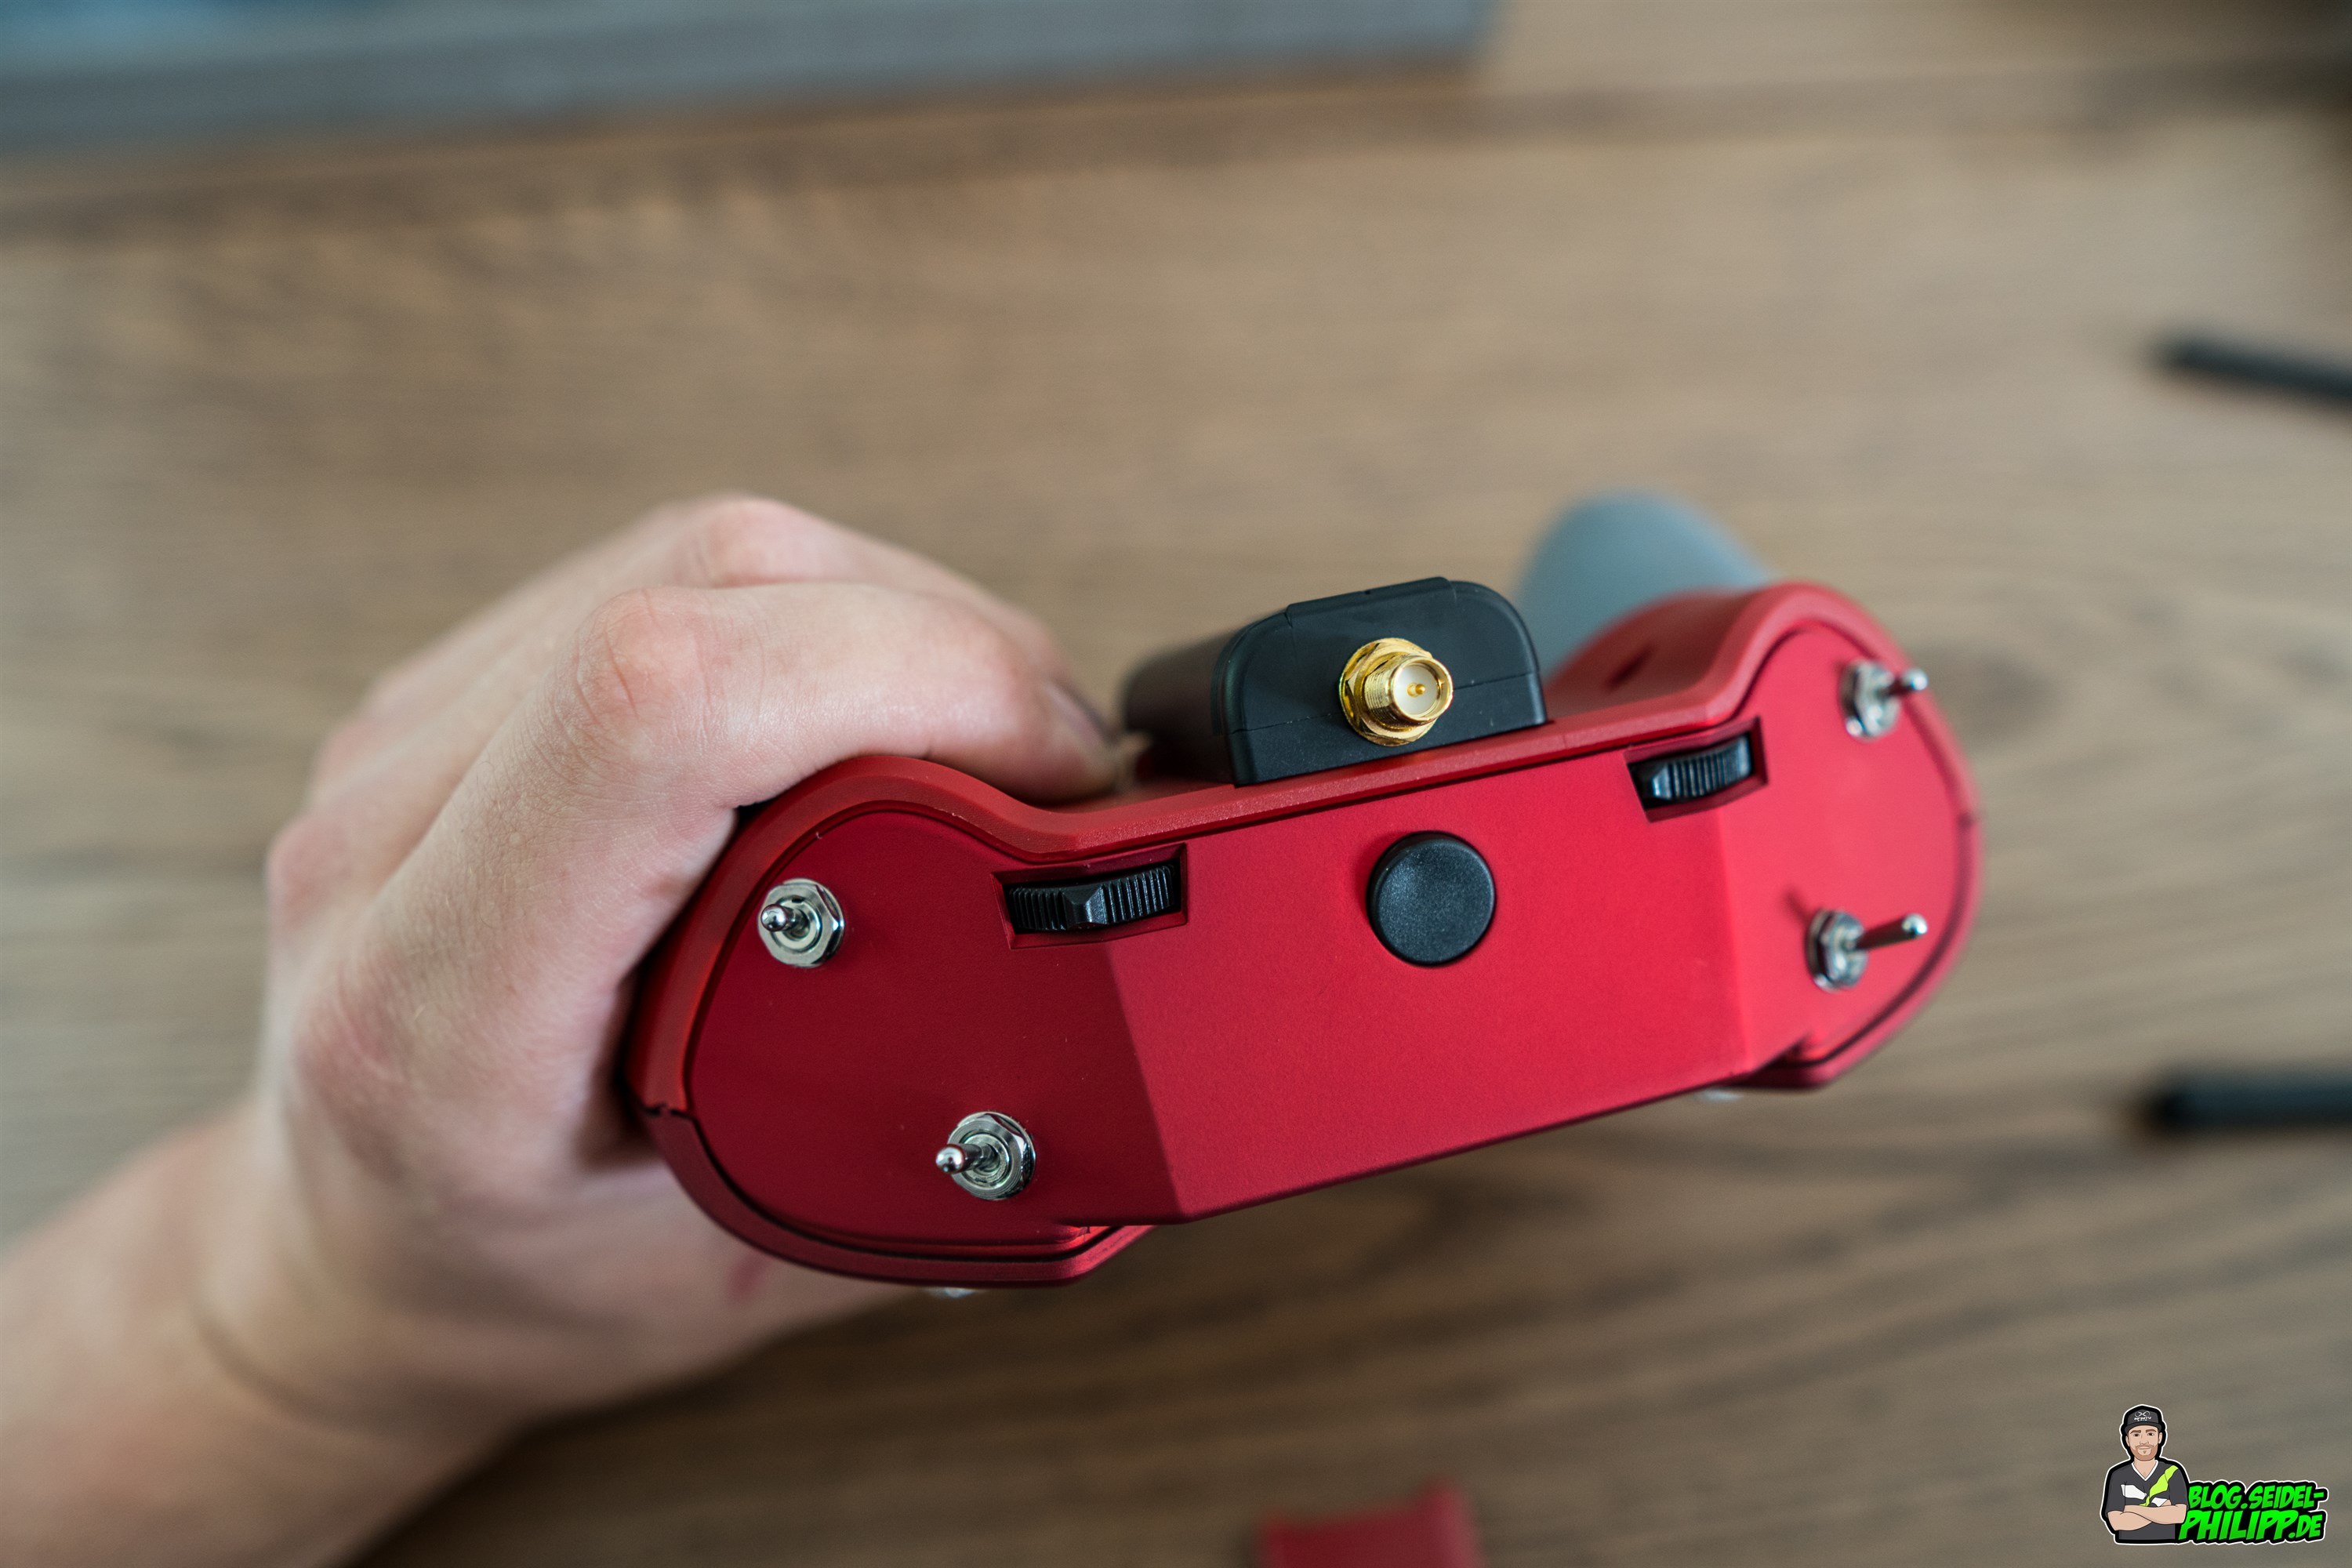
internal/external Antenna
The FrSky Taranis X-Lite has an internal antenna, which makes it extremely compact. If you want to use an external antenna you will find an SMA connector behind the black rubber cap for a 2.4GHz antenna.
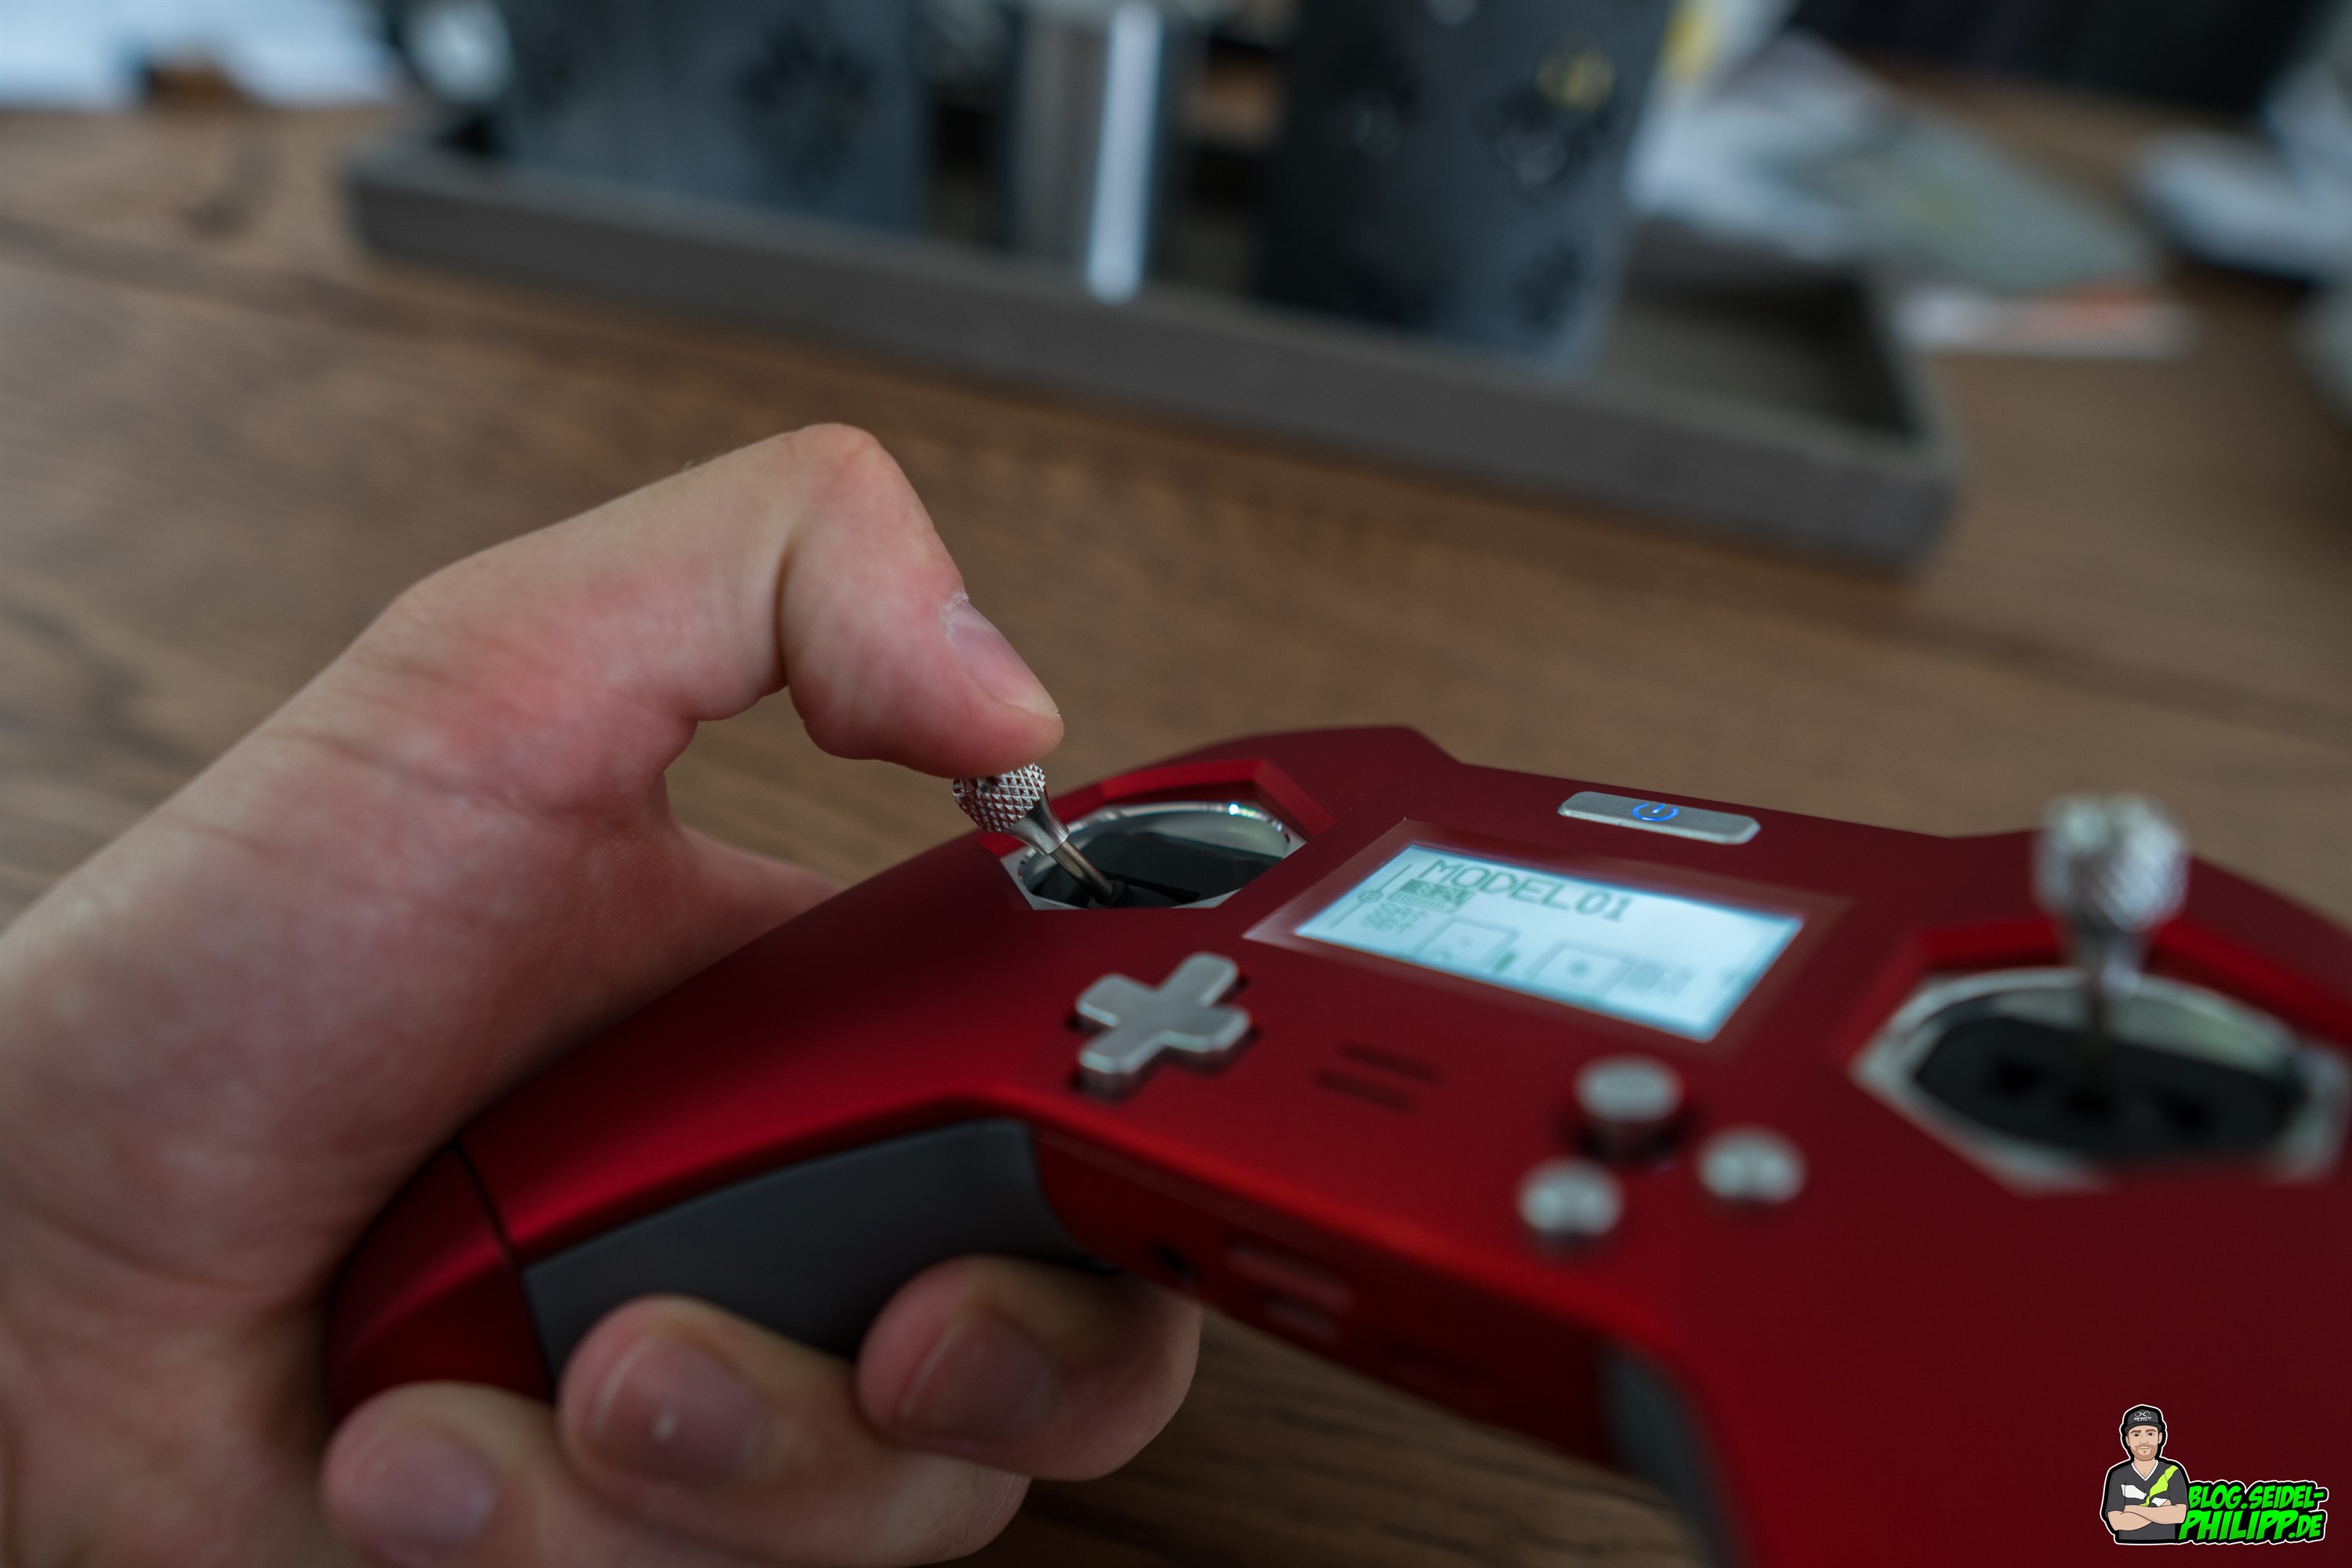
Buttons
Navigation/Enter Button (top right)
- long left: System menu | scroll quickly
- long right: Models | scroll quickly
- long high: statistics
- short high: main screen pages | scroll
- long down: telemetry
- short down: main screen pages | scroll
- push down short: Enter
- push down long: Reset
Back/Exit Button (bottom right rechts)
- back or exit
Shortcut Button (right)
- capitalize
Power ON|OFF Button
- long press to switch on or off
Set mode 2
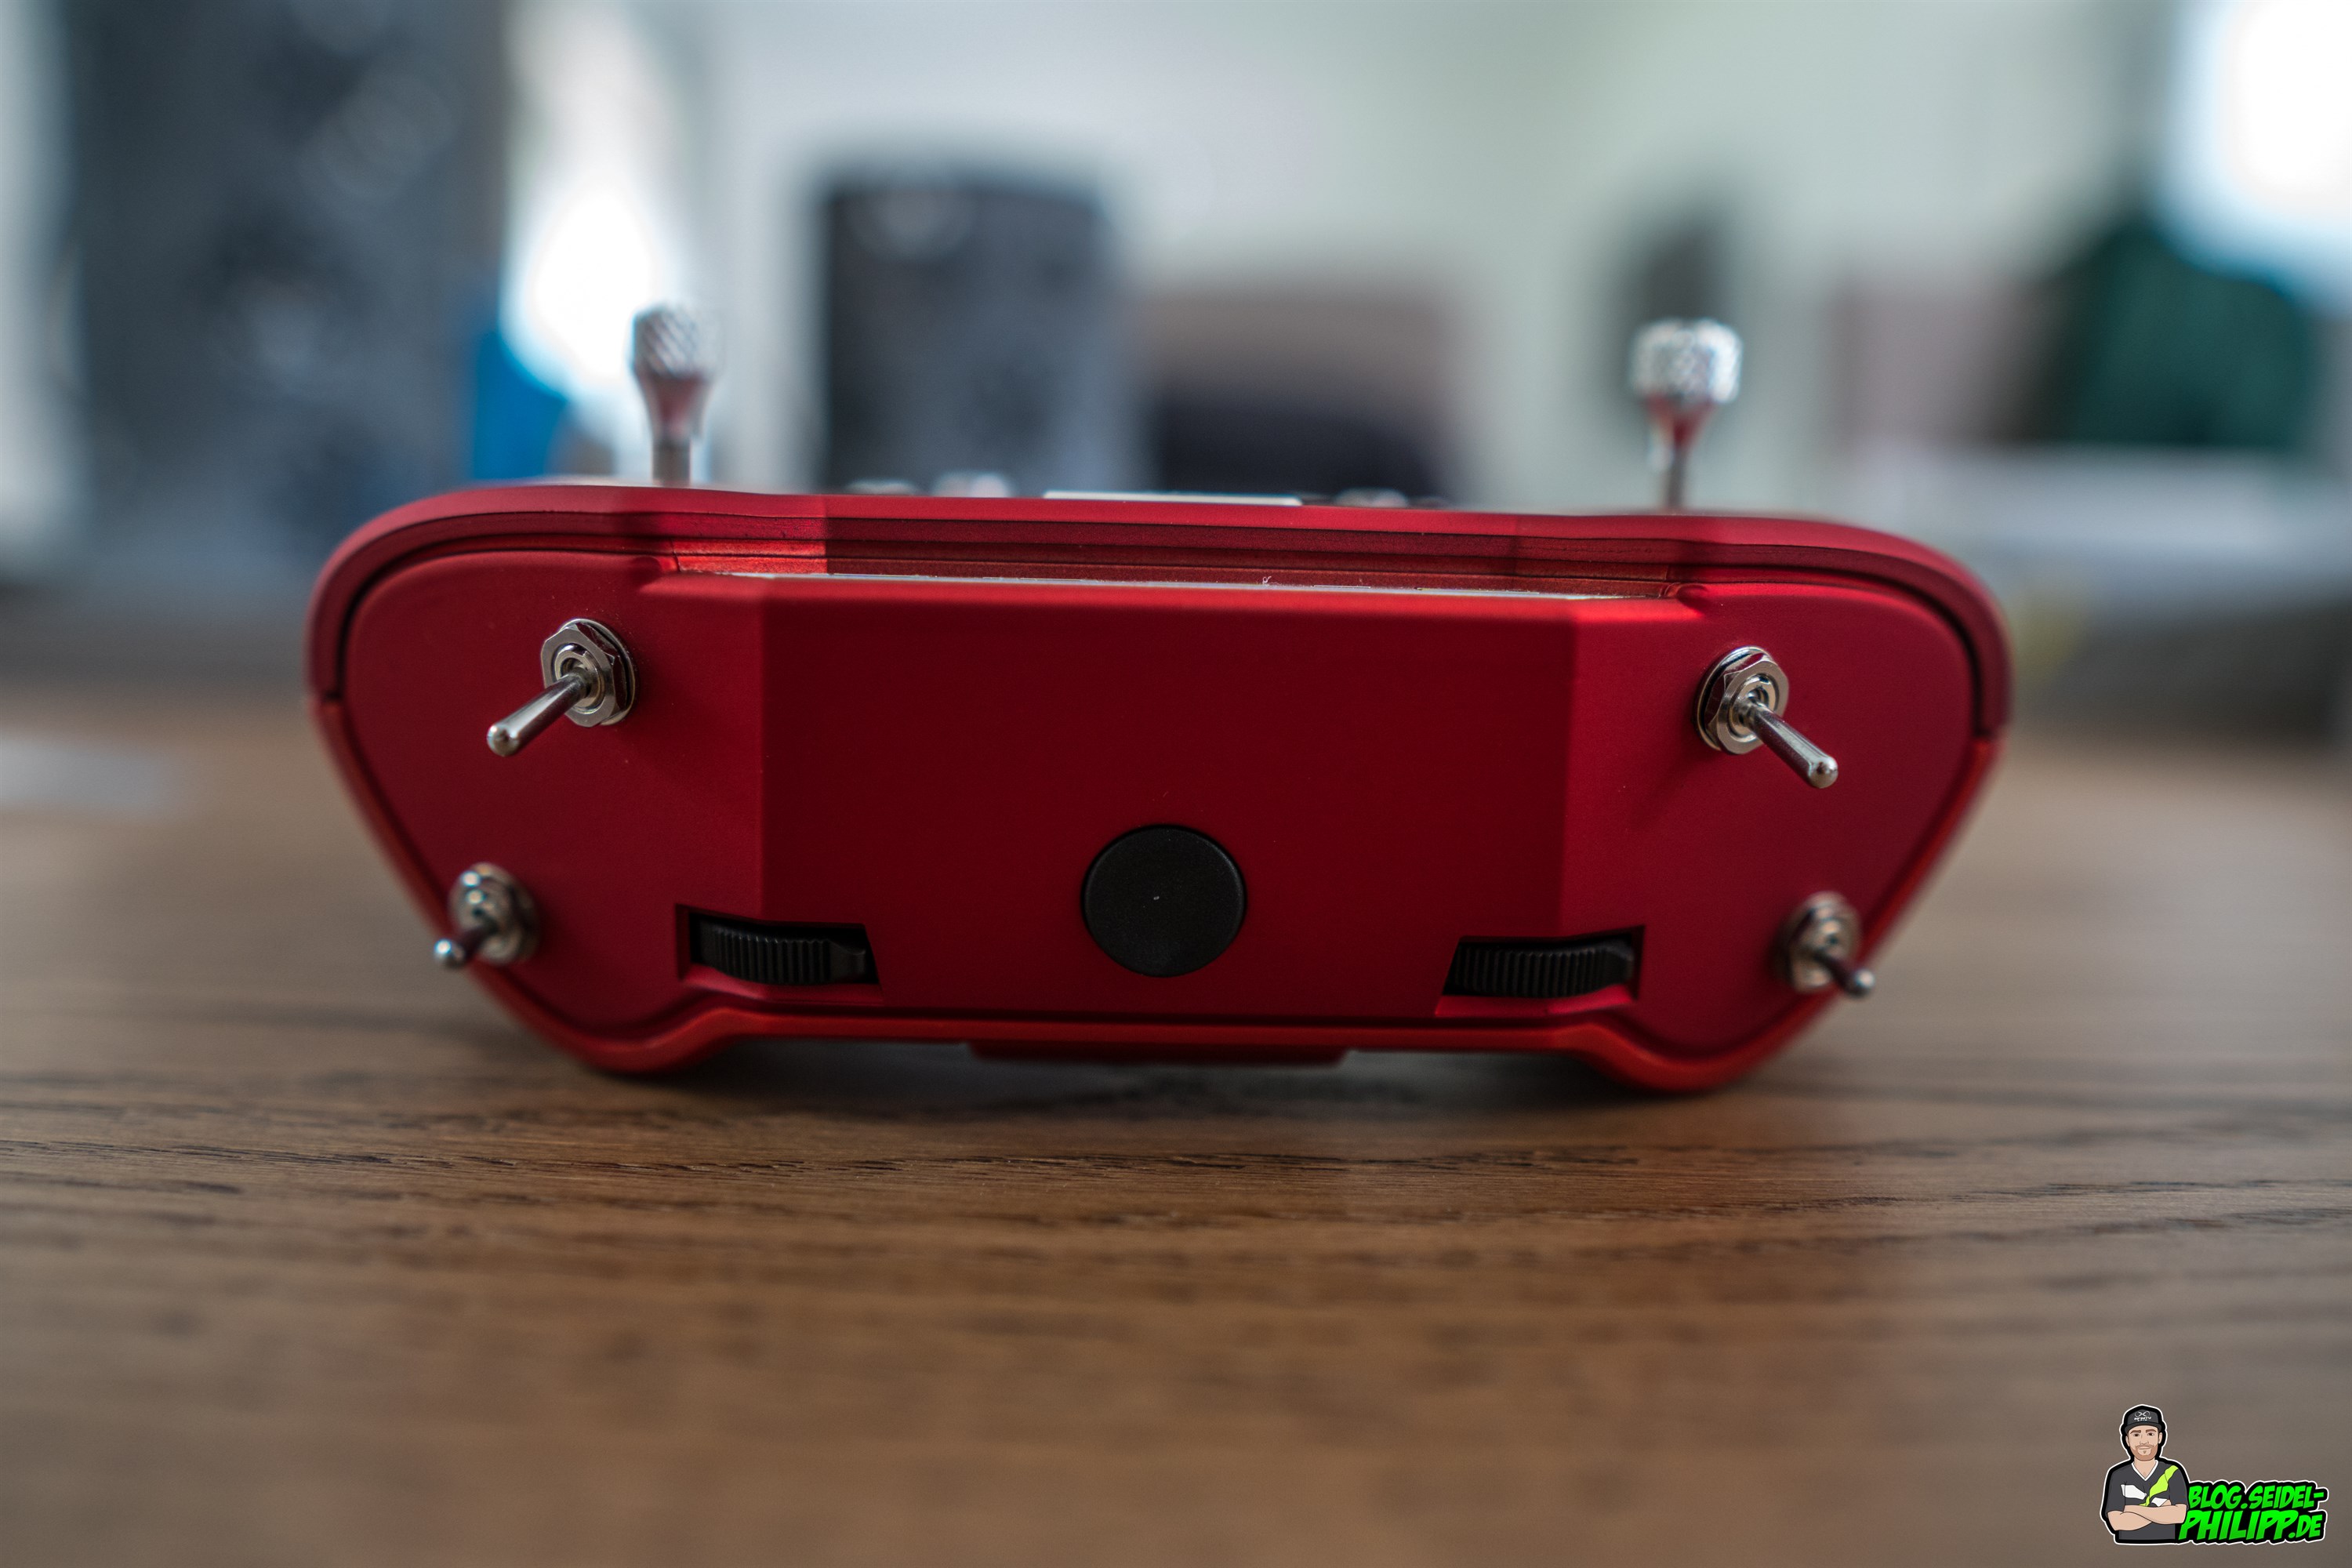
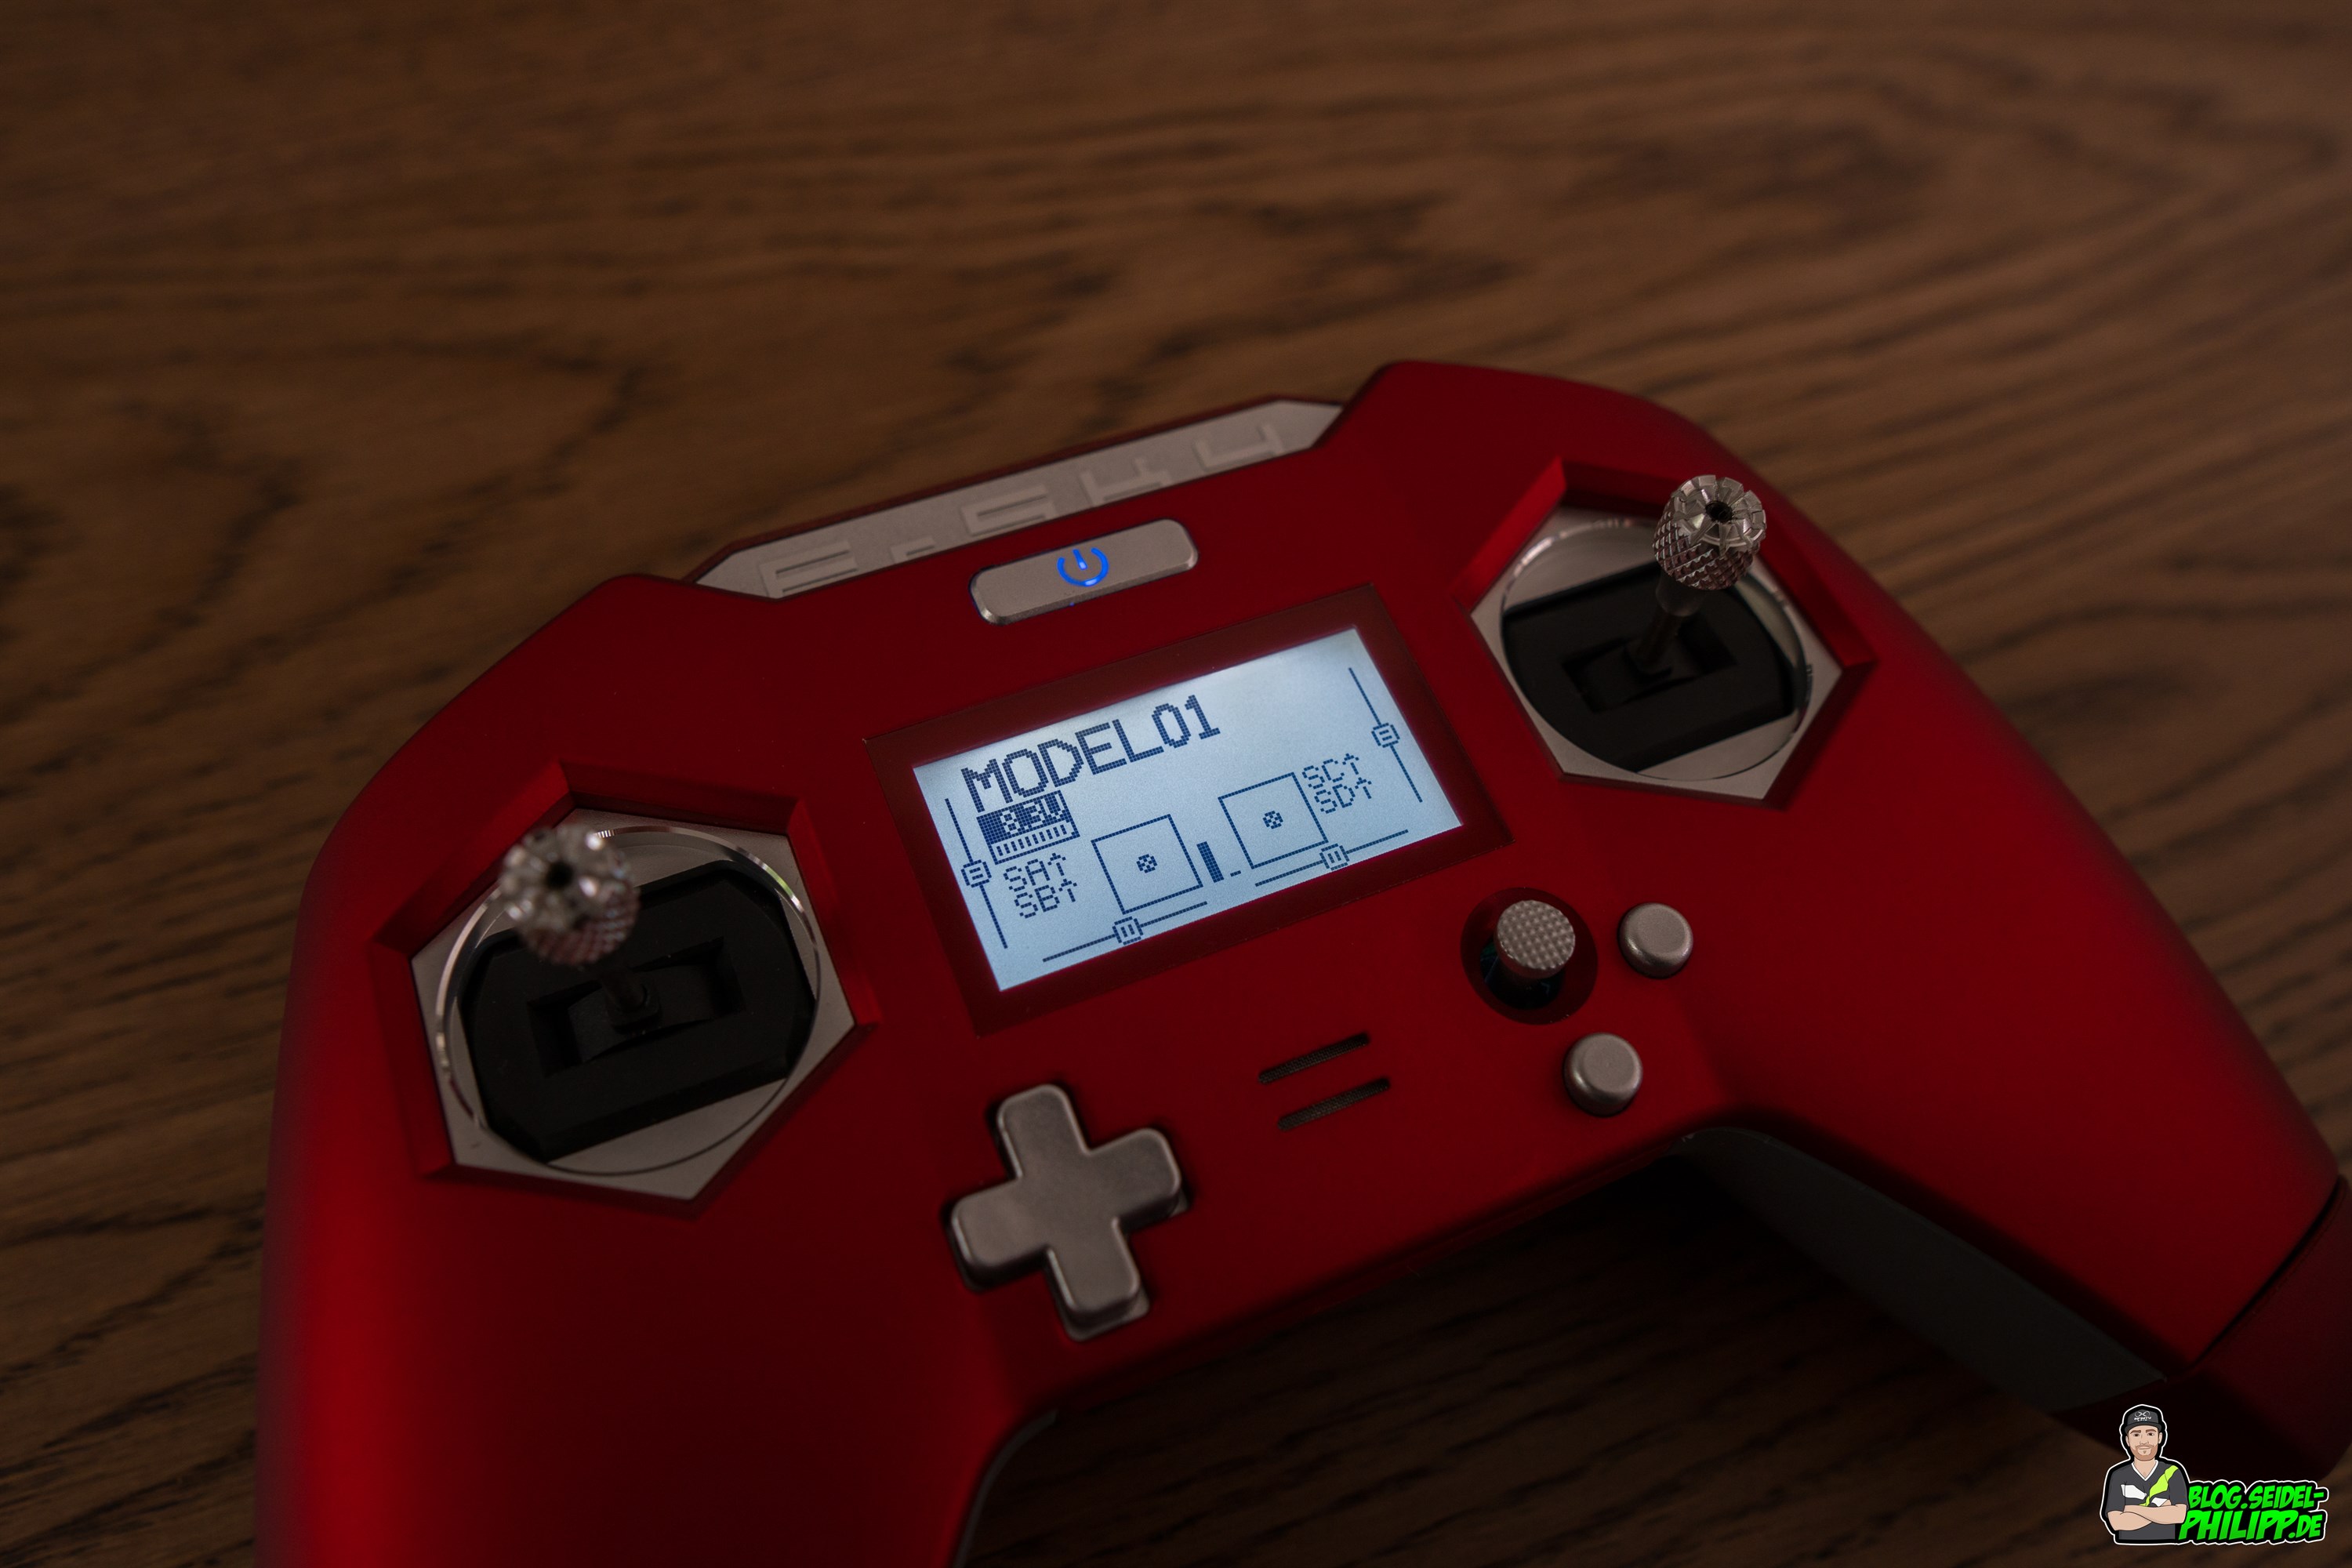
In the factory state, both gimbals are centered with a spring. For Mode 2, the procedure is as follows:
Go to „Radio Setup“ on page 1. Under „Mode„, select the number „2“ for Mode 2.
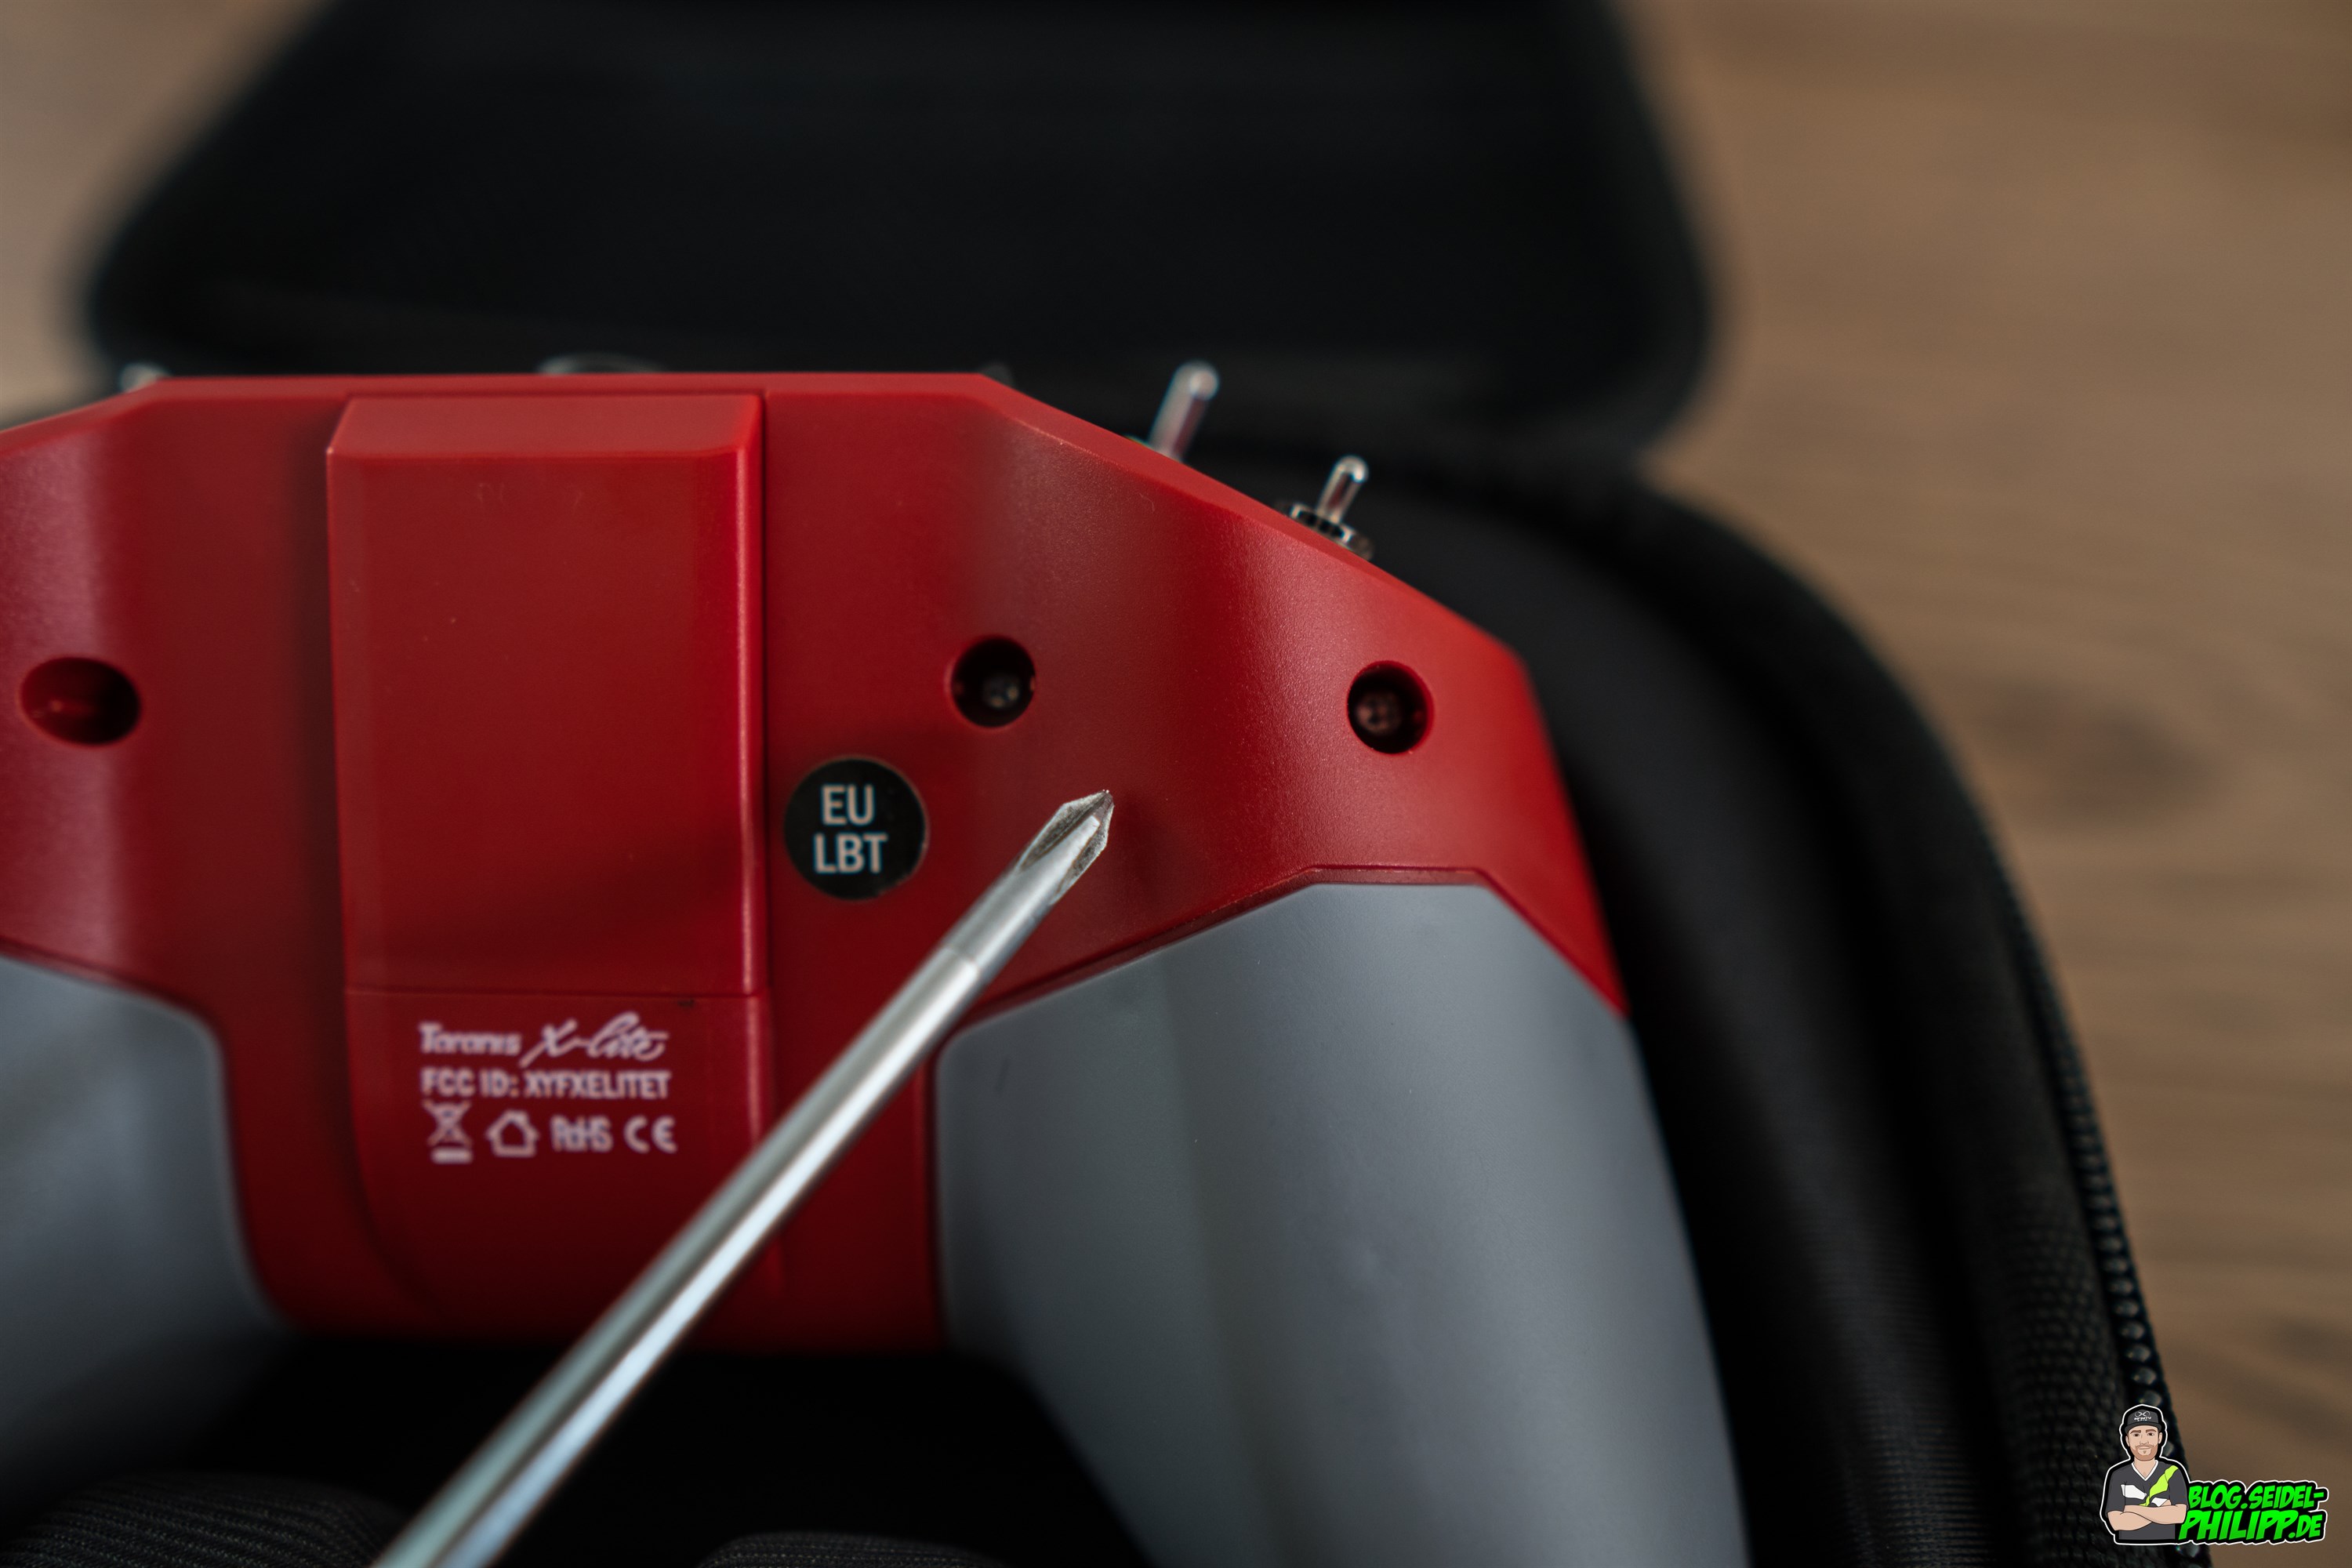
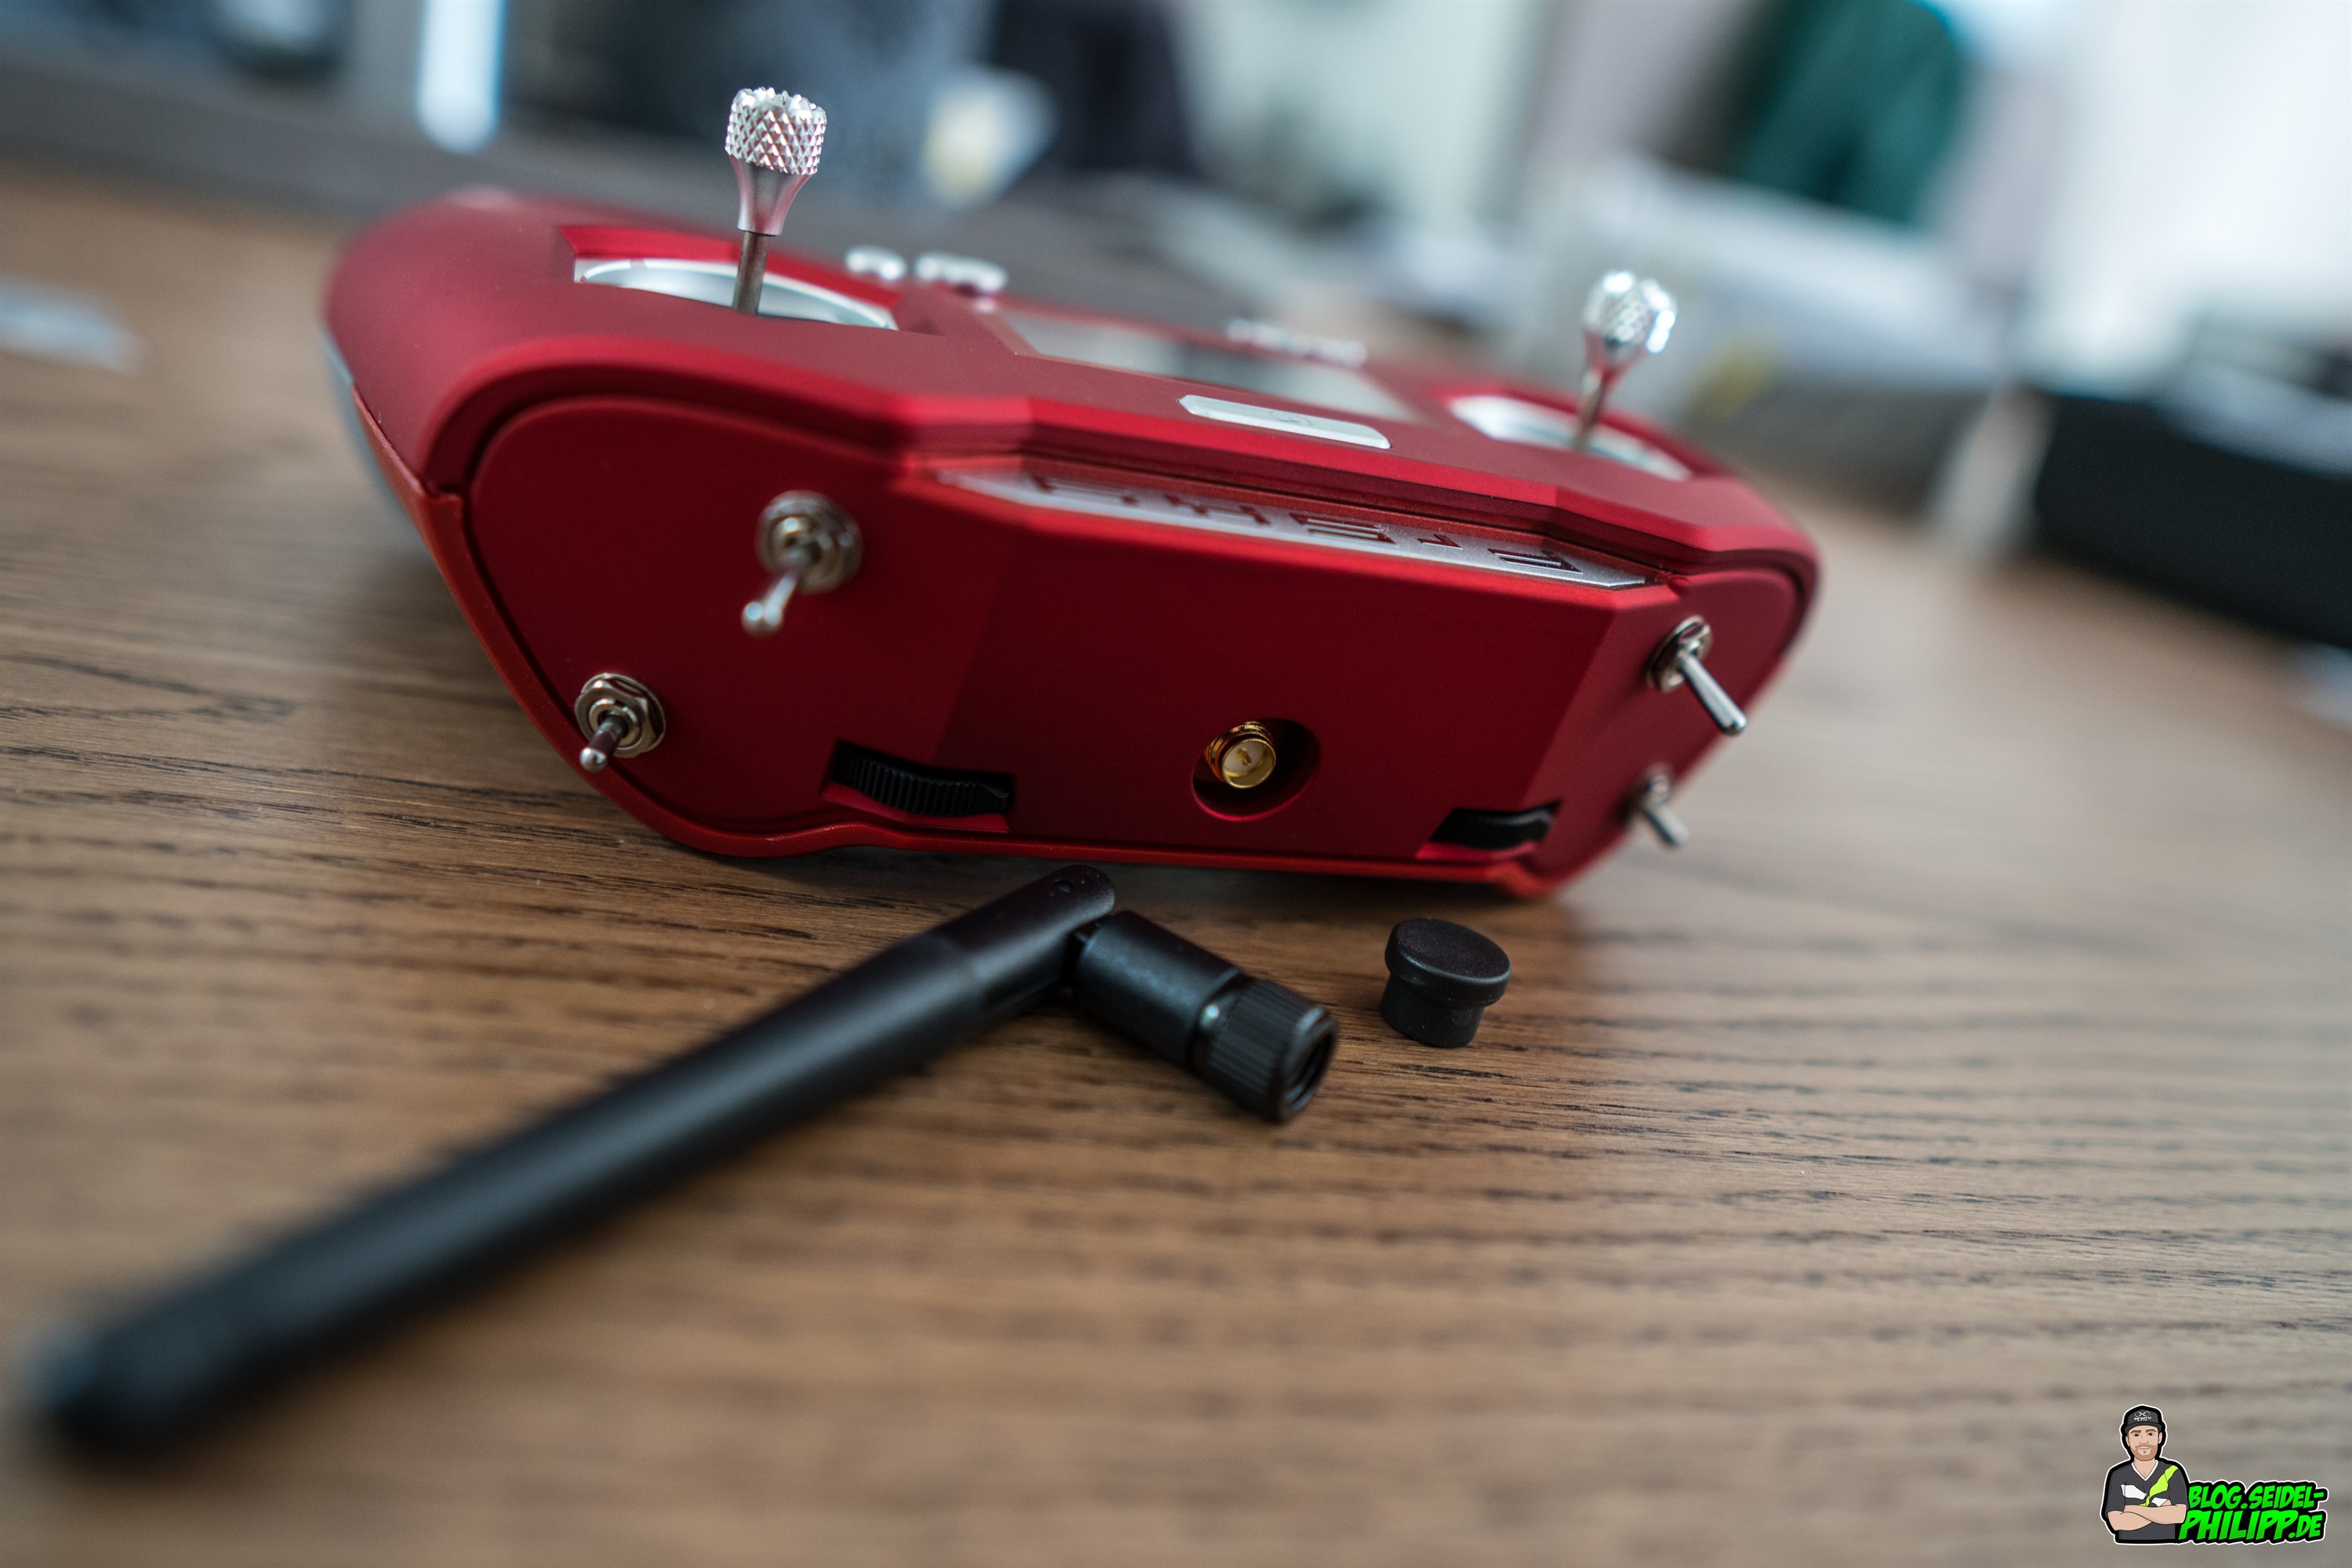
Next you have to screw the screws on the back into the provided holes.
The long screw is completely screwed in. With the short screw, the gas stick is set (resistance when moving).
Important: The long screw comes in the inner holes (top left of the screwdriver: see photo). The short comes in the outer hole. Carefully turn the screw in, not by force. There are occasional reports that the threads do not fit and the screw bends and possibly cause damage.
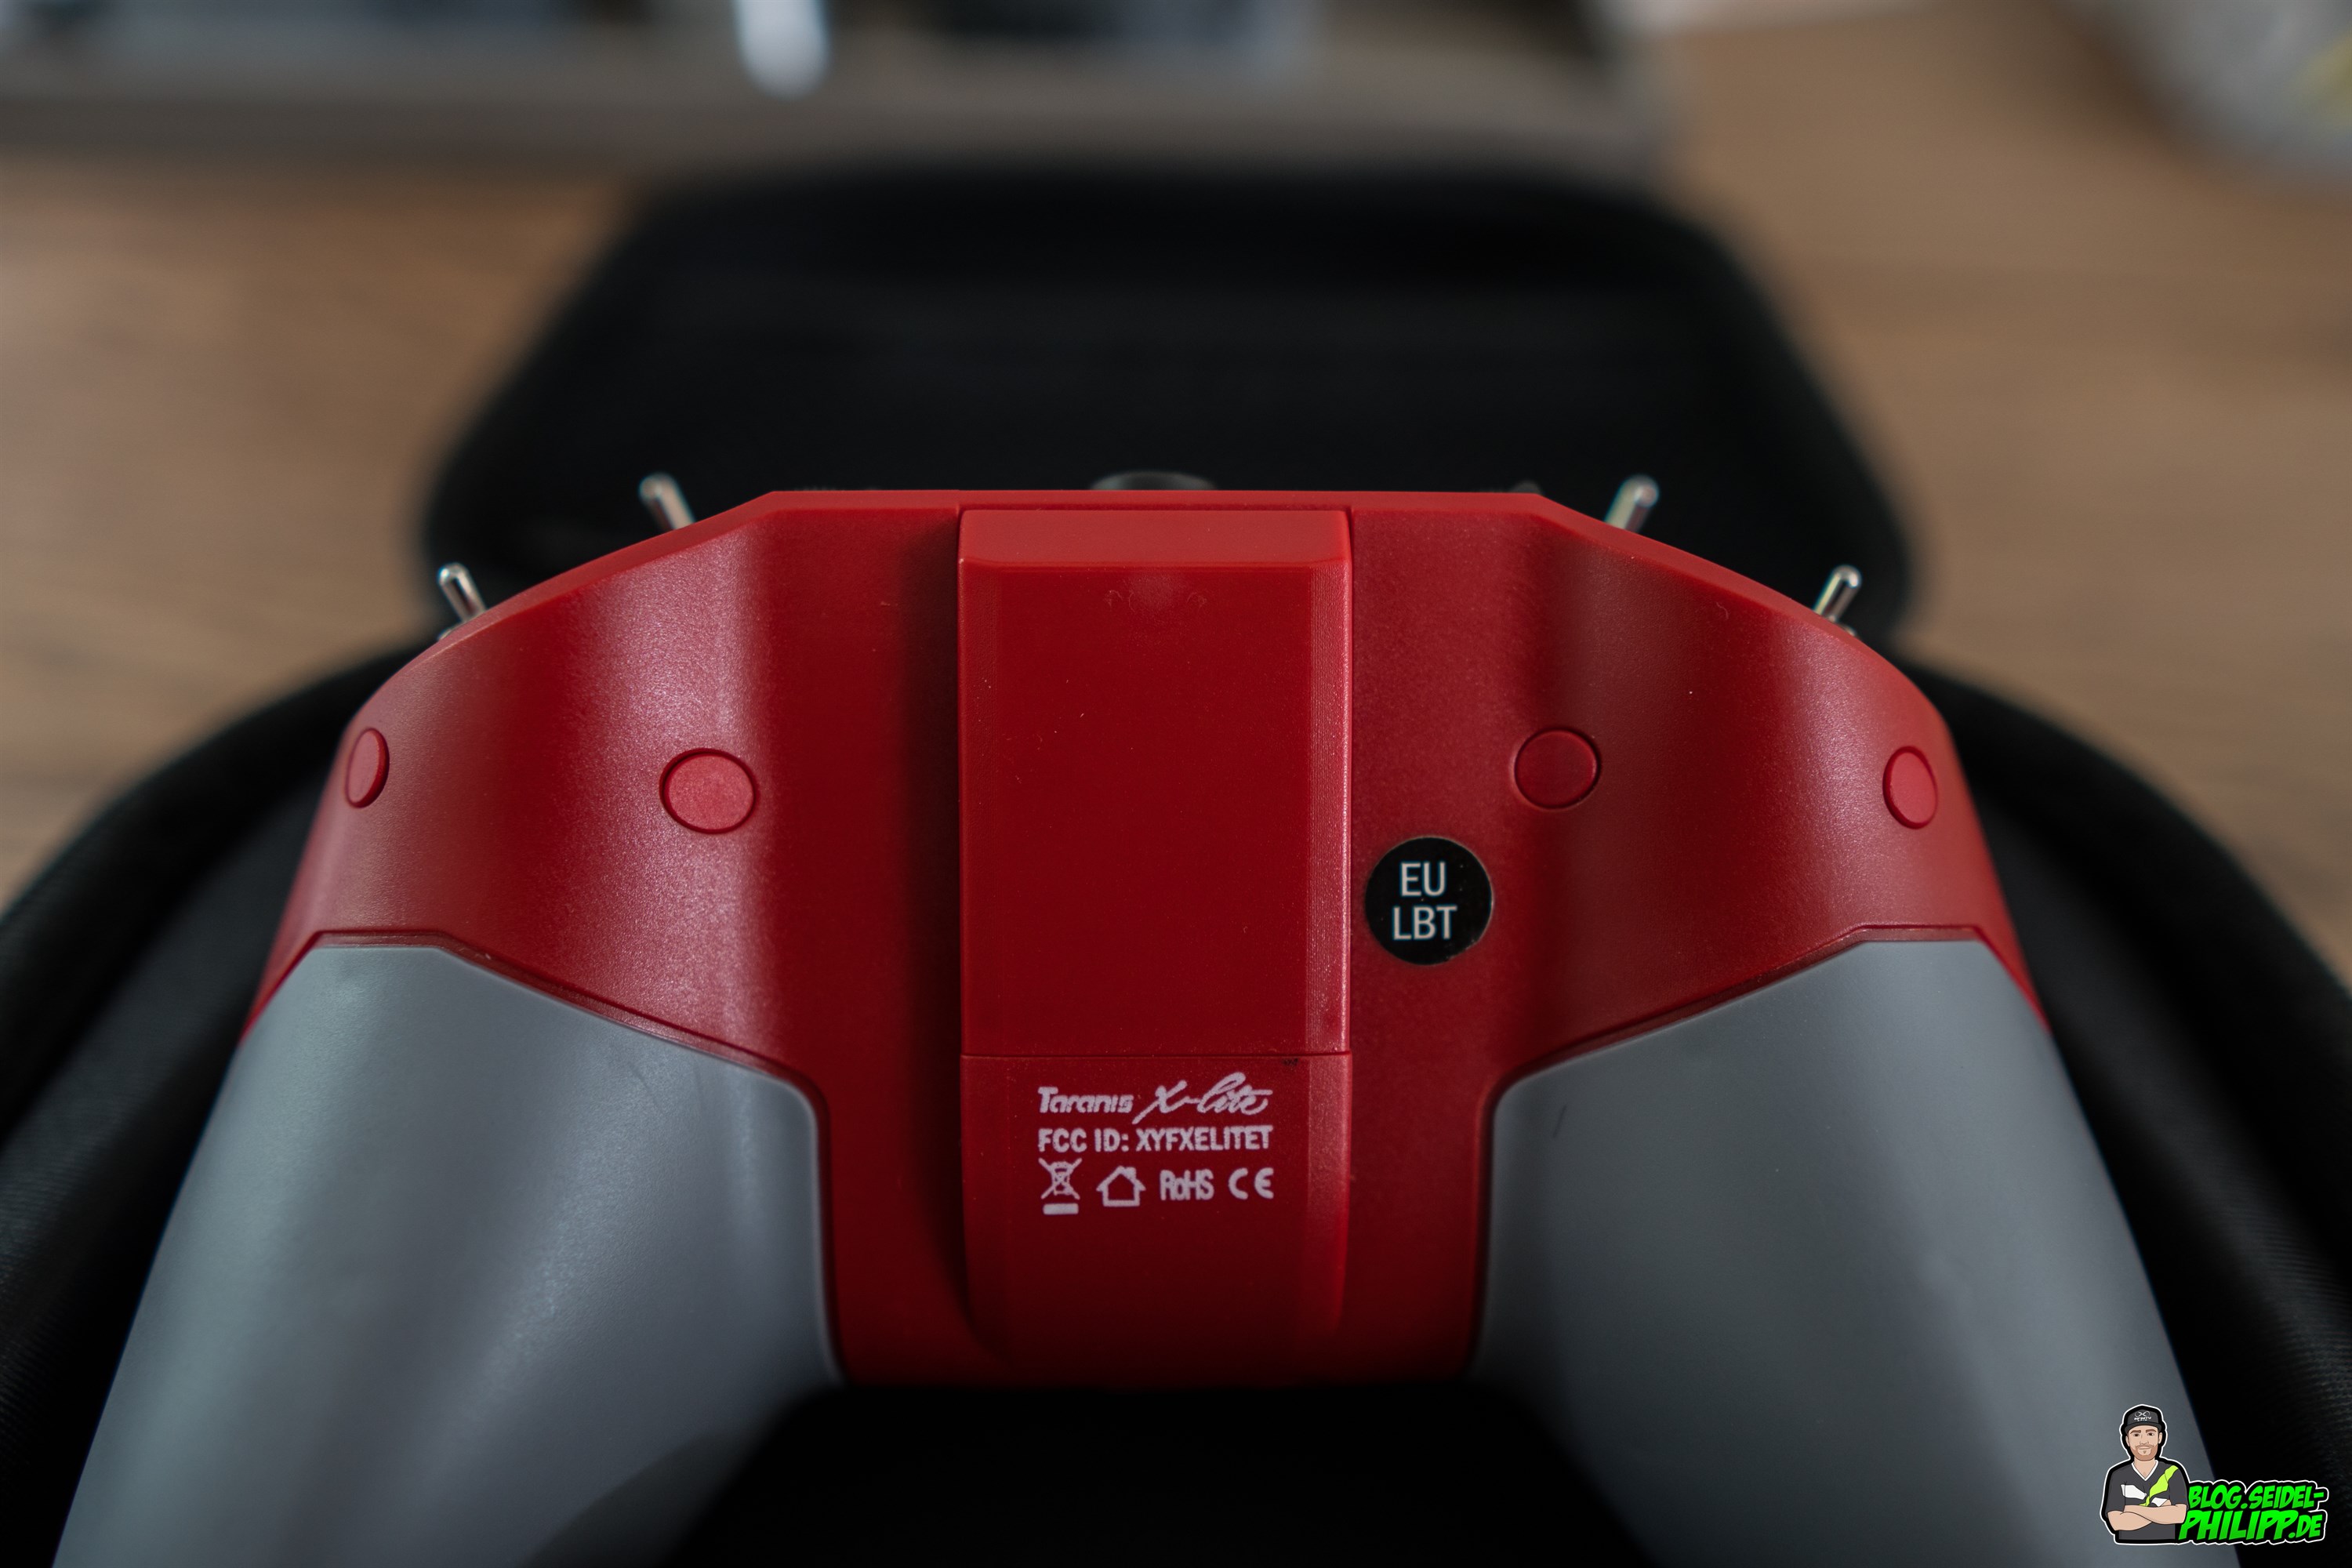
Lastly, you put the rubber plugs on the holes and you have a Mode 2 remote control.
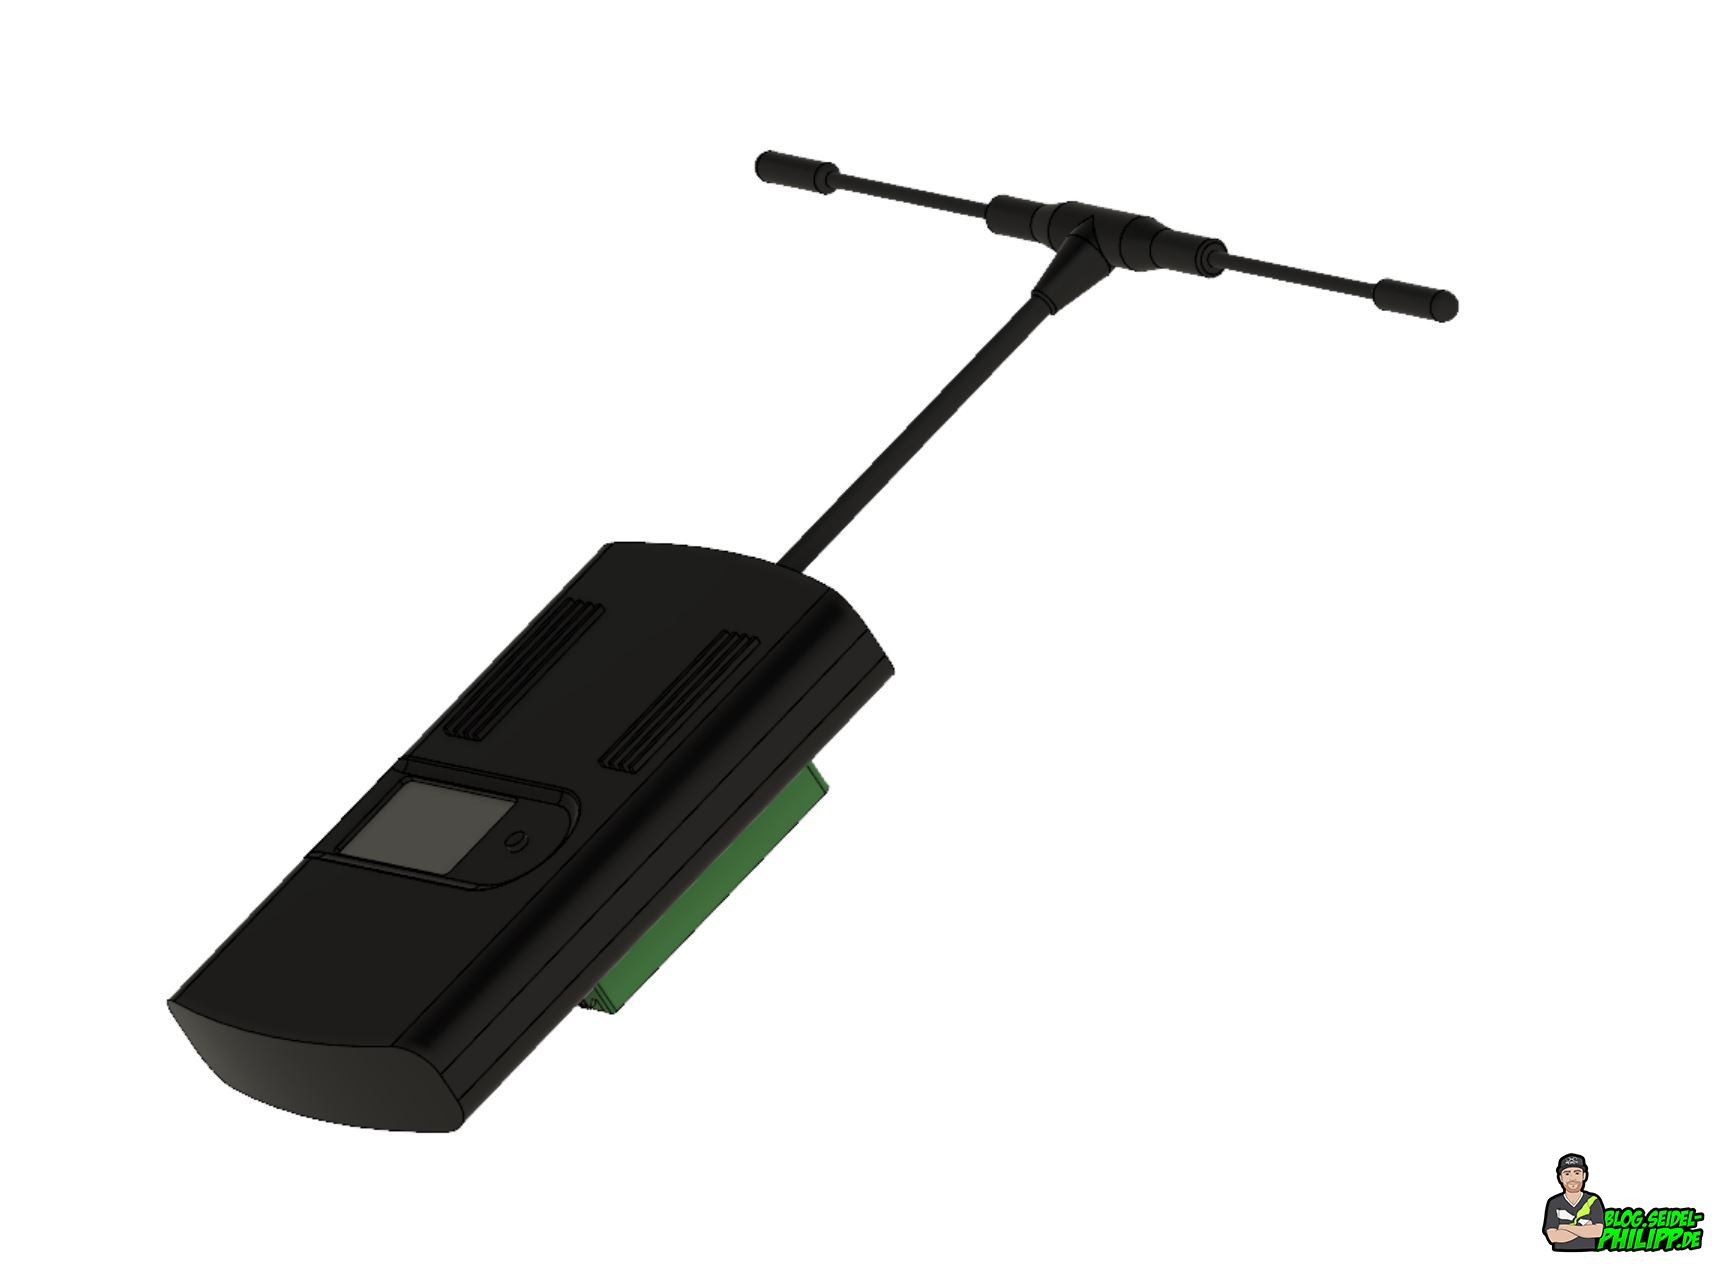
Teamblacksheep Crossfire Module
After the hardware specifications of the FrSky Taranis X-Lite were released, I was very sure that we did not need to make an inverter mod for the X-Lite to run the Crossfire module. According to the data sheet, external modules with a baud rate of up to 420khz can be connected.
Wiring
On the blog racefpv.eu you will find instructions for wiring up a crossfire module
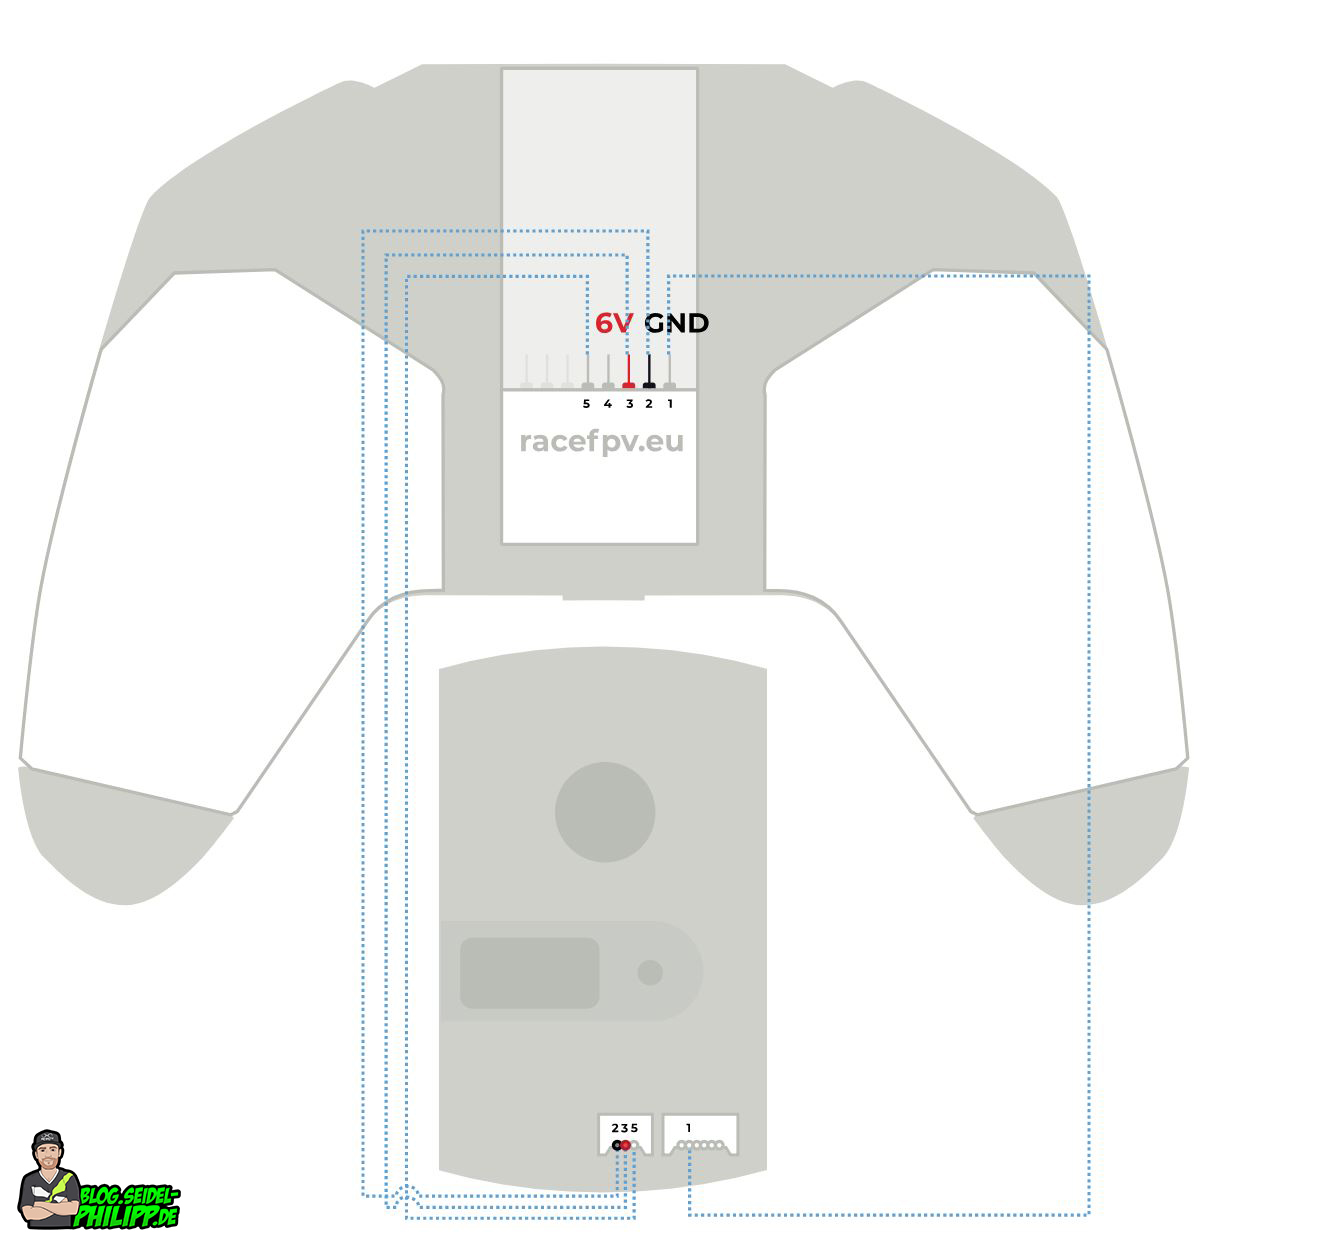
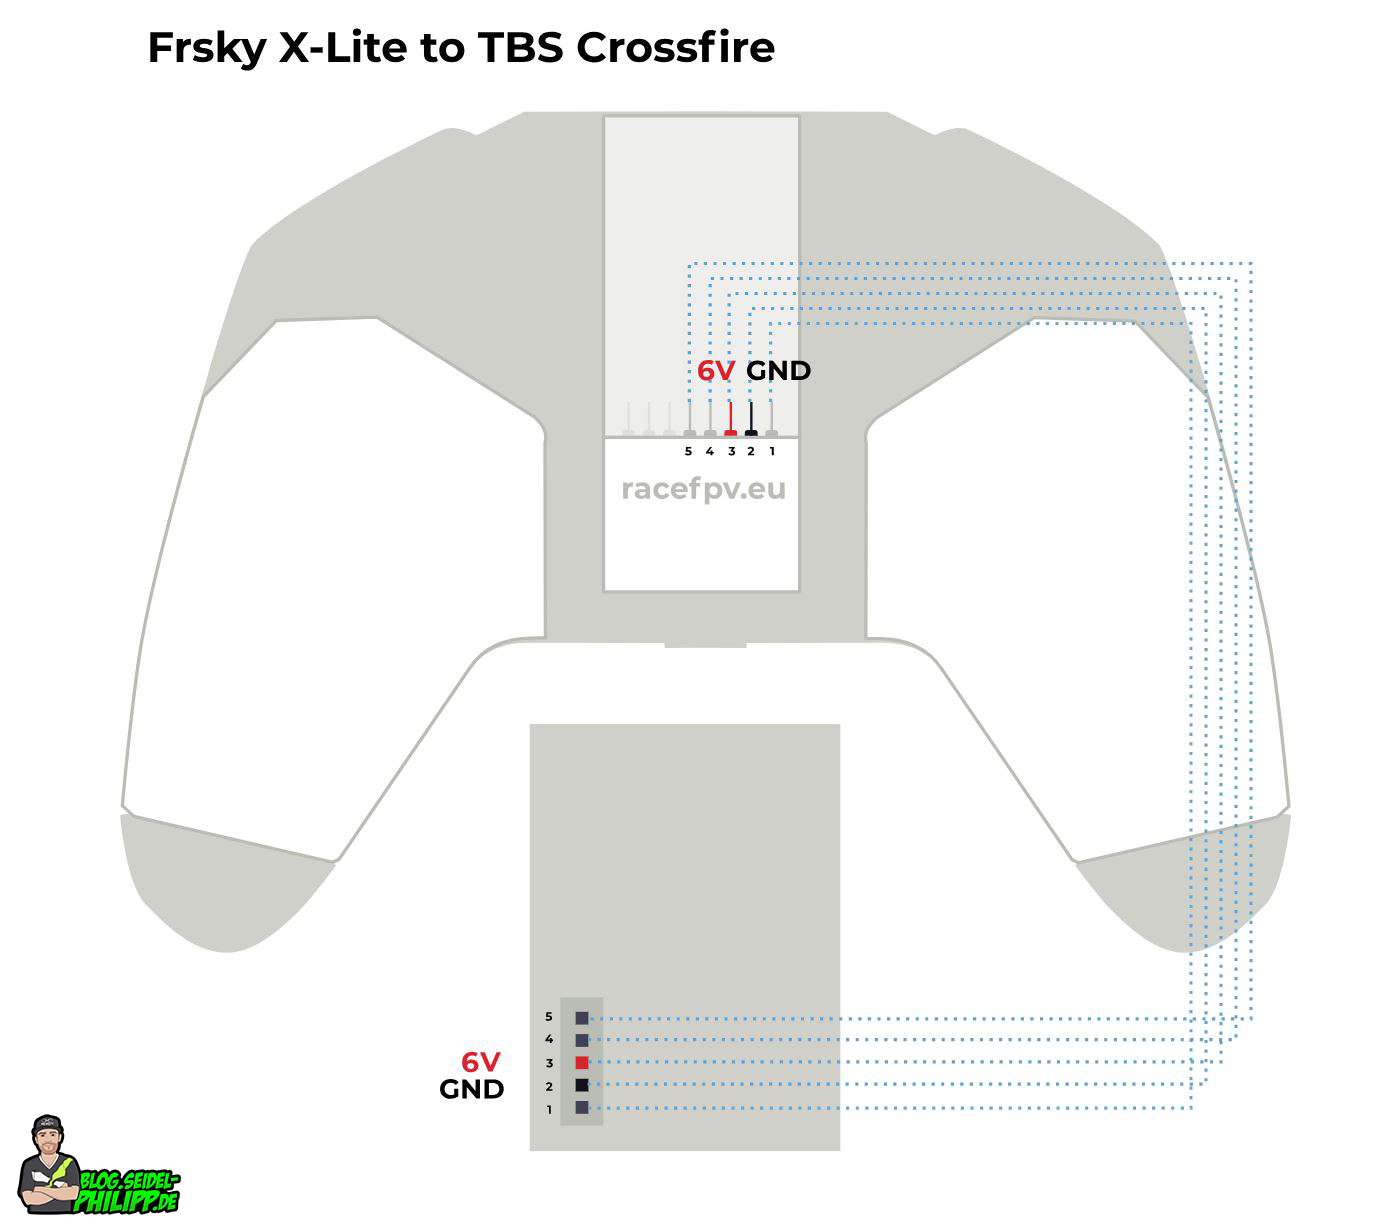
(Images by racefpv.eu)
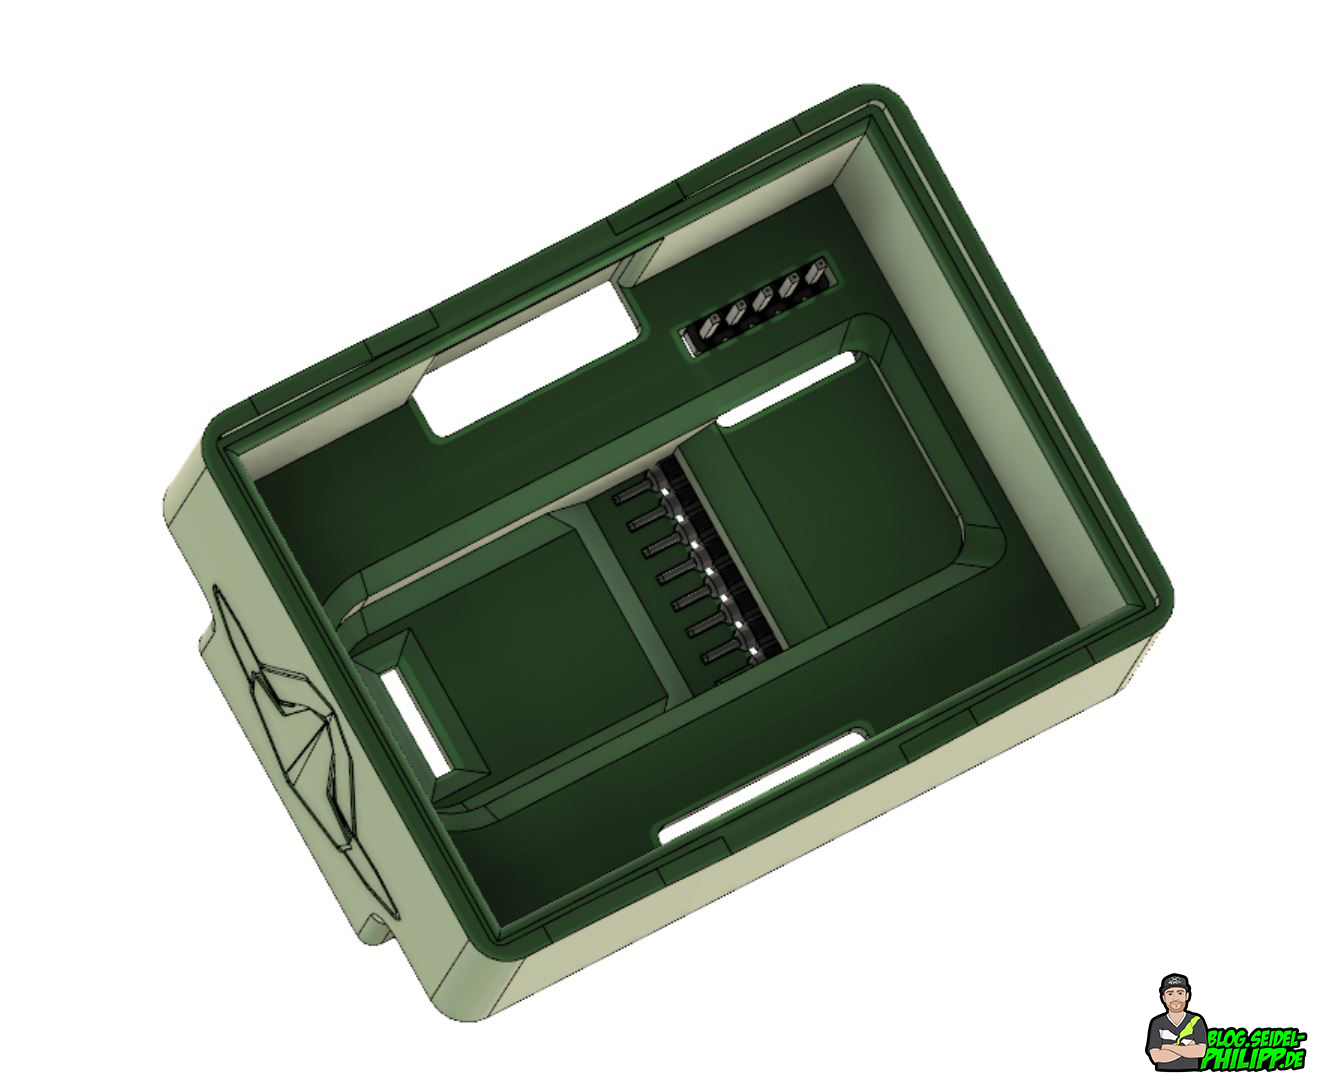
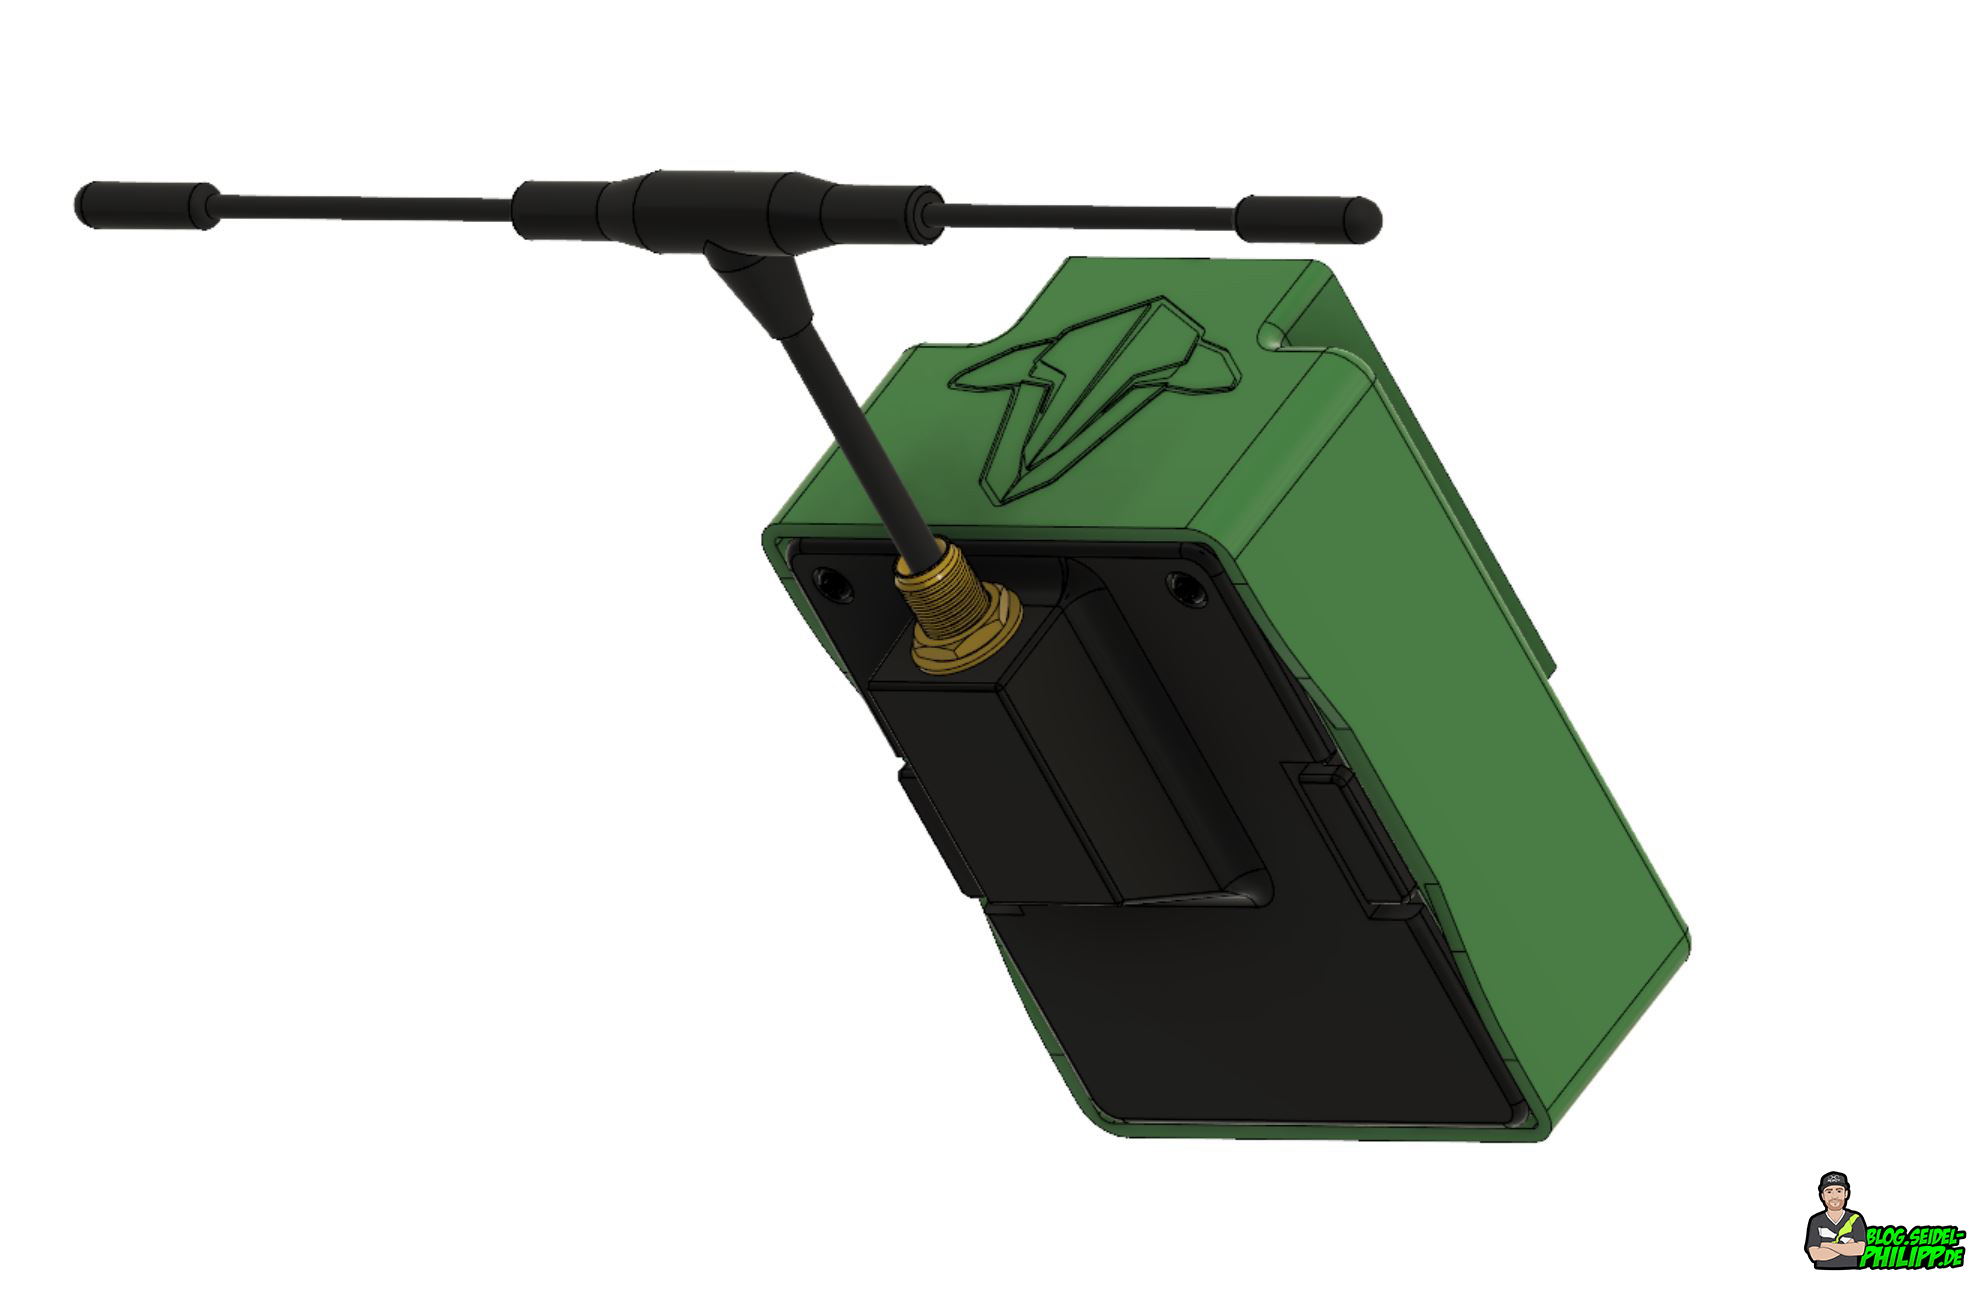
3D printed adapter
Since I have always wanted to have a SLA / DLP printer, this project then prompted me to buy a 3D printer. A DLP printer cures the liquid resin layer by layer using a UV LED screen. Since the resin is relatively expensive, I probably will not be able to make cheap SLA prints for you.
For the prototypes, I then quickly emptied the first bottle of resin, but now I have two adapters that I would not want to deprive you.
Oh yeah…. if you want to use the adapters you can of course download them here on my page. If you like my work I would be happy about a small amount for the resin piggy bank. THANK YOU!
FDM Printer: If your FDM printer is set up very well and you can print very fine layers, it is possible to print the adapters made of ABS or PETG with 100% infill.
If you do not have access to a 3D printer, you can also order it here:
- TBS Crossfire MicroTX JR Adapter for FrSky X-Lite
- TBS Crossfire Full Adapter for FrSky X-Lite
- TBS Crossfire MicroTX LOW PROFILE for FrSky X-Lite
Download Thingiverse Files:
- https://www.thingiverse.com/thing:2975434 (MicroTX FullTX)
- https://www.thingiverse.com/thing:3070865 (low profile for MicroTX)
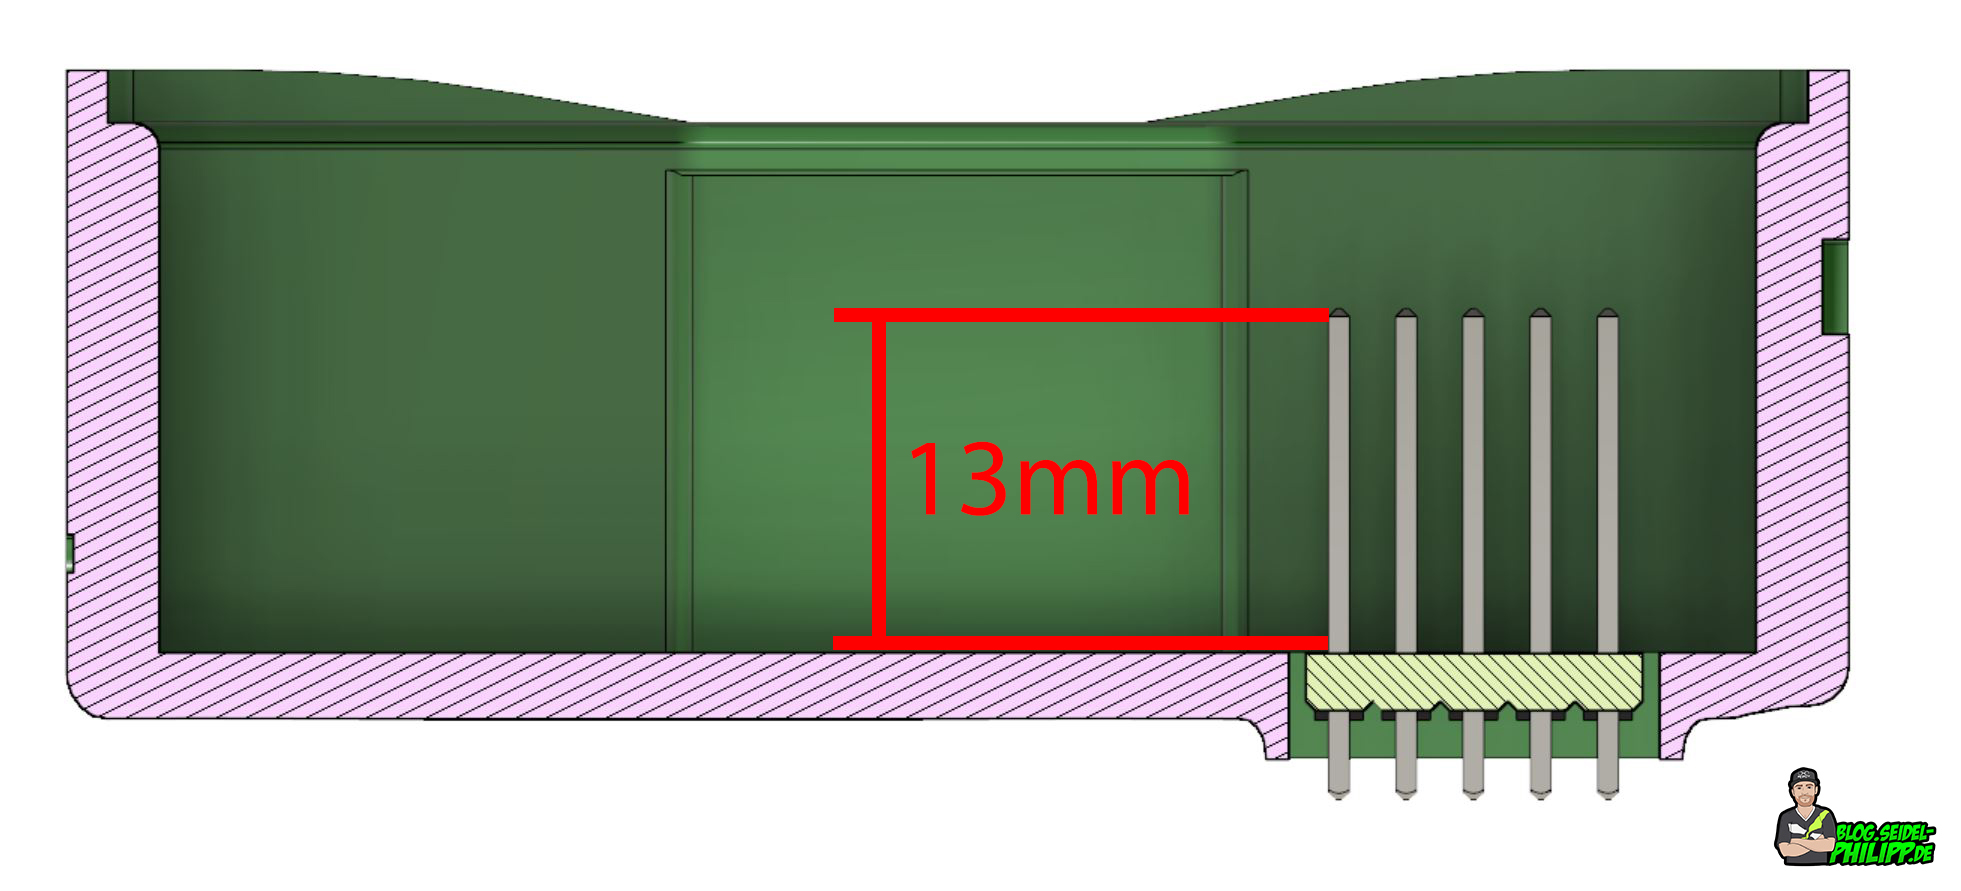
The following pin header are required
- 8x RM 2.54 Socket for round Pinheaders
- 5x RM 2.54 Pin Header (just for MicroTX JR Modulebay)
The pins in the module slot must be of the following length

MicroTX
Mit dem Laden des Videos akzeptieren Sie die Datenschutzerklärung von YouTube.
Mehr erfahren
Since the MicroTX is integrated in a JR module, there is unfortunately no other option but to print a module bay adapter.

Full-Size TX
Mit dem Laden des Videos akzeptieren Sie die Datenschutzerklärung von YouTube.
Mehr erfahren
The goal is to make the module as compatible as possible. For this reason, I recommend 3M Dual Lock on the TBS module to mount the TBS JR adapter (if present) and on the print part. This makes it possible to convert the module from X-Lite to JR module in a very short time. As a cable you need the plug type: Molex CLIK-Mate 1.25mm
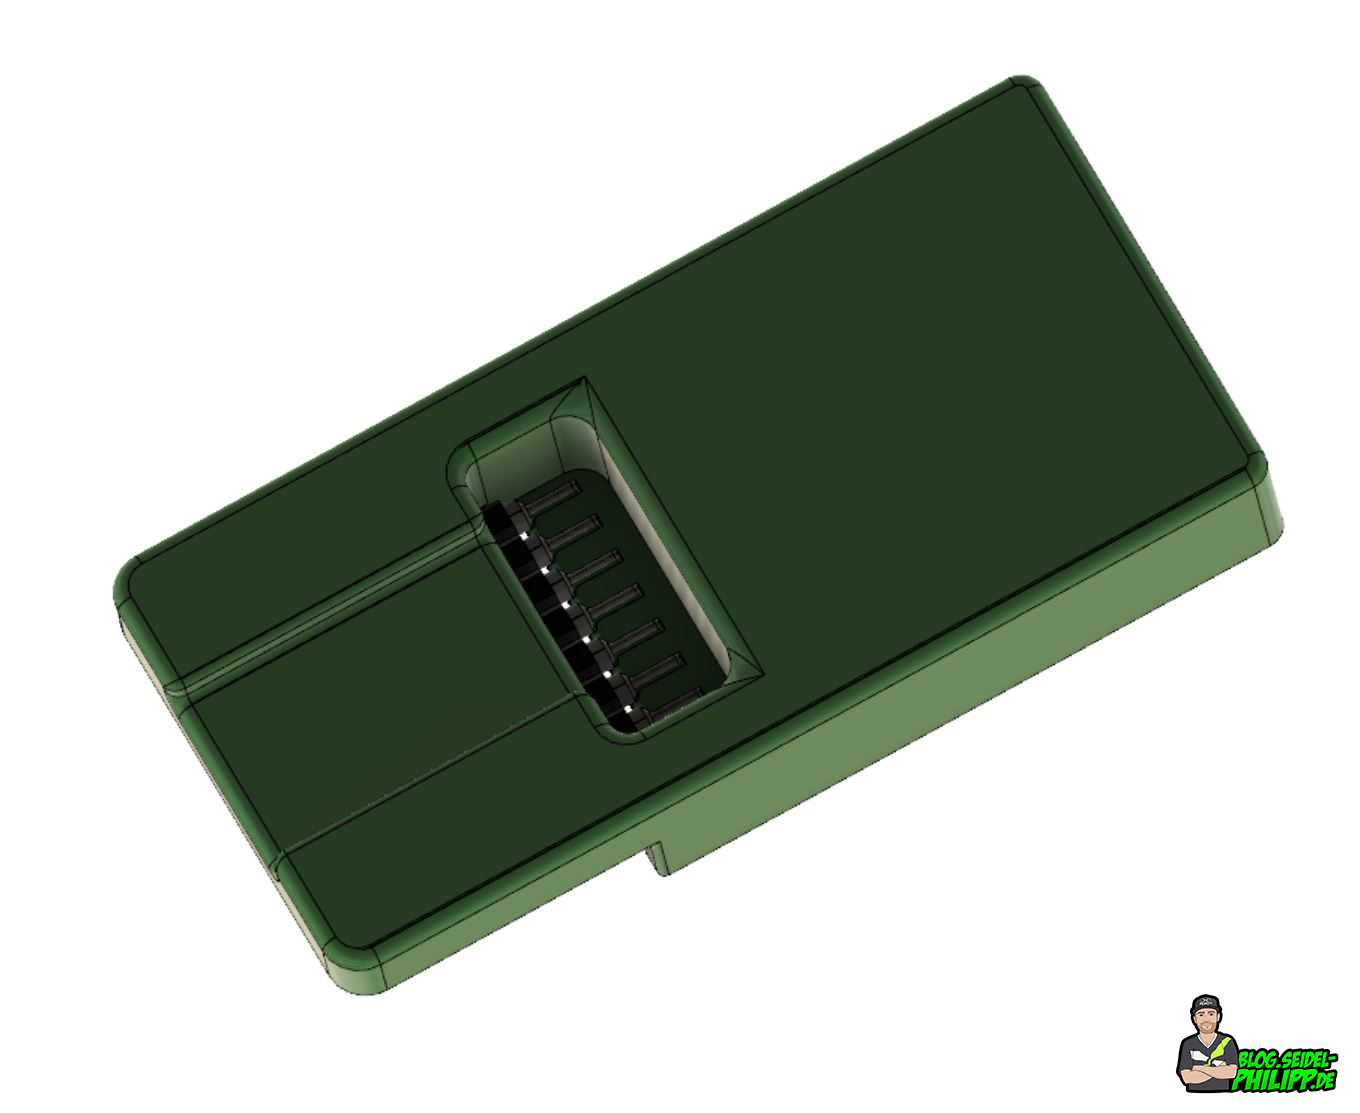

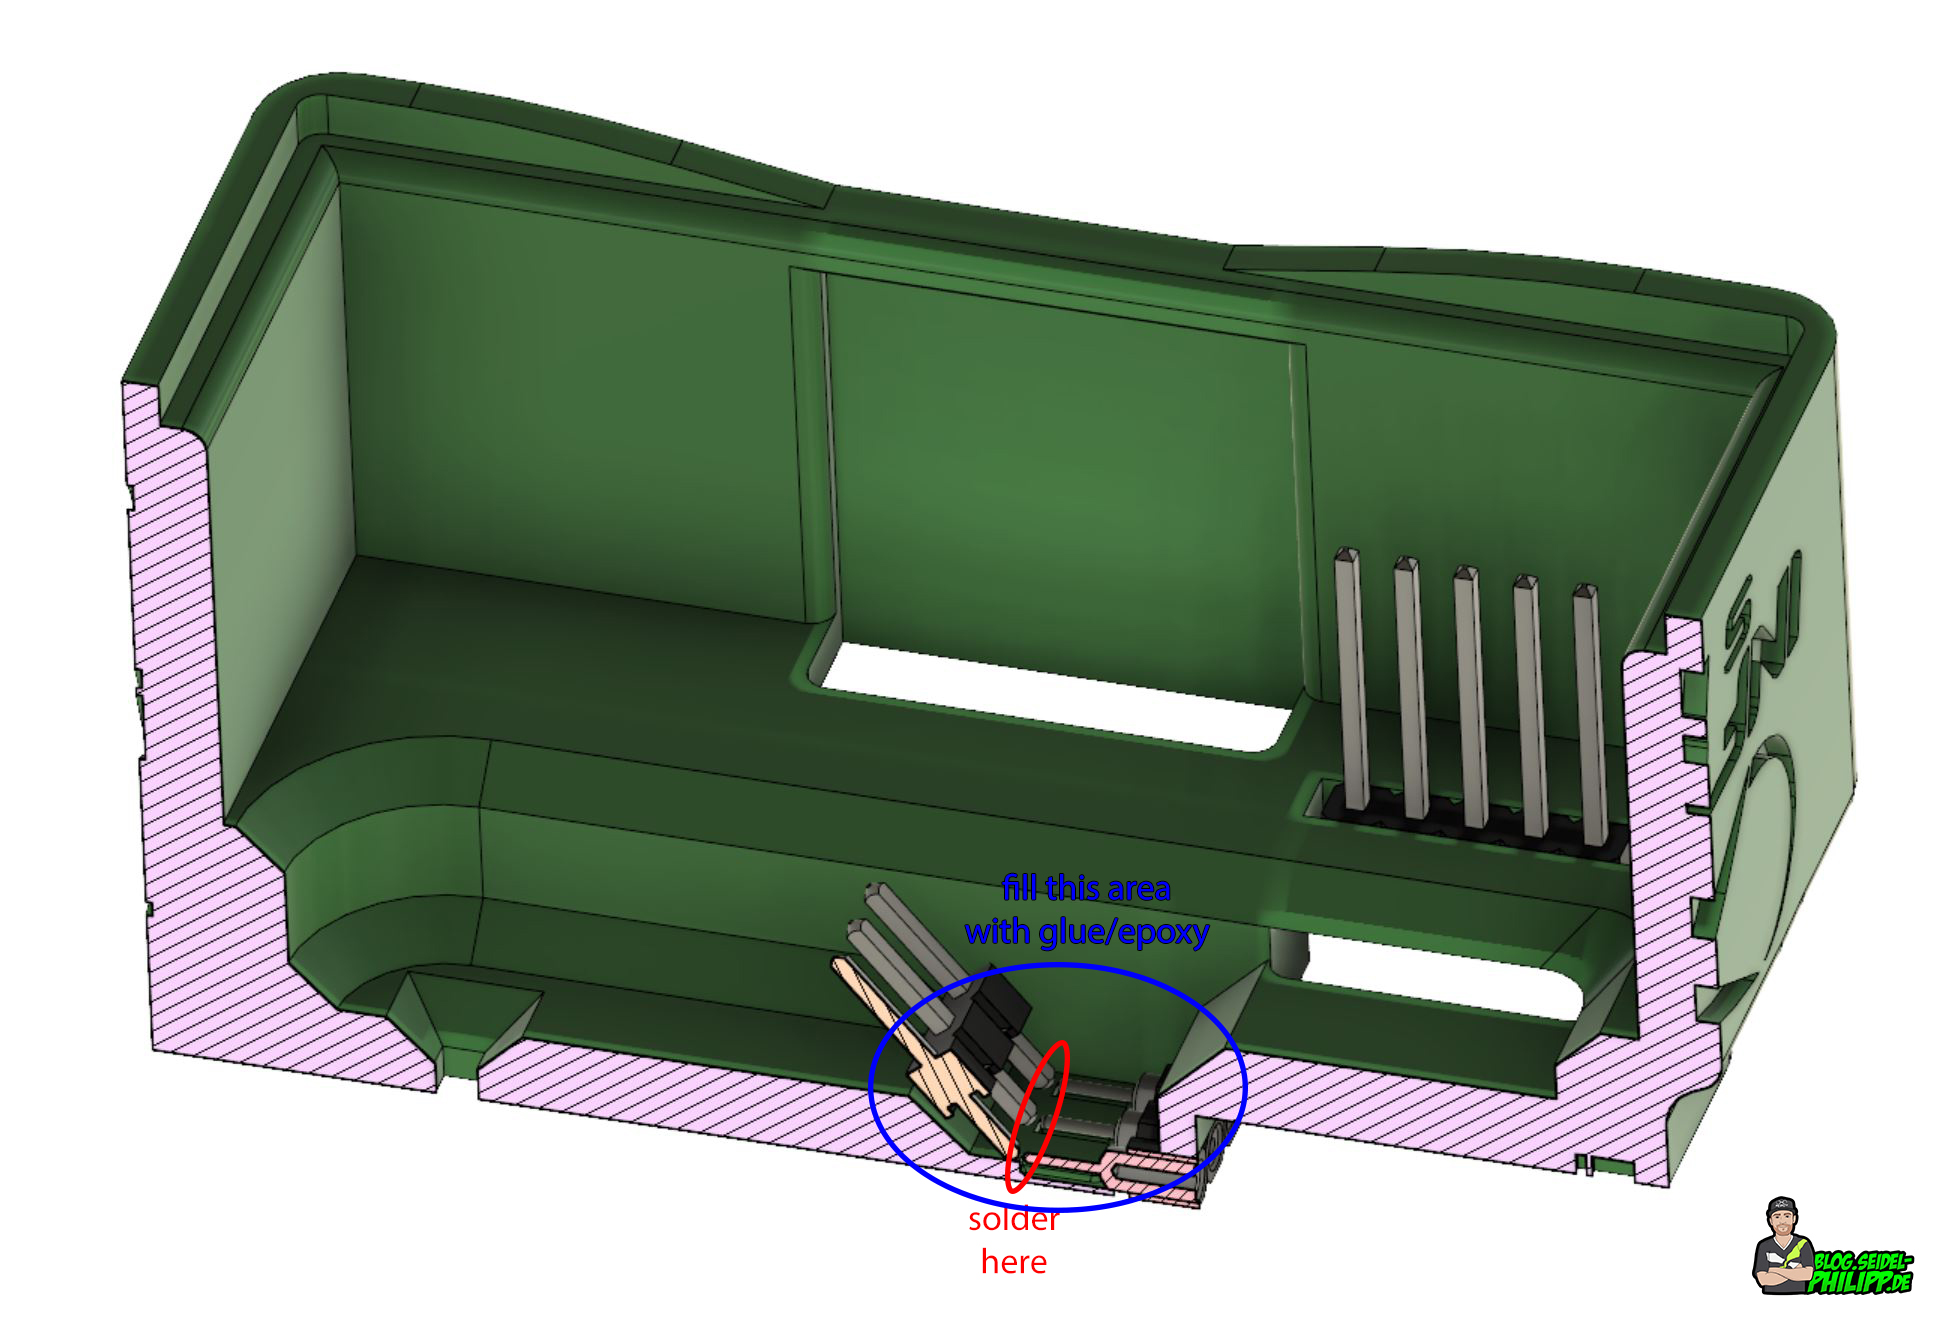
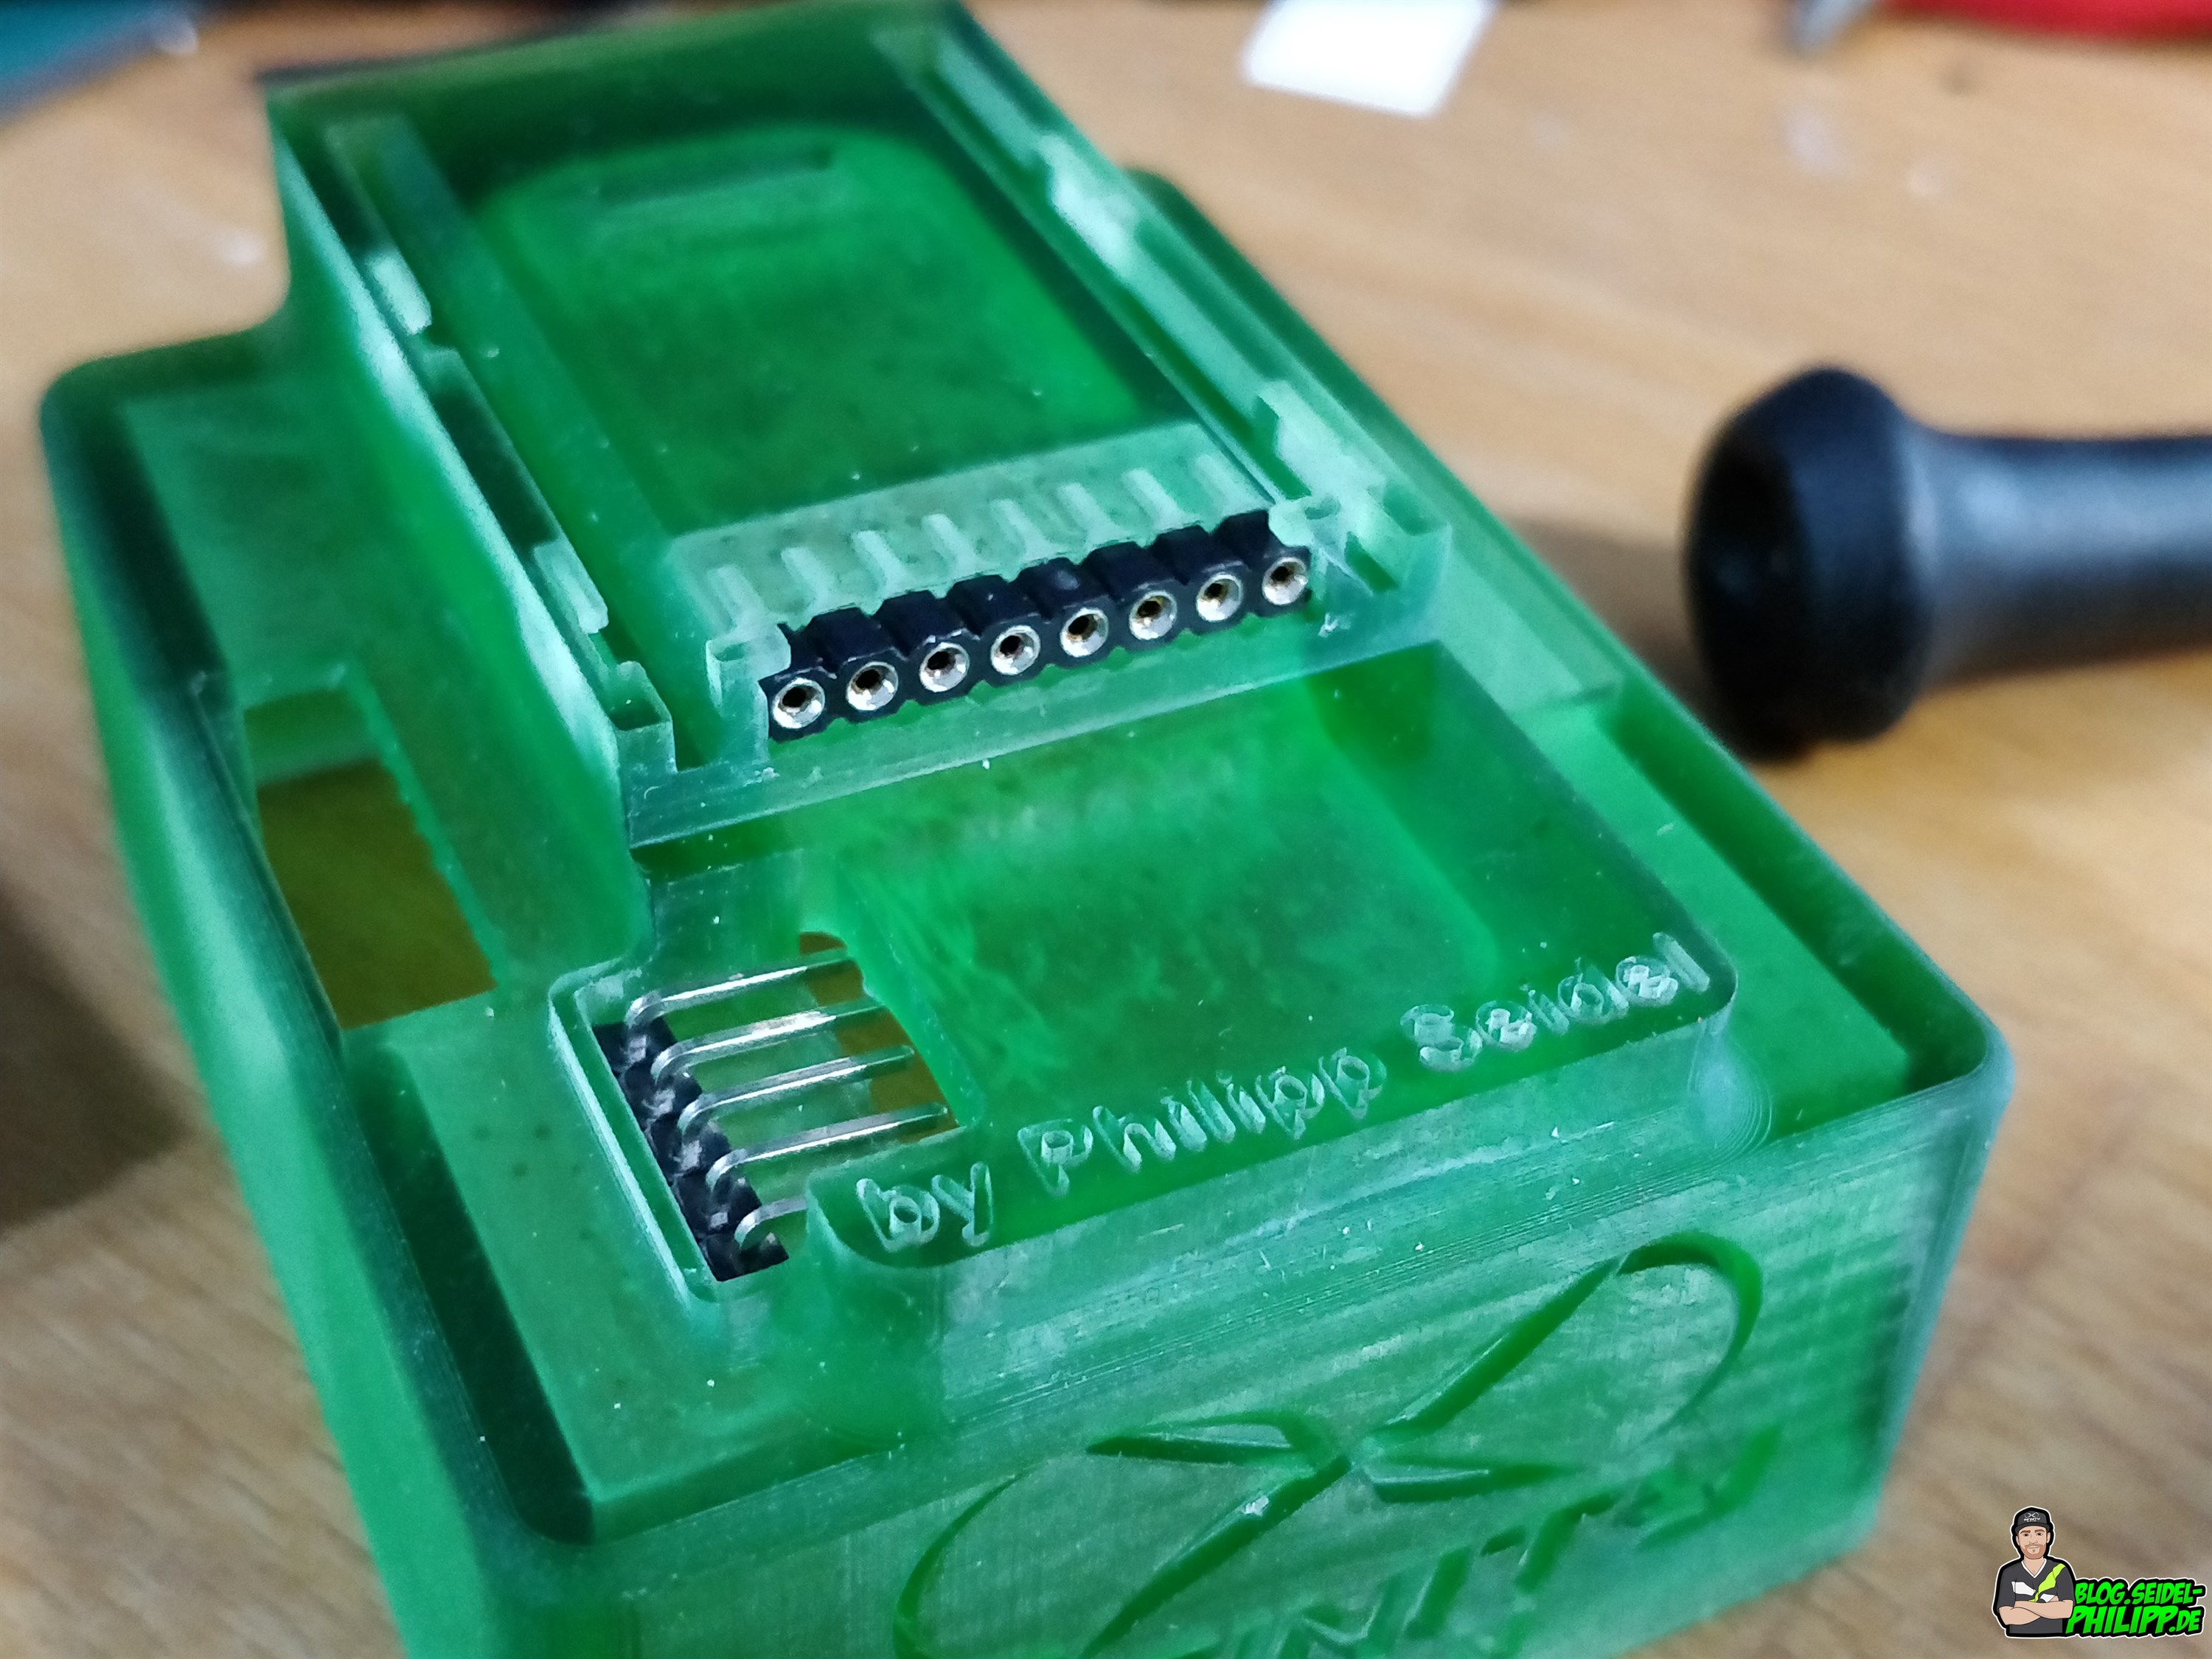
Please note that the X-Lite pins of the adapter hold very well to the pins of the X-Lite. That is why it is important that the pins are glued in the adapter. Solder in a 45-90 ° angle pin headers and then fill it with resin / hot melt adhesive, so that the angle is in the adhesive. In this way we ensure a proper strain relief. The same goes for the pins in the JR module bay.
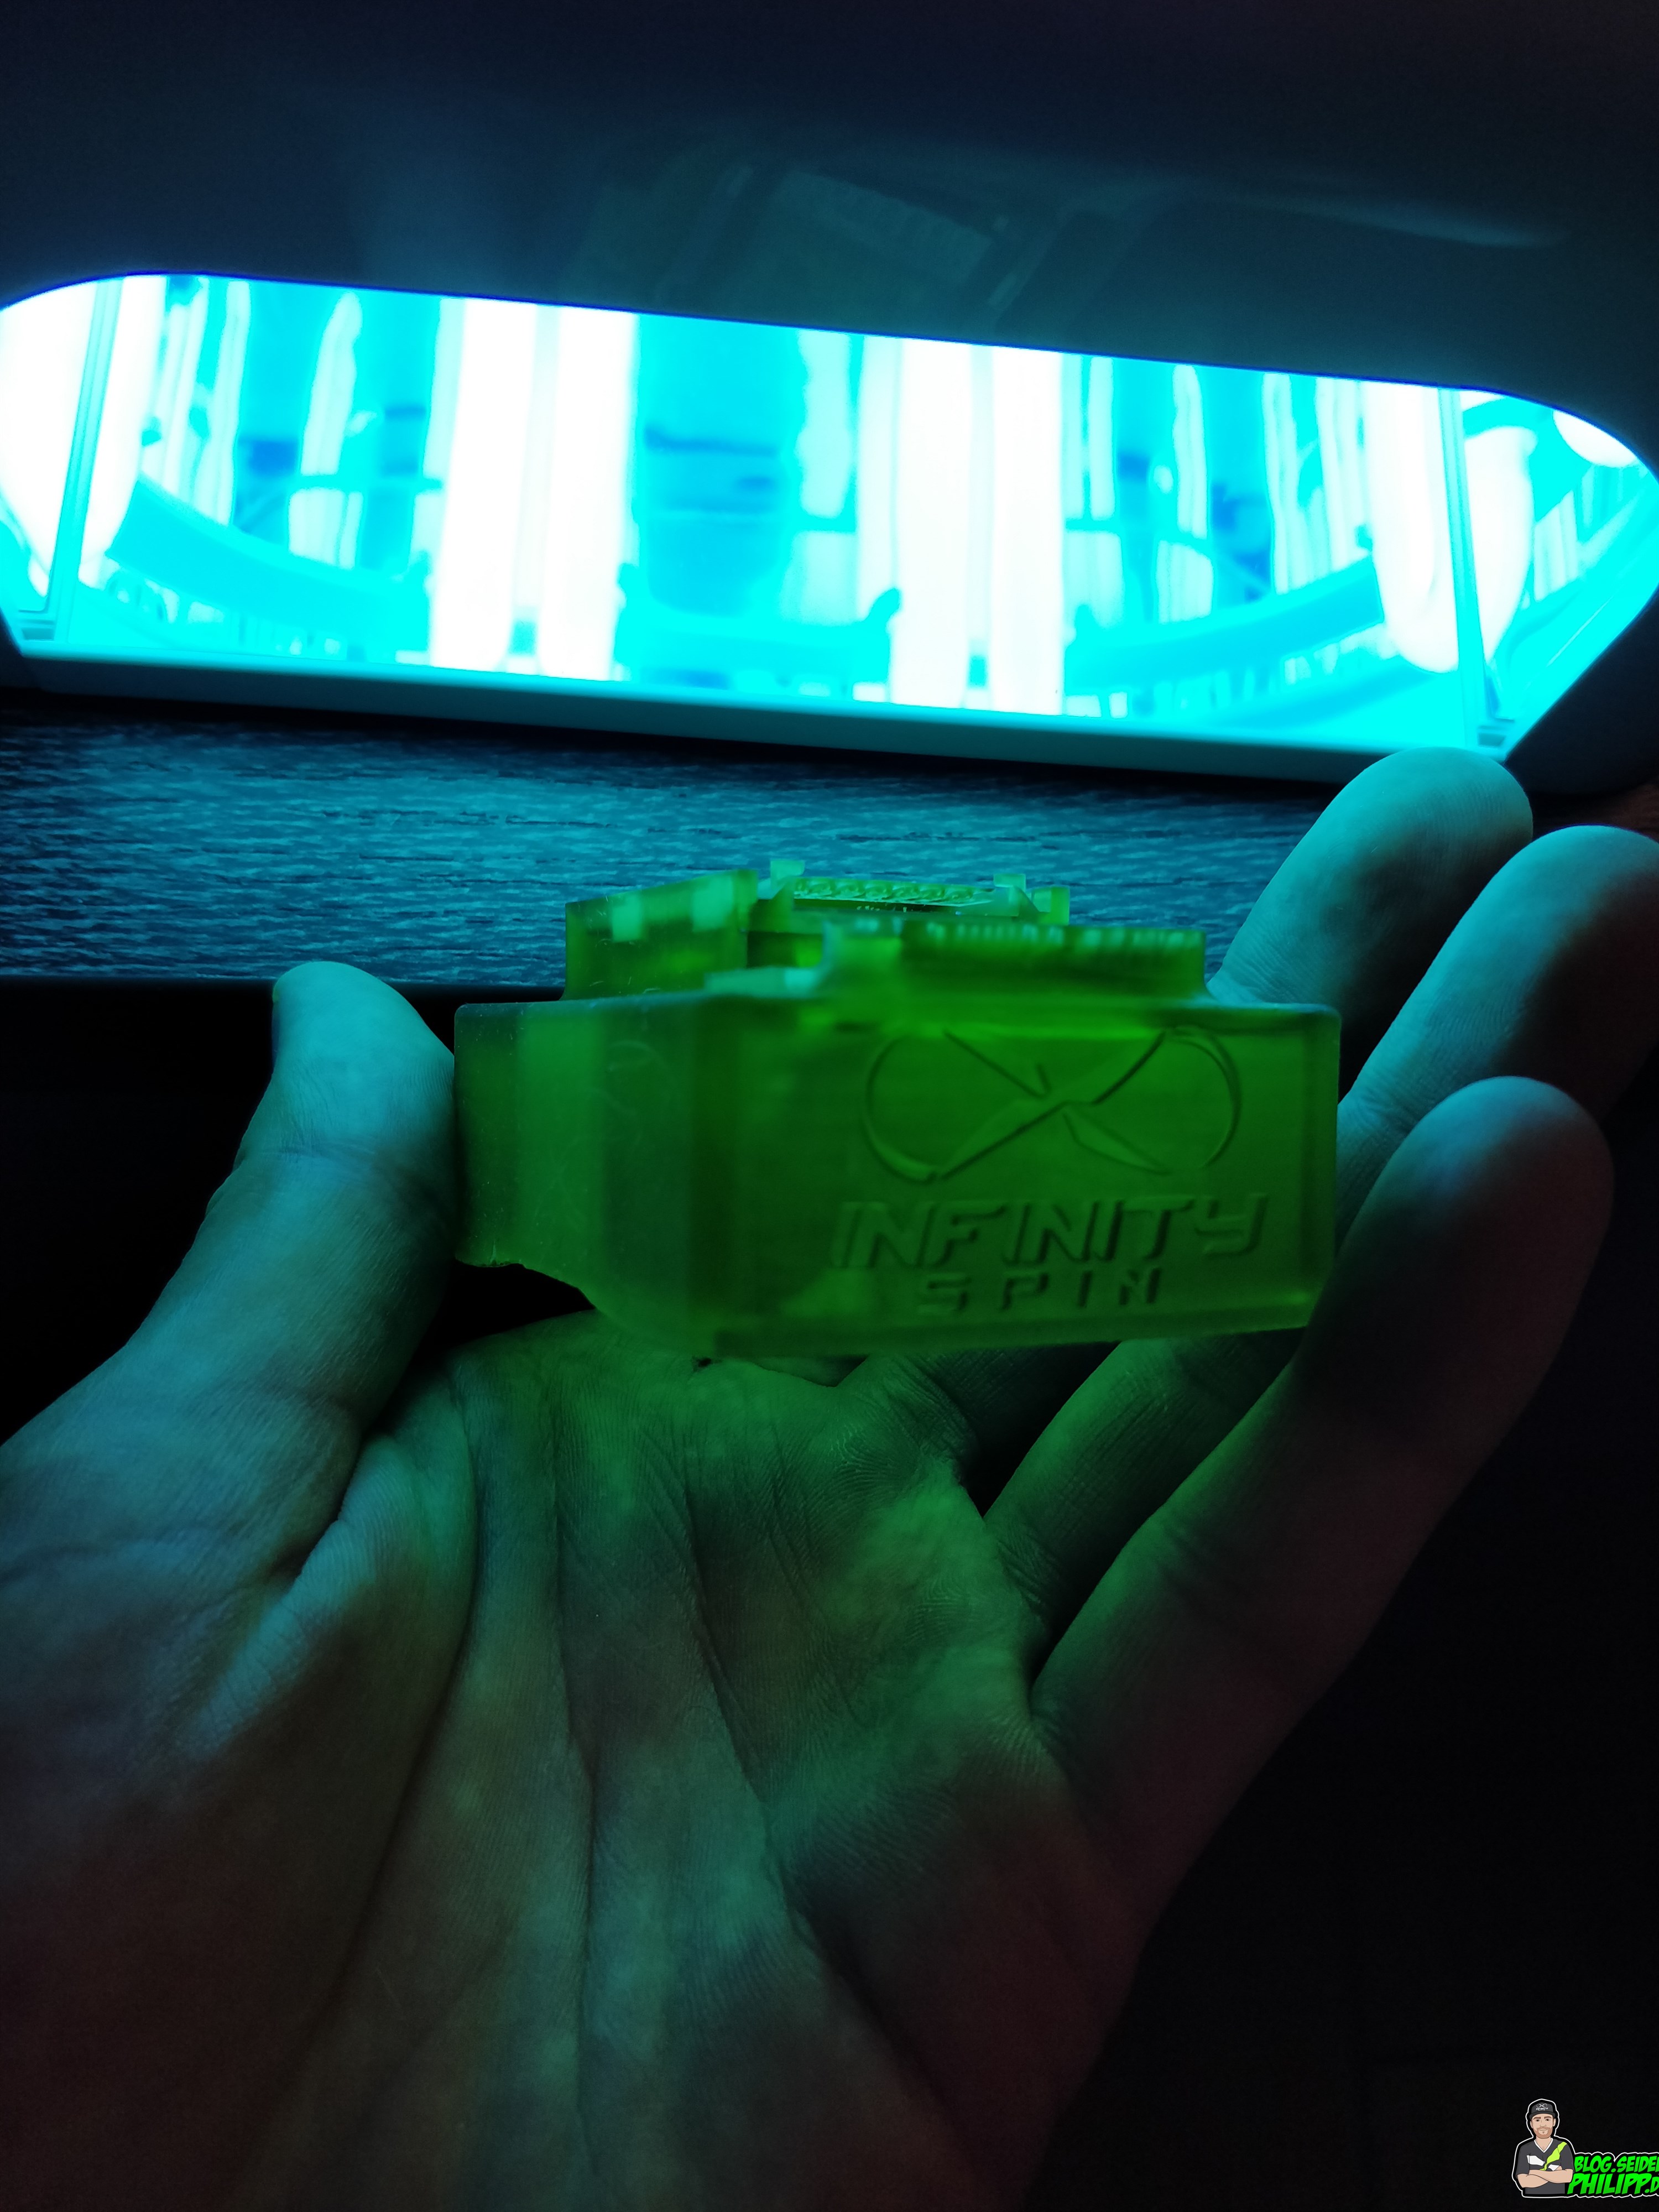
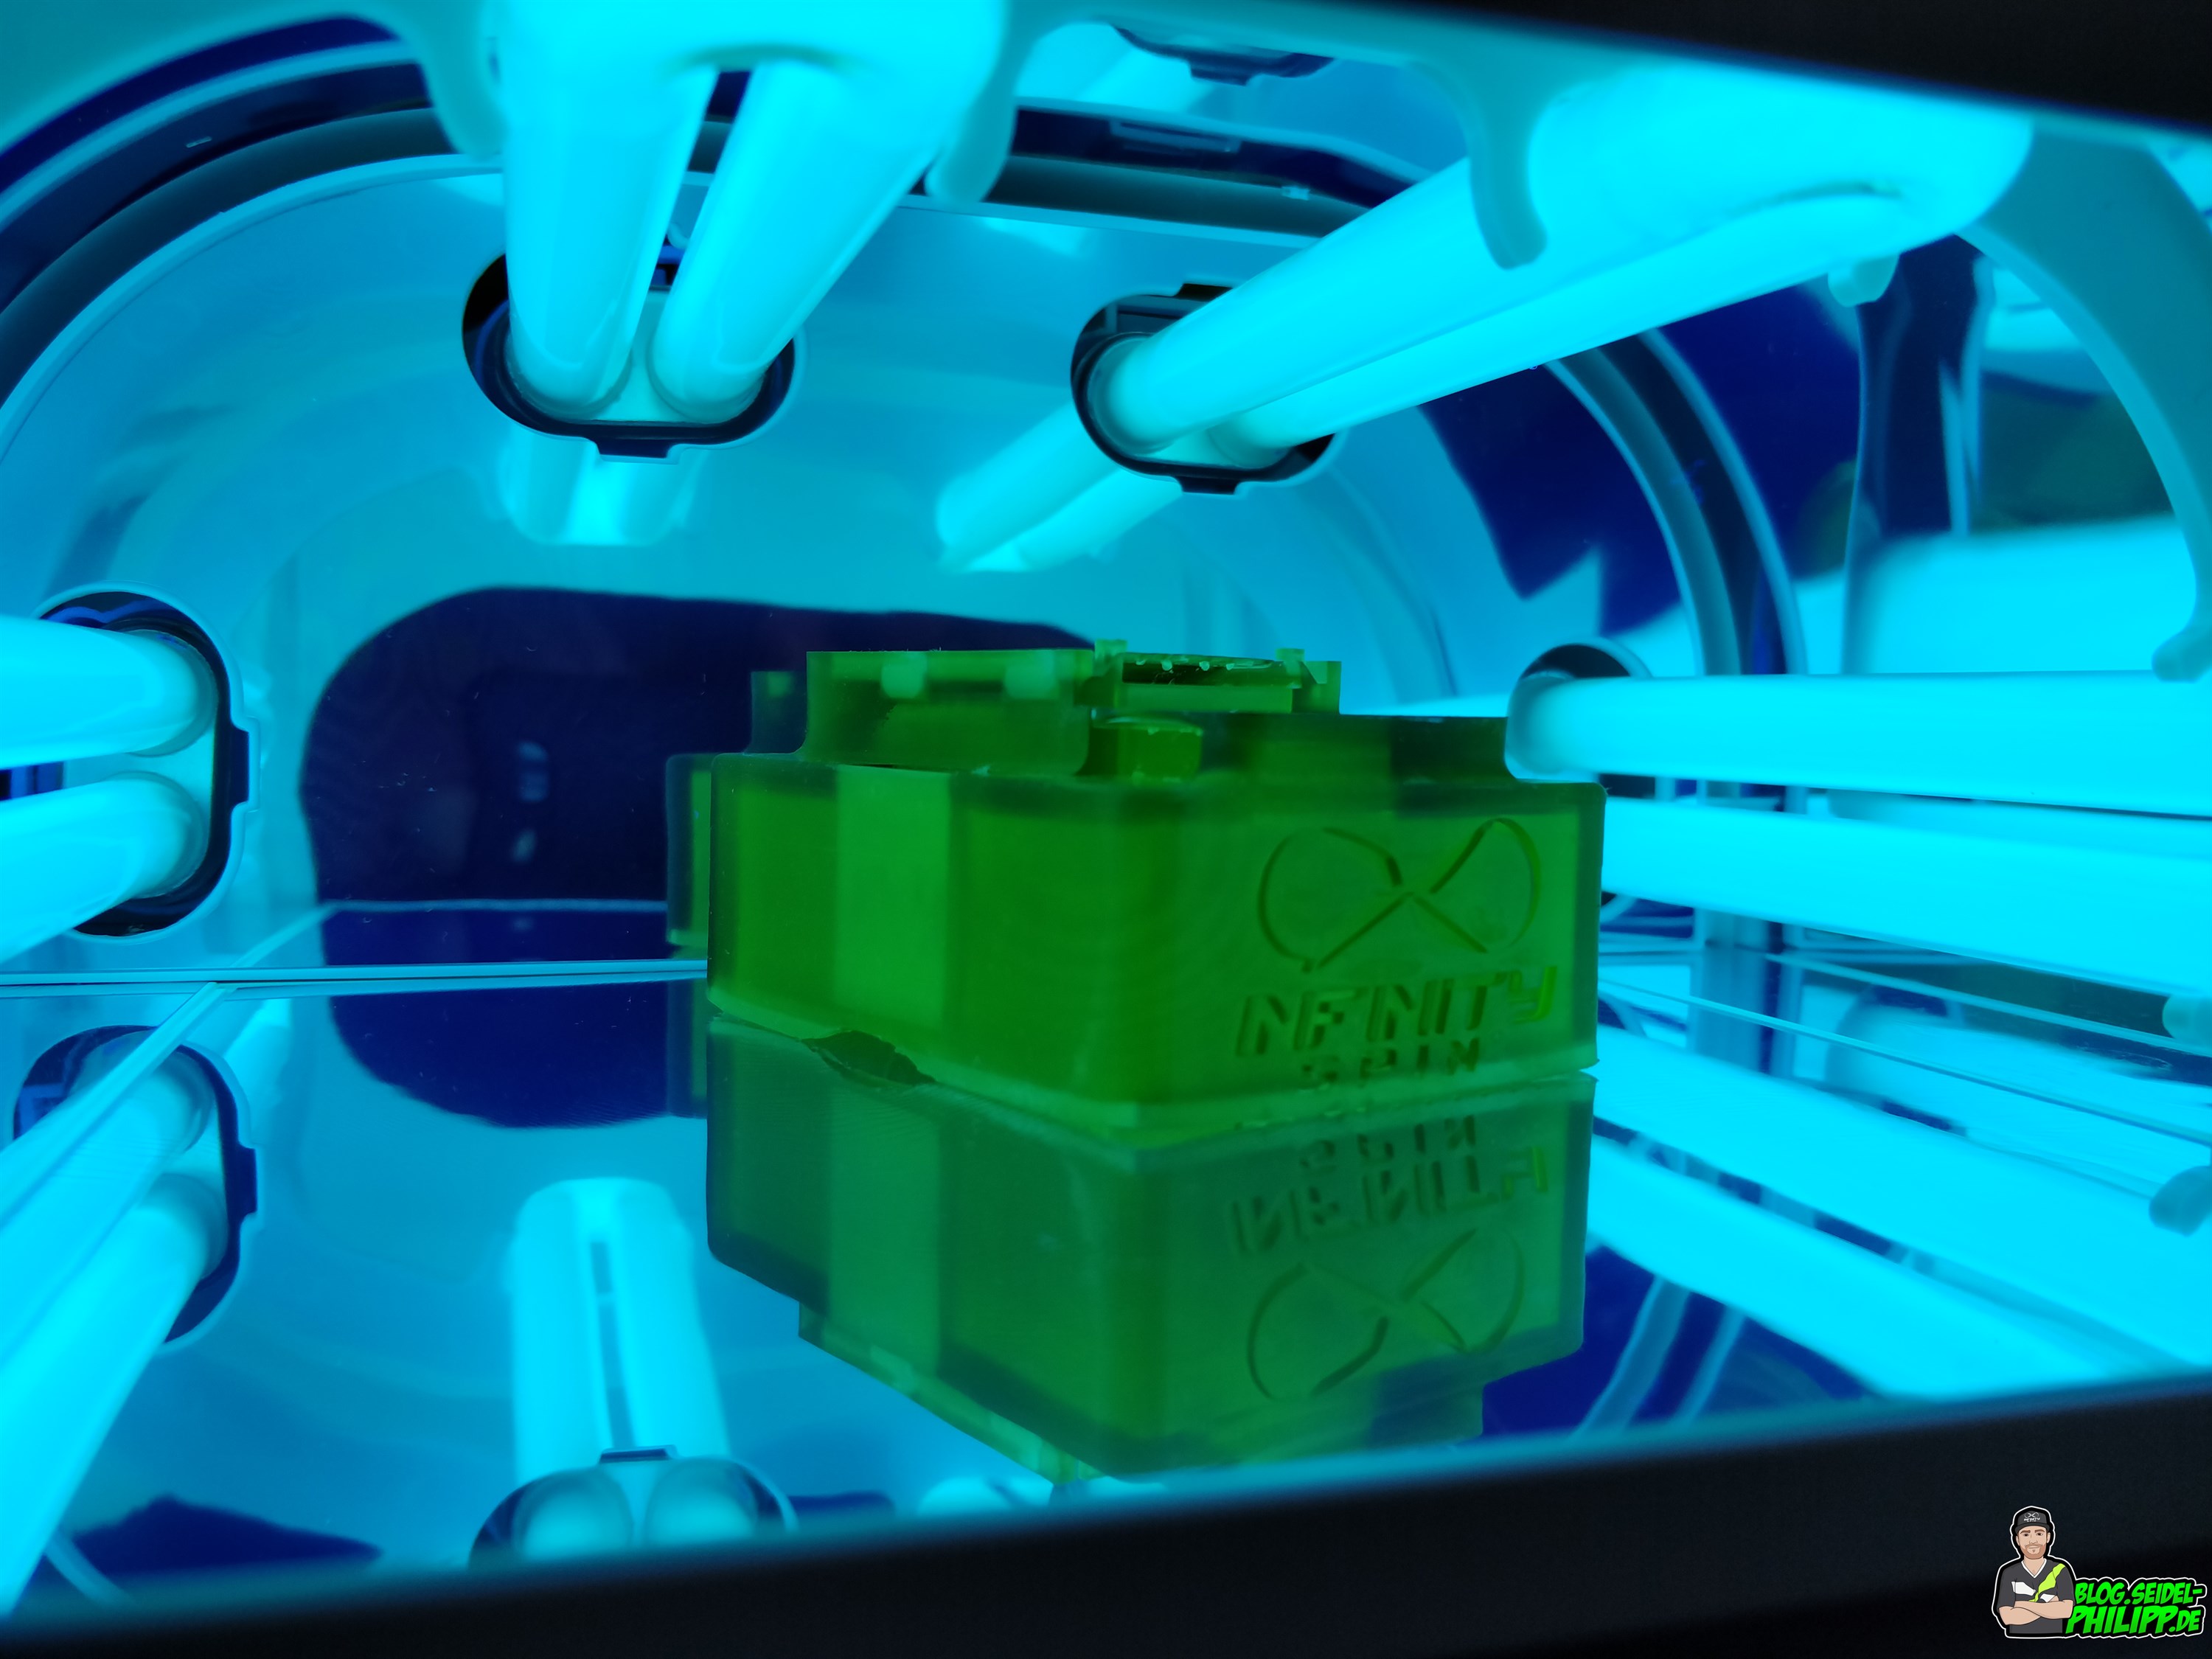
Photos
Here are a few photos. Resin printed parts are cleaned with isopropanol (99.9%) and post-cured under a UV lamp!


Module Bay
With the X-Lite FrSky has introduced a new kind of module bay.
The well-known JR bay has now become a slide bay. Modules are put on and snap in with a short movement downwards.
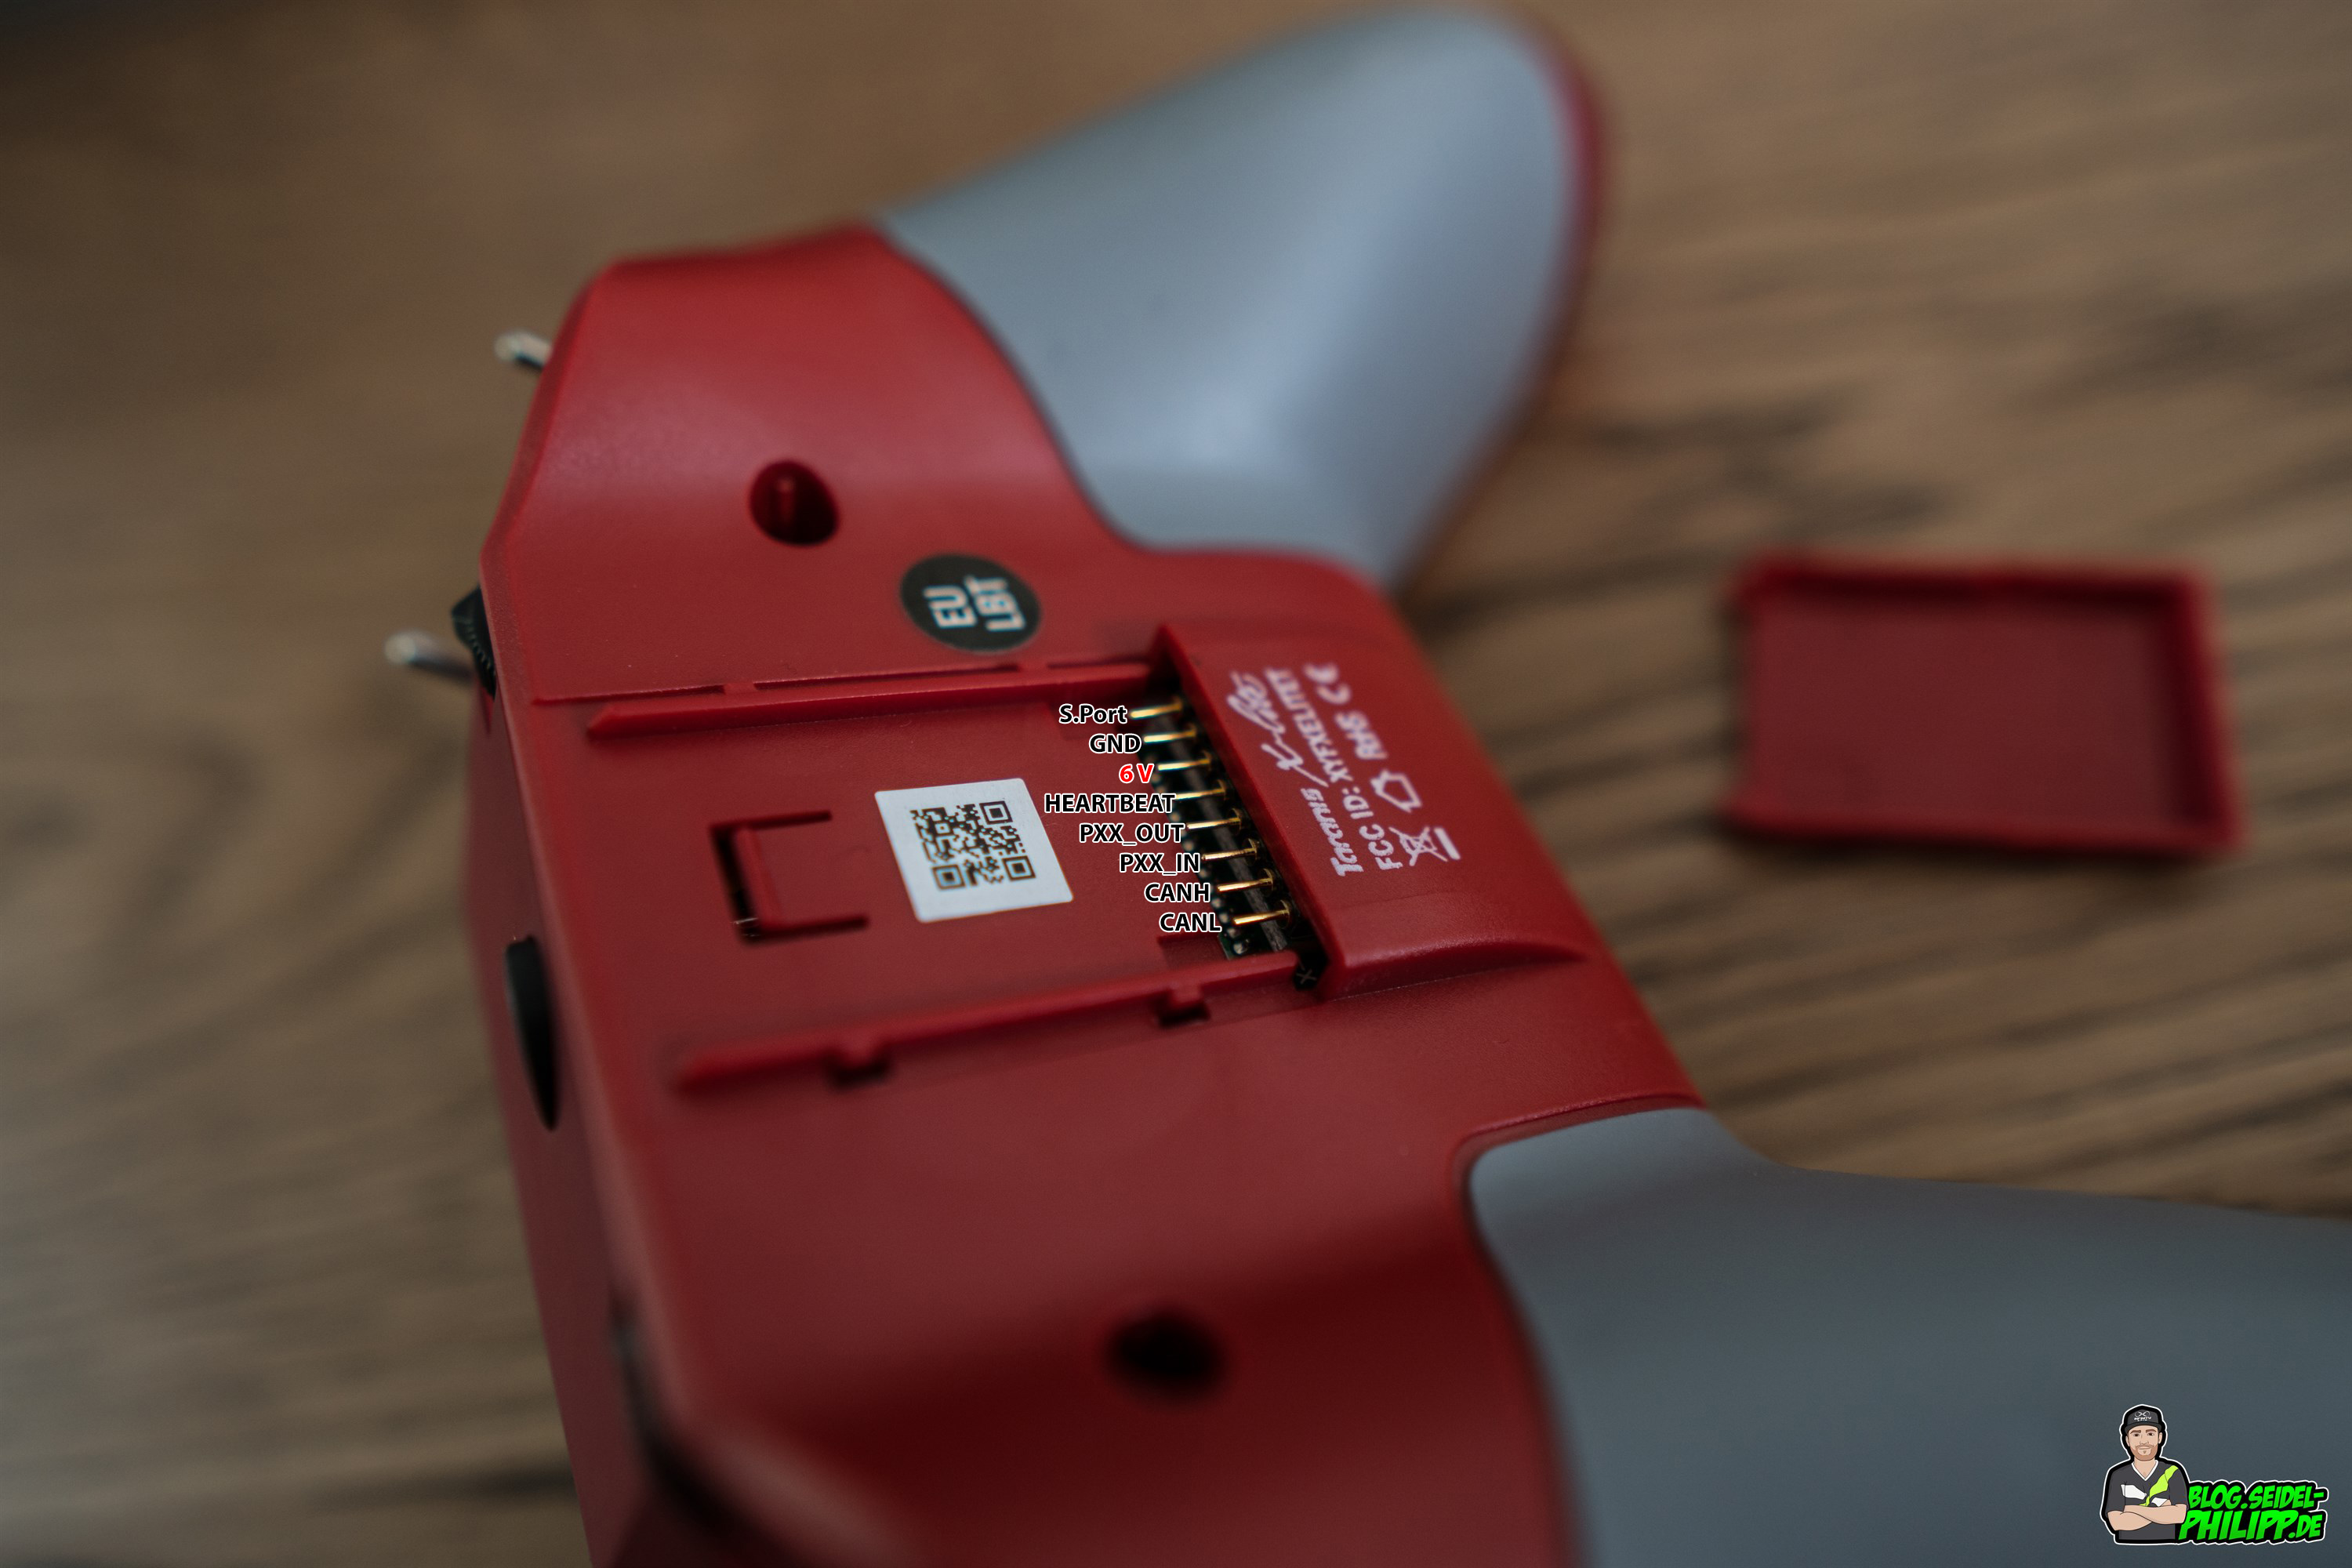
Here you can find the pin assignments of the FrSky Taranis X-Lite
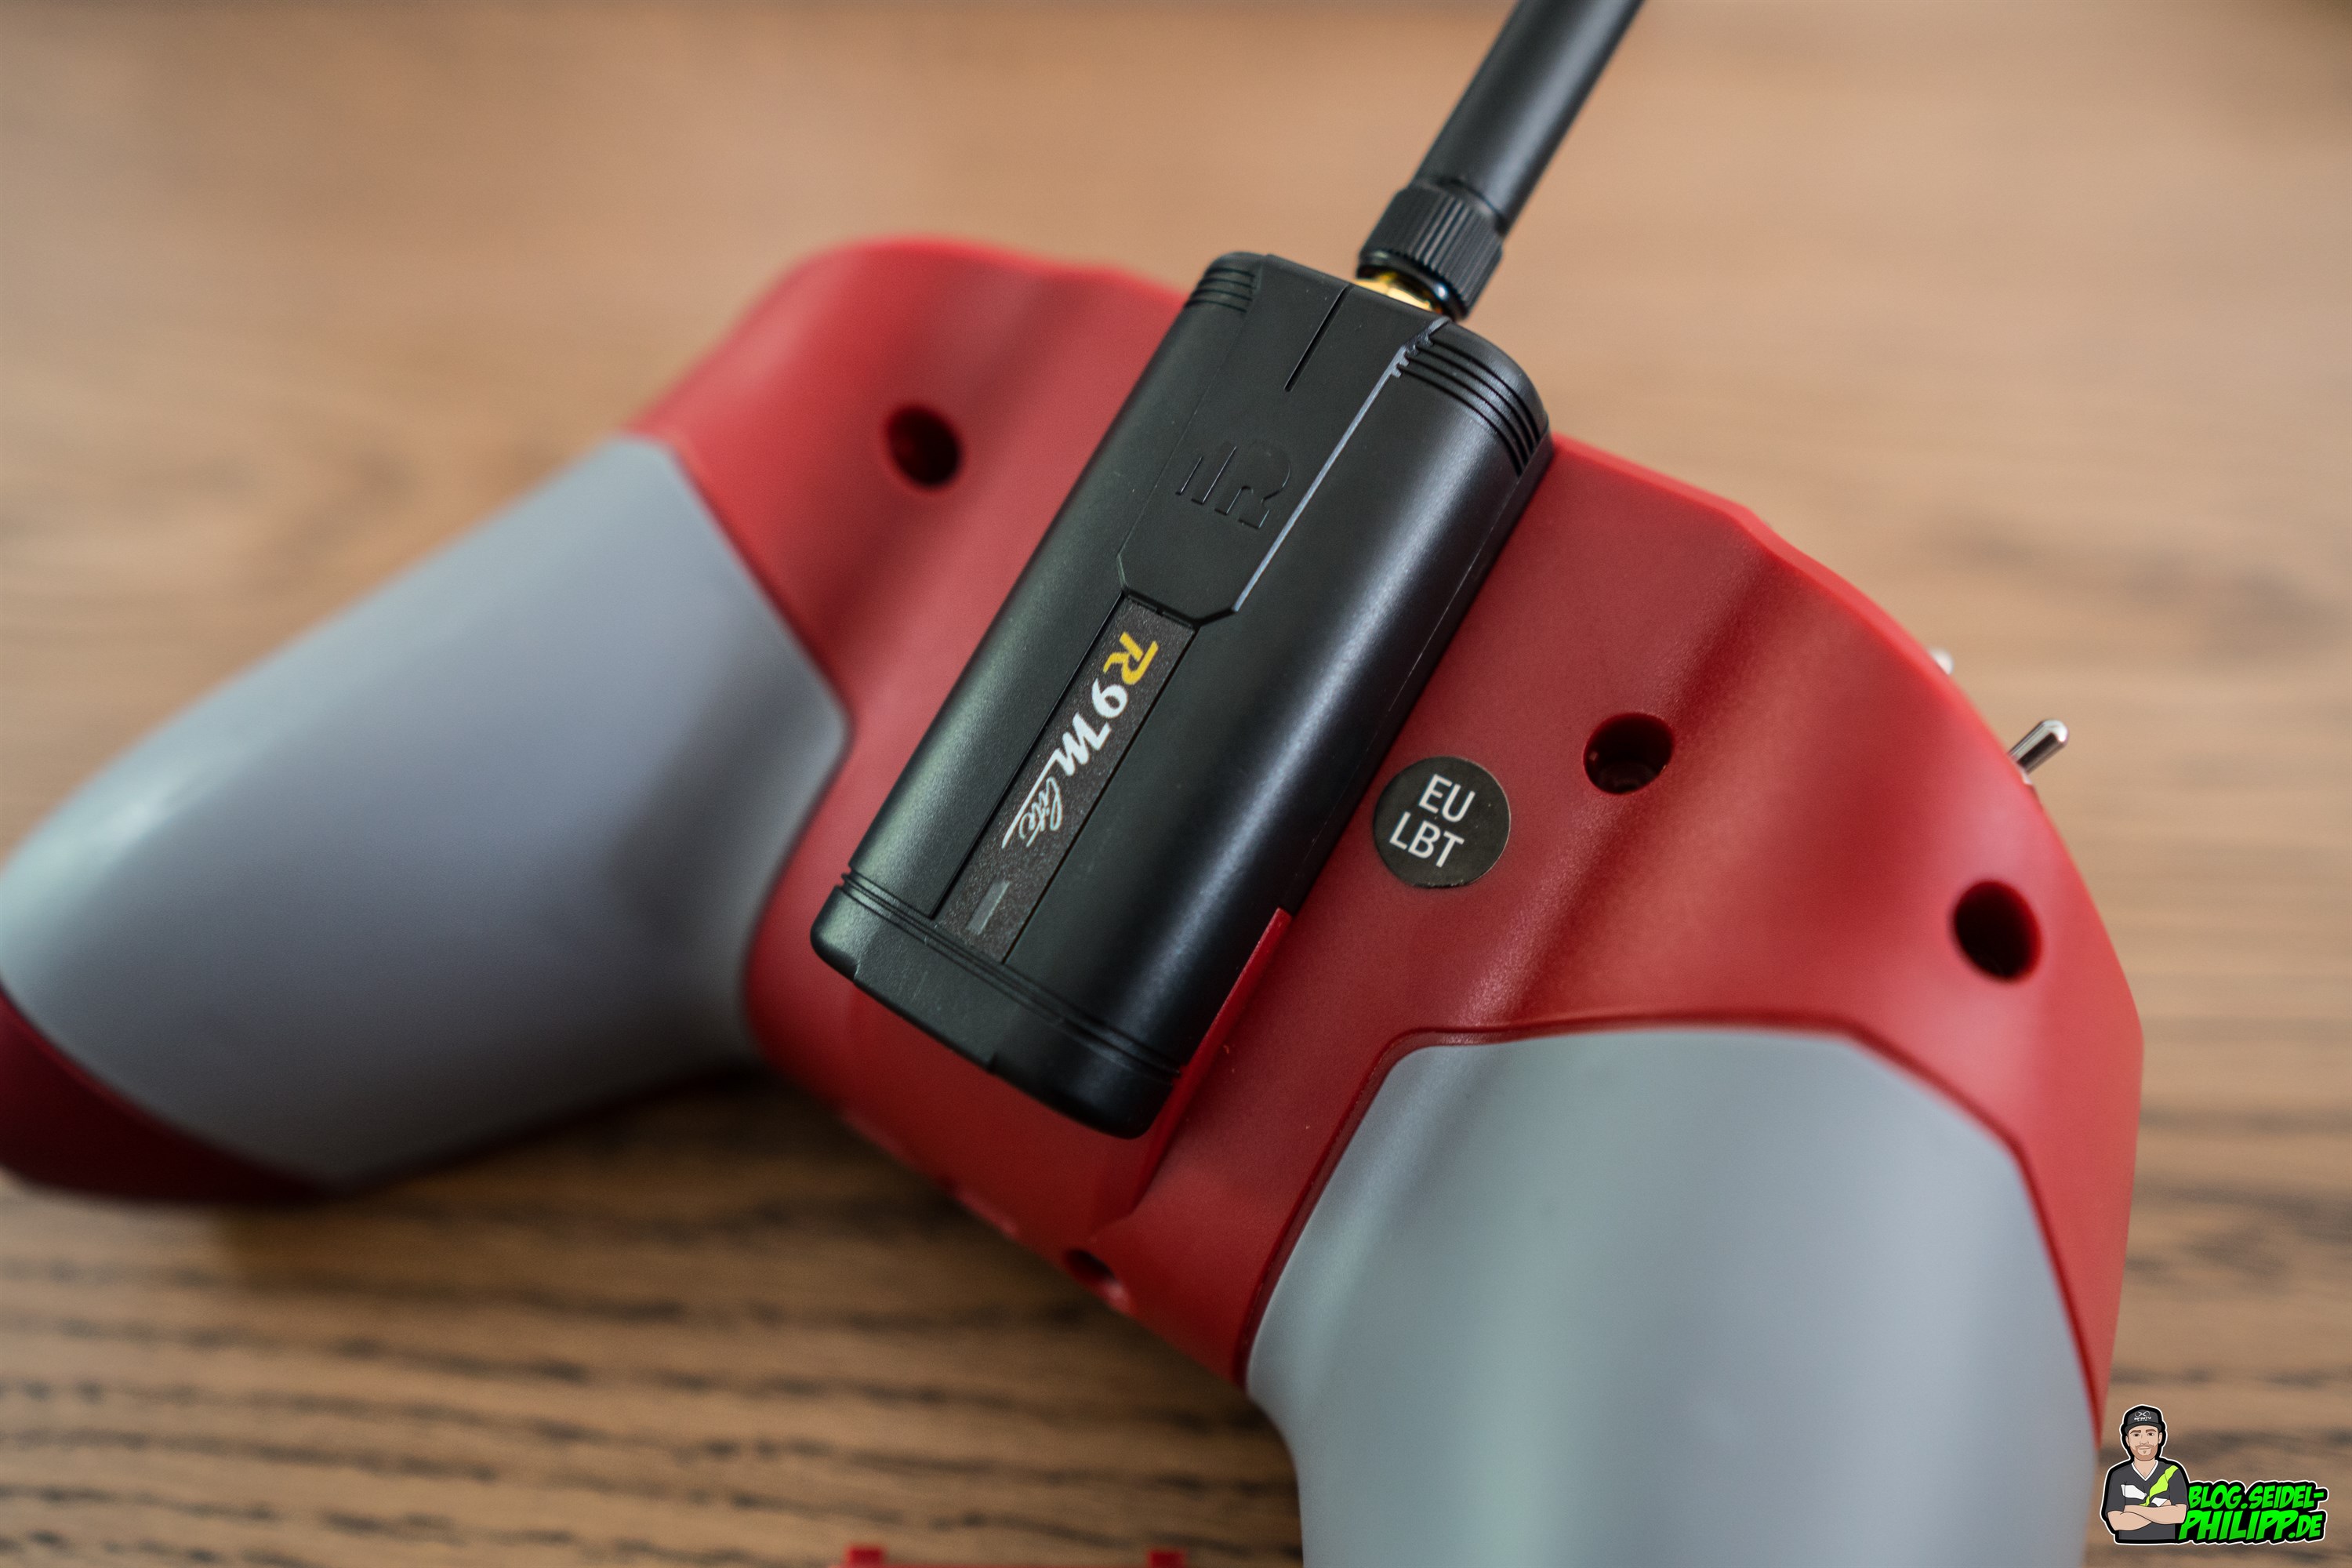
On these photos you can see how small the new modules for the X-Lite are. In this case, this is a LongRange Modul R9.
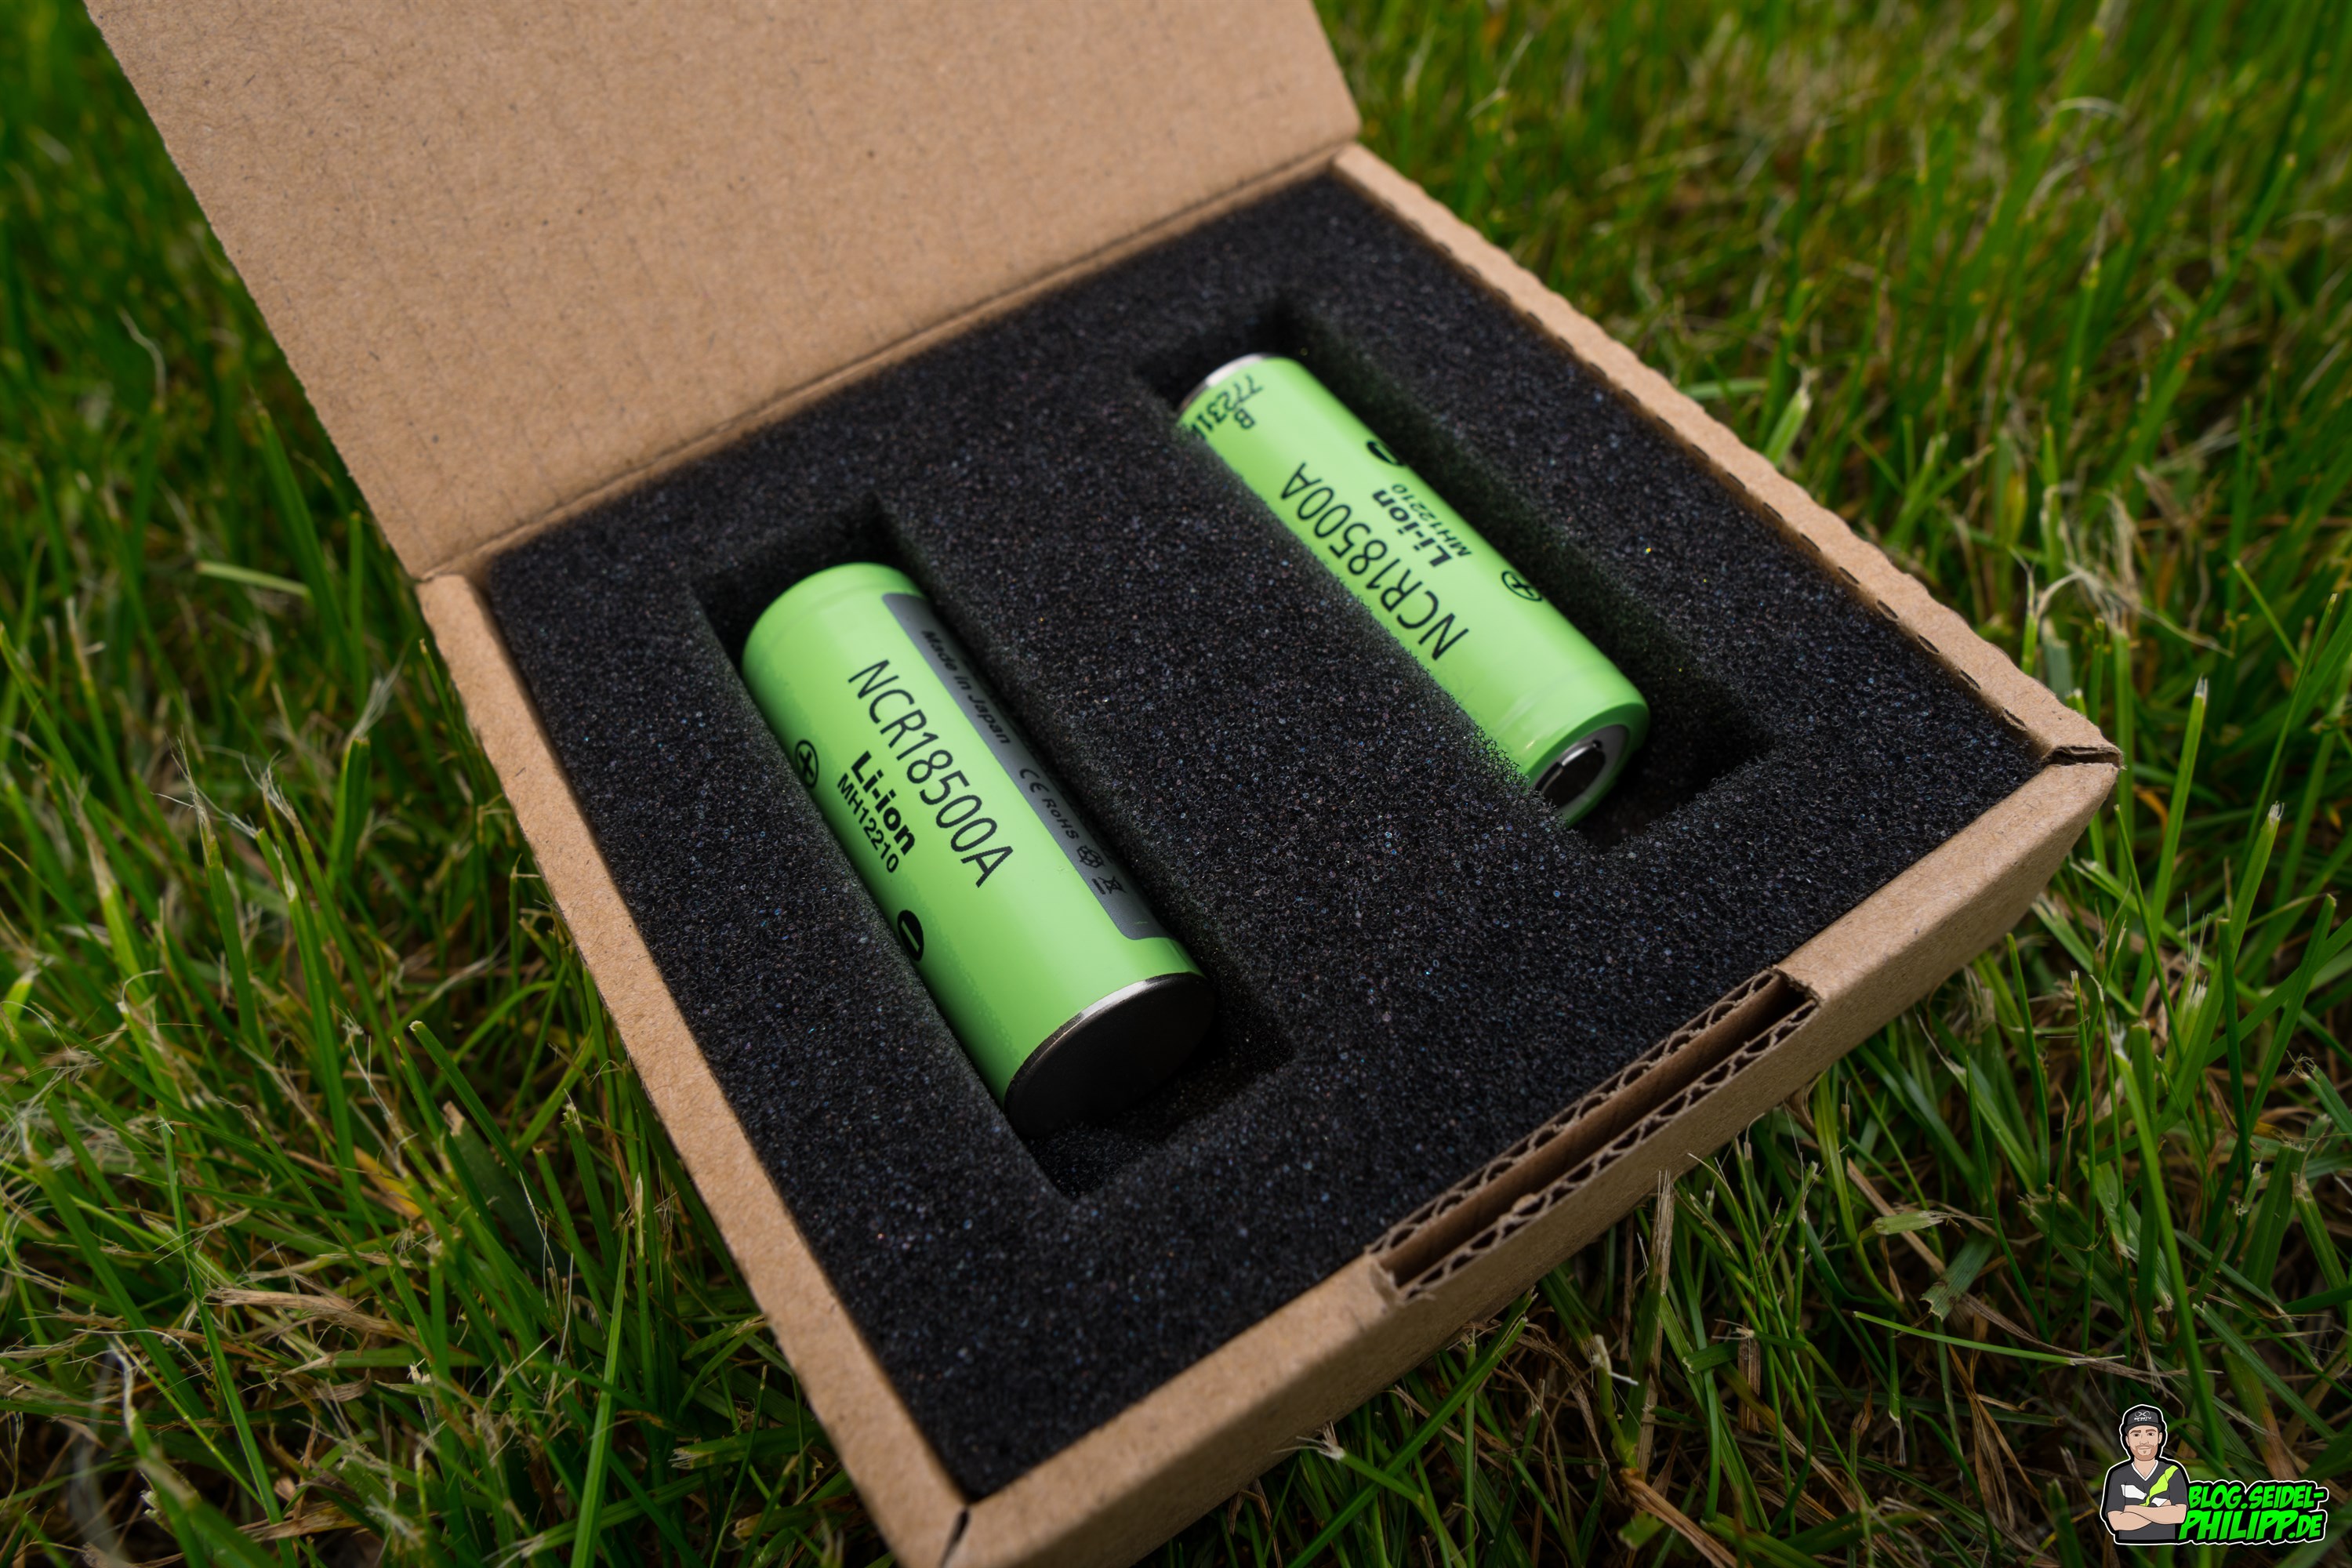
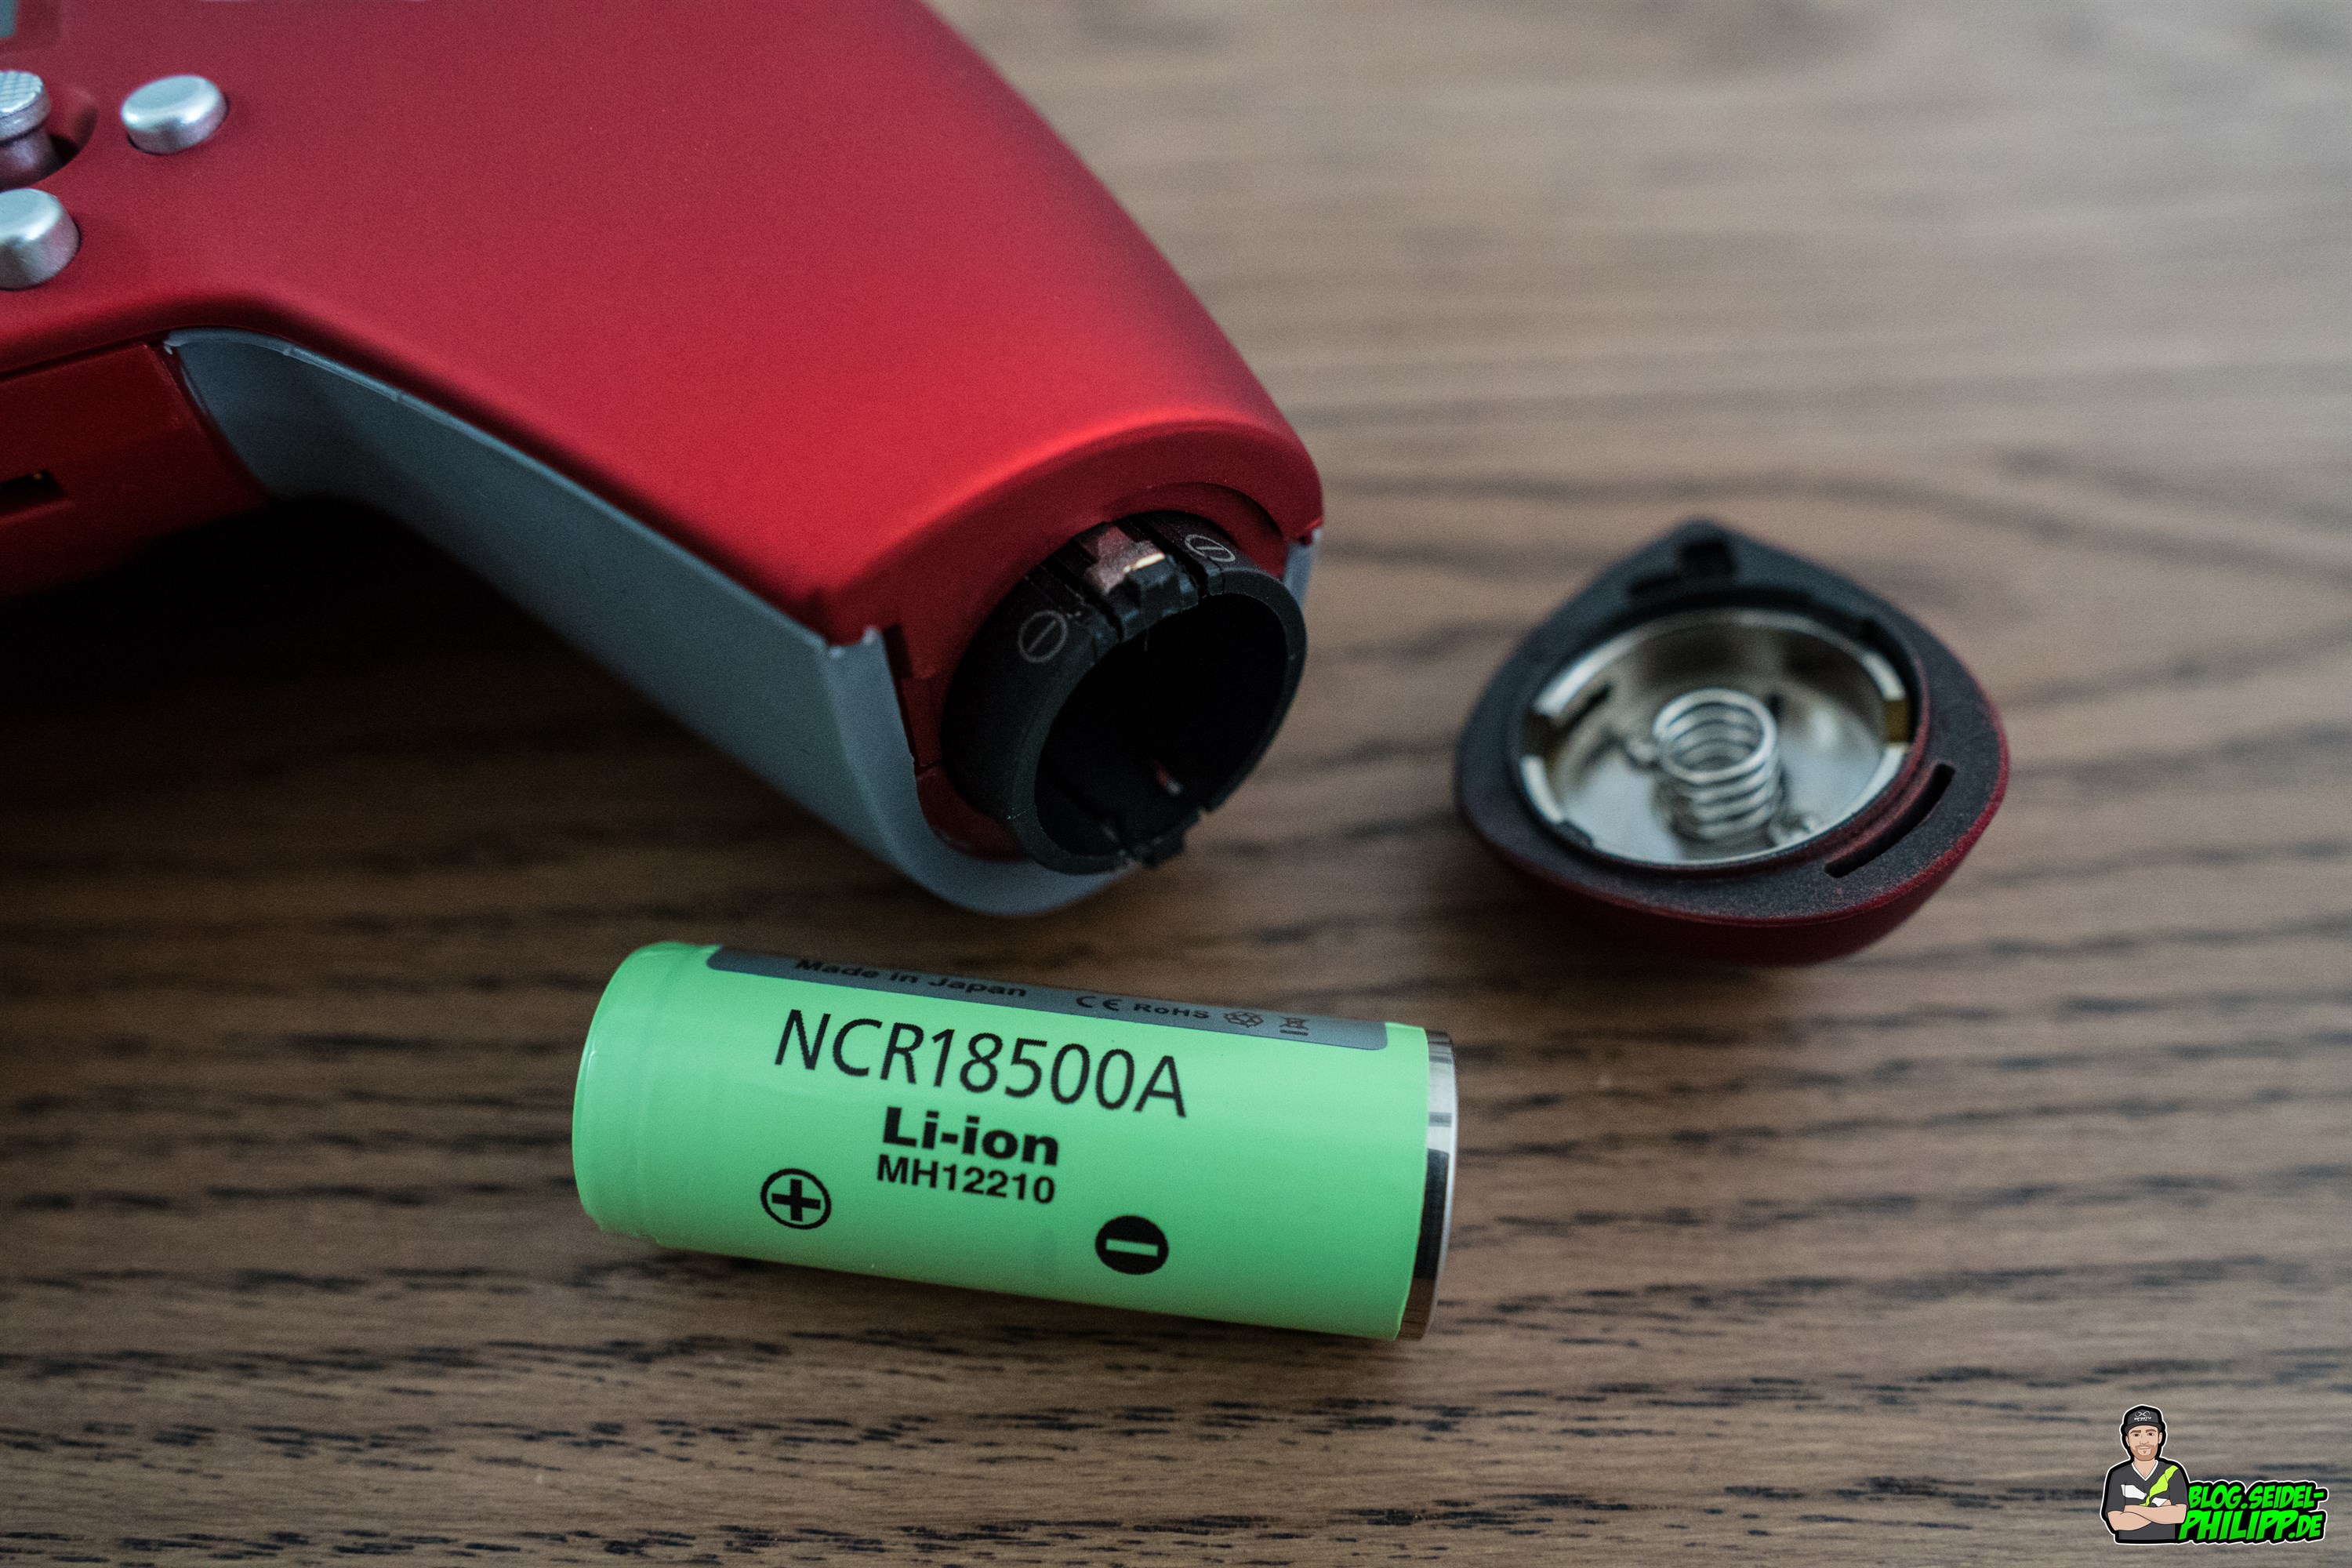
Batteries
I use the Panasonic NCR18500A 2040mAh. To charge these cells, i use a portable charger from CSL.
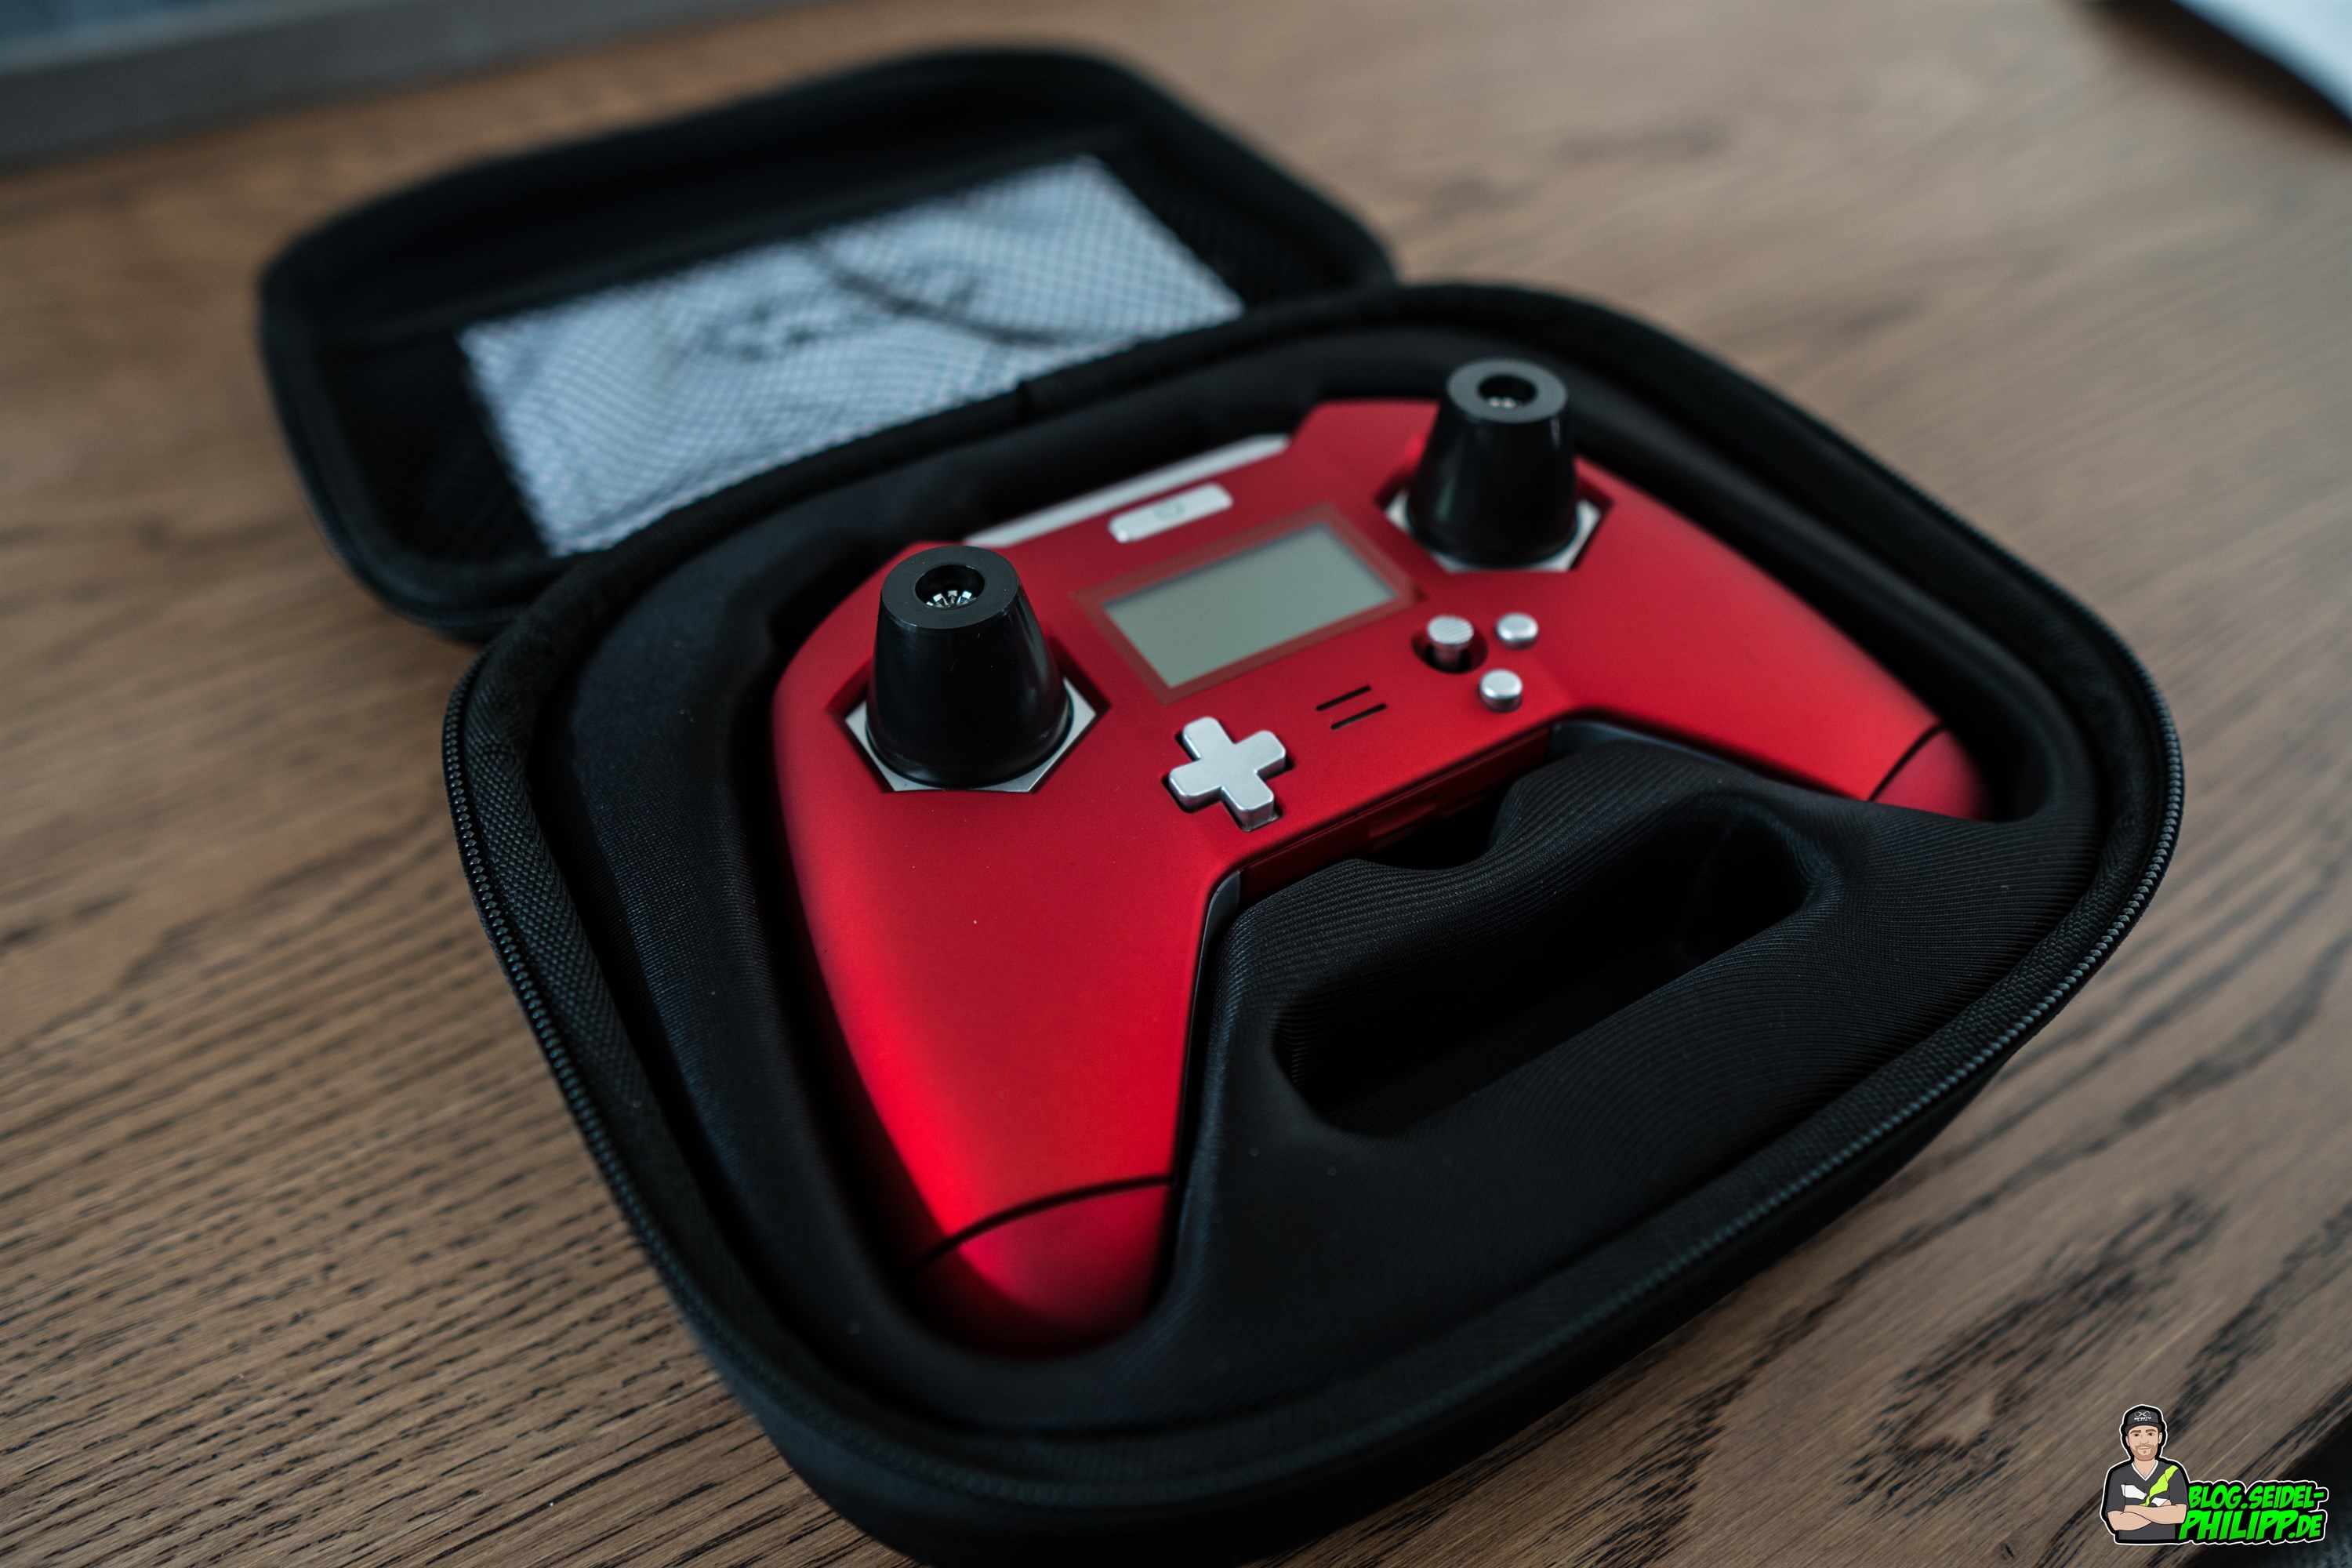
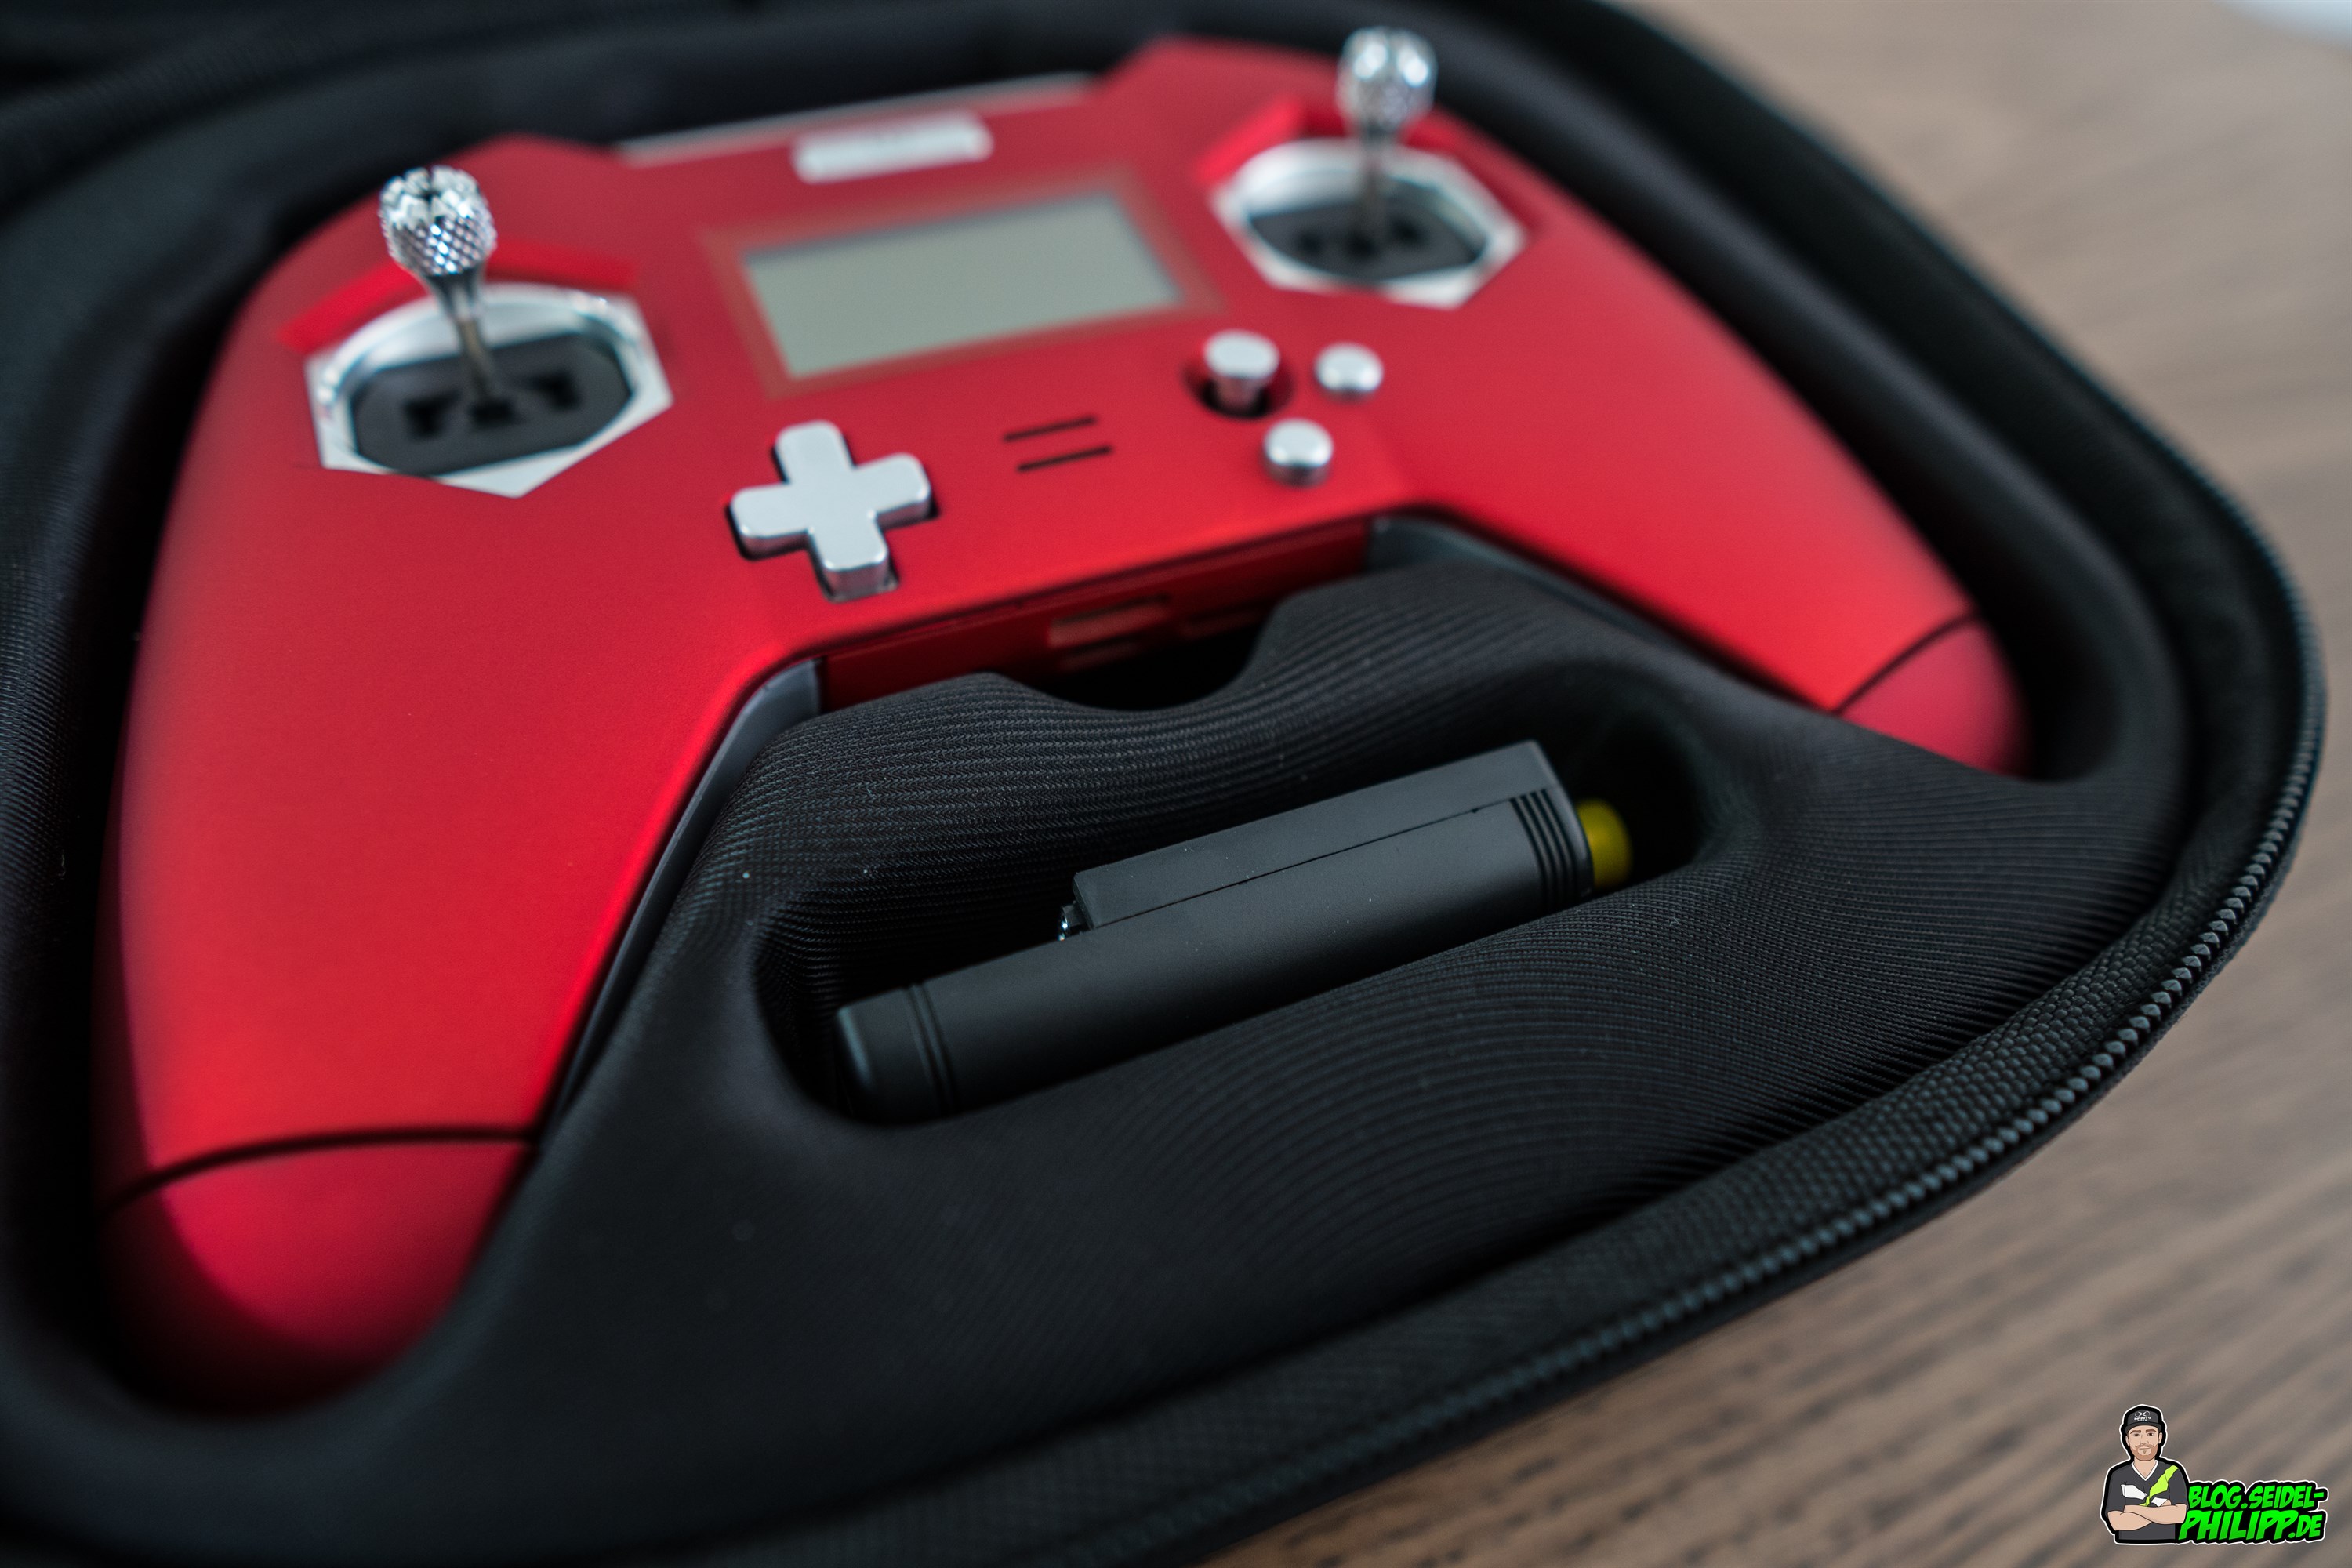
Bag
FrSky Taranis X-Lite comes in a nice bag. The two shells are relatively hard and protect the FrSky Taranis X-Lite perfectly.
The remote control is accurately accommodated in a negative mold. In the upper half, other accessories such as antennas or batteries can be stowed.

Here you can stow modules like FrSky R9M Lite
Firmware flashing
To my delight it is possible to flash the Taranis (OpenTX board and iXJT module) without problems. It is possible (I did it) to flash an EU remote control on Non-EU and back again. So it does not matter where the remote control is bought.
flashing OpenTX (EU LBT/NON EU FCC)
Step 1: OpenTX Companion
download latest OpenTX Companion version (in this tutorial 2.2.2RC1)
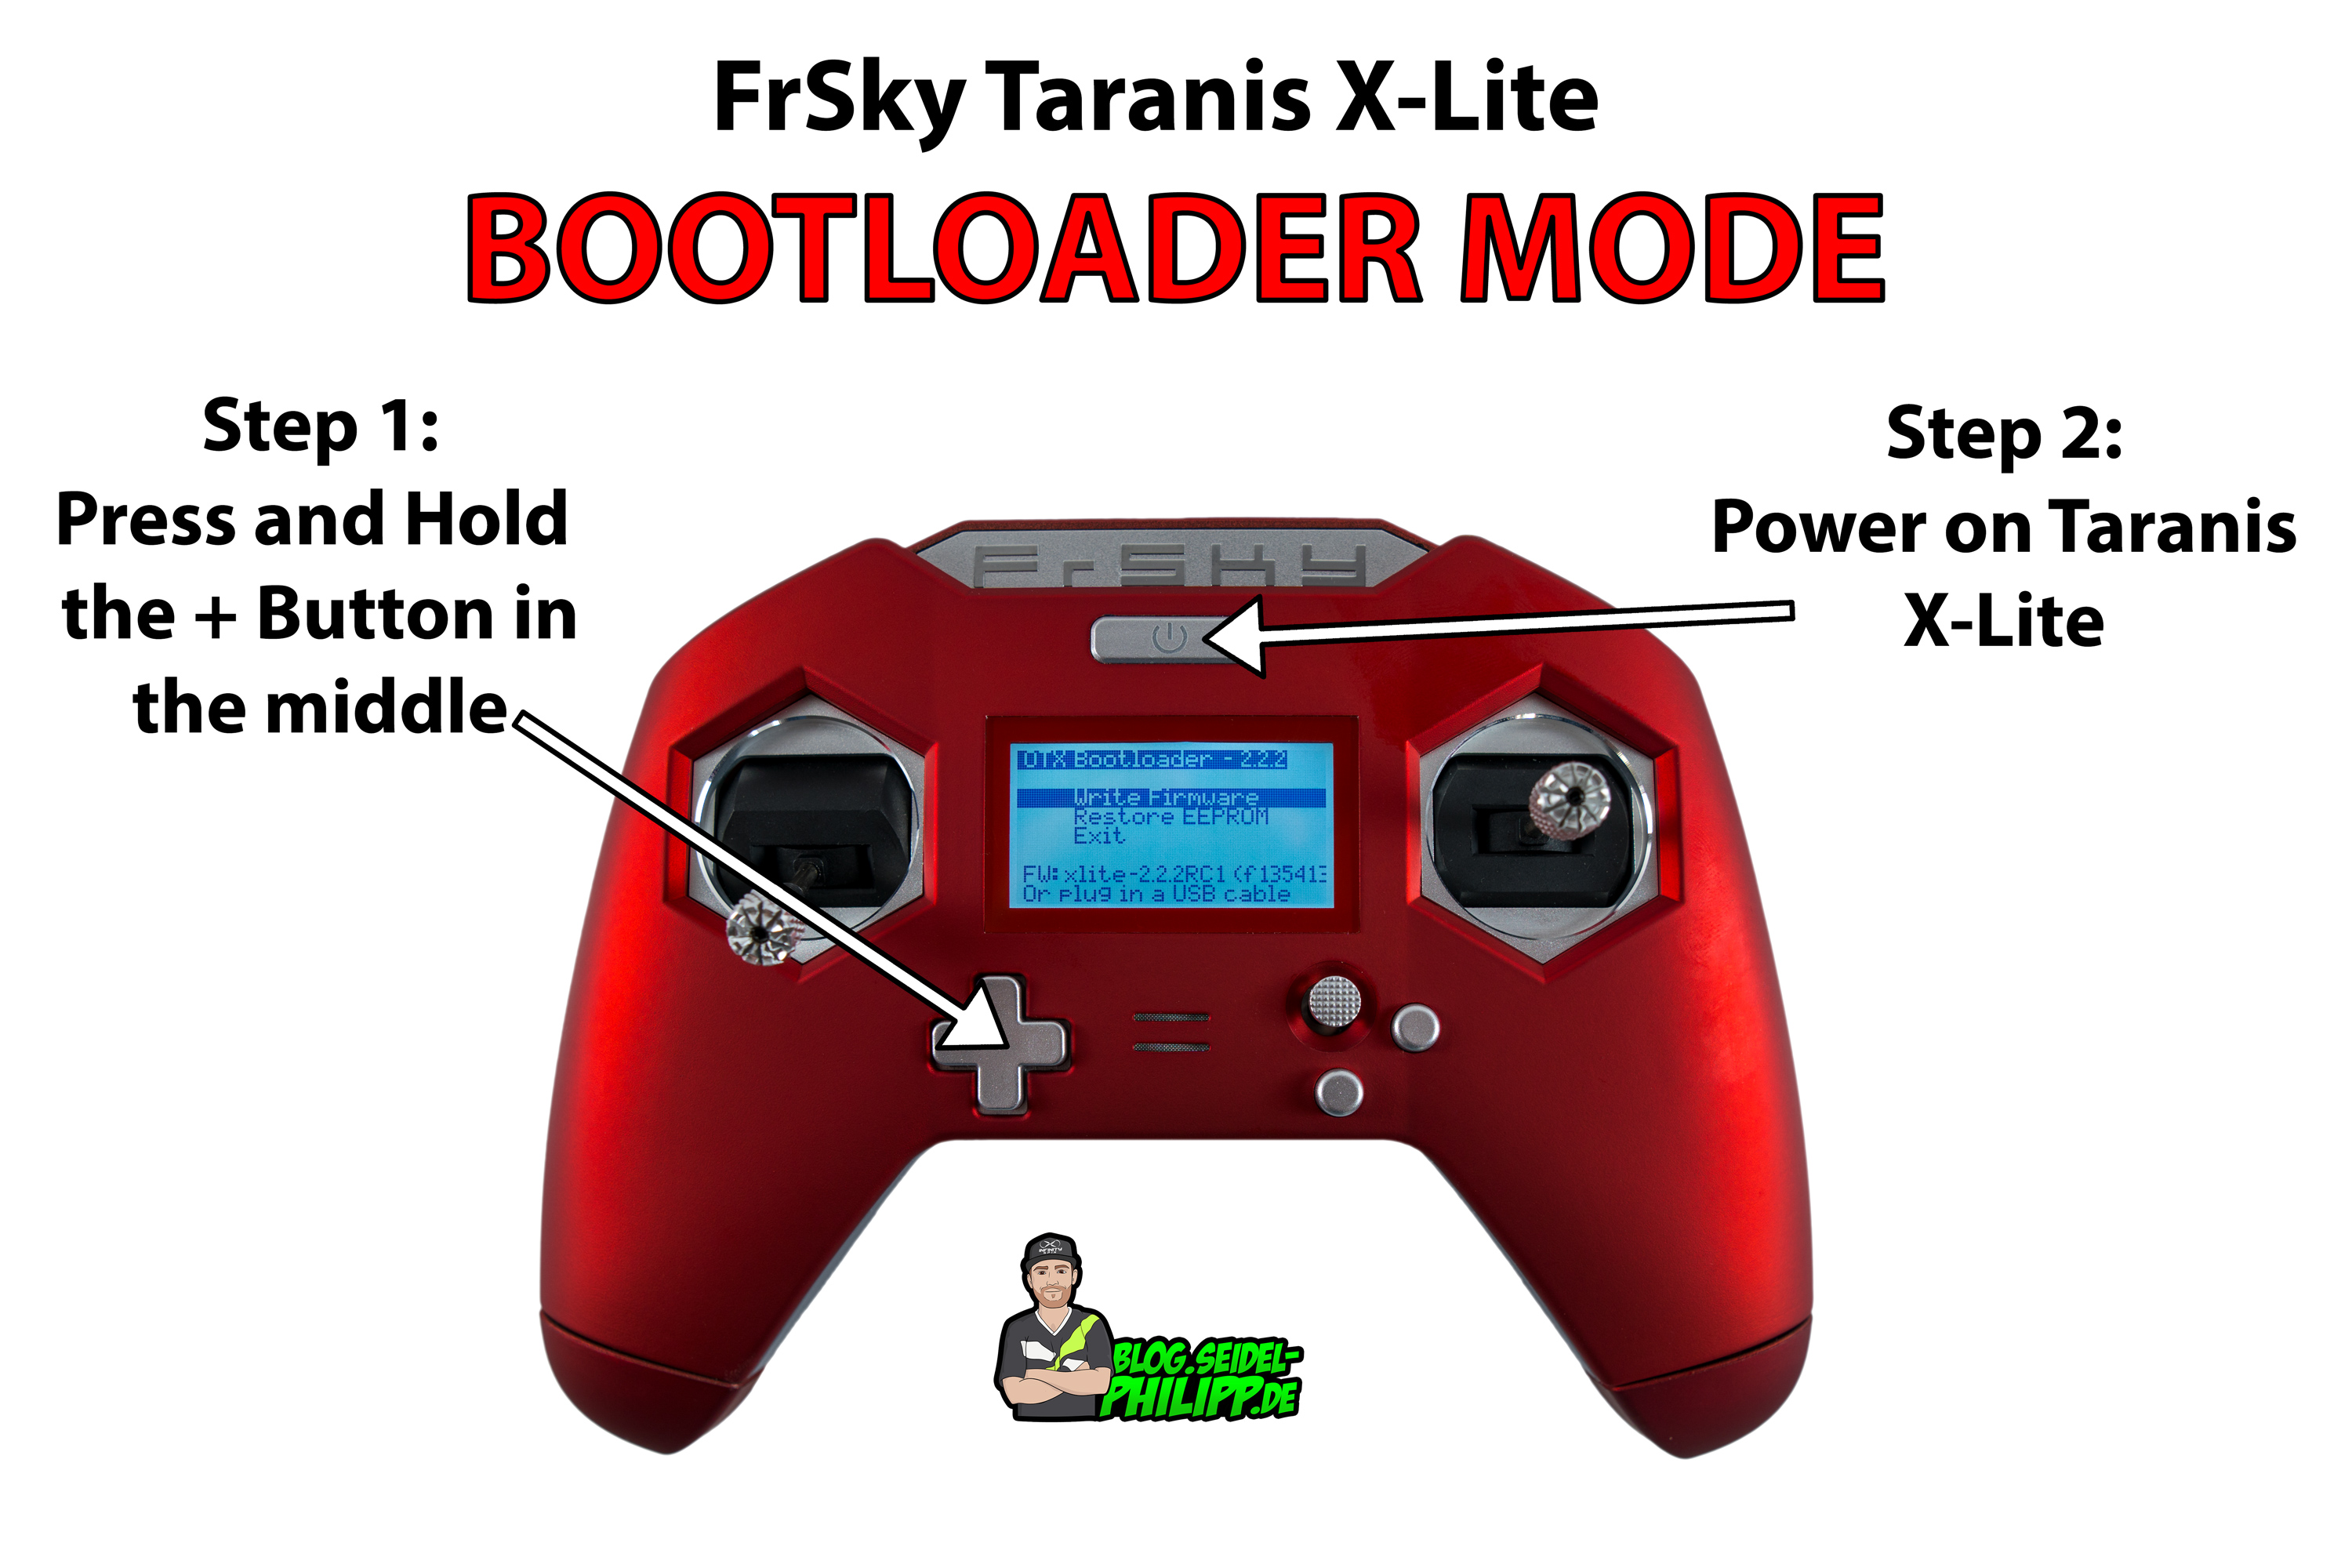
Step 2: Connect FrSky Taranis X-Lite / Bootloader mode
Start your X-Lite in bootloader mode and then connect a USB cable to the remote
Step 3: configure OpenTX Companion
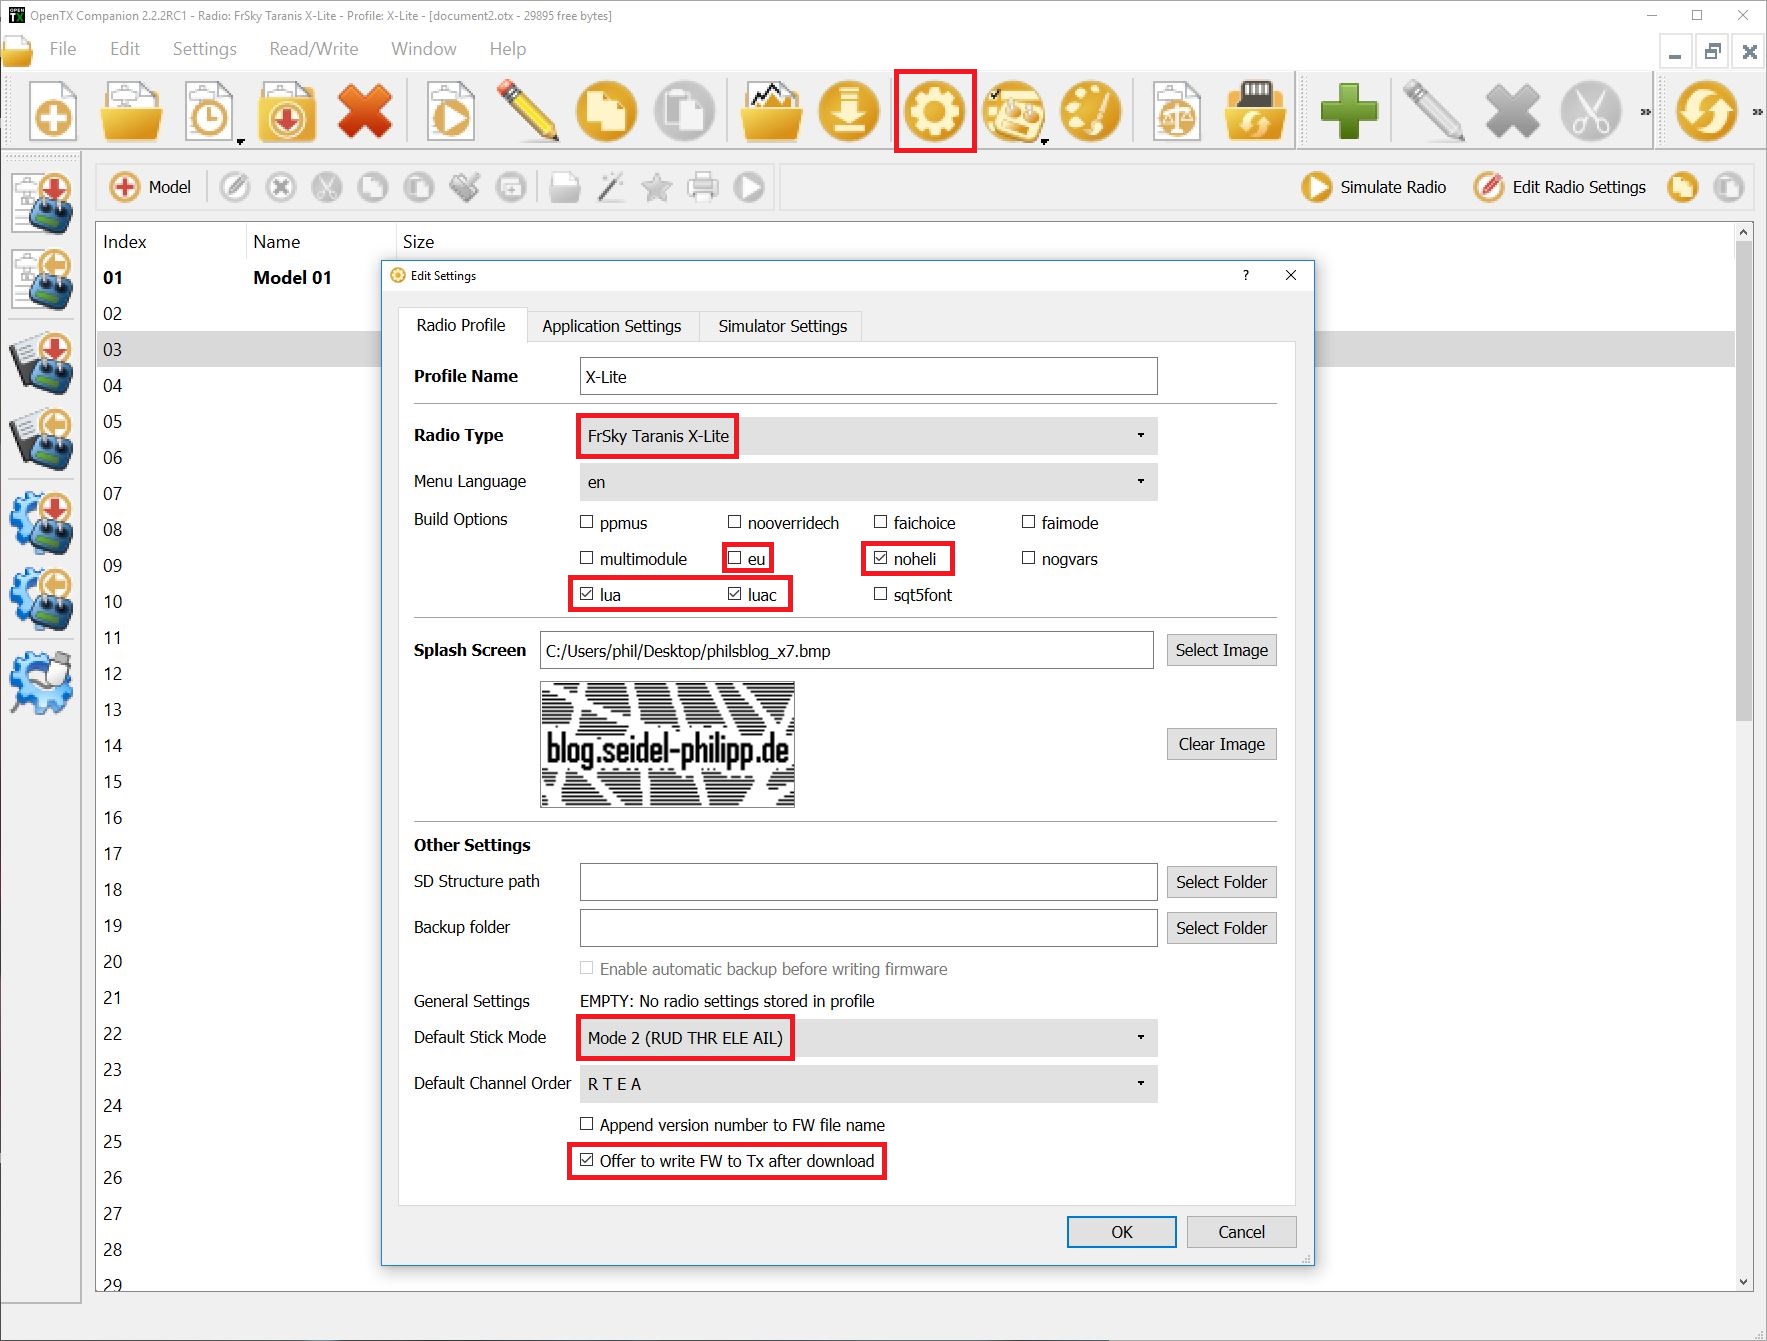
Start OpenTX Companion and click on the gear icon.
Select all options as shown in the screenshot below.
Note: If you want to flash on EU / LBT, select „eu“ under „Build Options„.
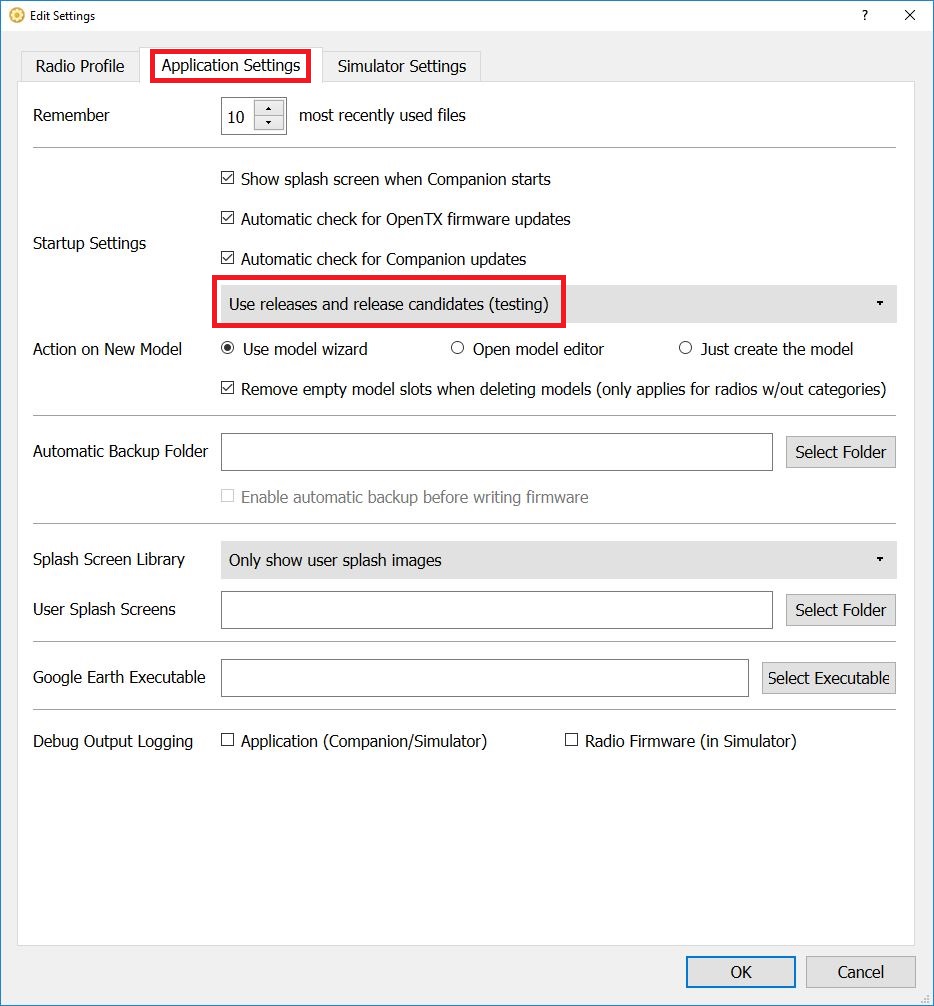
Now click on „Application Settings“ and select „Use release and release candidates (testing)„. If the firmware is no longer „RC (Release Candidate)“ I recommend to remove the checkmark.
„Release Candidate“ means test firmware.
Step 4: Download OpenTX & SD Card content
Now click on the „Download“ icon and click on „Check for updates“ or „Download firmware„. Before that you should download the SD card files by clicking on „Download SD contents„, if you want to run an SD card in your X-Lite.

Step 5: flash OpenTX
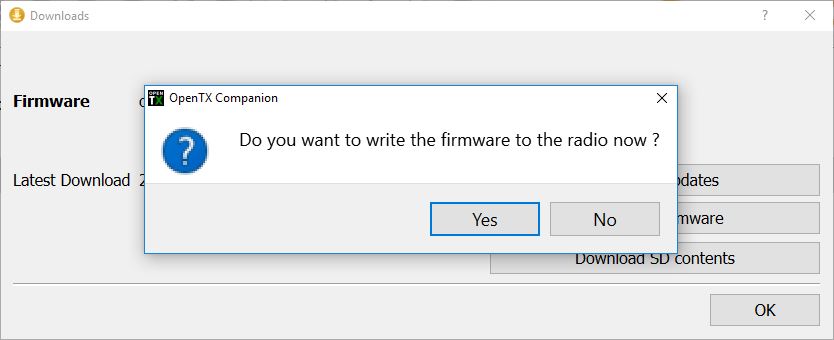
After downloading the firmware, click „YES„.
Info: Please save the file on your Computer (e.g Desktop), NOT on the SD Card of your Taranis.
In the following settings you can select a logo of your choice. If not, choose „Use firmware start screen“
If you would like to use a logo of my blog or my Team InfinitySpin, you can download it here. You can use the logo of the QX7. It has the same resolution!
Click on „Write to TX“ and the spark will be flashed.

flash internal iXJT Module (EU LBT/NON EU FCC)
Step 1: download Firmware
Download the firmware for the internal iXJT module under „FIRMWARE-iXJT_Lite„. Unzip the archive and copy one of the .frk to your SD card in your Taranis. Copy the file to the folder „FIRMWARE“
- „iXJT_Lite_EU_450k_20180416.frk“ for EU/LBT
- „iXJT_Lite_NonEU_450k_20180416.frk“ for Non-EU FCC
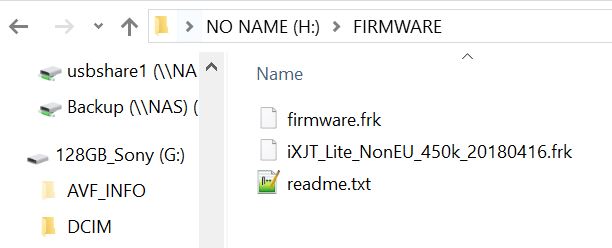
By the way: My Taranis did not show the firmware „iXJT_Lite_NonEU_450k_20180416.frk“ (see photo). I copied it and renamed it „firmware.frk“ and it worked.
Step 2: flash iXJT Firmware
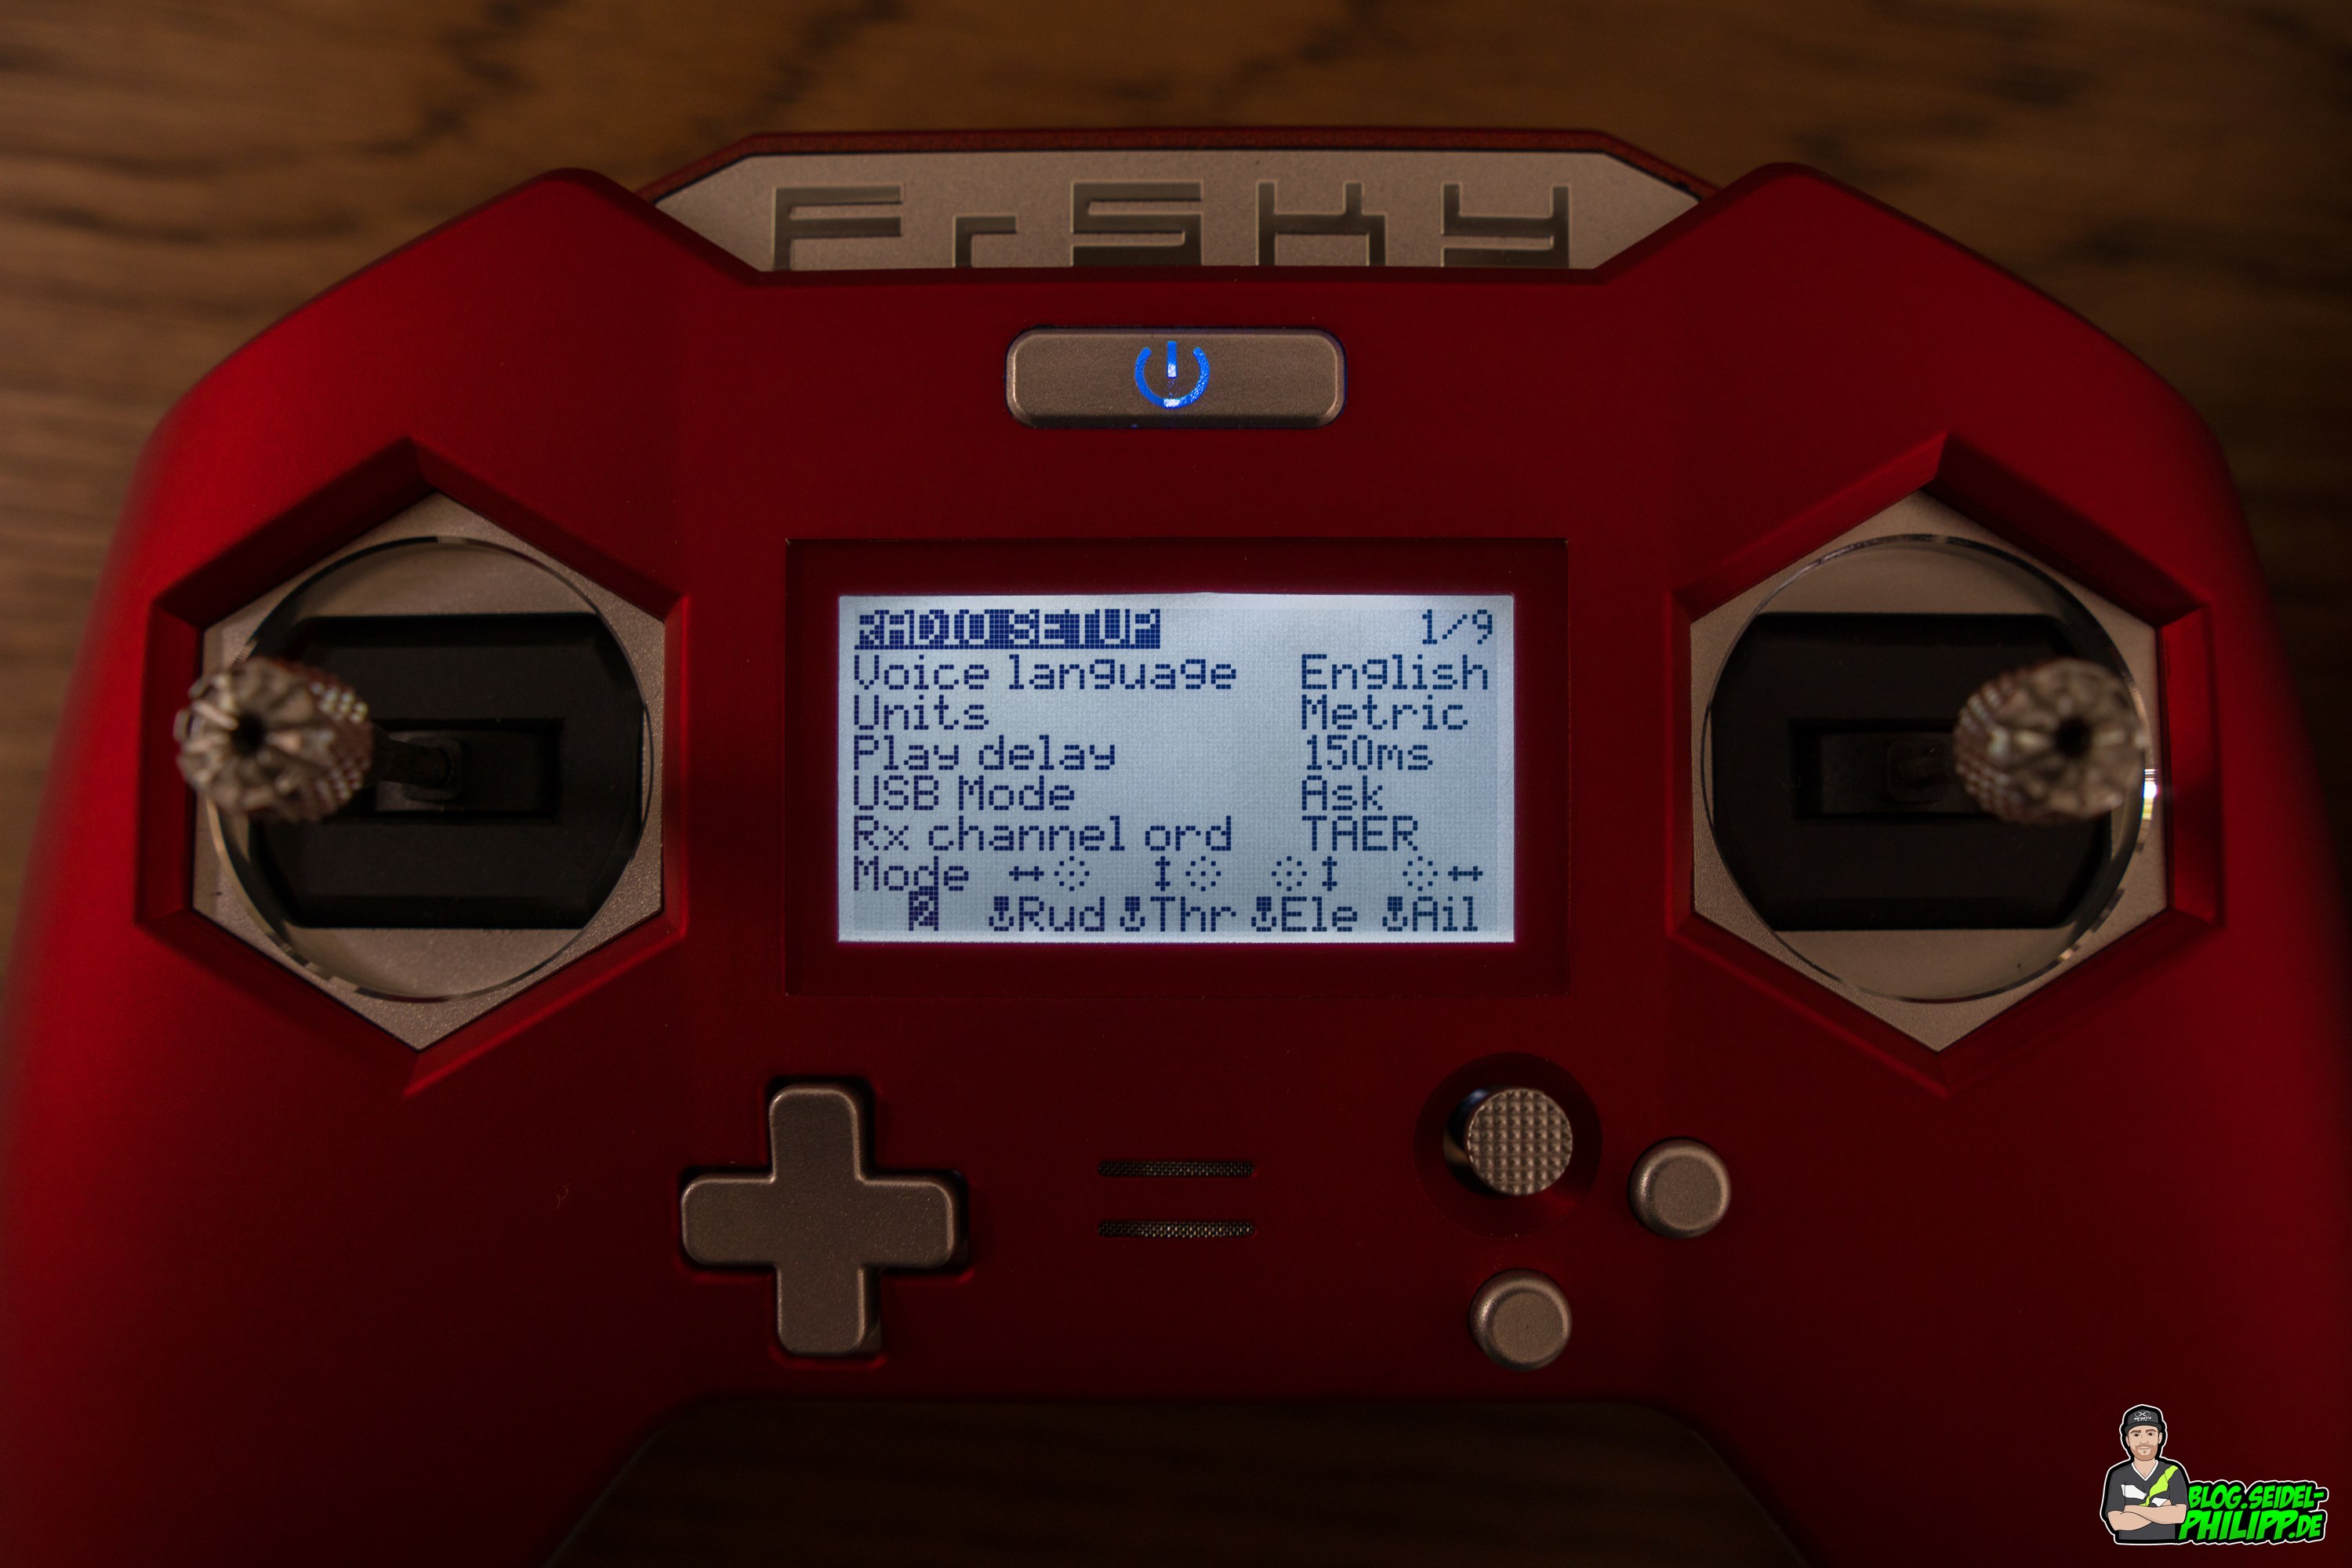
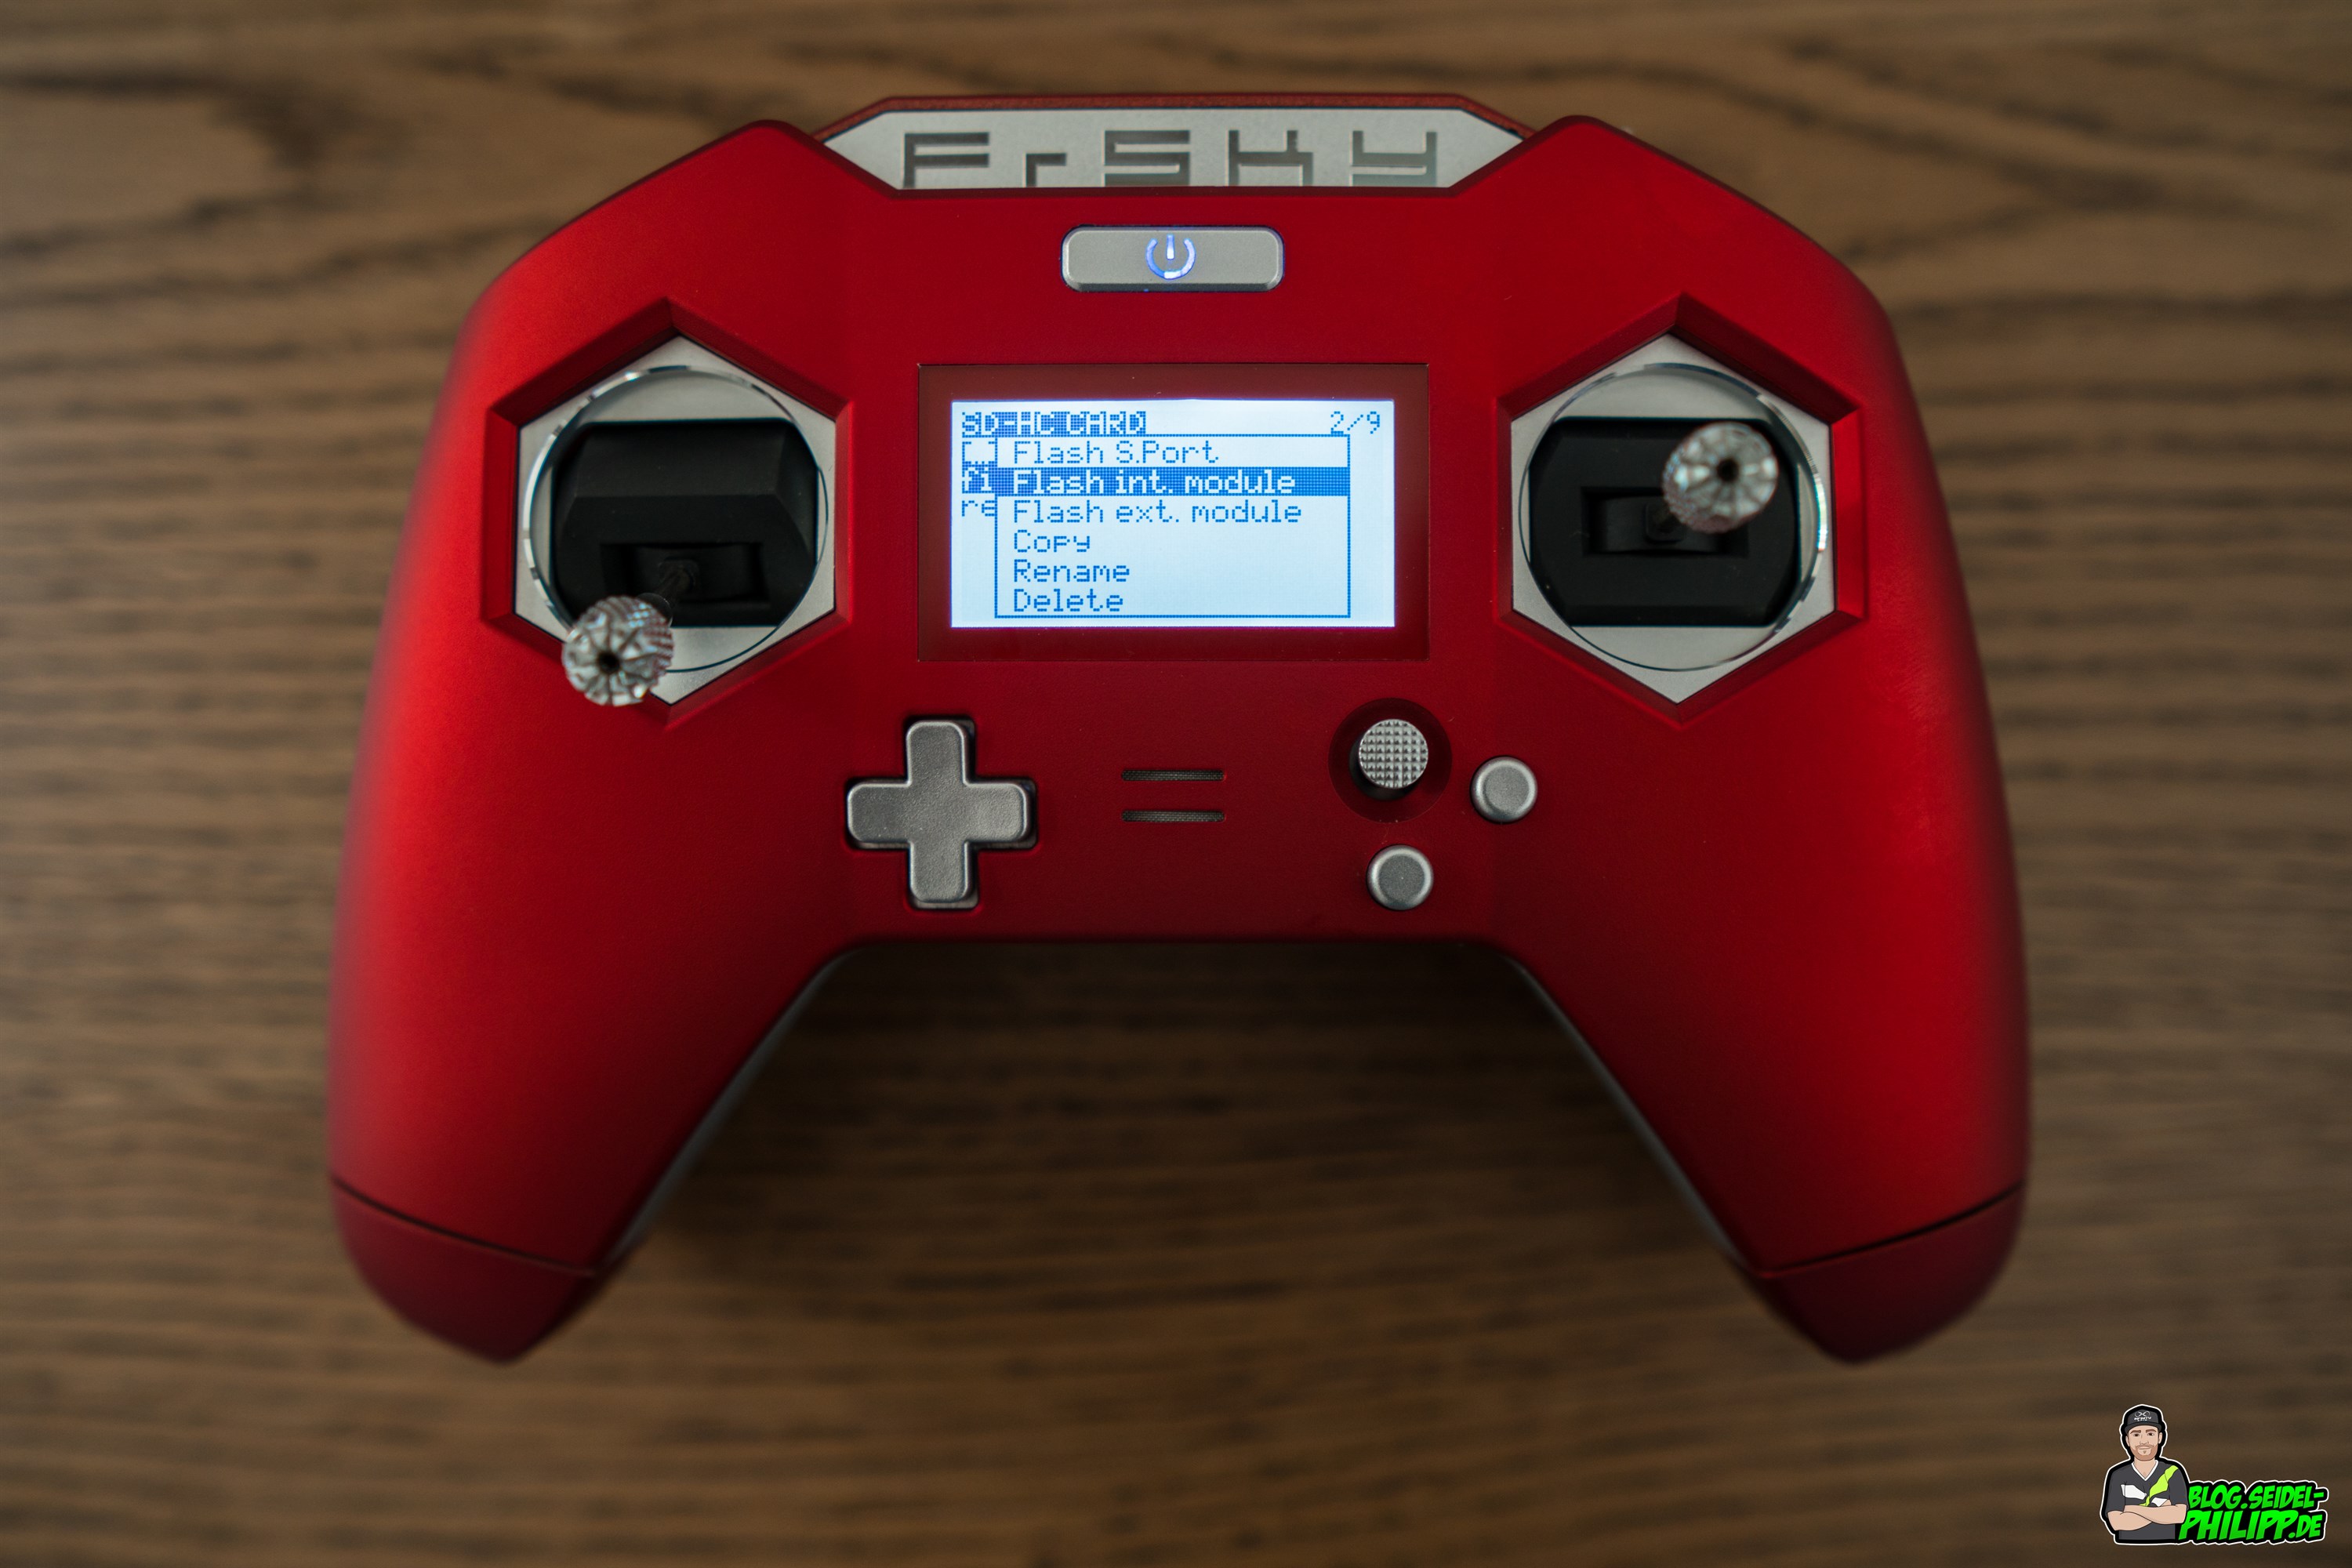
Now turn on your X-lite and go with a long press of the right joystick to the left in the „RADIO SETUP„.
Navigate to page „2/9“ and go to the „FIRMWARE“ folder.

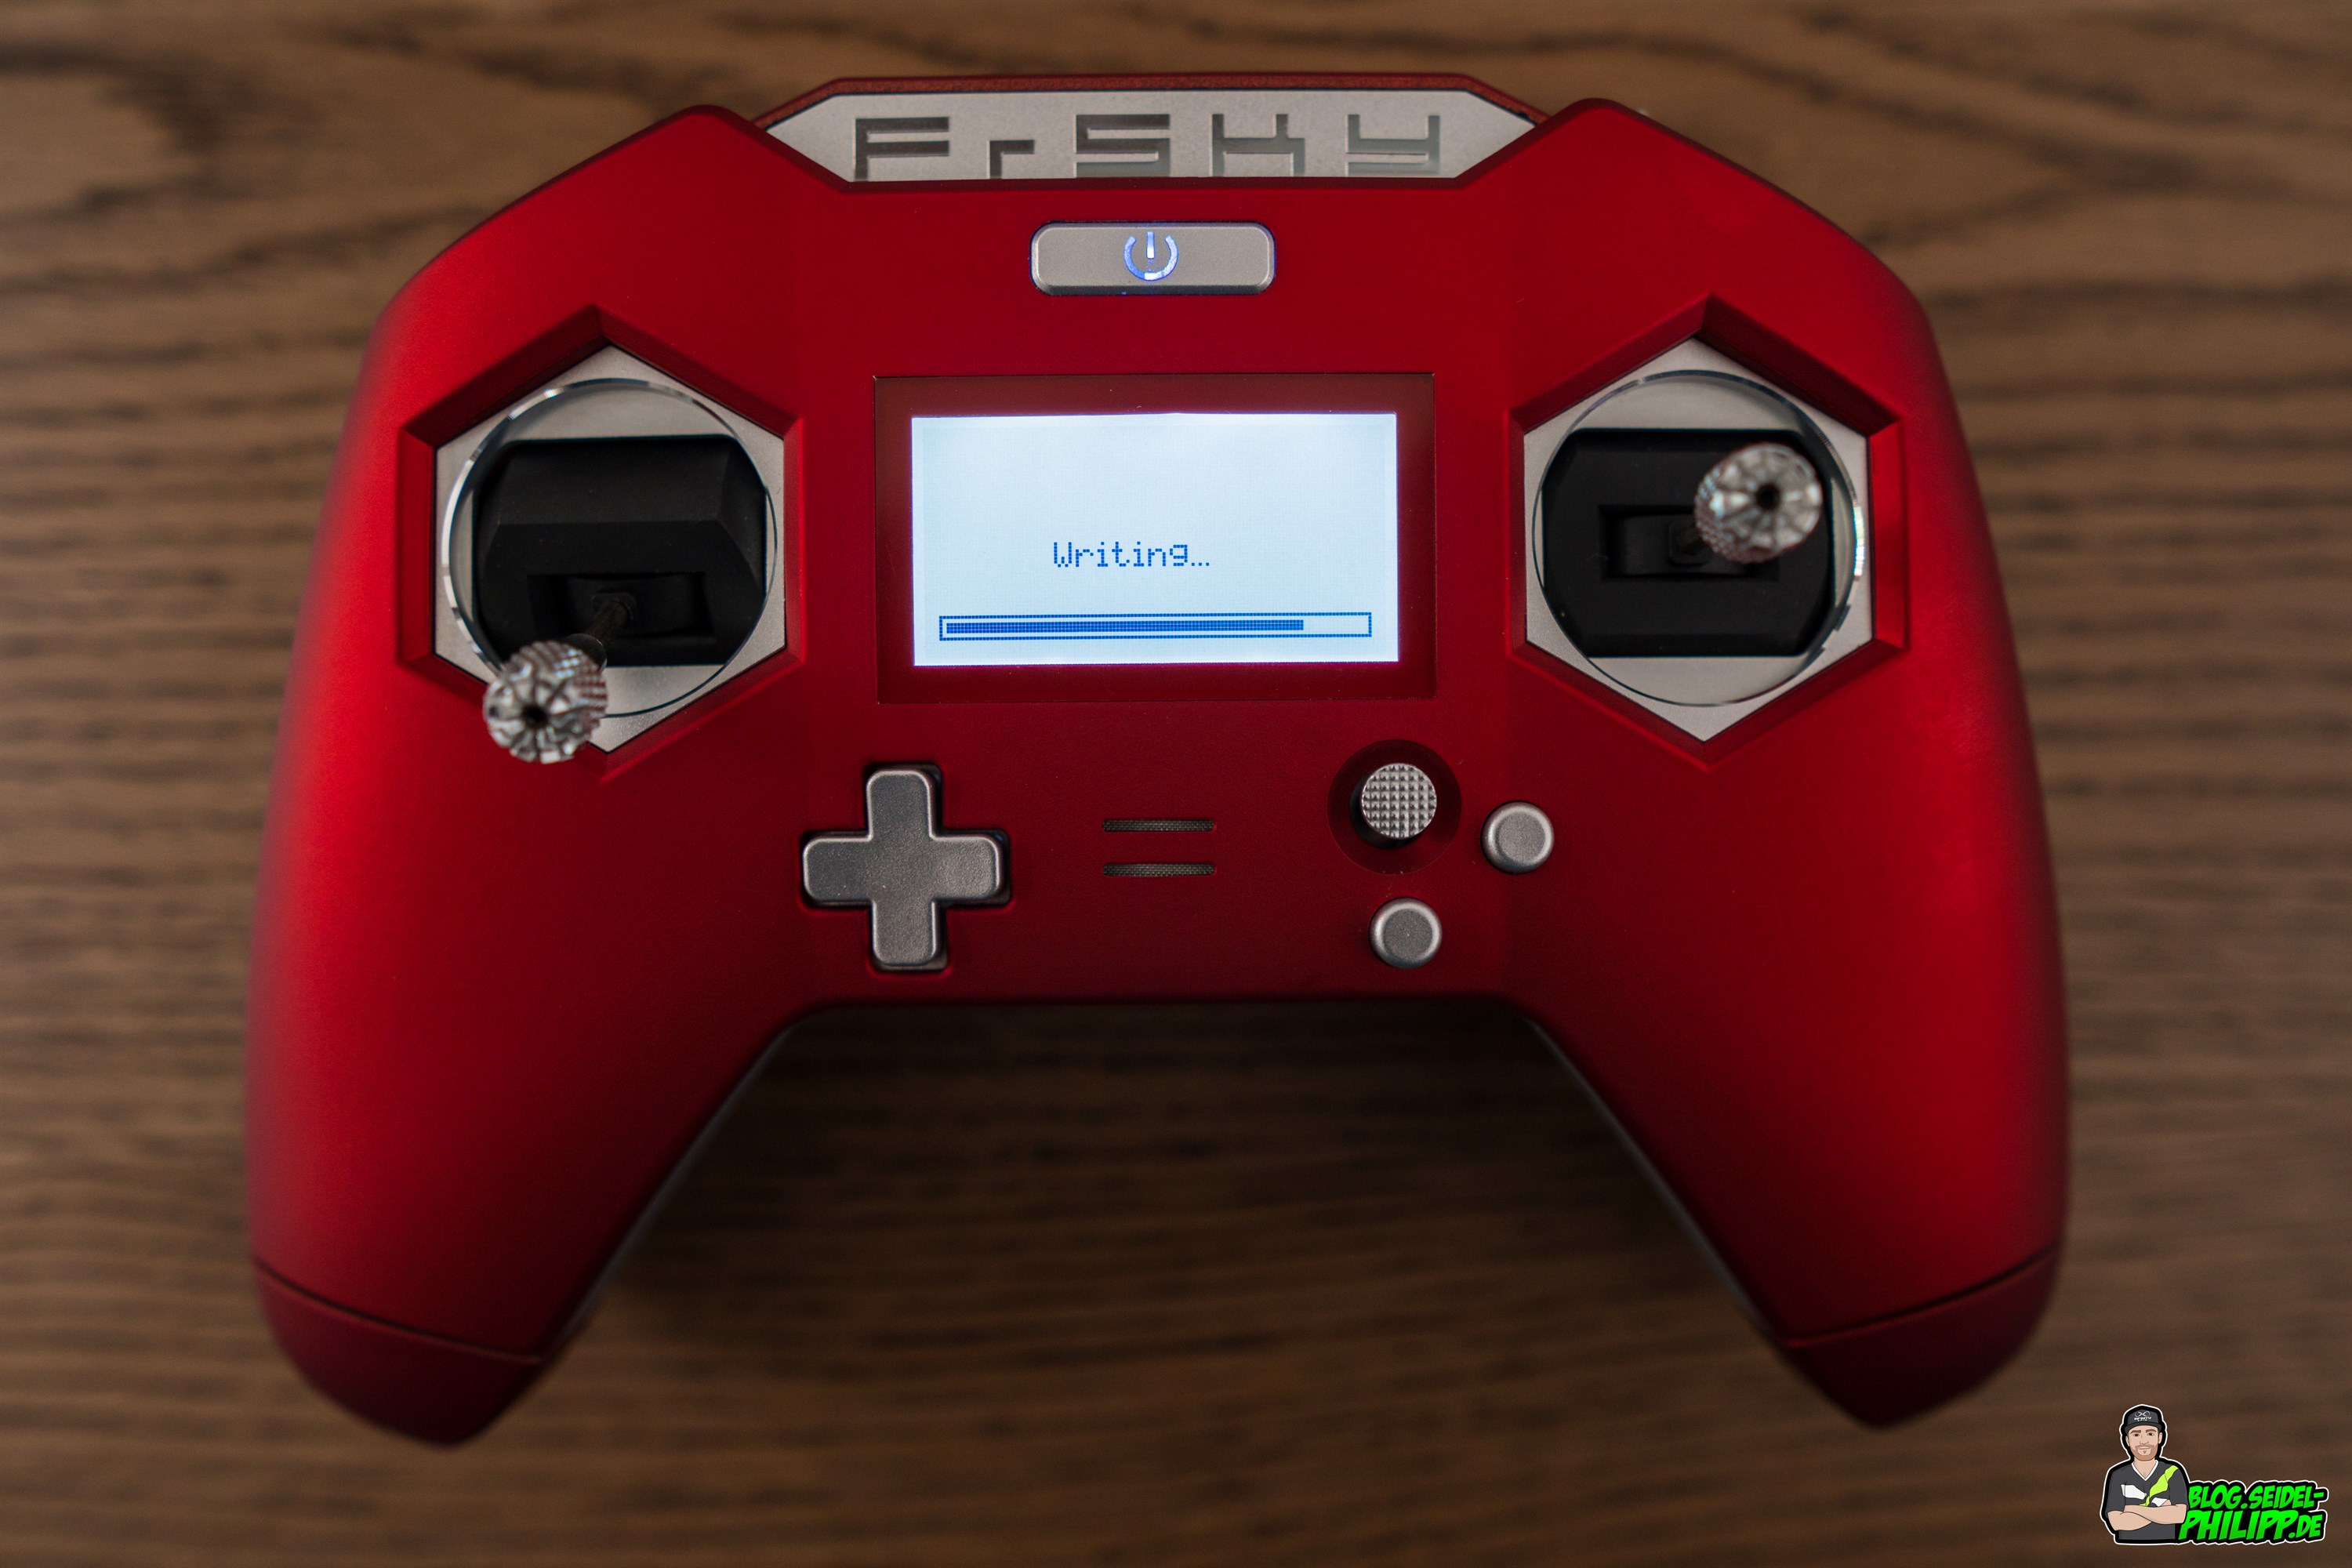
Now select with a long press on the file „firmware.frk“ the option „Flash int. Module“ and confirm this.
After the „Writing“ note has disappeared, the module has been successfully flashed!
LUA Script
I’m in contact with Betaflight programmers and Flyduino as well. We already have customized LUA scripts that will be available soon. Stay tuned!
Mit dem Laden des Videos akzeptieren Sie die Datenschutzerklärung von YouTube.
Mehr erfahren
Update 23.06.2018:
Conclusion
We waited a long time for that. Personally, I was always bothered by the big remote controls and was very satisfied at first glance. It would be a dream if Teamblacksheep offered a new adapter for the FrSky Taranis X-Lite and the Full-Crossfire module.
The general processing looks very solid. The gaps on the battery caps could have been a bit smaller. When you turn on a loud „clack“ from the speaker can be heard. You can also hear a constant noise when using the headphones. That could have been done better.
Since I have not flown many batteries with the flight control, I can not say much the small X-Liteand affect the flying style. For Tiny Woops and all „fun quads“ it is almost the perfect remote though.
As a great USB-C fan, I would have liked that FrSky finally get rid of MicroUSB in a complete new development. Also a minus point is the missing usb charging function for the internal Li-Ion cells.
In the next few weeks, I will now extensively test the FrSky X-Lite and complete this report. Please share your experiences with the FrSky X-Lite in the comments.
What I noticed immidently were the way less travel on the sticks. I had to lower my rates down significantly to fly the same copter almost the same. Qualitatively, I think the gimbals are good, but I have to say that I only use the X-Lite for small woops or „toys“ and no racing / freestyle copter anymore. This is partly due to the low stickway and the fact that the Crossfire Module is simply too bulky at the back. I had the Tango 2 (prototype) in Hong Kong in my hand and most likely will switch to this remote.
|
|
|
thank you ! i printed your design. fitted with r9m.
looks and feel very good. hope it survives long.
all is working fine.
🙂
This are so far the best XF adaptor options so far.. I was wondering if its possible to design something for the new X9 Lite. Its the same pinout, but the pins are deeper into radio backcover, so I can’t use any of the above.. I have the full tx and I would want to have the lowest profile as possible… thanks for your work
Hello You did a great job, I like pinout of connectors
thank you very much
New question, which just became relevant; wil this work for the X9 Lite as well? What do you think? Cheers!
Hi Rob,
hehe good question which came in my mind today aswell!
I like the size of the remote!
Anyone tested it?
Phil
Hi Phil,
I am a bit lost.
I got an X-Lite FCC Version. I flashed it to LUA-Noheli-EU via Opentx. I flashed the internal modul via SD Card to the EU Version.
I downloaded my models from my X7S into the X-Lite Openttx profile. It got converted. I saved it. I downloaded the data und models from the X-Lite. I opened the converted file and copied the models. I set the X-Lite country to EU.
Problem is: The X-Lite does not connect to the RX of the selected Modul.
What have I done wrong, what can I make to have it run probably?
Please help.
Hey,
your internal old XJT Module from the X7S is different (different id) from your internal new module of the X-Lite. I think you have to rebind your quads again! I hope that helps!
Greetings,
Phil
I used square ones, it reduces the complexity of the adapter a bit. You can remove the very tiny clips and the bottom „wing“ that holds the flimsy round female pin headers.
Yeah true, these little clips are not really needed if you glue in the pins properly!
This radio just needs long sticks to feel right for me, with big hands. So I made my own 30mm stick ends using 7mm diameter alu rod. loving it now, the sticks have a bit more travel than I get on my X9D.
The 3D crossfire micro case works so well! I’ve been using it for about a month & its been an amazing experience to use this radio with crossfire!
Phil, I wonder if you are considering an V2 version of this case? It seems that some space could be saved to make a low-profile version, incorporating a new back case of the micro. I know some people have done a „stealth“ mod, but your outside solution is much more accessible for people.
Thanks again for your work on this, I love it!
Hi Riquez,
yeah, already thought about it. On the micro TX its possible to split JR Module Bay and Electronics via 4 screws. You basically unscrew it from the JR Part.
One could just draw a simple Adapter where we can screw it back on. I think it will be as thin as the Full Module version.
Unfortunately i don’t have any MicroTX which i can use to deisgn the case. 🙁 Sorry mate!
When i get my fingers on a MicroTX, ill draw one for you! 🙂
Greetings,
Phil
This is great!
About the Header Pins for the crossfire adaptor – you have linked to the round type. Can we use the square type? I already have many of those.
Hey Riquez,
you have to use the round one, because the X-Lite has Round pin headers too. 😉
Thx for your work! Really looking forward for Crossfire LUA script because it’s impossible to configure module or receiver for now.
Hey Alexander,
please use this for now. Buttons need to be changed, but it works.
https://www.dropbox.com/s/9myptv2t3d13gpt/CROSSSFIRE.lua.zip?dl=0
Yep, it works! Thanks once again!