
HP DPS-1200FB Power Supply Hack for charging LiPos (12 V / 24 V)

![]()
In this guide, you will learn how to mod the HP DPS-1200FB (A) power supply to use for LiPo charger or 3D printer. In addition, I’ll show you how you can connect two power supplies in sieries to get 24 V.
Warning:
Note that 220V (or more) may be present in the interior of the power supply. If you are unsure to do it yourself or you are not expert, you should not make this mod. I accept no liability for any damage that may result from this tutorial.
Do not operate the device when it is opened. Please also note that this power supply has capacitors may still be charged for a long time with high voltage, even if the power cord is removed.
Inhaltsverzeichnis
What wee need
- HP DPS-1200FB (A) Power Supply (Used already from 30€)
- 1x resistor between 330 Ω and 1000 Ω (z. B. Conrad Sortiment)
- Soldering Iron (e. G. TS100) + solder (e.G. FixPoint)
- optional: screwdriver (e. G. Wera 0,4 x 2mm)
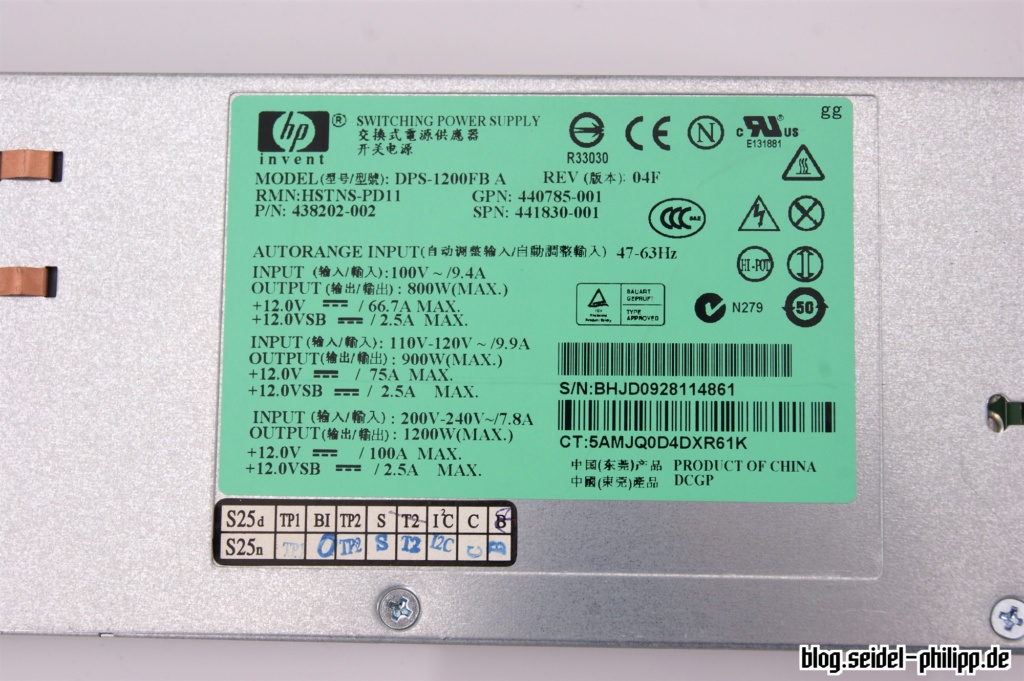
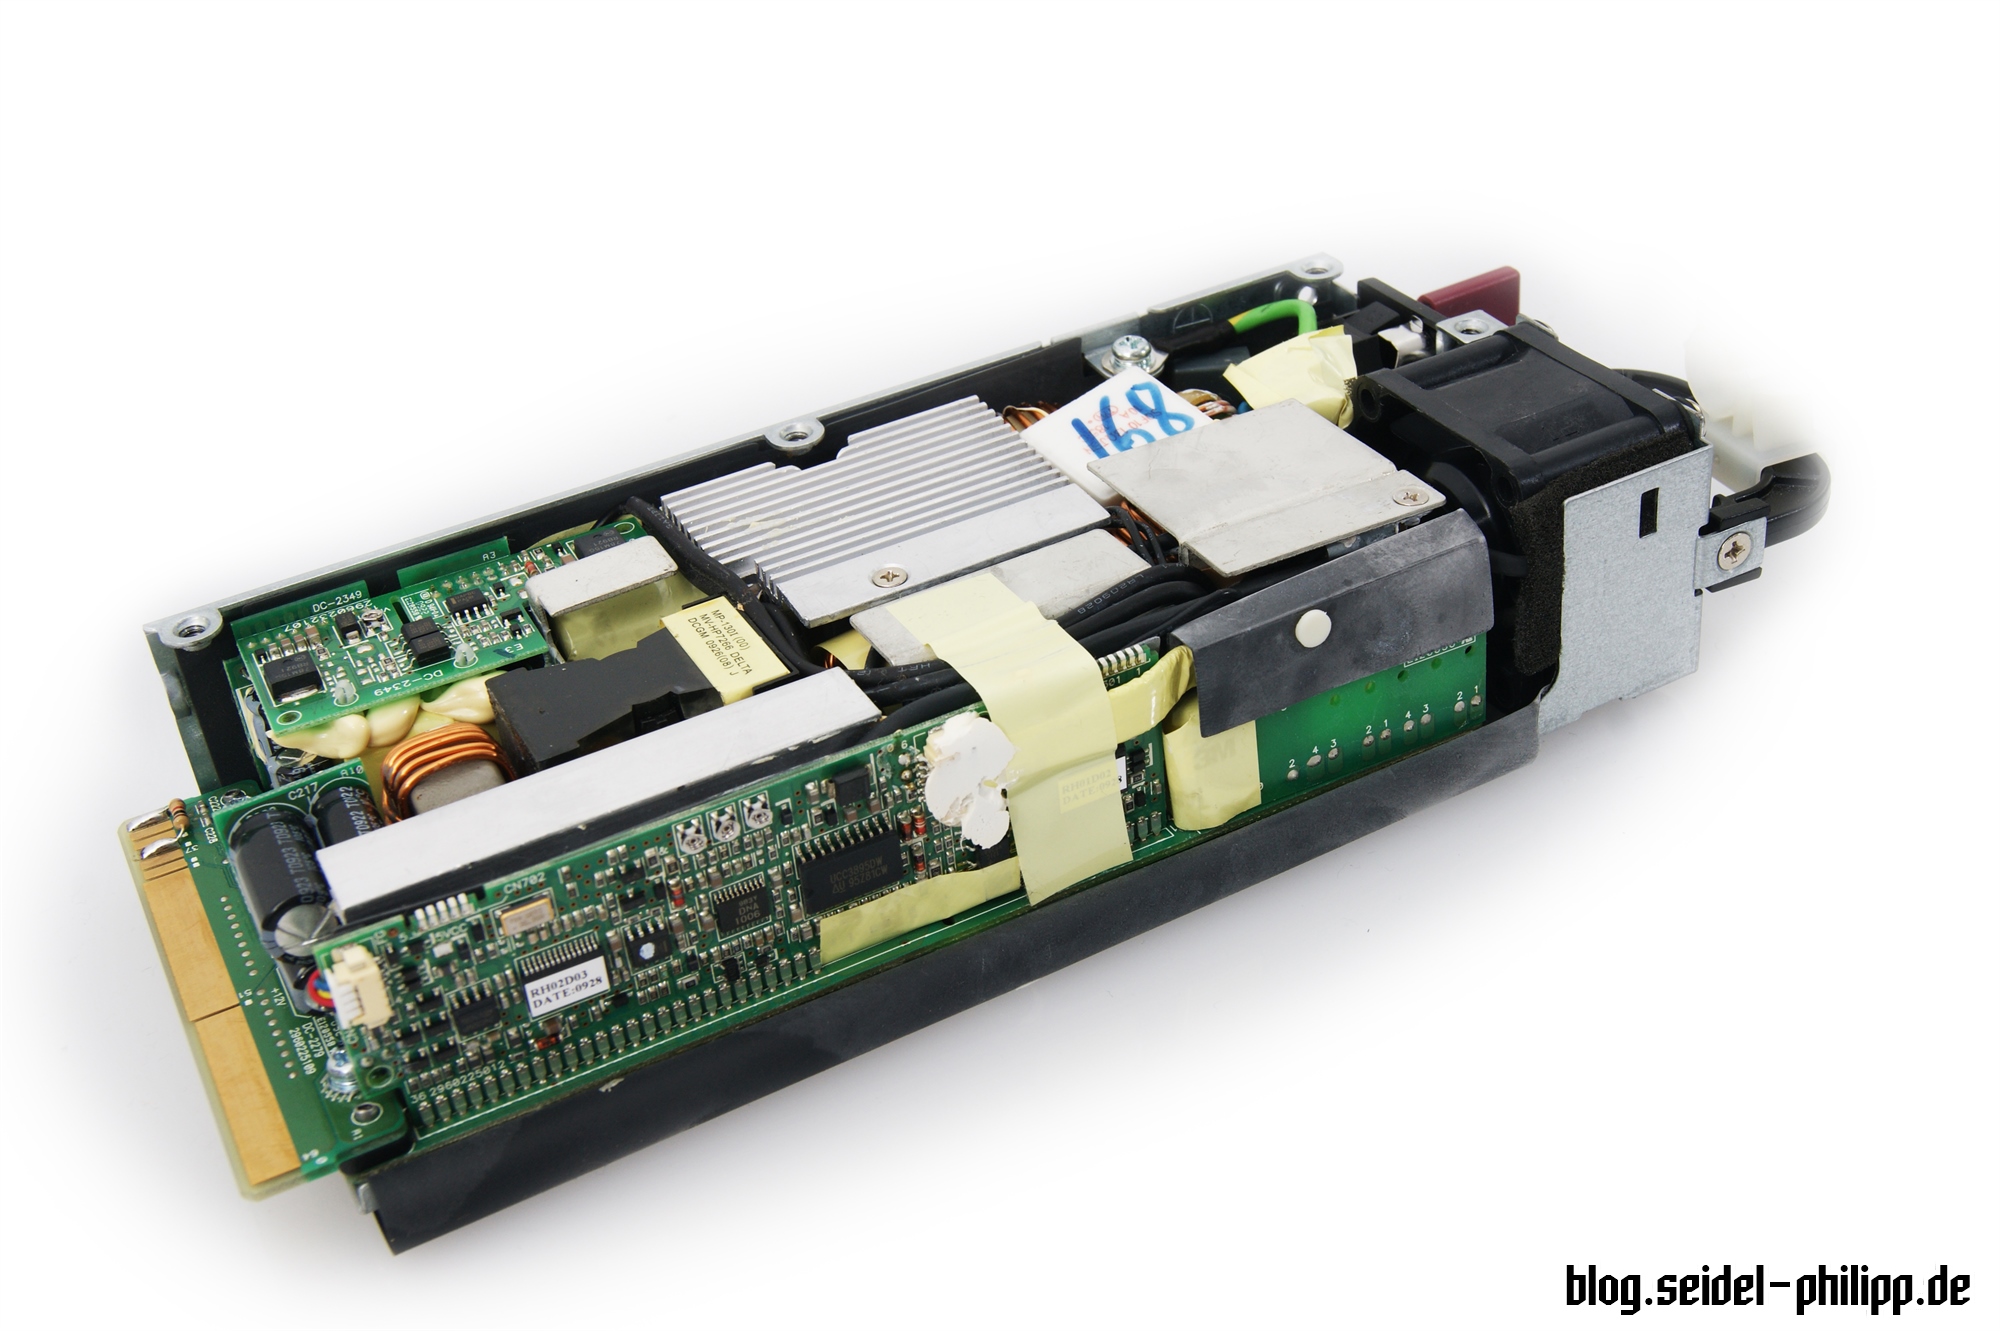
The HP DPS-1200FB
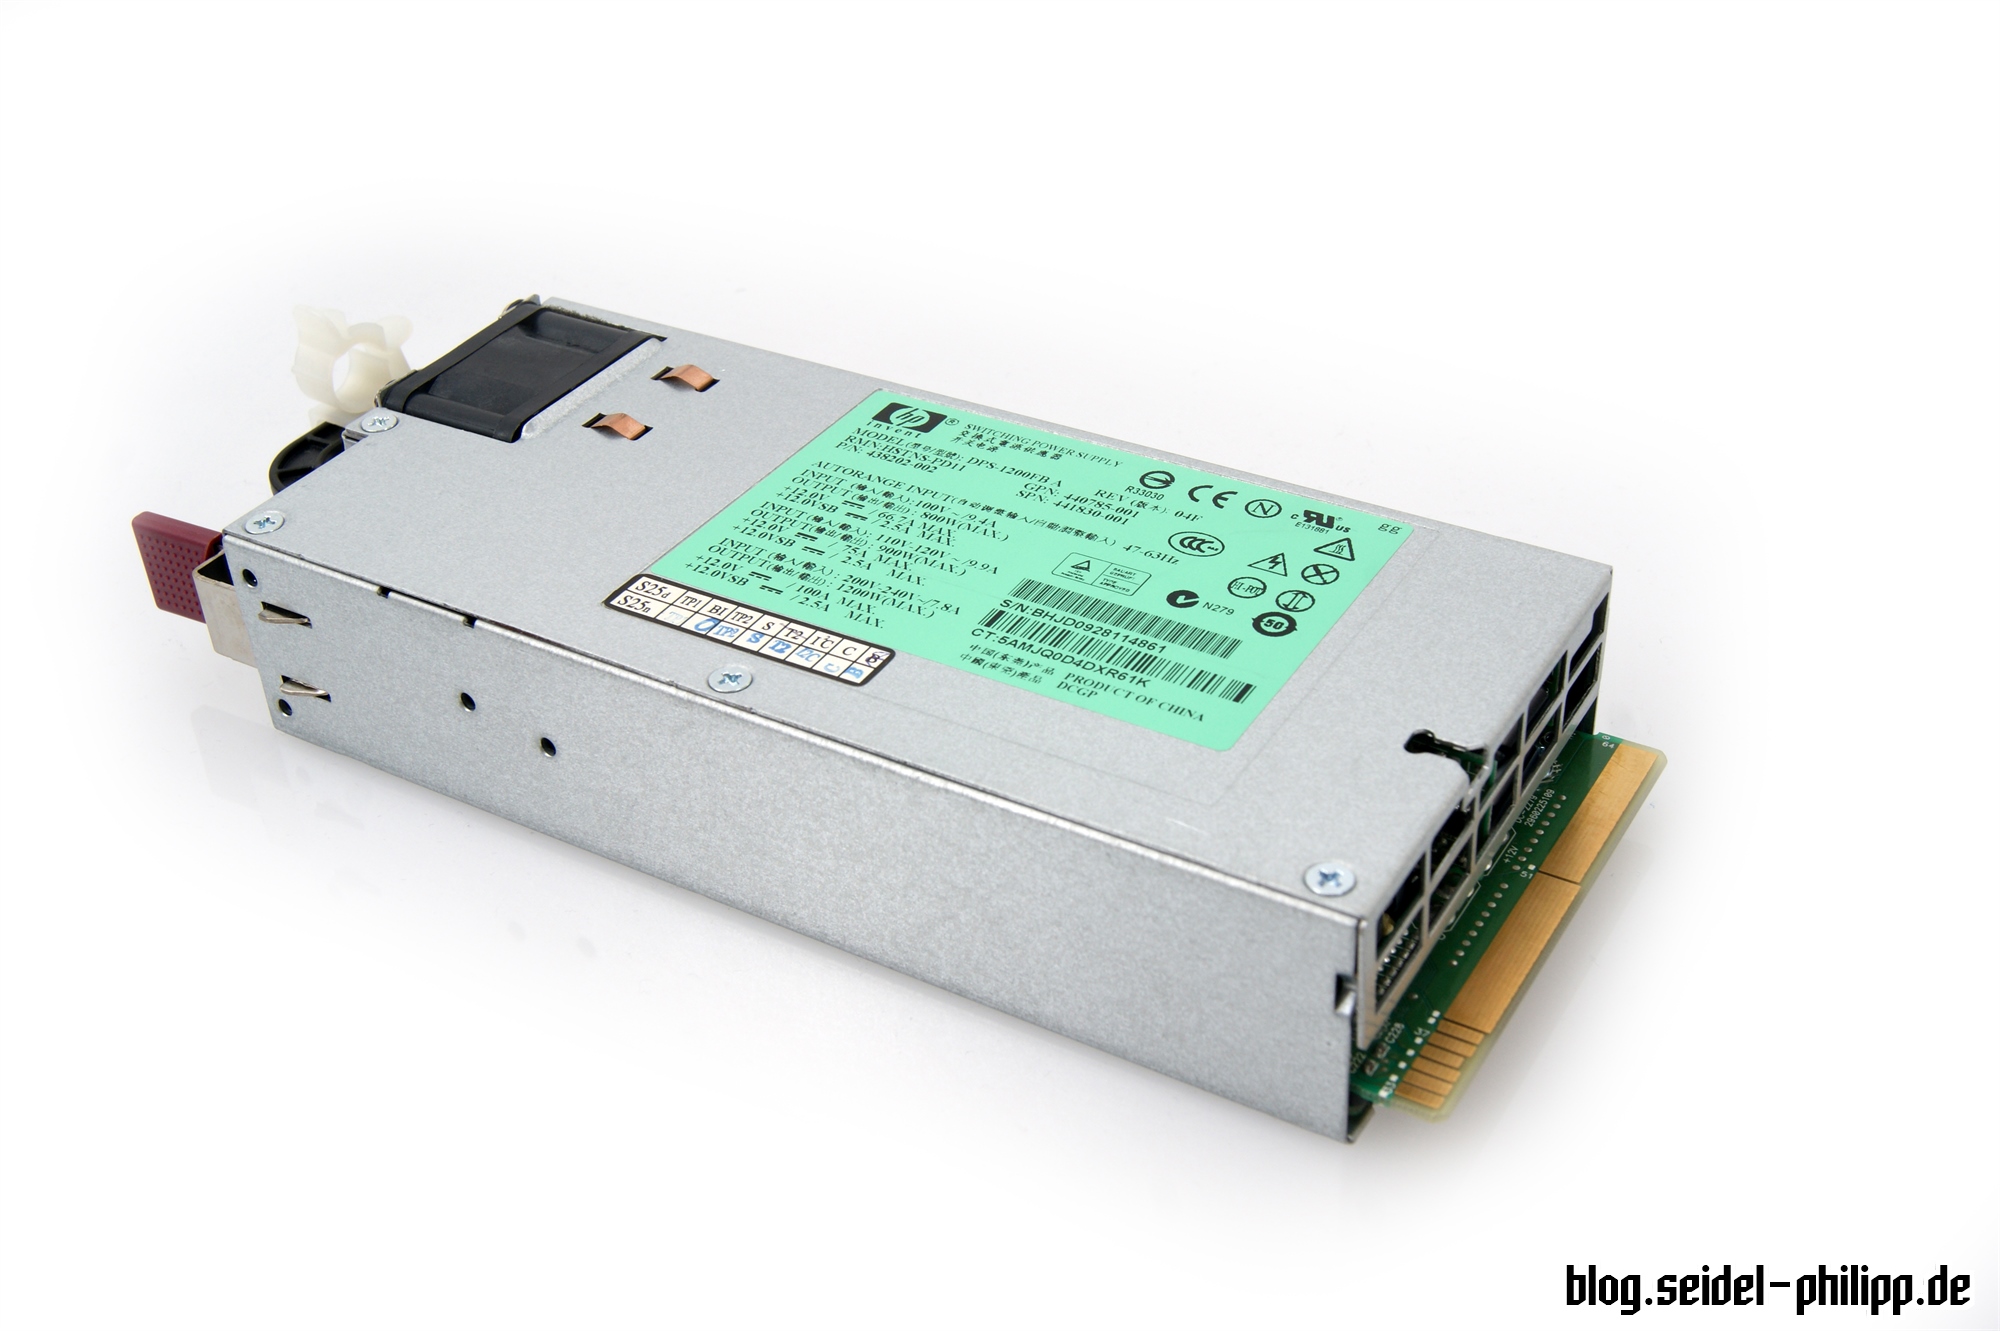
The HP DPS-1200FB is a server power supply with extremely high performance. It offers up to 100 amps at a voltage of 12 volts. Therefore, it is particularly suitable for the power supply of high-powered chargers. It is usually operated in server farms and pushed into the server racks. Therefore, we have to hack the power supply to be able to operate it.
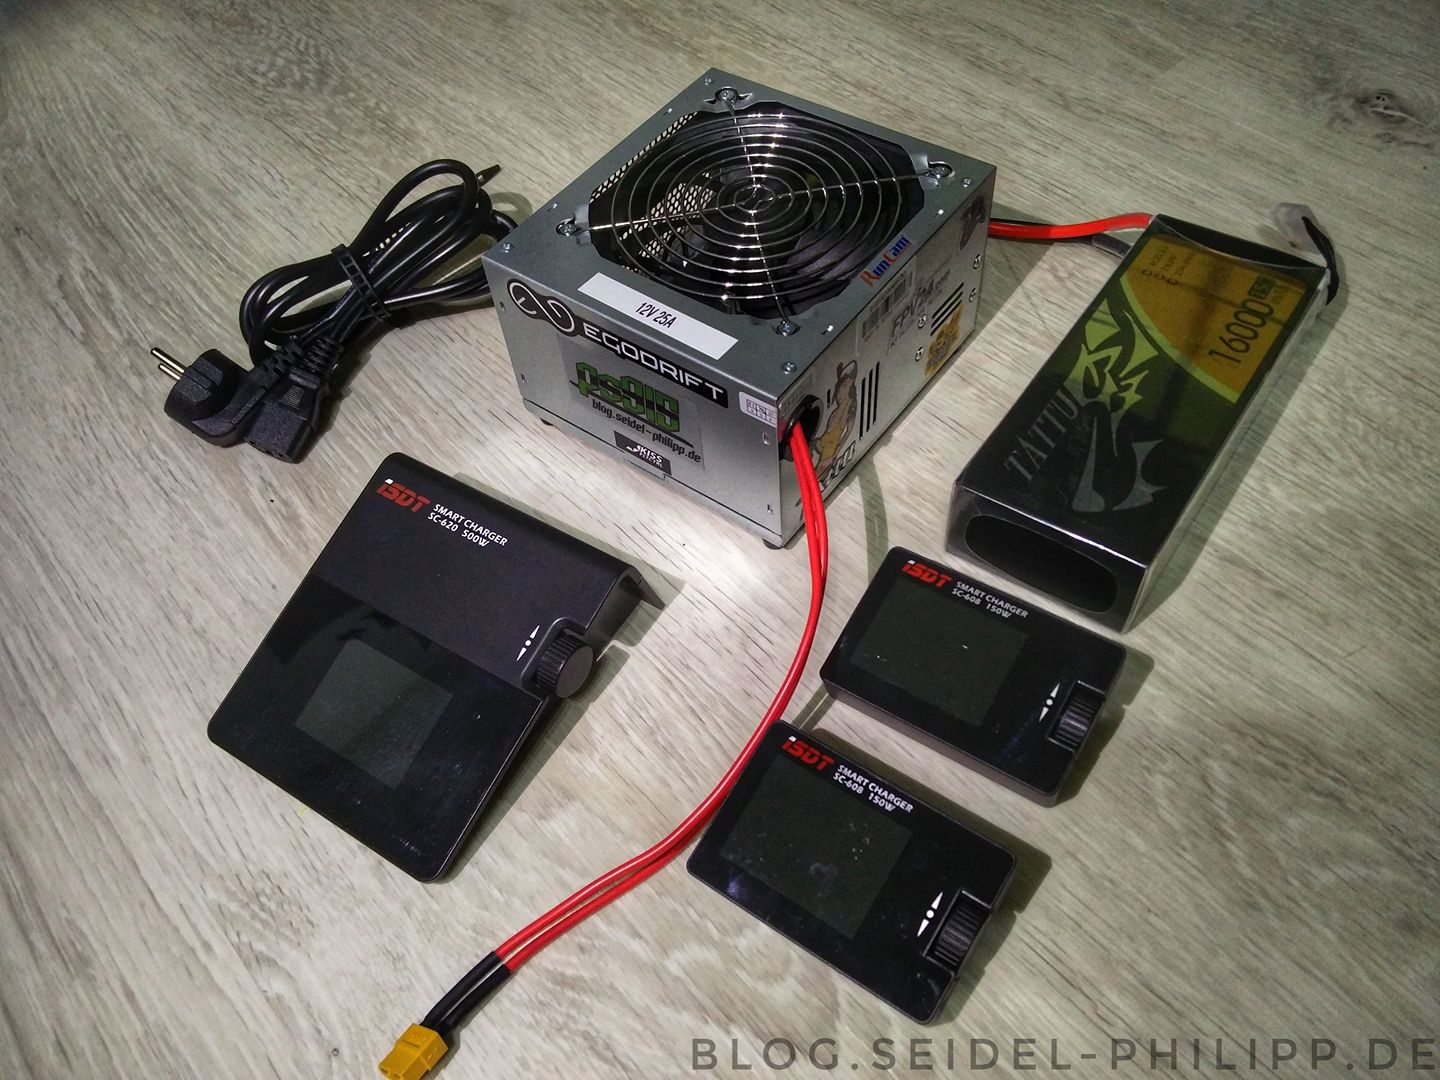
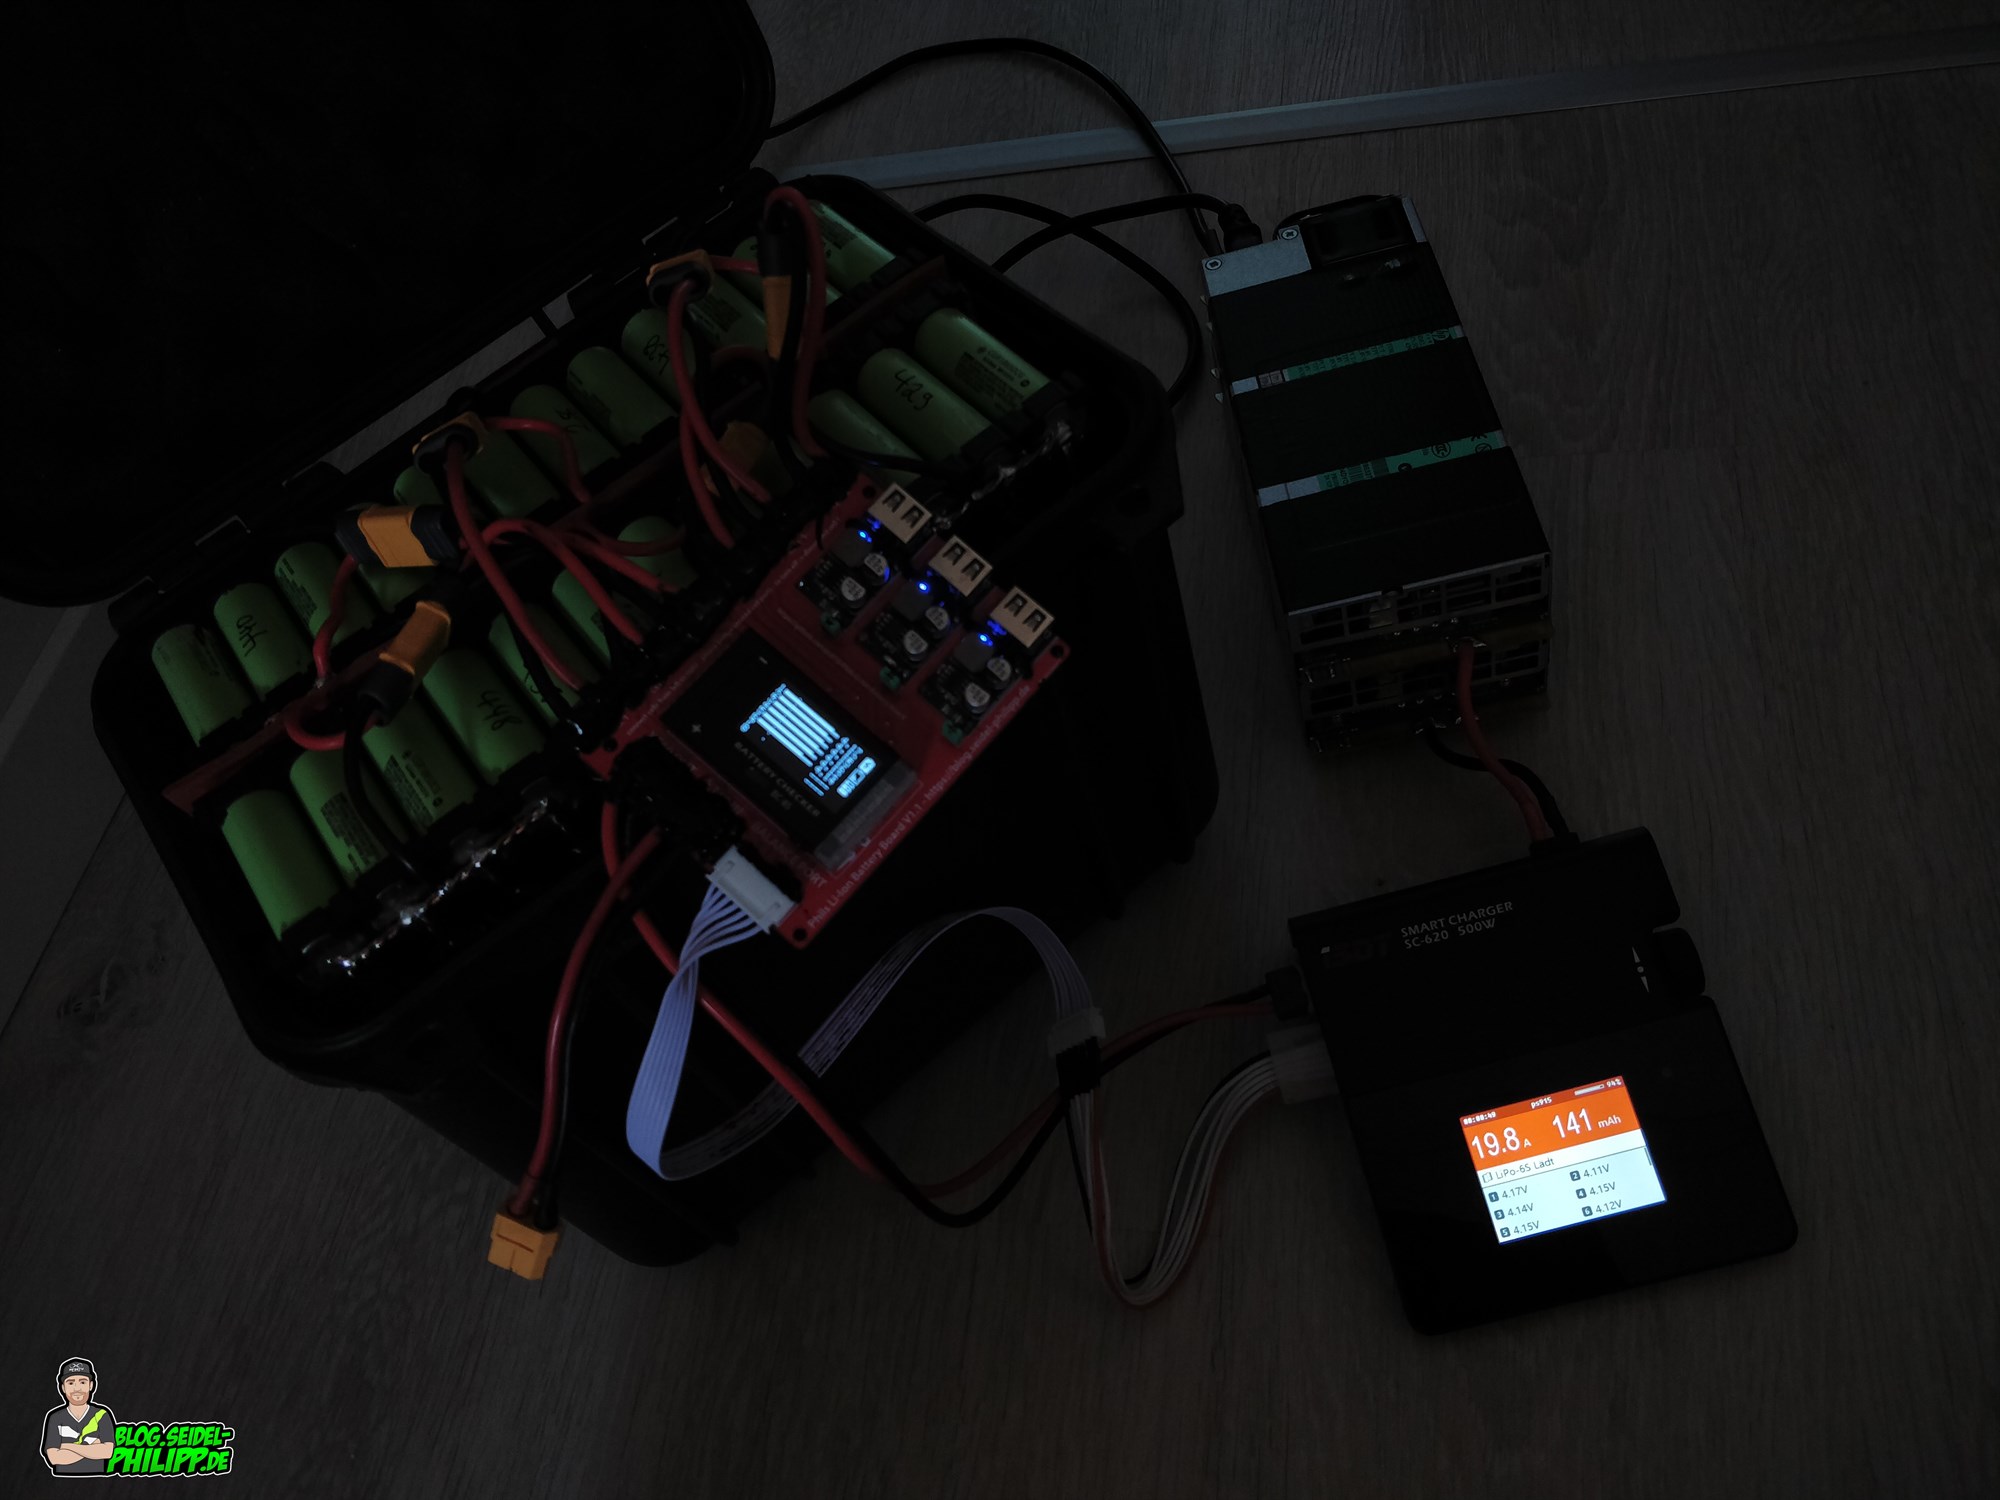
Incidentally, I have previously converted an old computer power supply which gave me 25 amps at 12 volts. The goal was to charge the Tattu 16000mAh 4S Lipo Feldakku in an acceptable speed (with the ISDT SC-620). You will find a brief guide as a text in the picture description on Facebook.
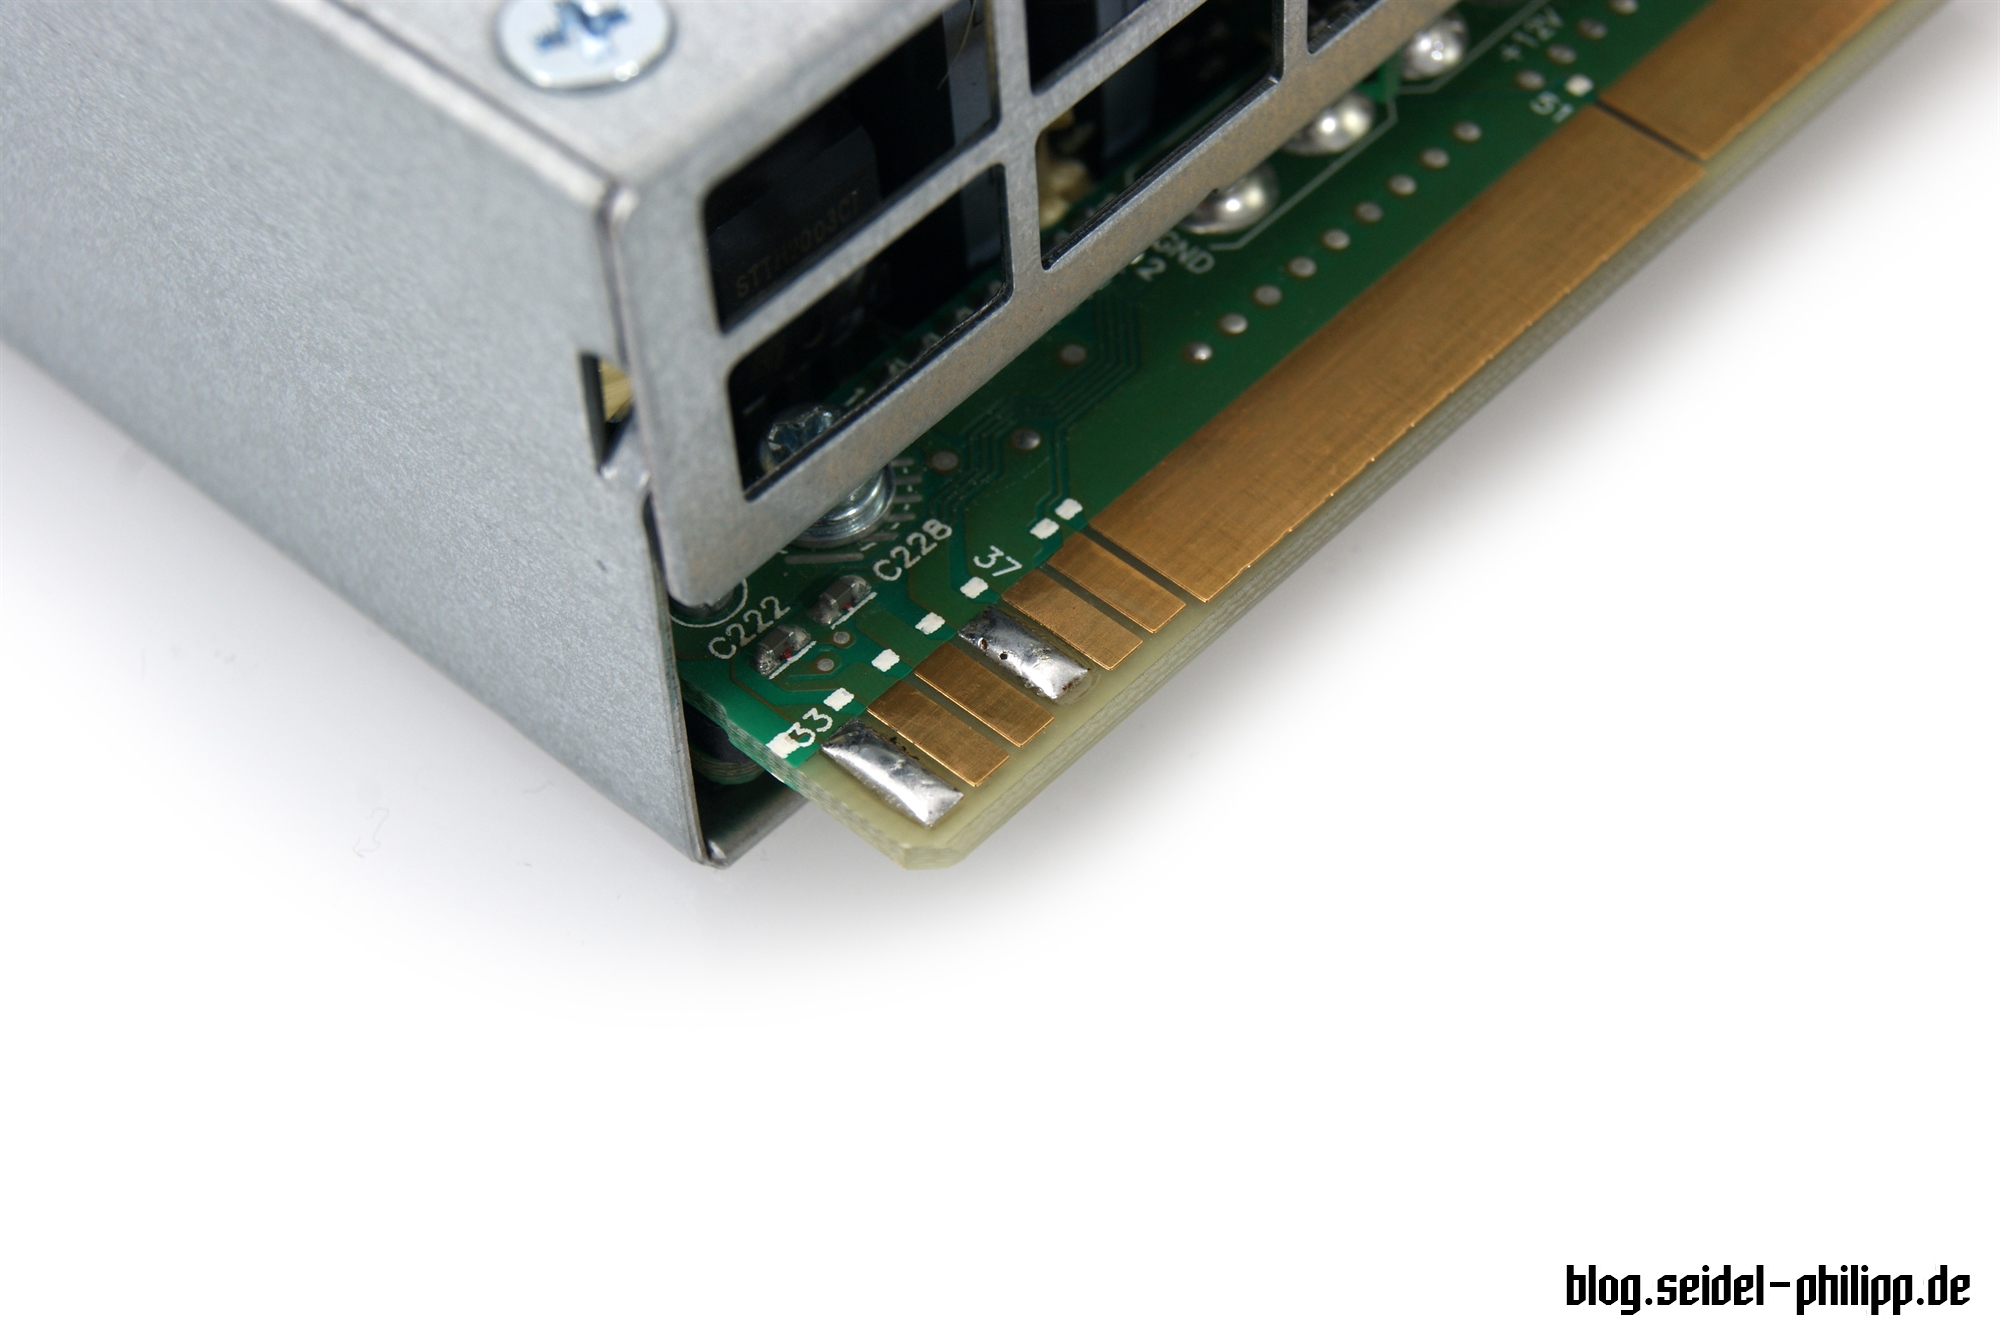
The connections
If you look at the top of the power supply you can find a series of connections. We are interested in only the PIN33, PIN36 as well as 12 V and the GND connection.
On the back are further connections, which are also not of interest to us.

If you plan to operate the power supply at the limit and want to get very high currents, you should solder 12V and GND down and above (exactly one above the other) to distribute the load evenly.

power up the supply – solder a resistor
The first thing we need to say the power supply that we have pushed it into the appropriate bay in the server. This is relatively simple by soldering a resistor.
We provide the contact surfaces with a little solder and we do not create a short circuit between the adjacent pads.
Next we look for a suitable resistor. You can solder a resistor between 330 Ω and 1000 Ω. I have a Conrad-Box with various resistors.
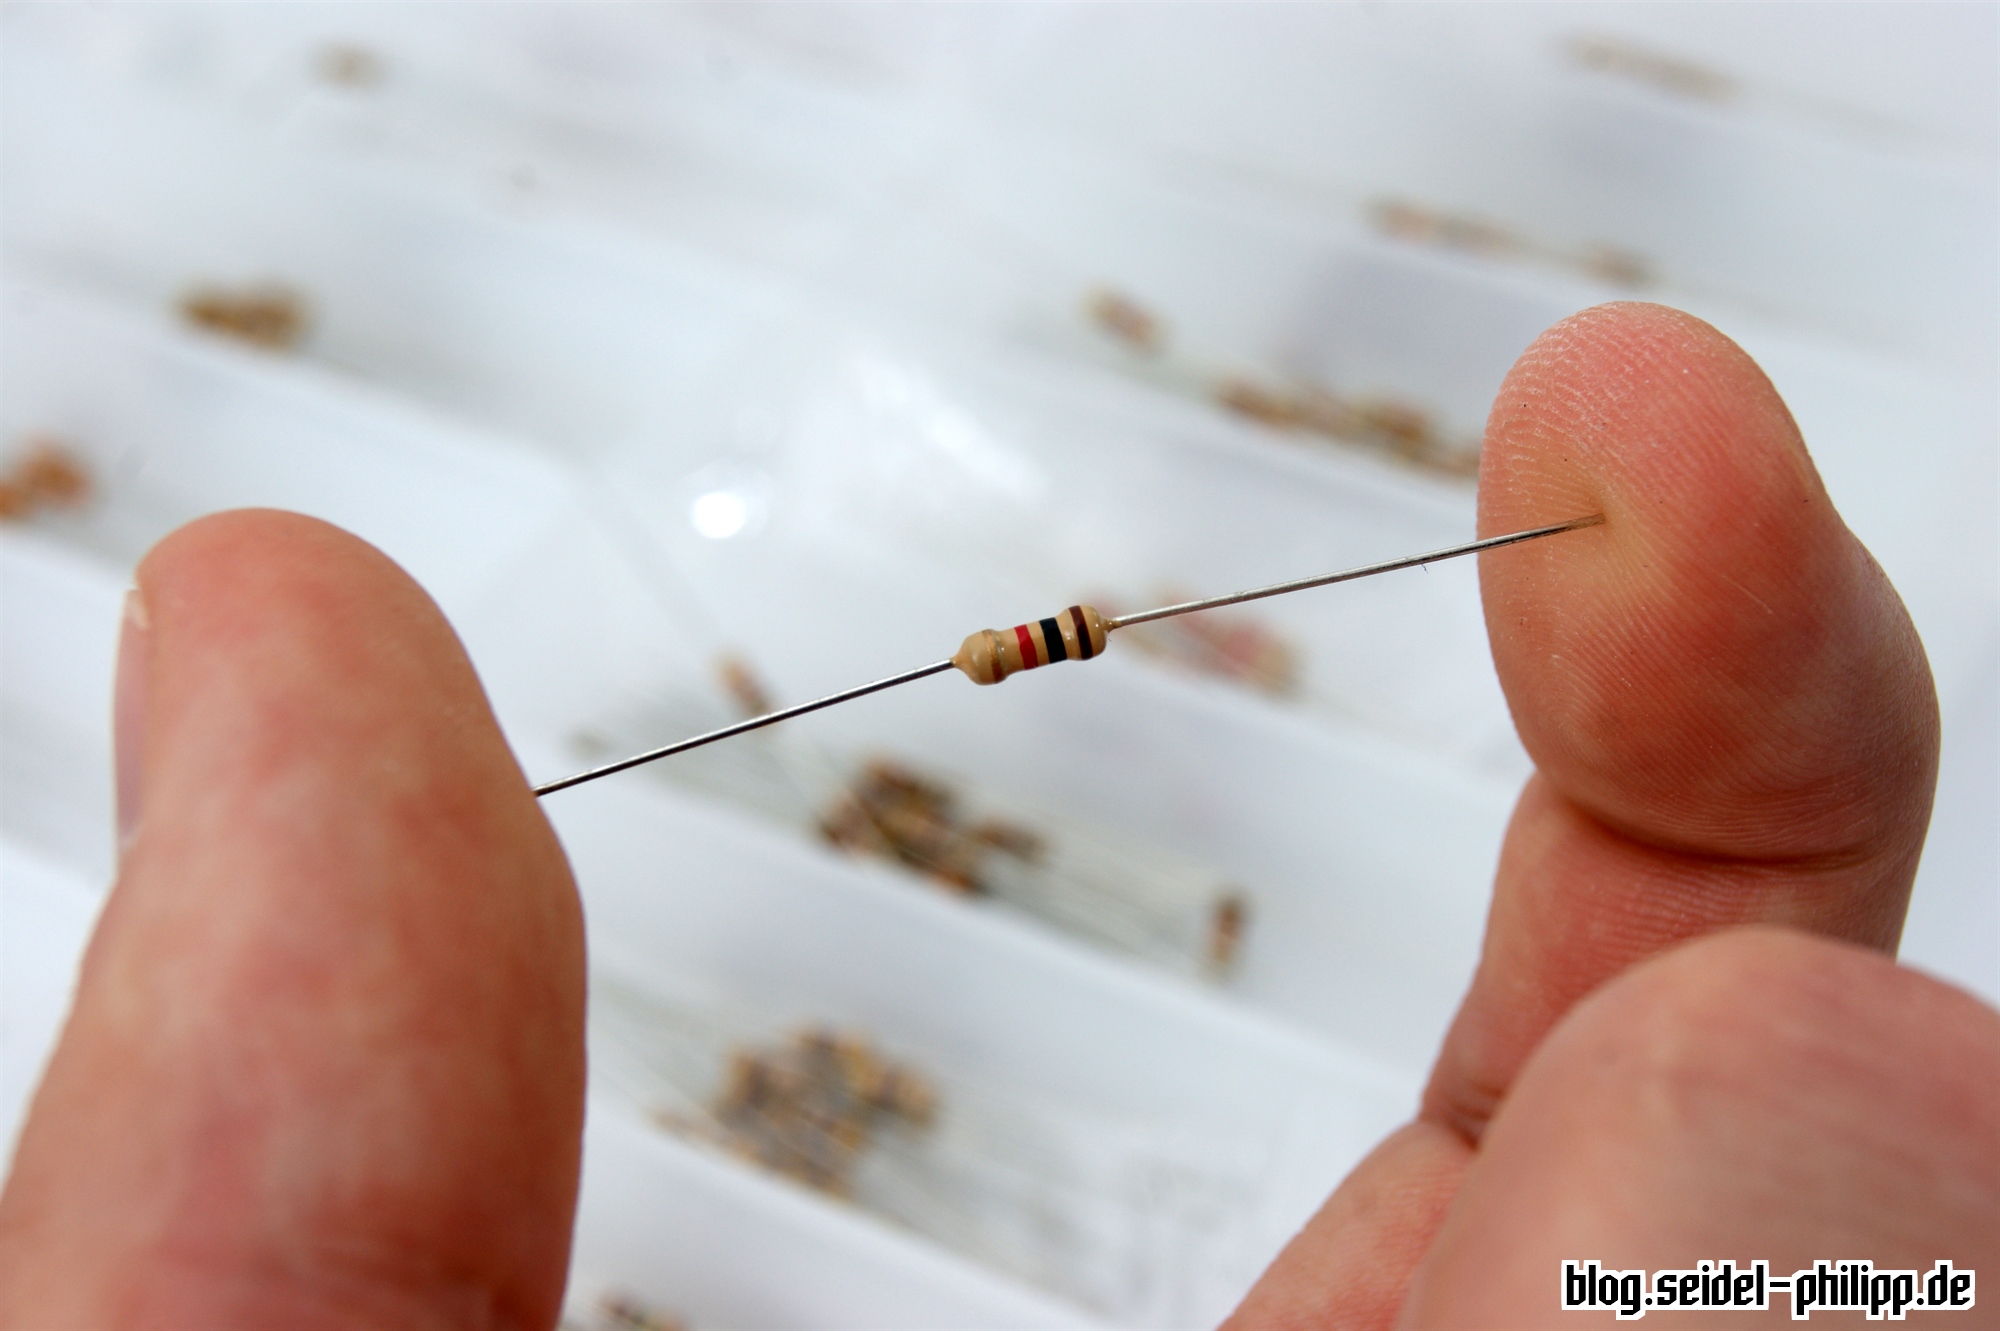
You can fold both legs of the resistor directly at the resistor, the dimension fits perfectly for the two soldering surfaces. The legs you should be shortened a little. Now place the resistor flat on the pretinned pads and solder it. Afterwards, I have bent the resistor up, so that he has no contact with the circuit board.

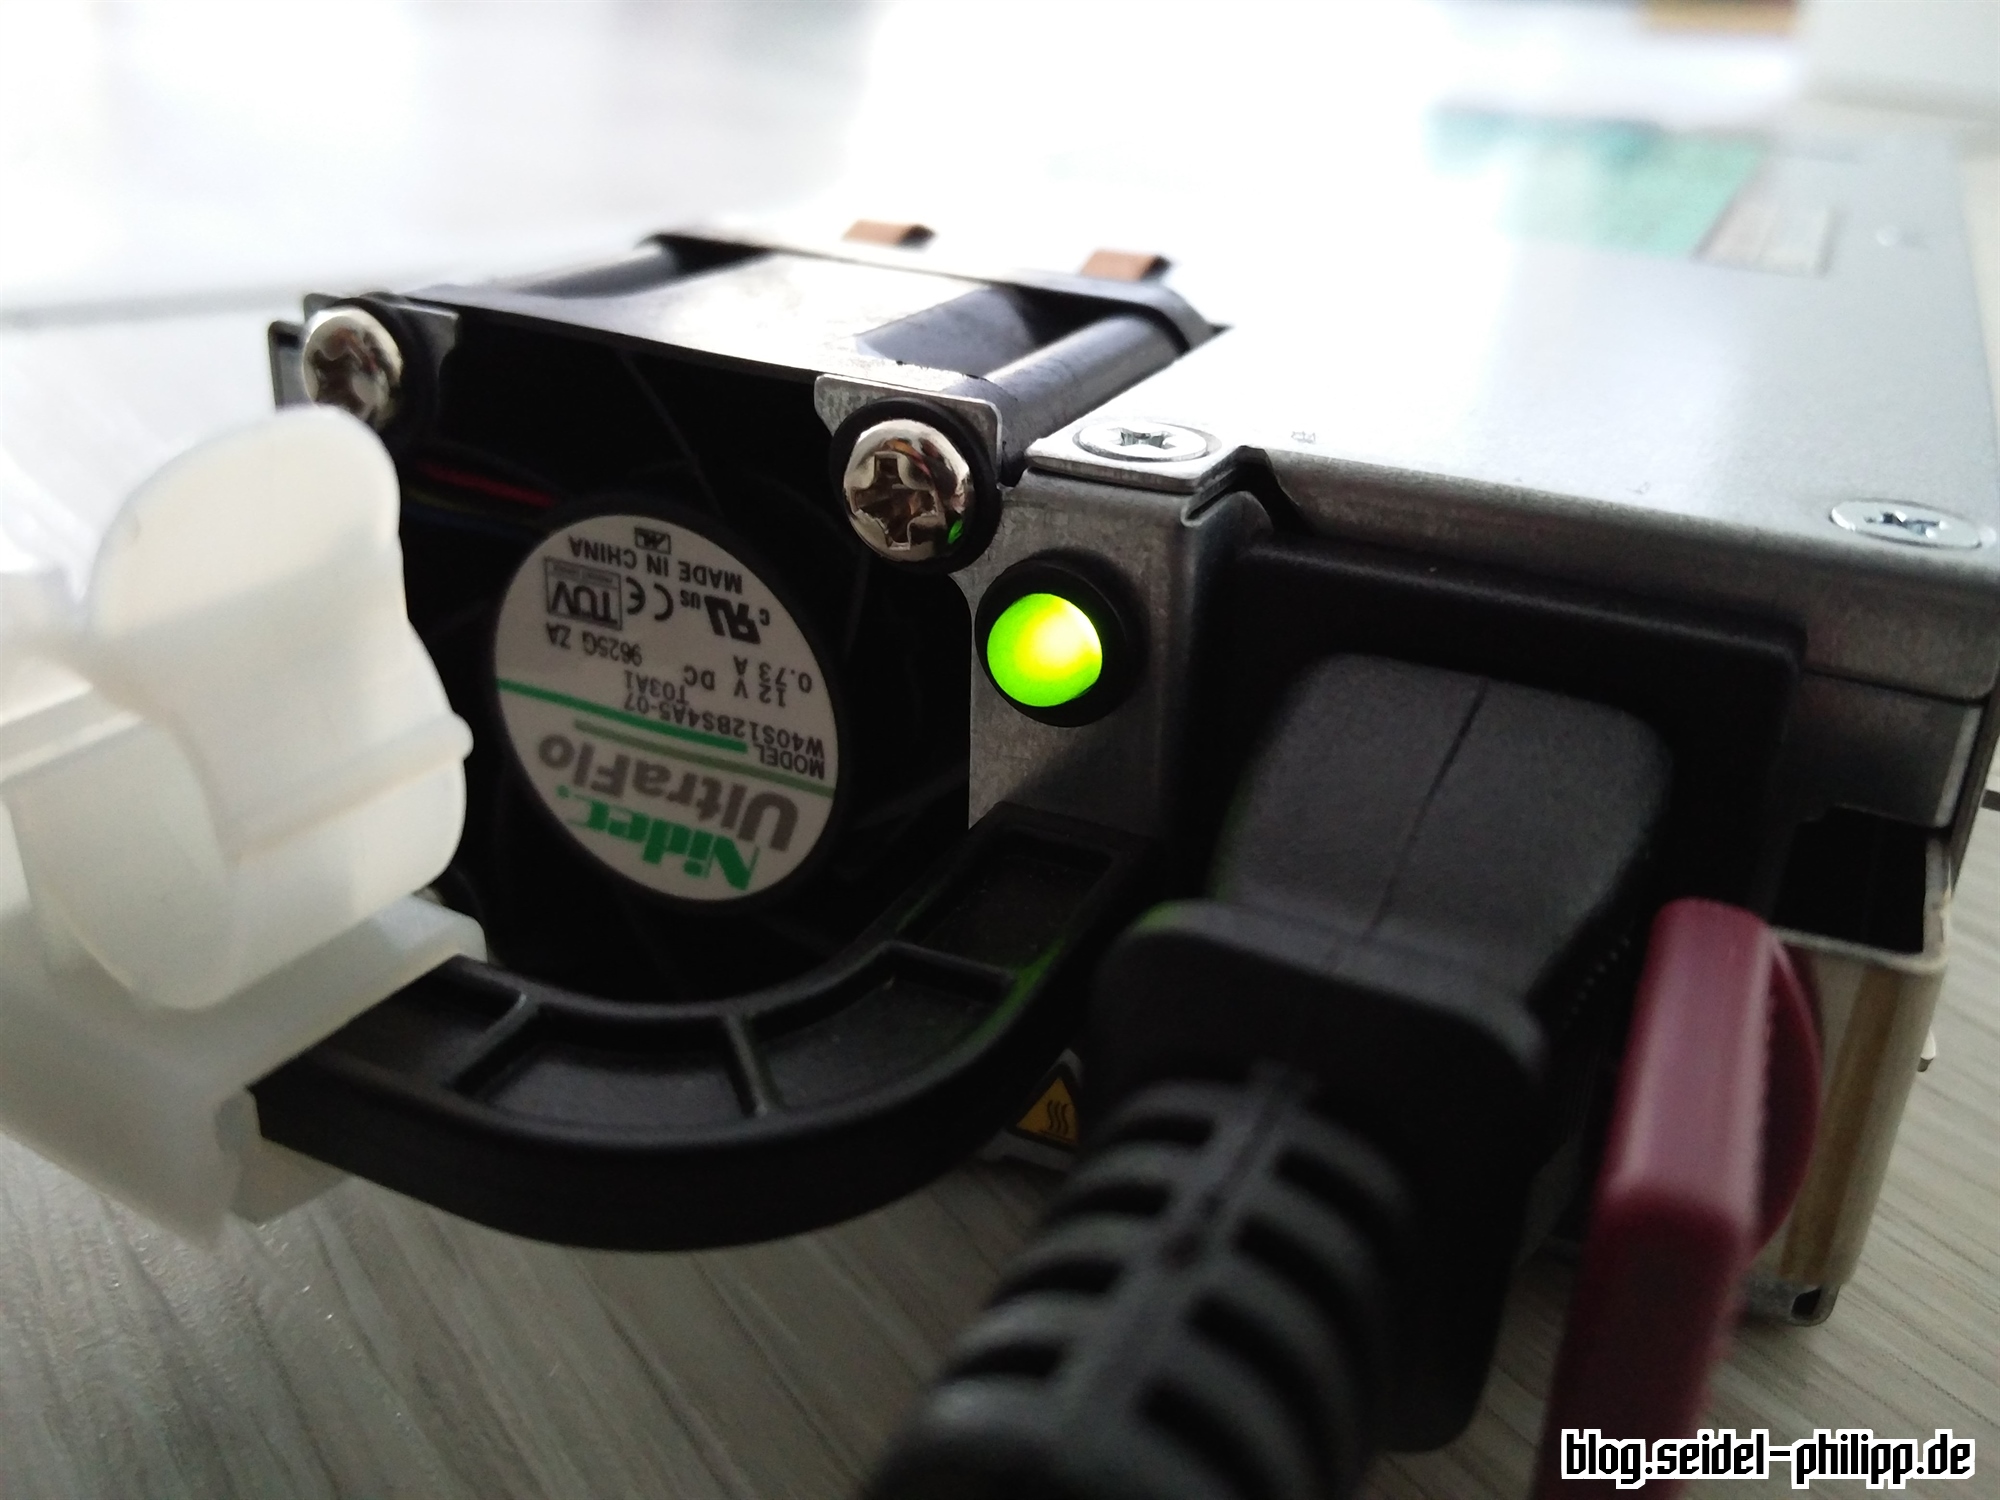
If everything is correctly soldered, you can plug the power supply into the socket for the first time. When the green LED lights up, the power supply is raised and now supplies 12 V voltage.
With a multimeter, you can now test whether the 12 V is really applicable.
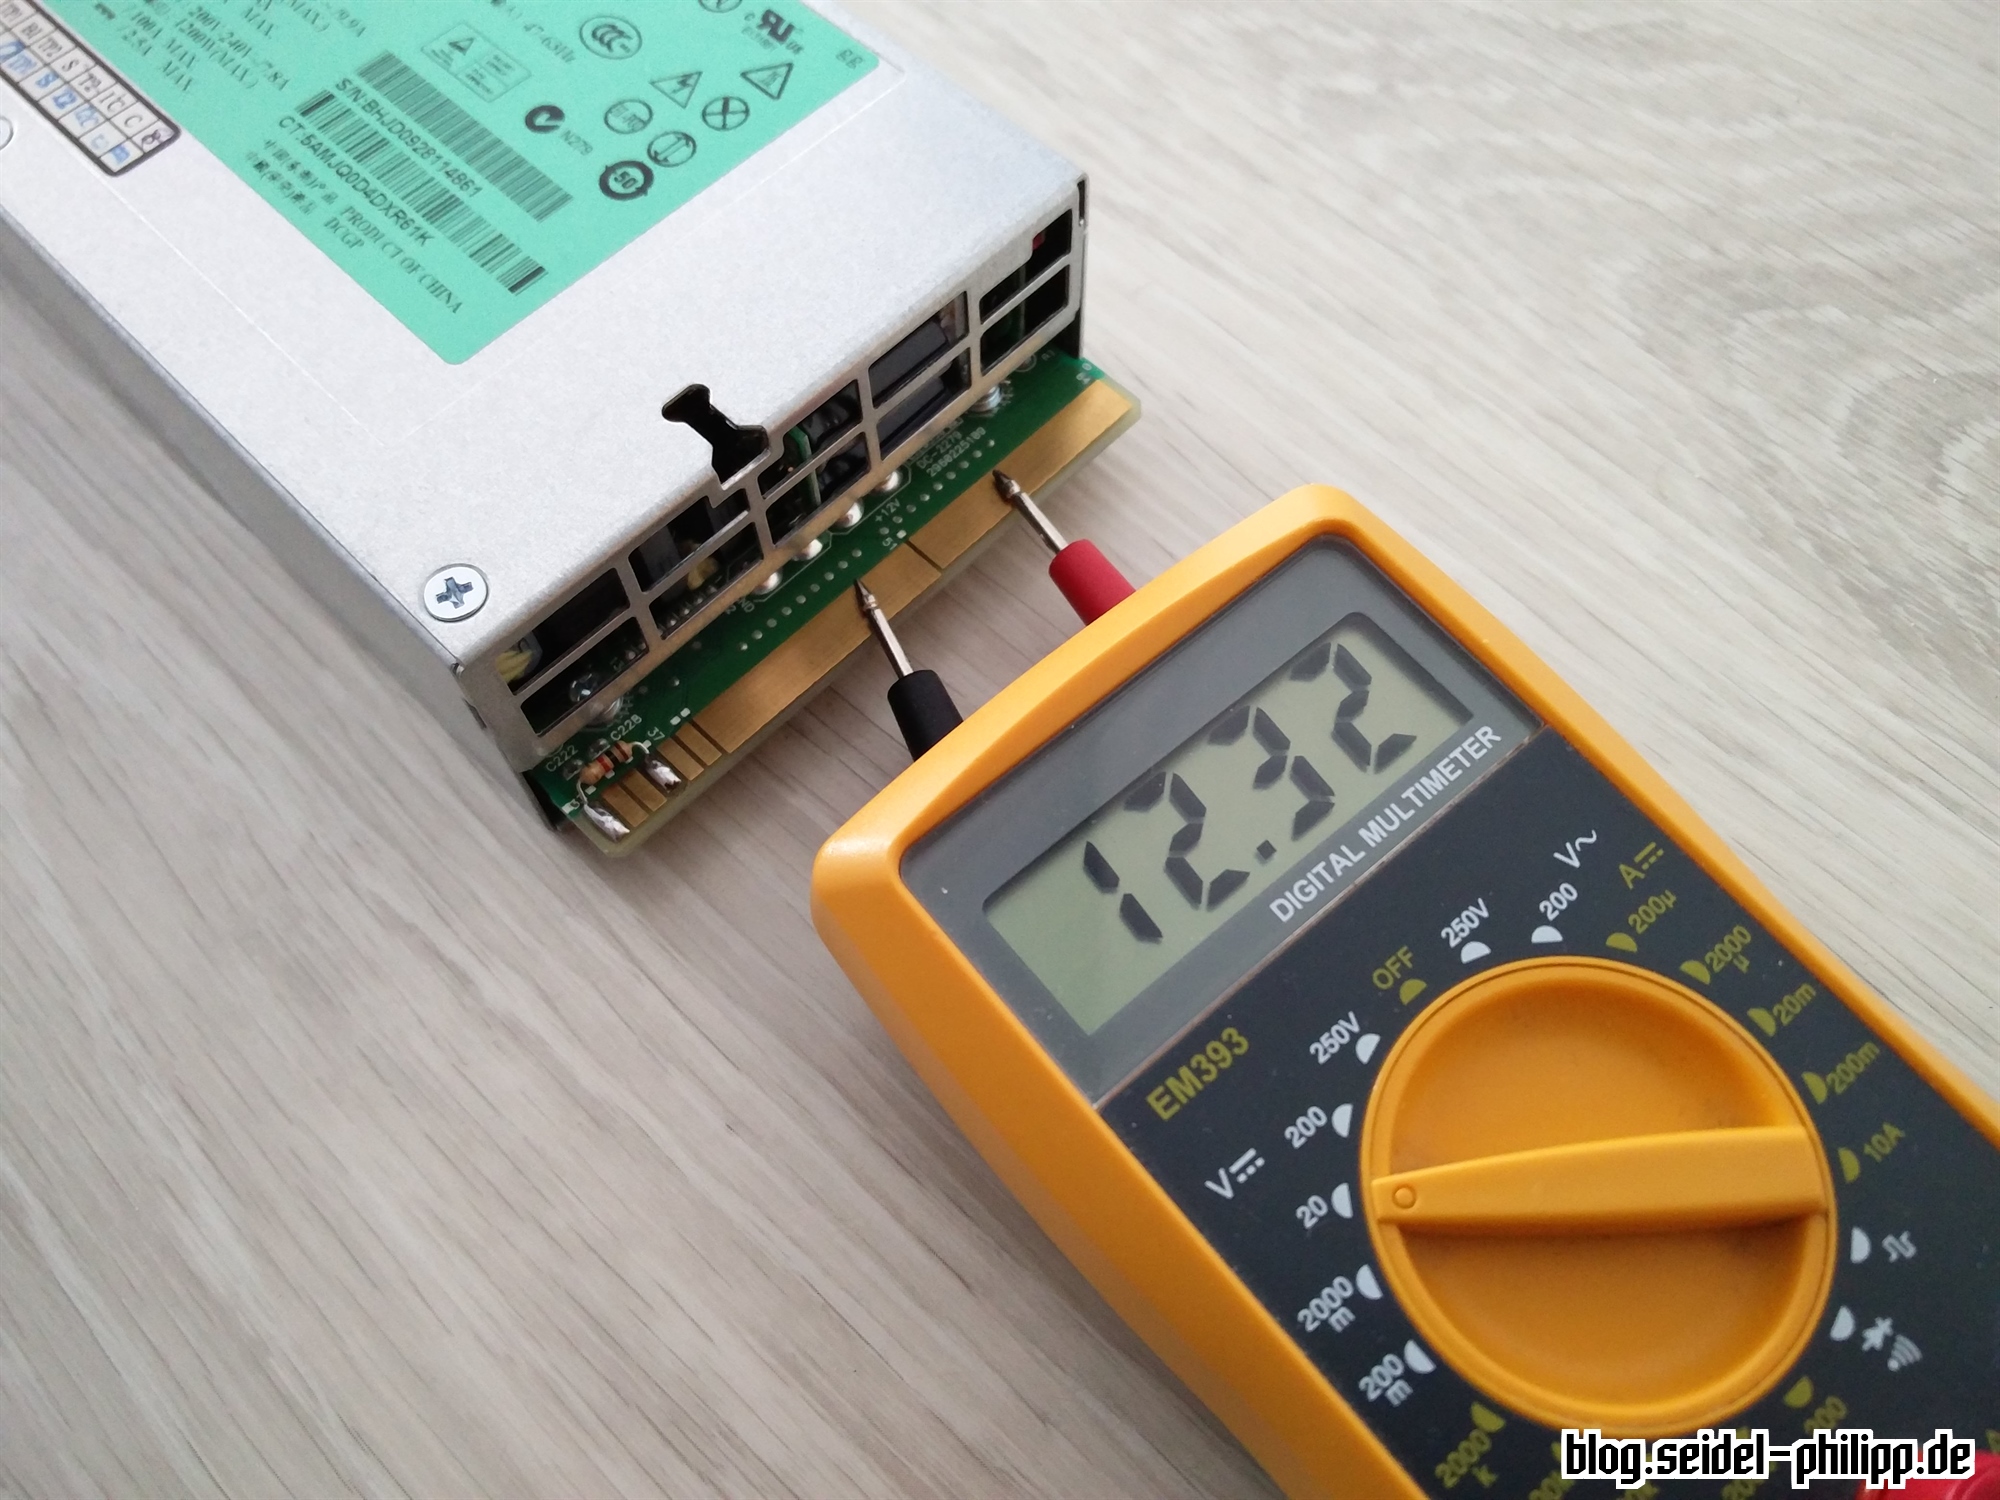
Optional: Voltage adjustments
As can be seen in the picture above, the power supply provides slightly more than 12 V. For our chargers this is usually not serious, because they can usually be operated with significantly higher voltages. However, if you want to use the HP DPS-1200FB for other things like a 3D printer and need exactly 12V, there is a possibility to set the voltage precisely to 12V.
Warning:
Note that 220V (or more) may be present in the interior of the power supply. If you are unsure to do it yourself or you are not expert, you should not make this mod. I accept no liability for any damage that may result from this tutorial.
Do not operate the device when it is opened. Please also note that this power supply has capacitors may still be charged for a long time with high voltage, even if the power cord is removed.
Open the Case
You can open the power supply by removing the 4 marked screws. Then remove the black insulation. The insulation can be glued.

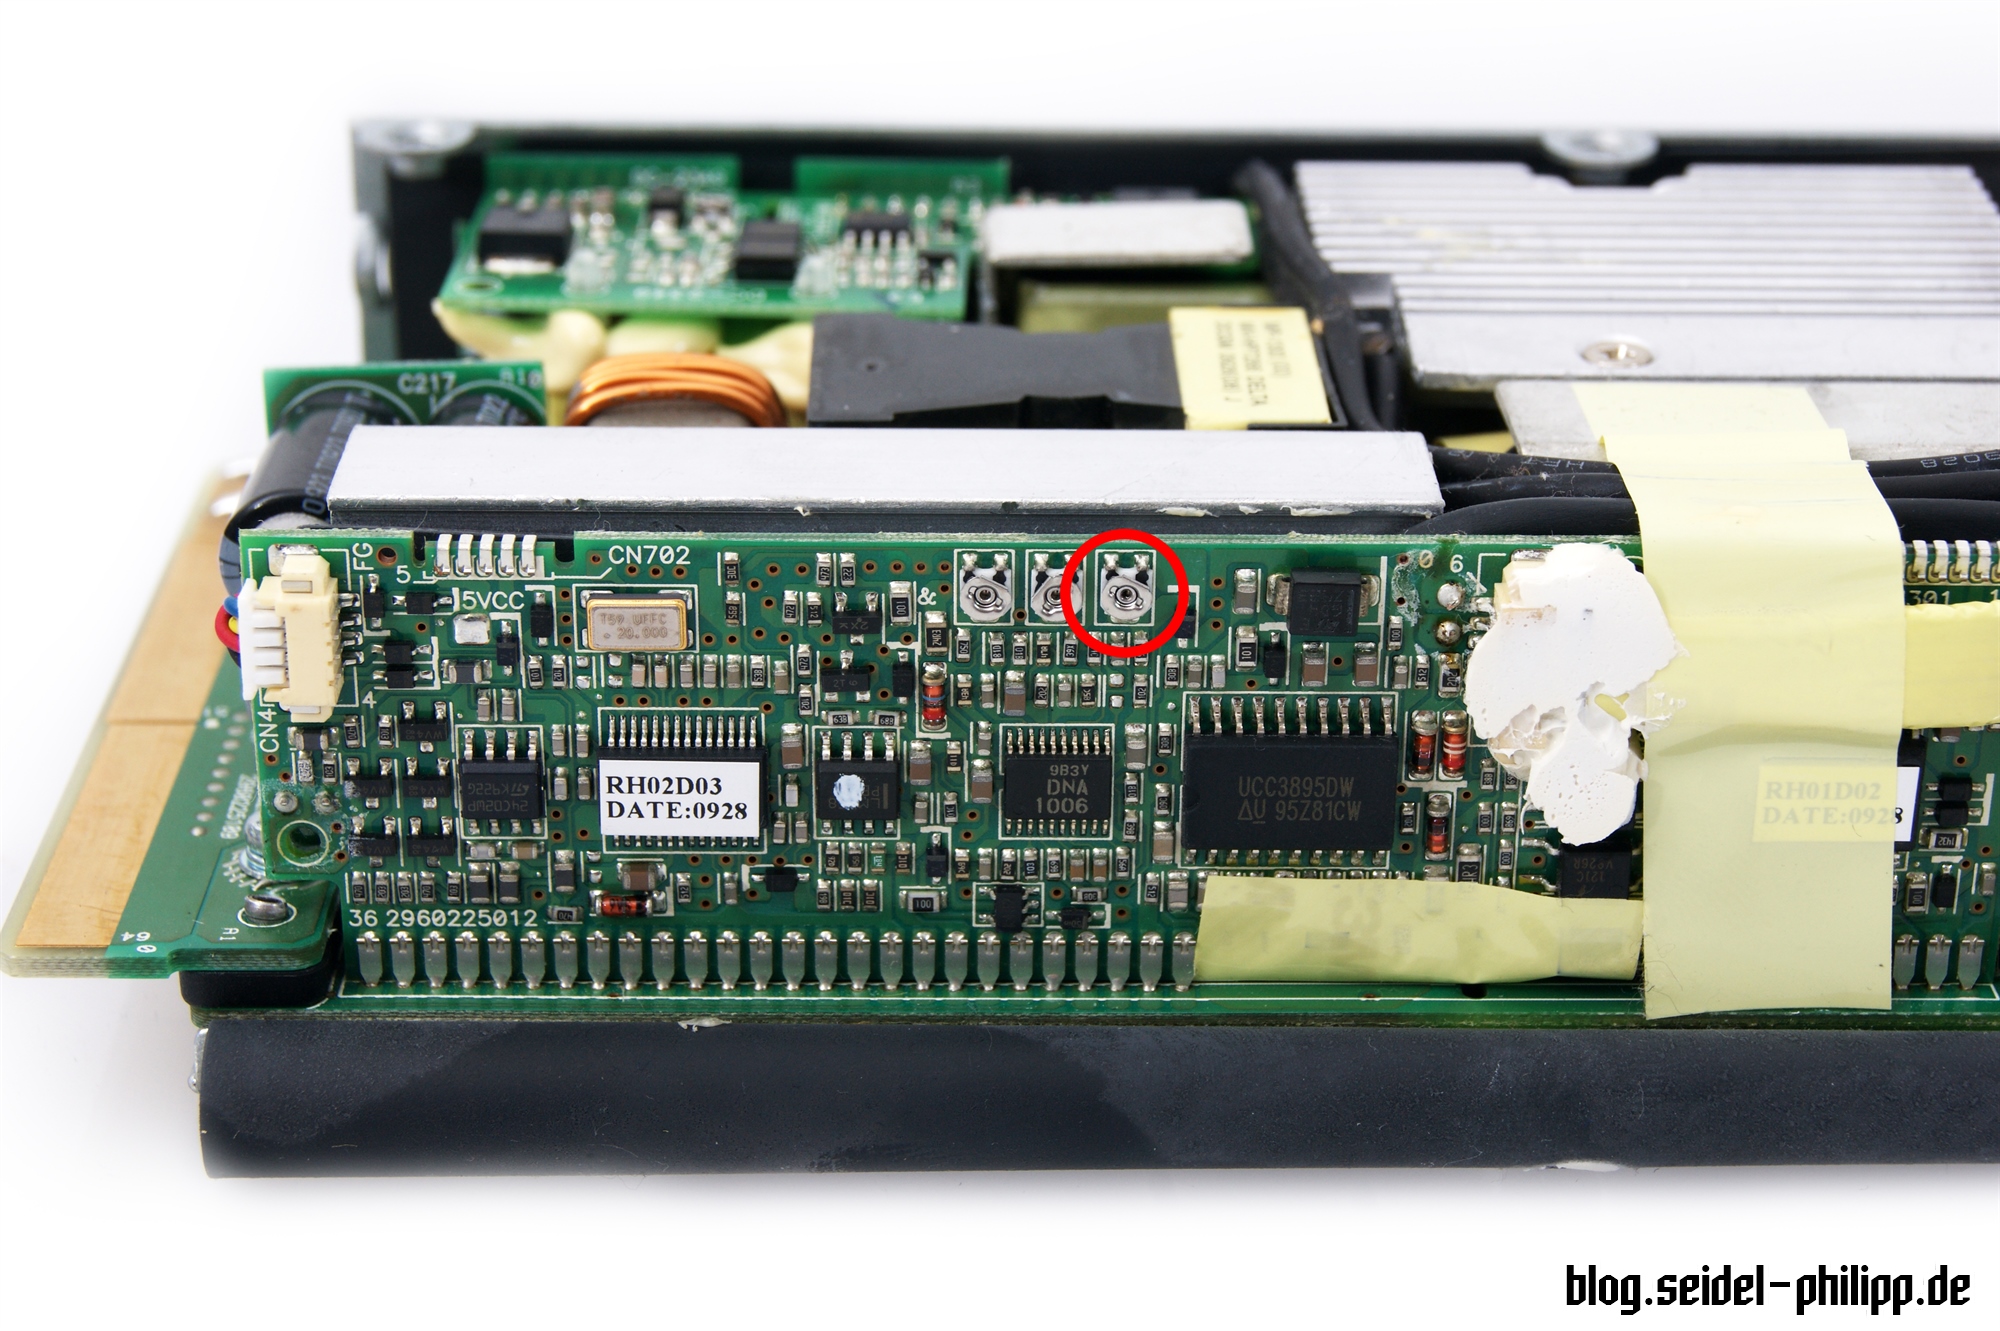
Find the adjusting screw
You can fold the insulation and push it under the device. Then you should see the following board on the side of the device.
Adjust the voltage
Rotate the marked adjustment wheel to fine-tune the voltage. If you turn counterclockwise, the voltage will increase.
Check the voltage
Afterwards, we check the voltage with a multimeter and, if this is correct, can re-assemble the power supply. The power supply is now ready for use.

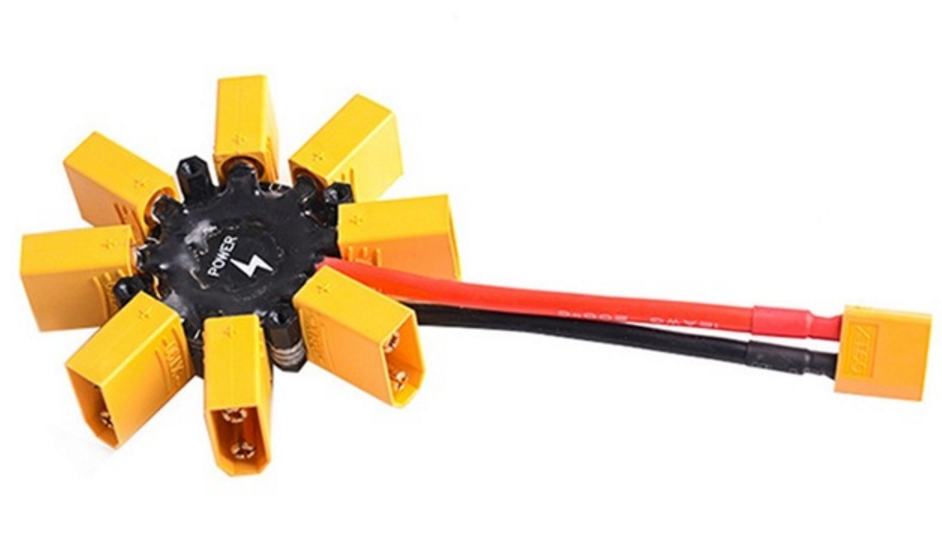
Power Hub
To power more than one device, your can use these kind of Power-Hubs.
24 V Mod
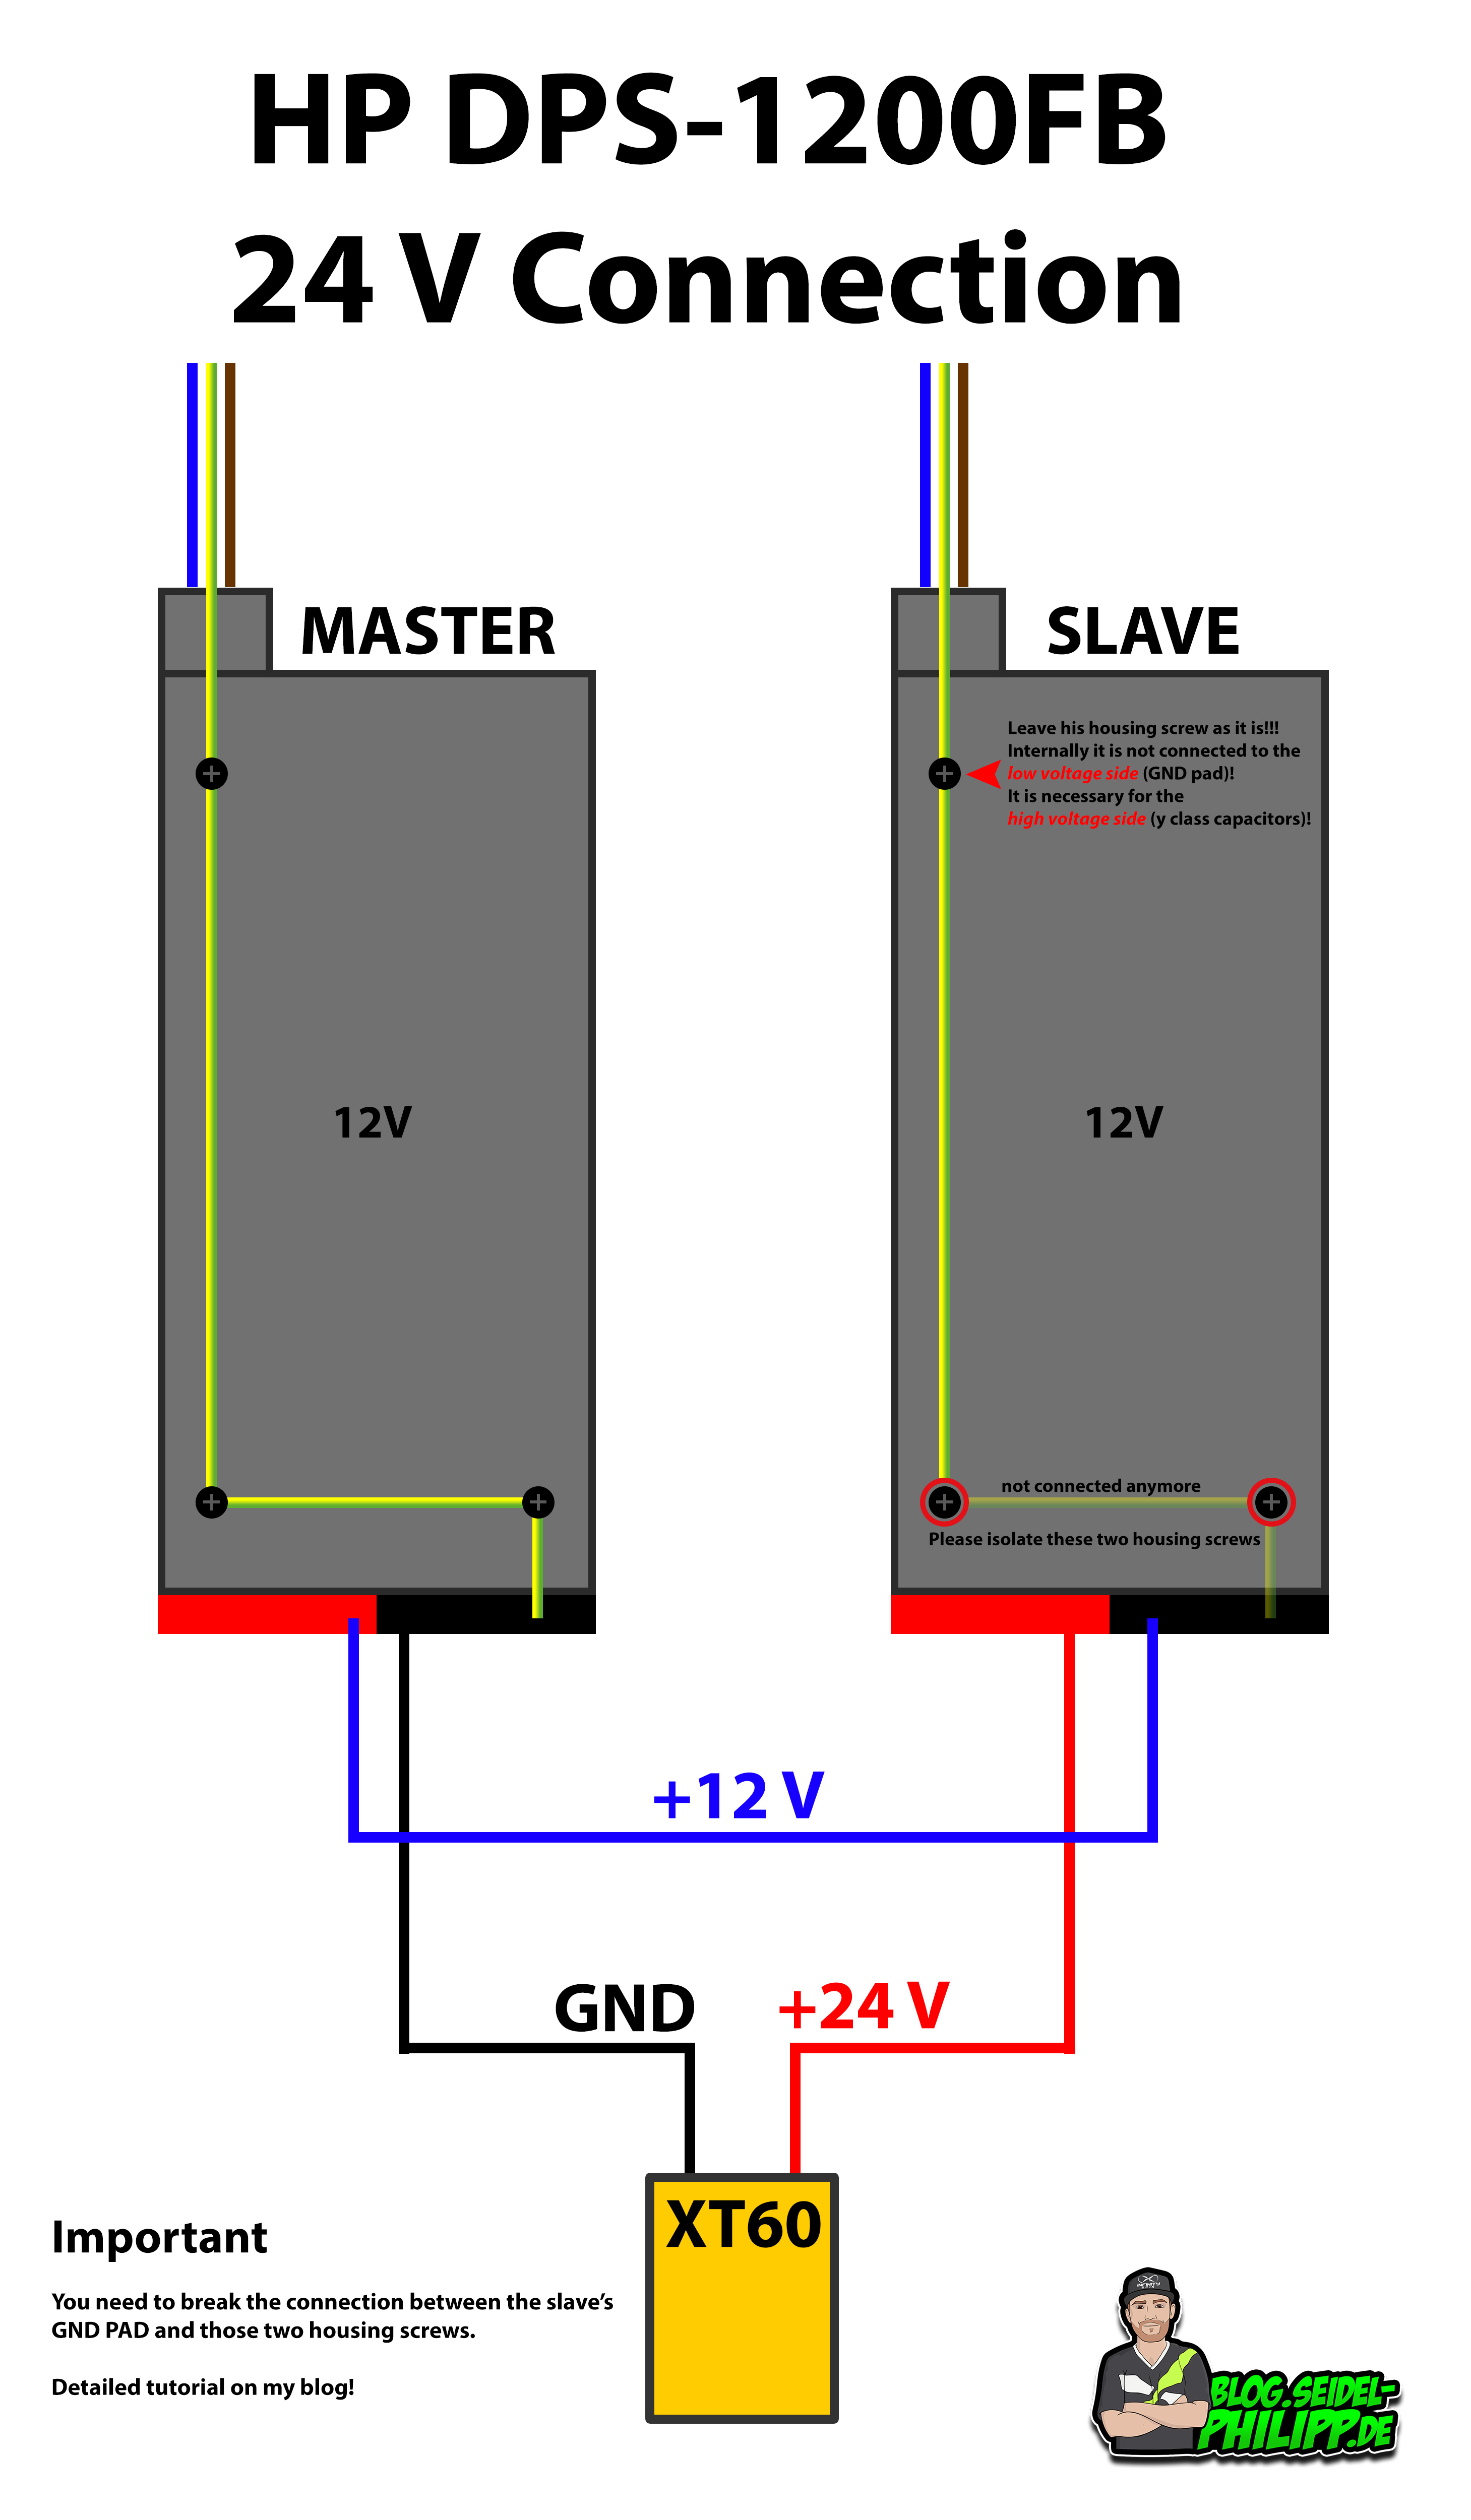
It is possible to connect two power supply units in series, so that you get 24 V output voltage. Below I explain how to adjust the power supply for the 24 V operation.
Warning:
Note that 220V (or more) may be present in the interior of the power supply. If you are unsure to do it yourself or you are not expert, you should not make this mod. I accept no liability for any damage that may result from this tutorial.
Do not operate the device when it is opened. Please also note that this power supply has capacitors may still be charged for a long time with high voltage, even if the power cord is removed.
What is needed
- 2x HP DPS-1200FB (A) Power Supply (Used already from 30€)
- 2x resistor between 330 Ω and 1000 Ω (z. B. Conrad Sortiment)
- Soldering Iron (e. G. TS100) + solder (e.G. FixPoint)
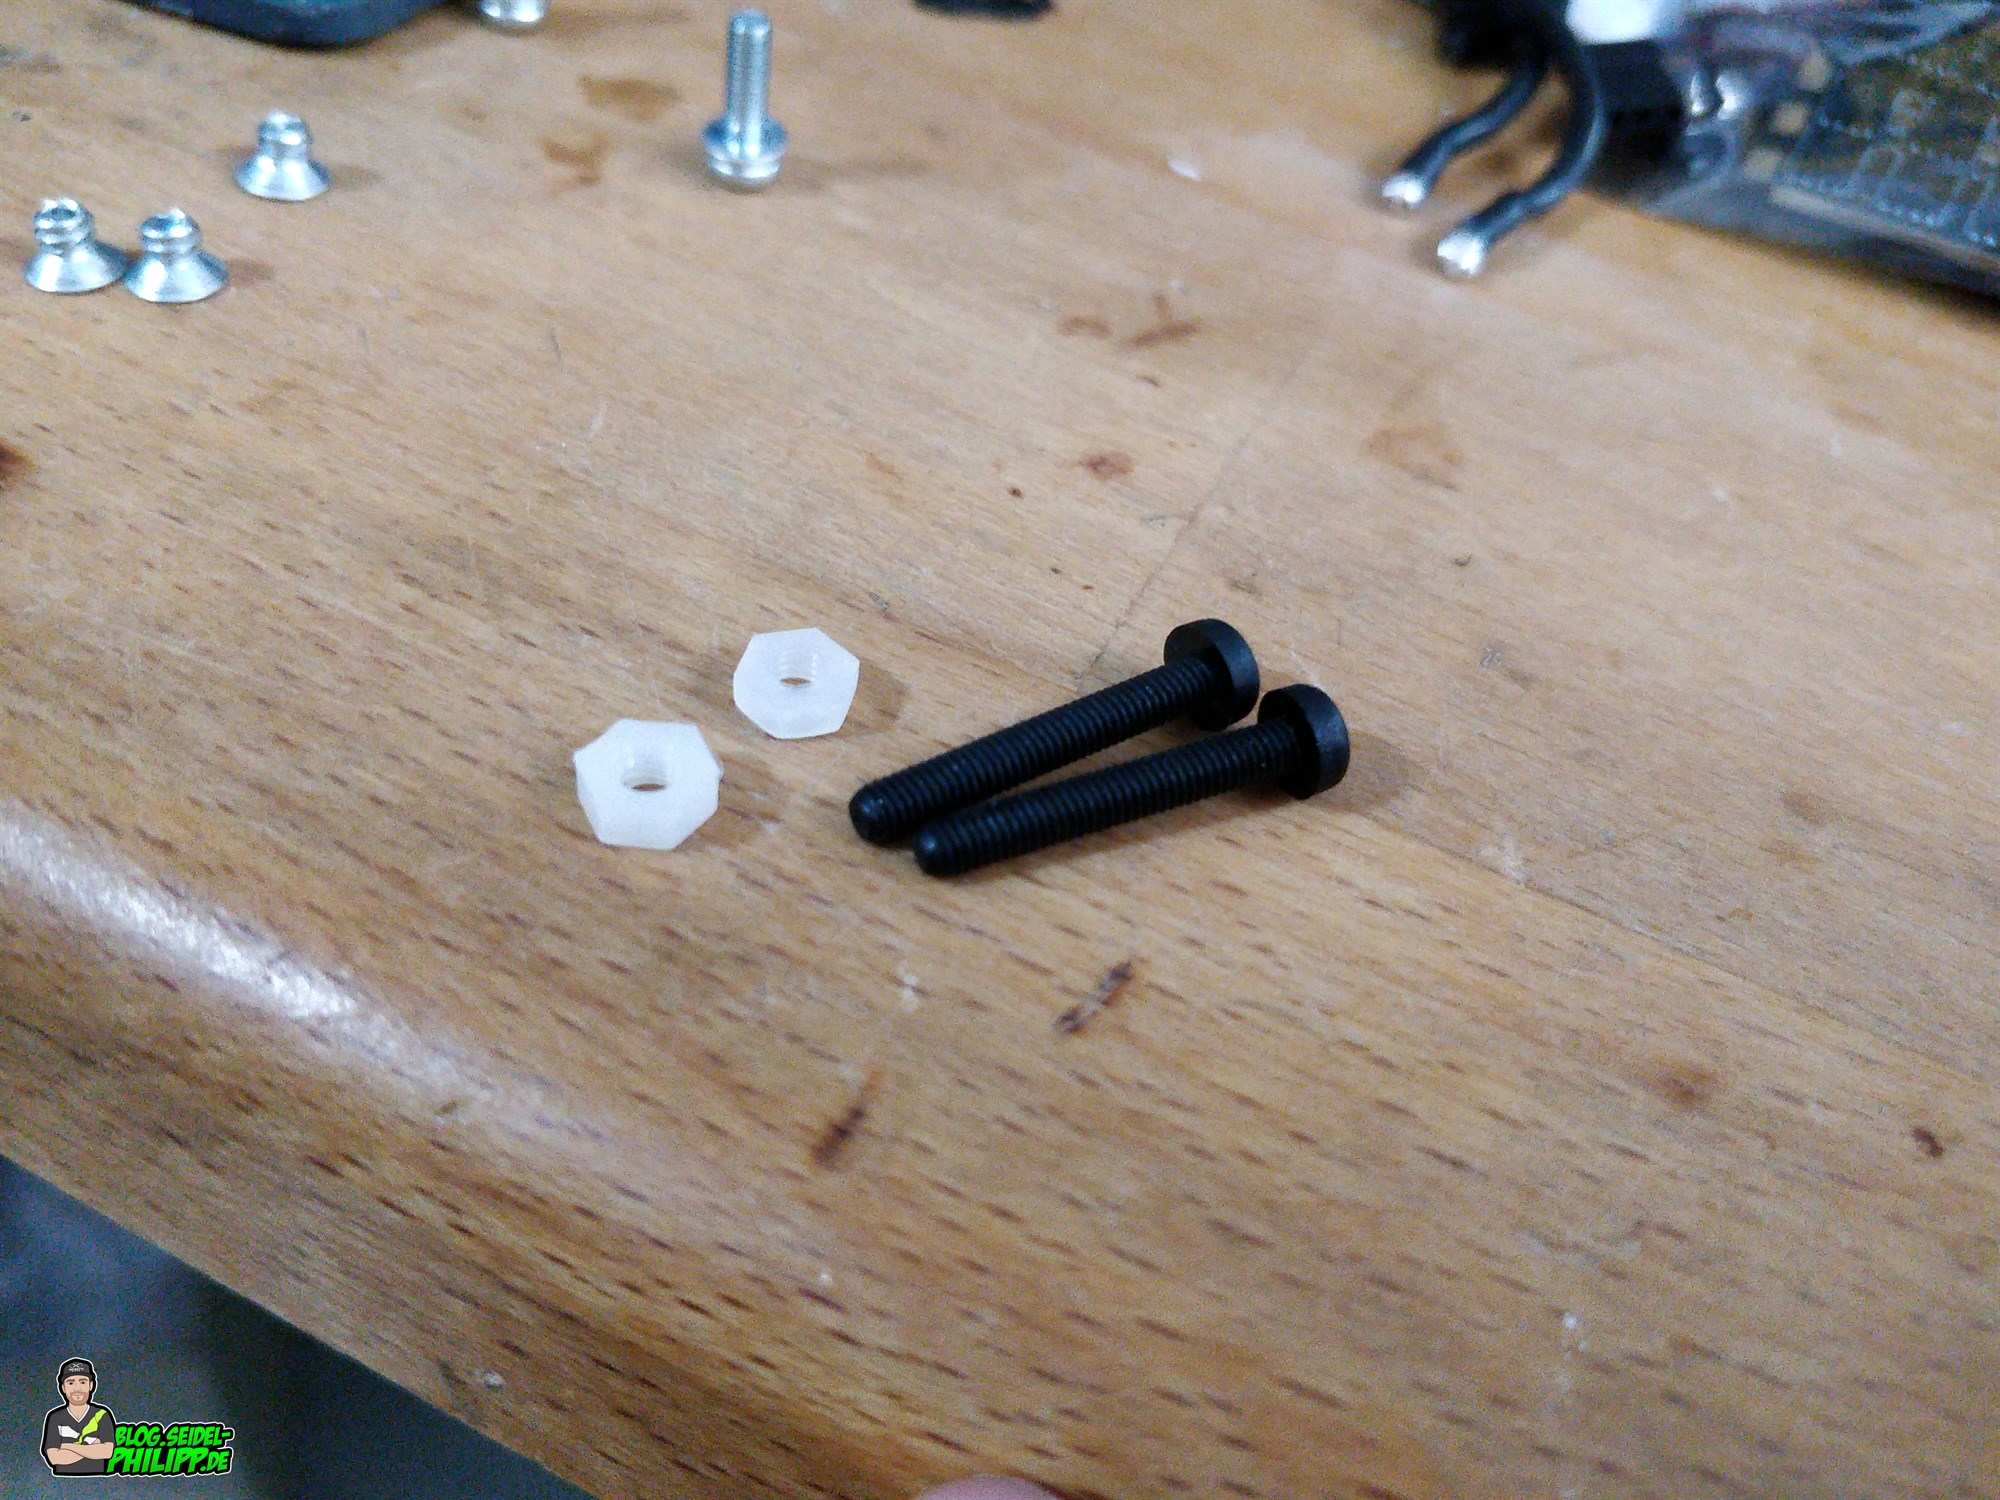
- M3 Nylon Screws and M3 Nylon Nuts
- 3mm drill
- 3M VHB sowie Gewebeband
- Netz-Y-Kabel 1x Schutzkontaktstecker auf 2X Kaltgerätestecker 1,8m
- optional: screwdriver (e. G. Wera 0,4 x 2mm)
power up the supply – solder a resistor
First, make sure you mod both power supplies with a resistor as described above.
Master / Slave power supply
The master power supply is now finished with the soldered resistor. The slave power supply needs a bit more work. For the HP DPS-1200FB, the GND (low voltage side) pad which we solder our XT60 connector to, is connected to the housing ground. We have to cut this connection to avoid a short.
To do this, we first open the case as described above.
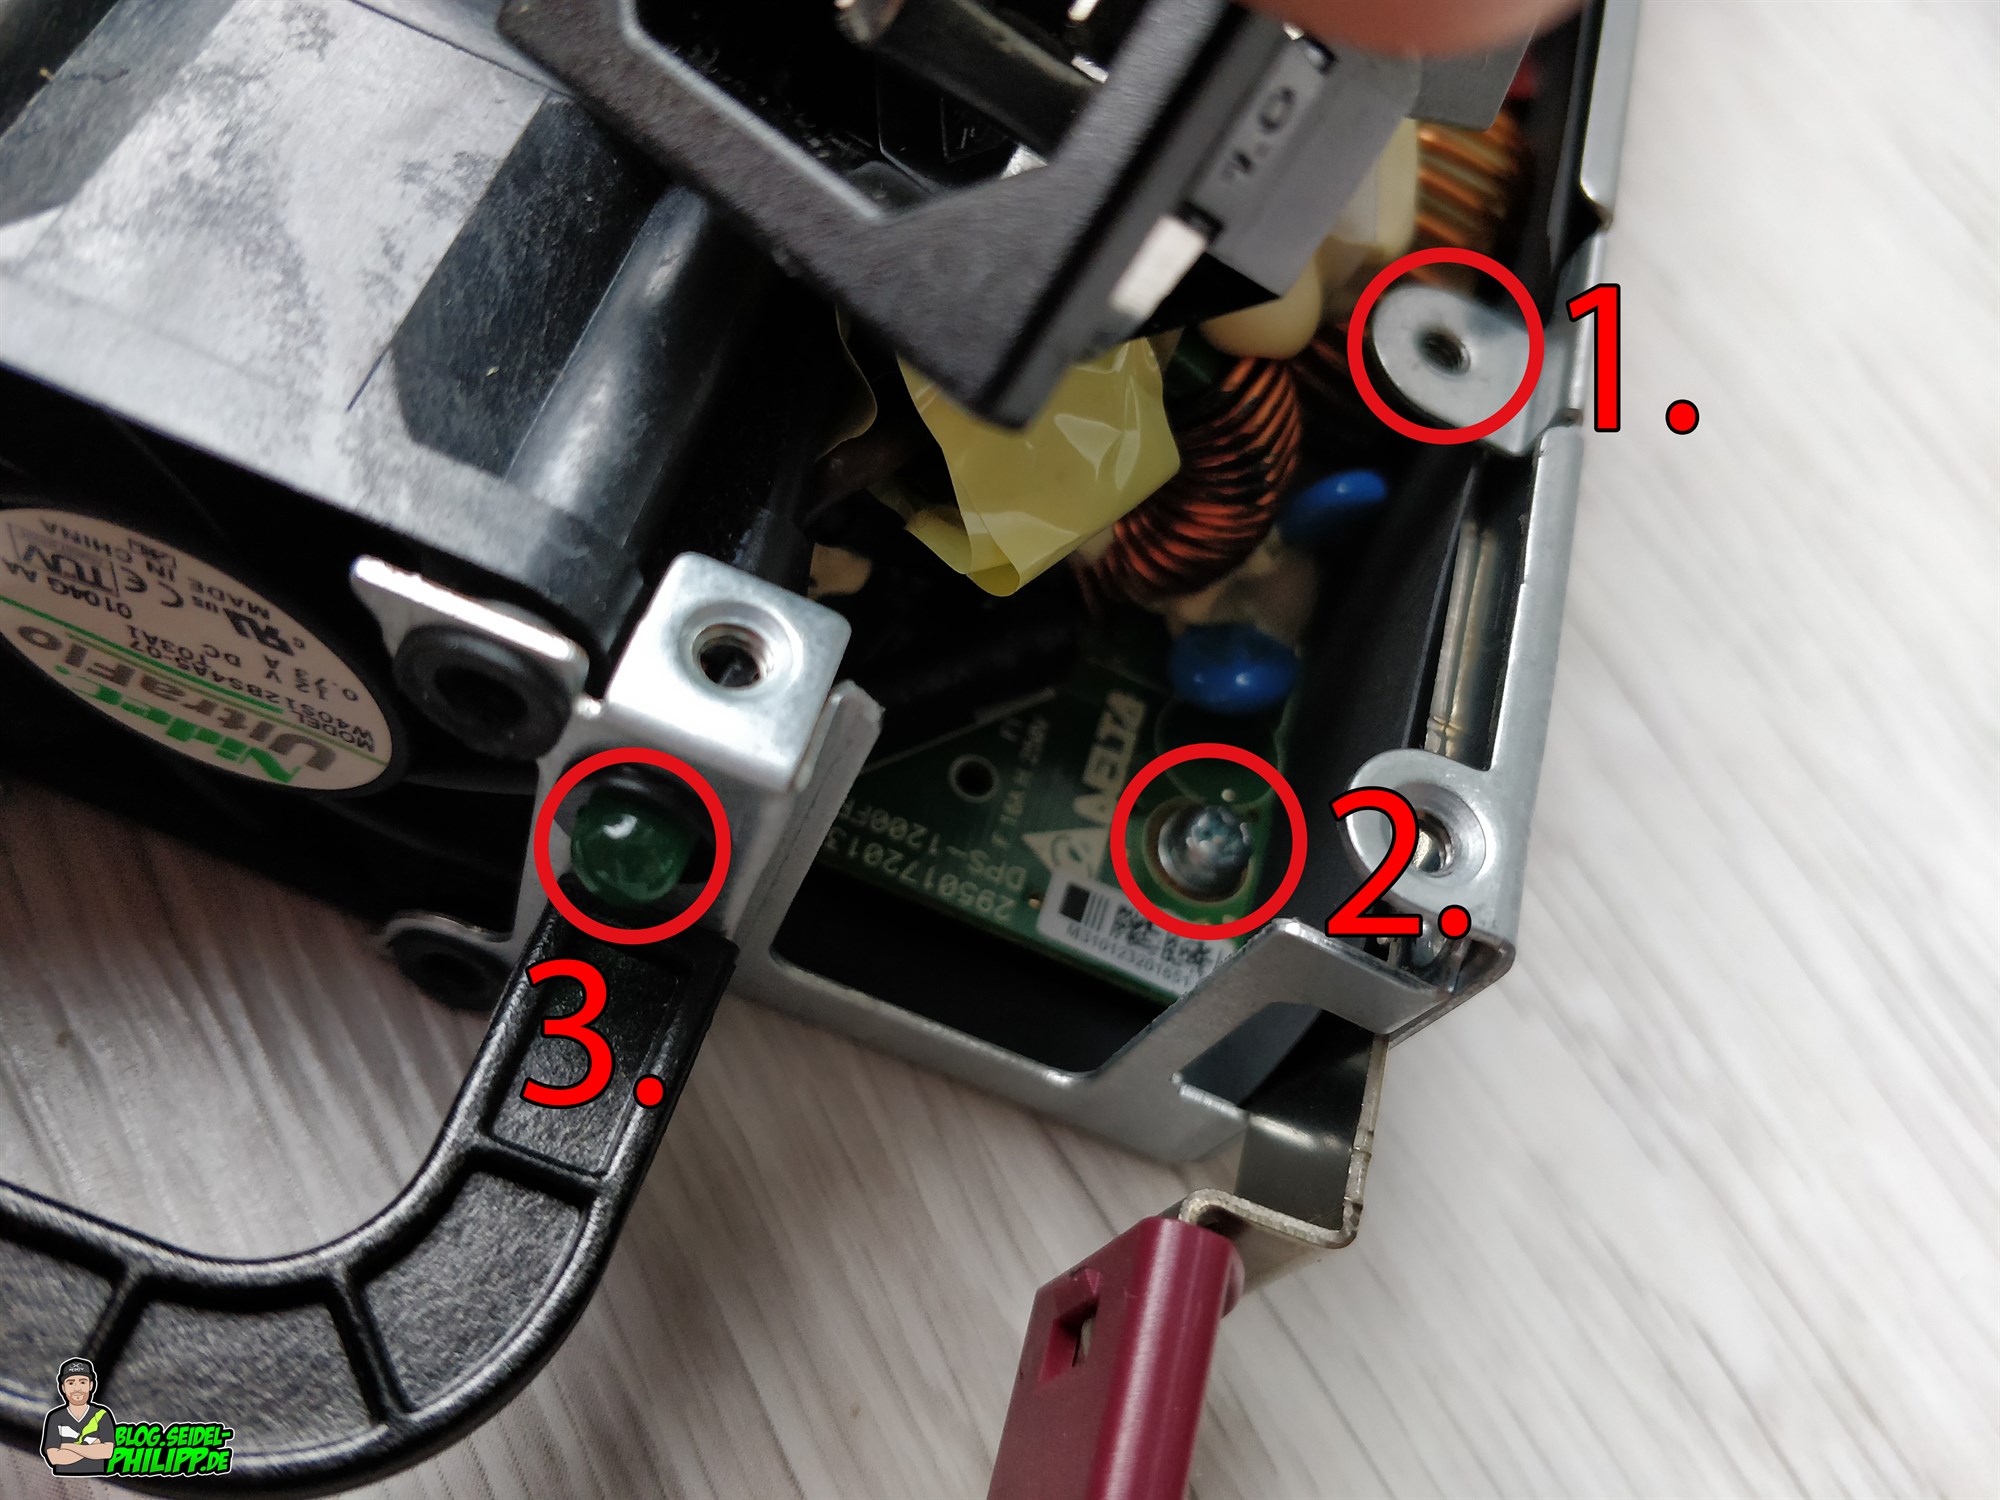
In addition, we remove the 4 screws of the fan.

Unscrew the ground cable (1.). Now you can press socket for the power cable upwards and get to the third housing screw (2) which must also be removed.
The green LED (3.) is gently pressed into the interior of the power supply until it pops out of the plastic.
Now we carefully remove the entire power supply and take care that you do not touch any components with your hands, as there may still be high voltages present.
You can also remove the black insulation without damaging it.
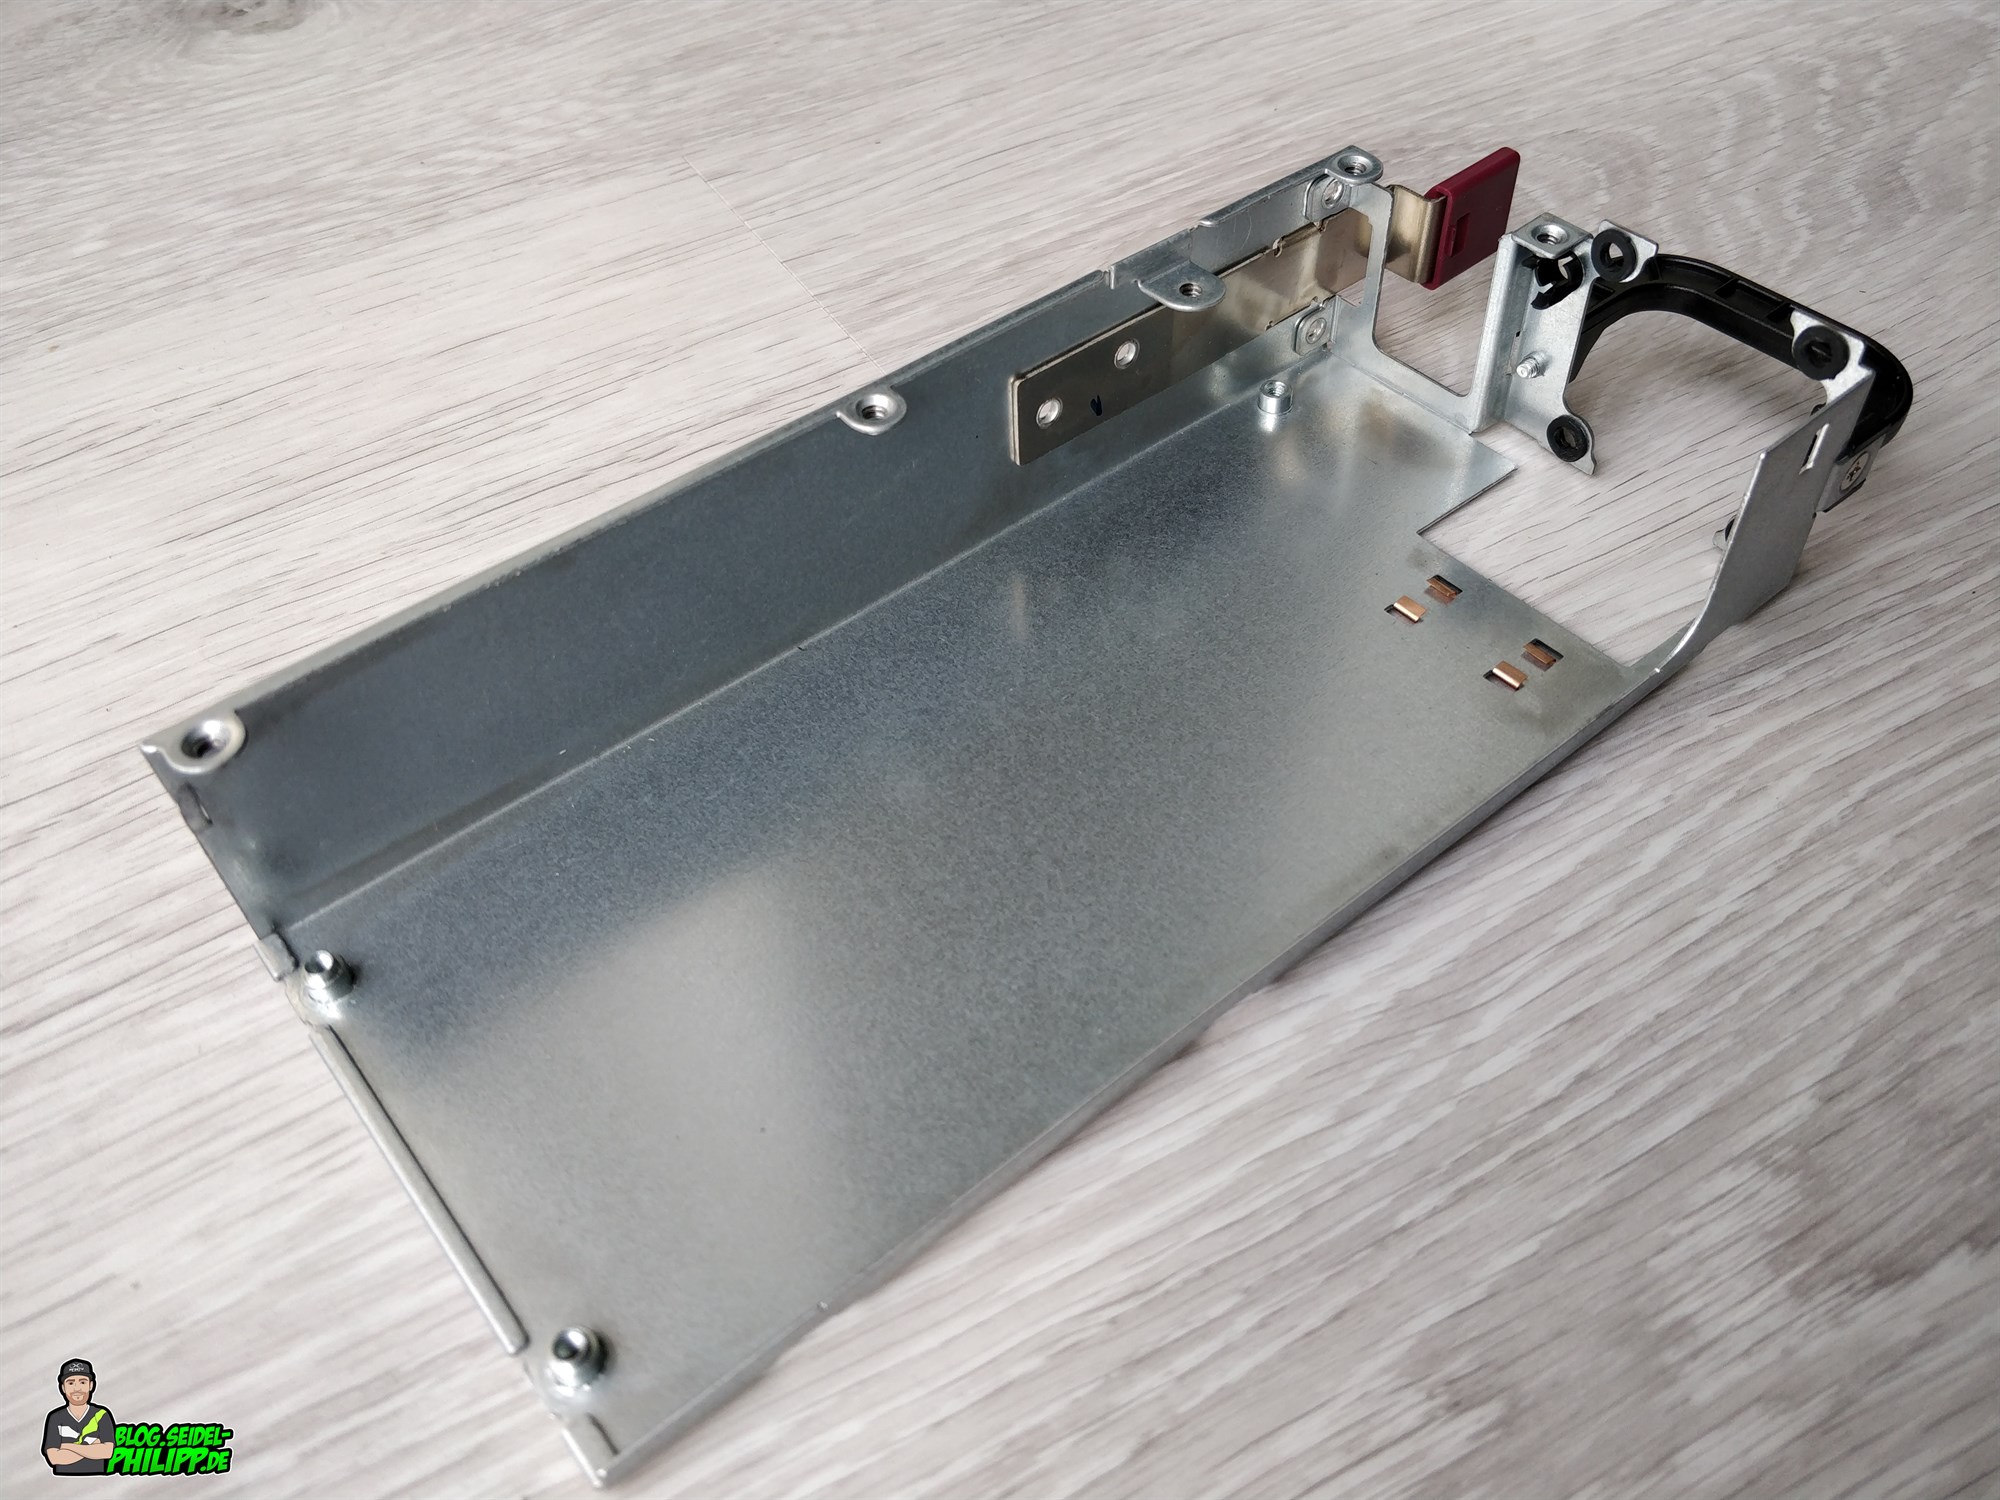
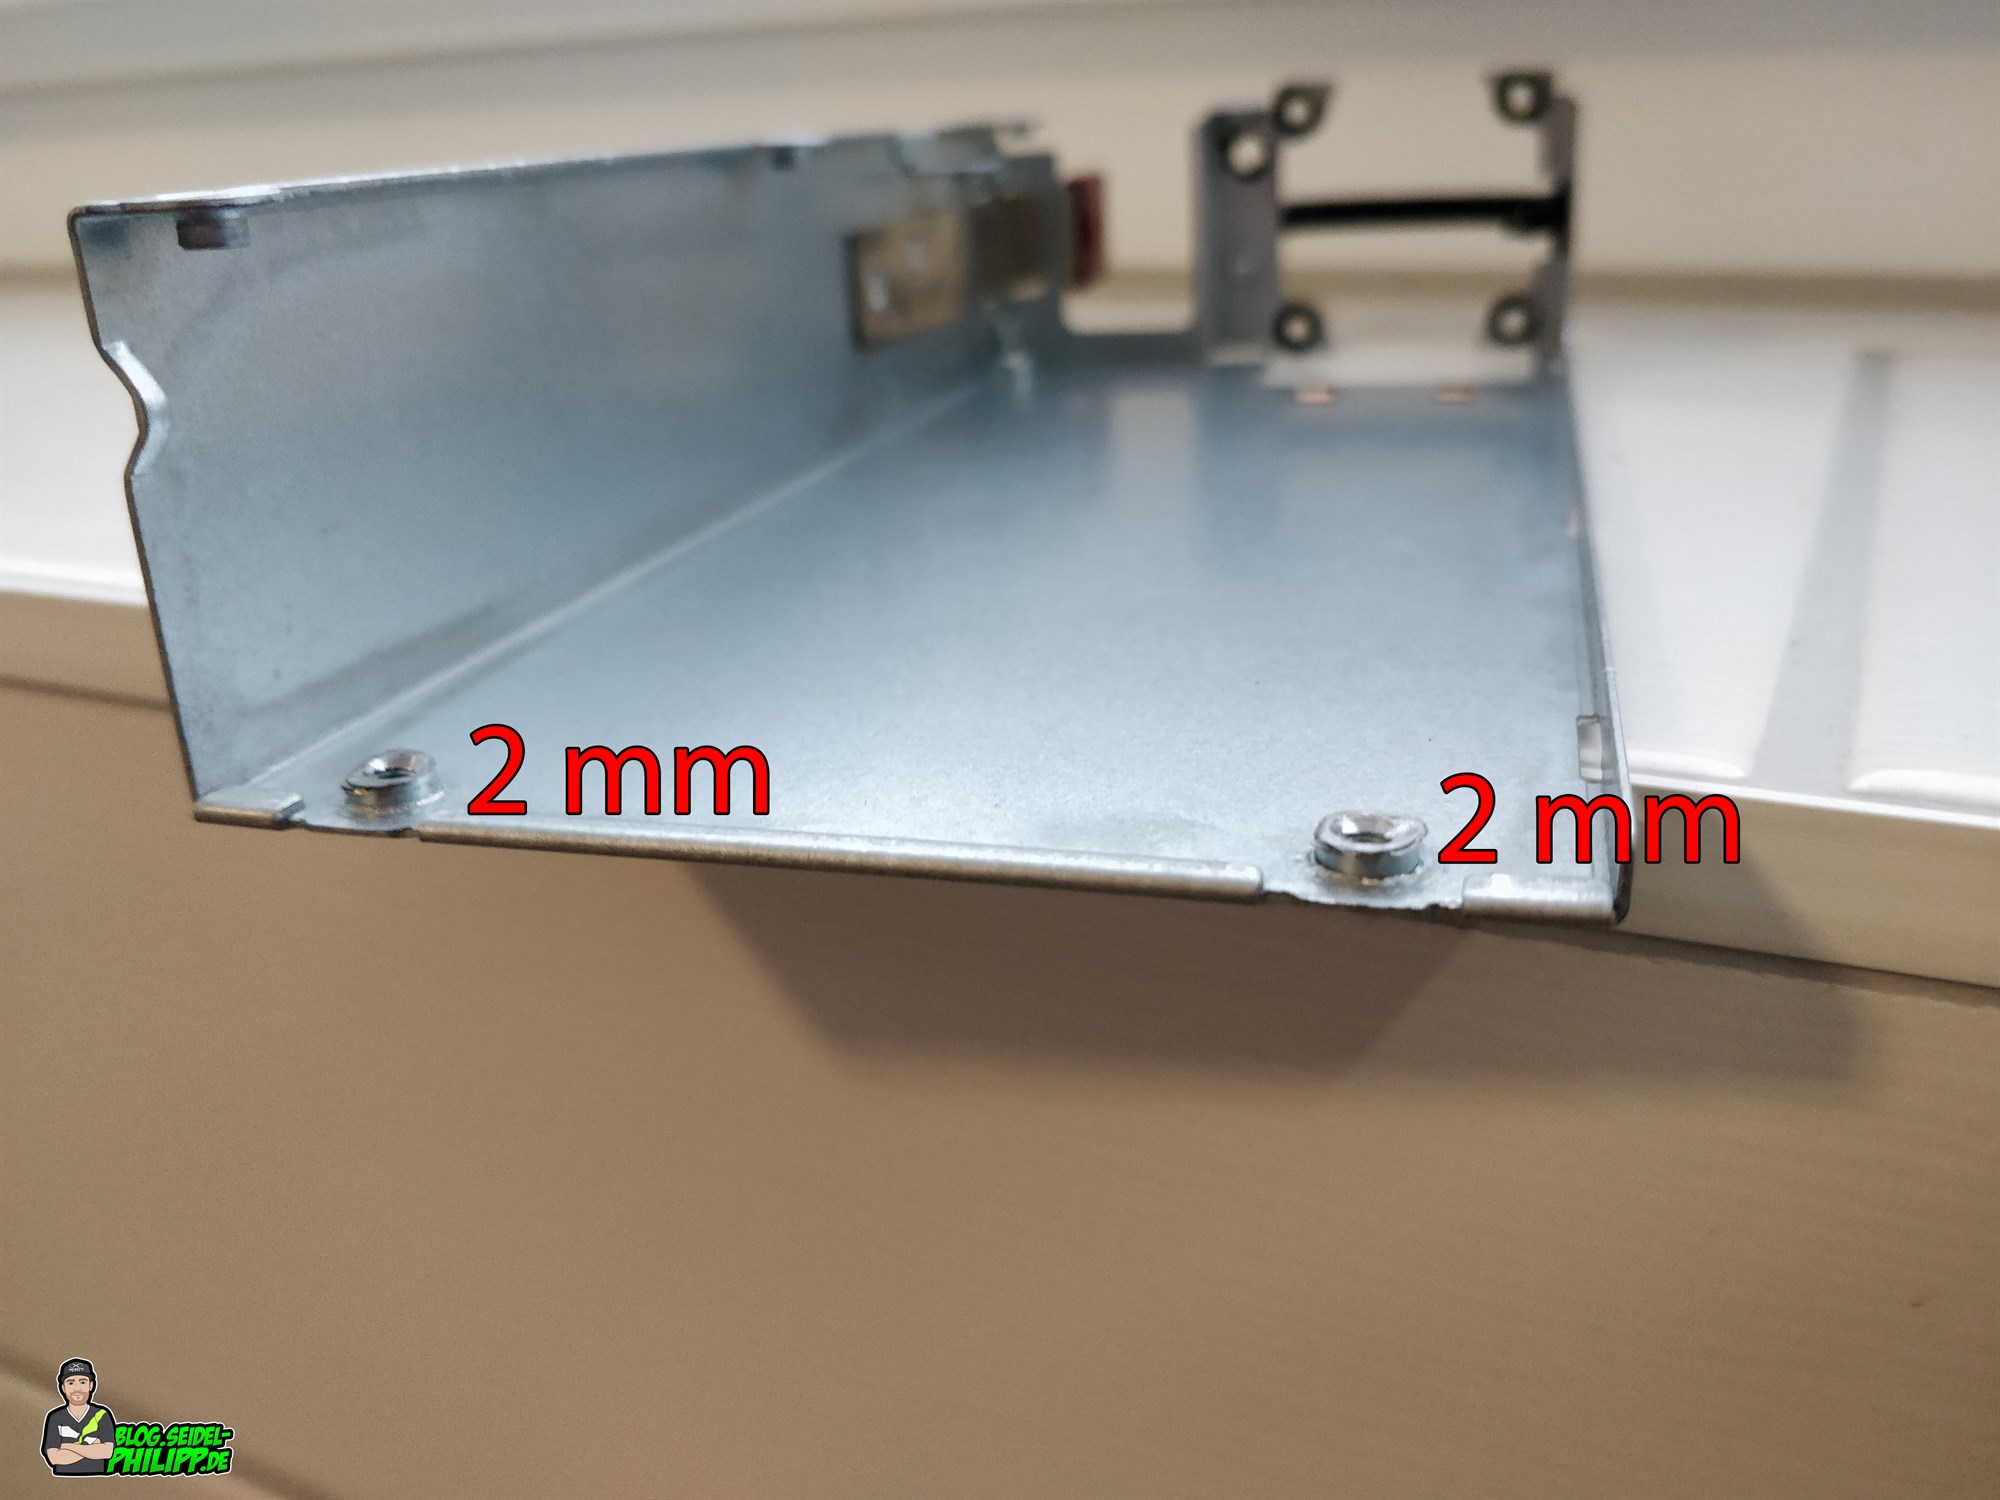
Now you grind the spacers with a file, to 2 mm height. Drill out the thread with a 3mm drill
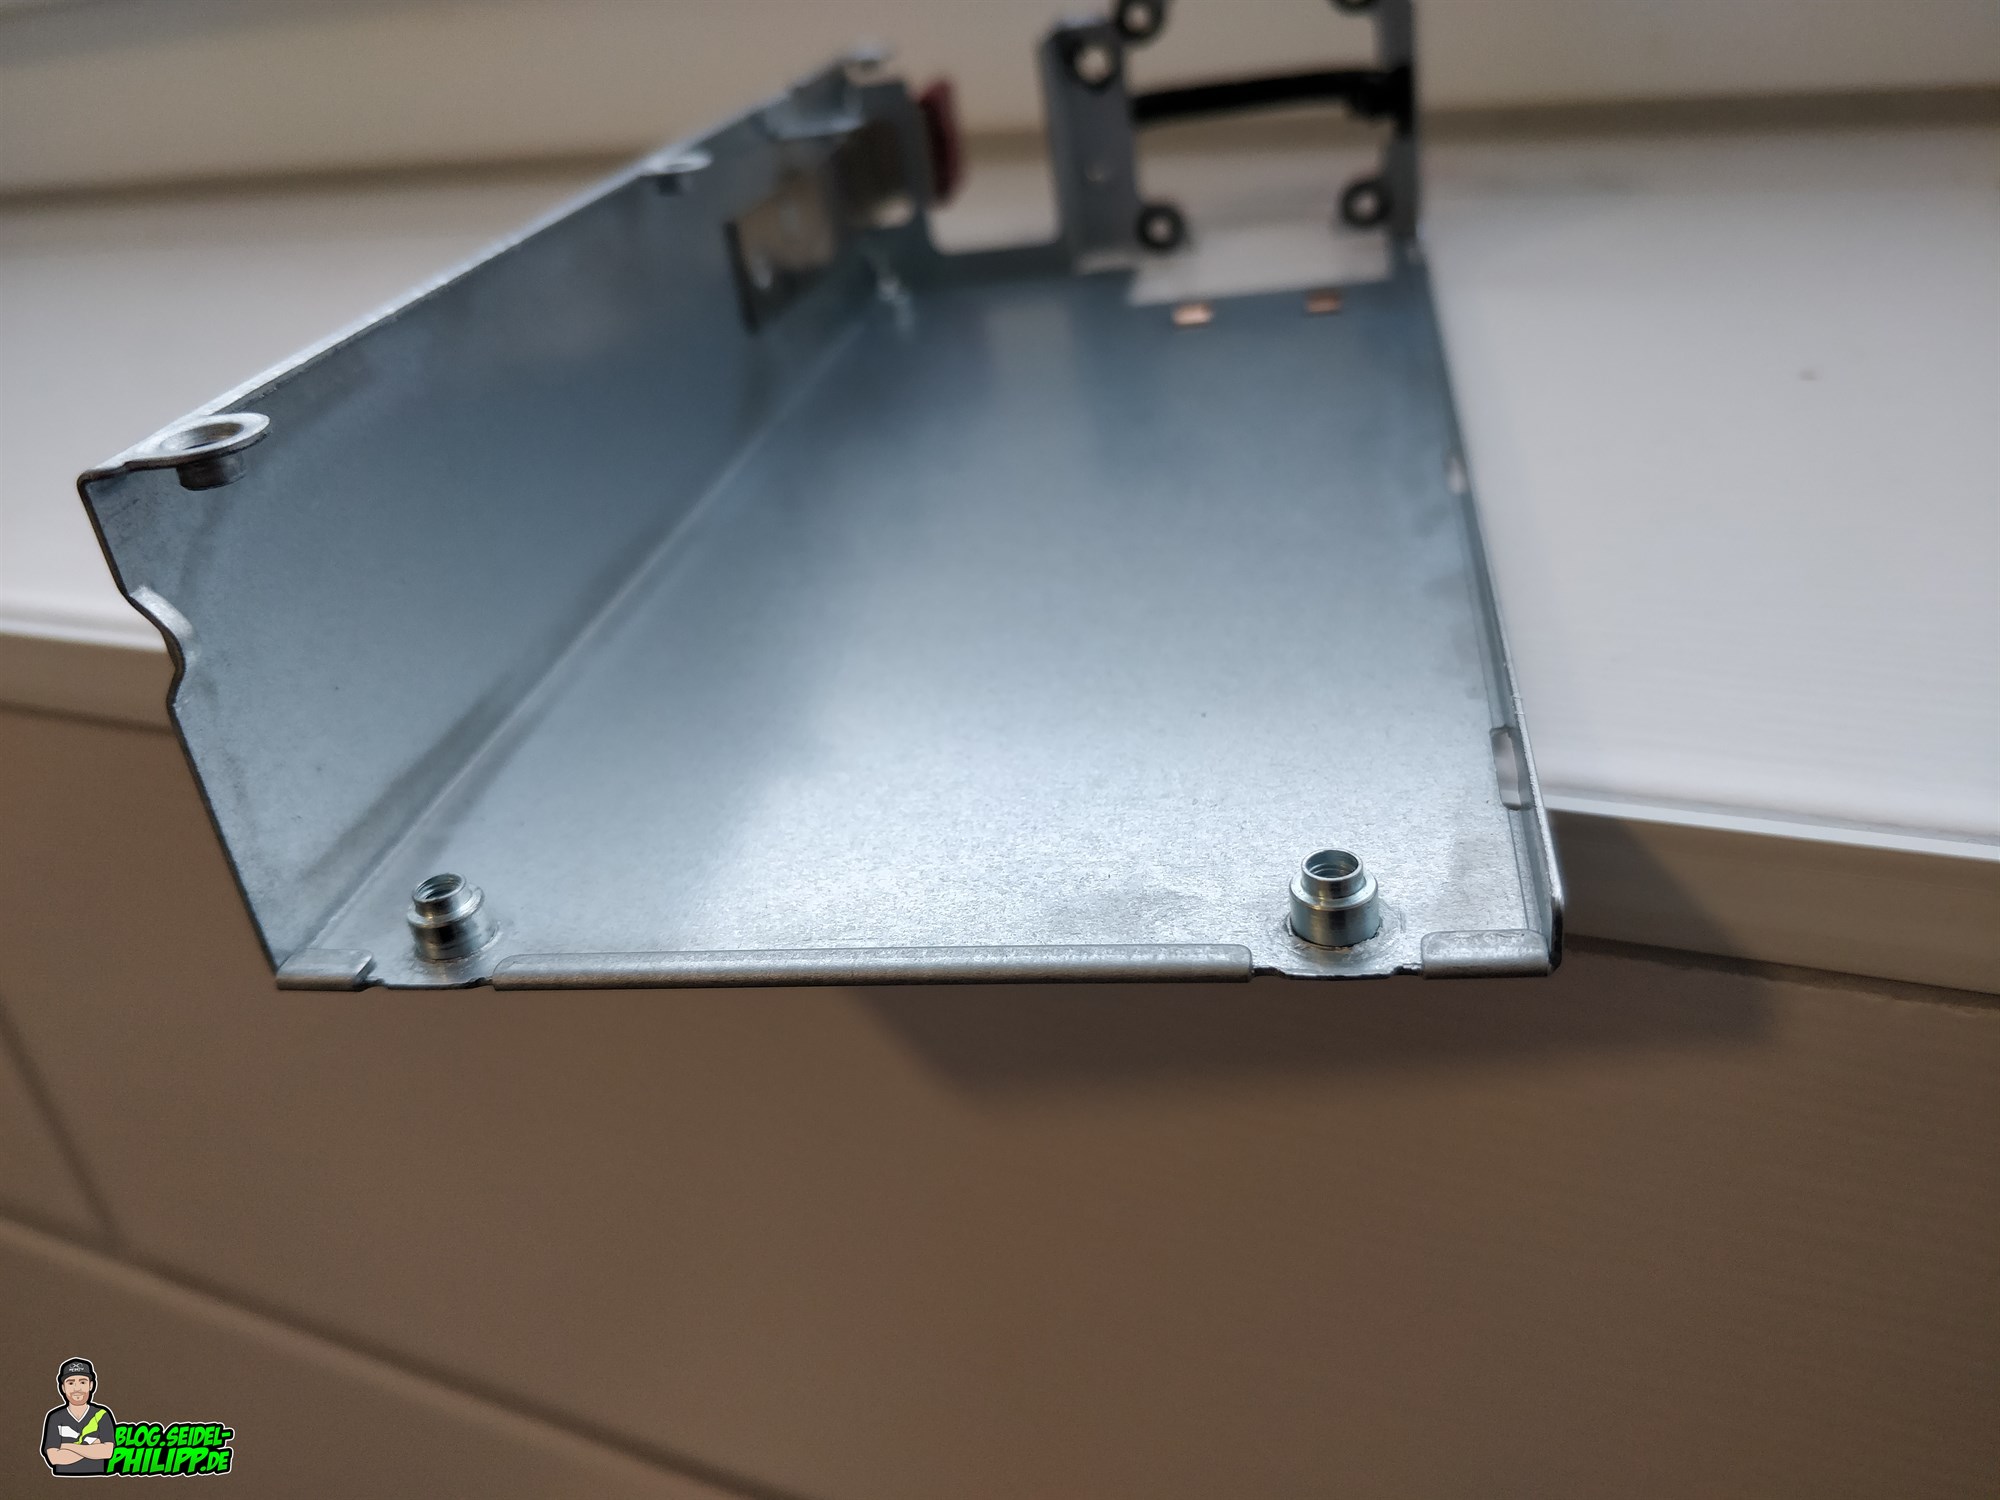
Screw the nylon screw together with the nylon nut.
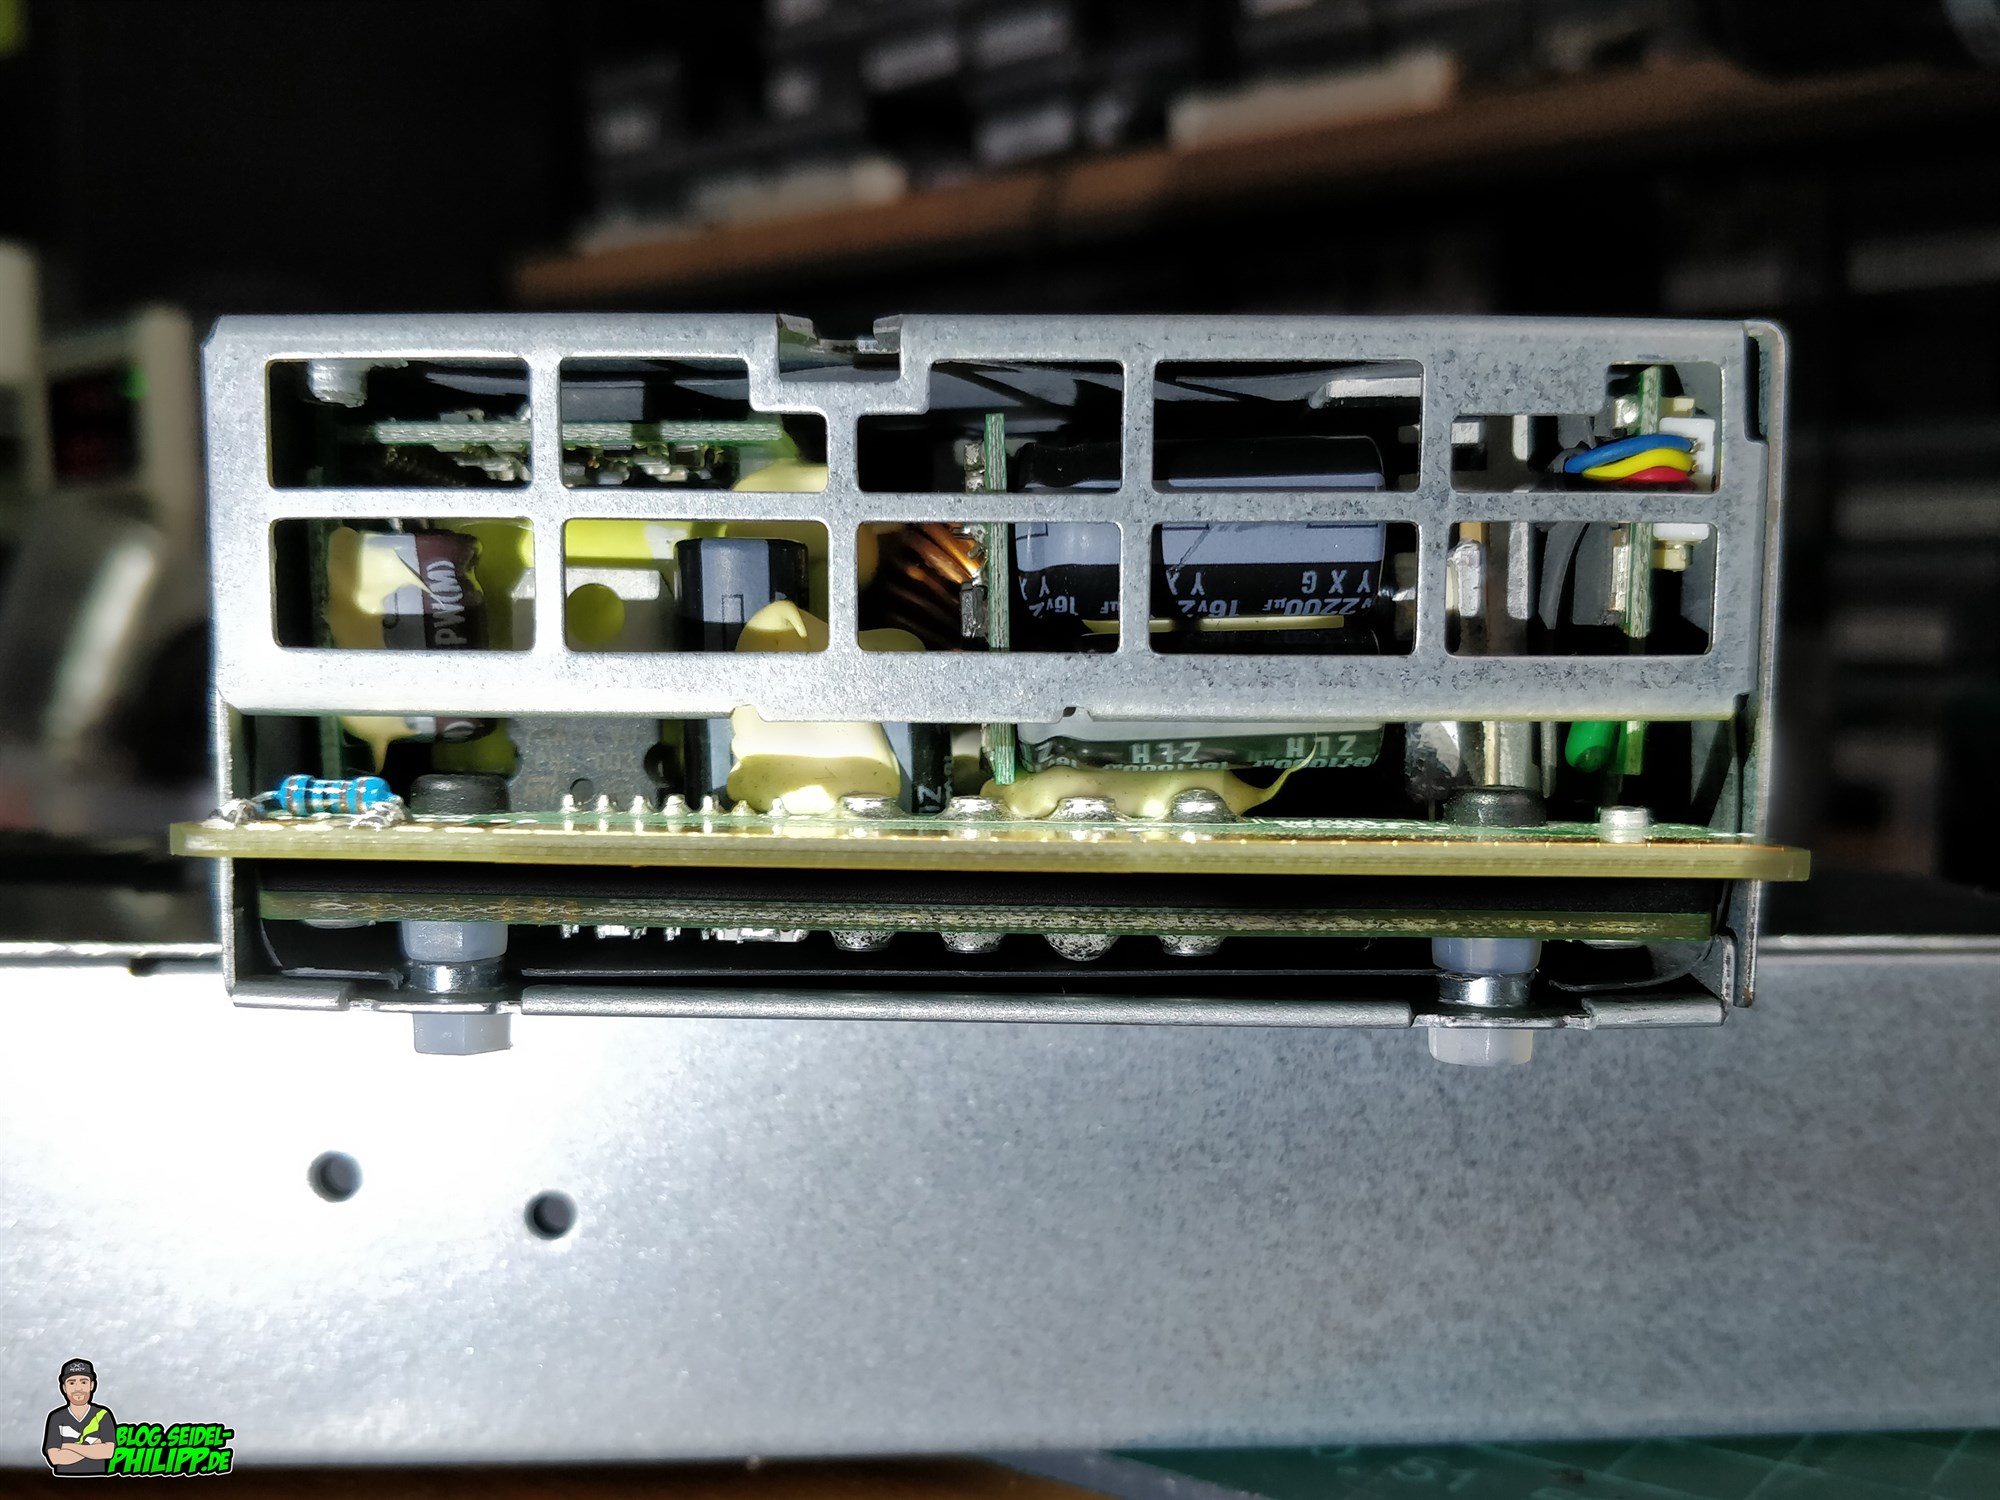
Now you can reassemble the case and screw the nylon screw completely through the housing and lock it with another nylon nut. You can cut off the protruding screw.
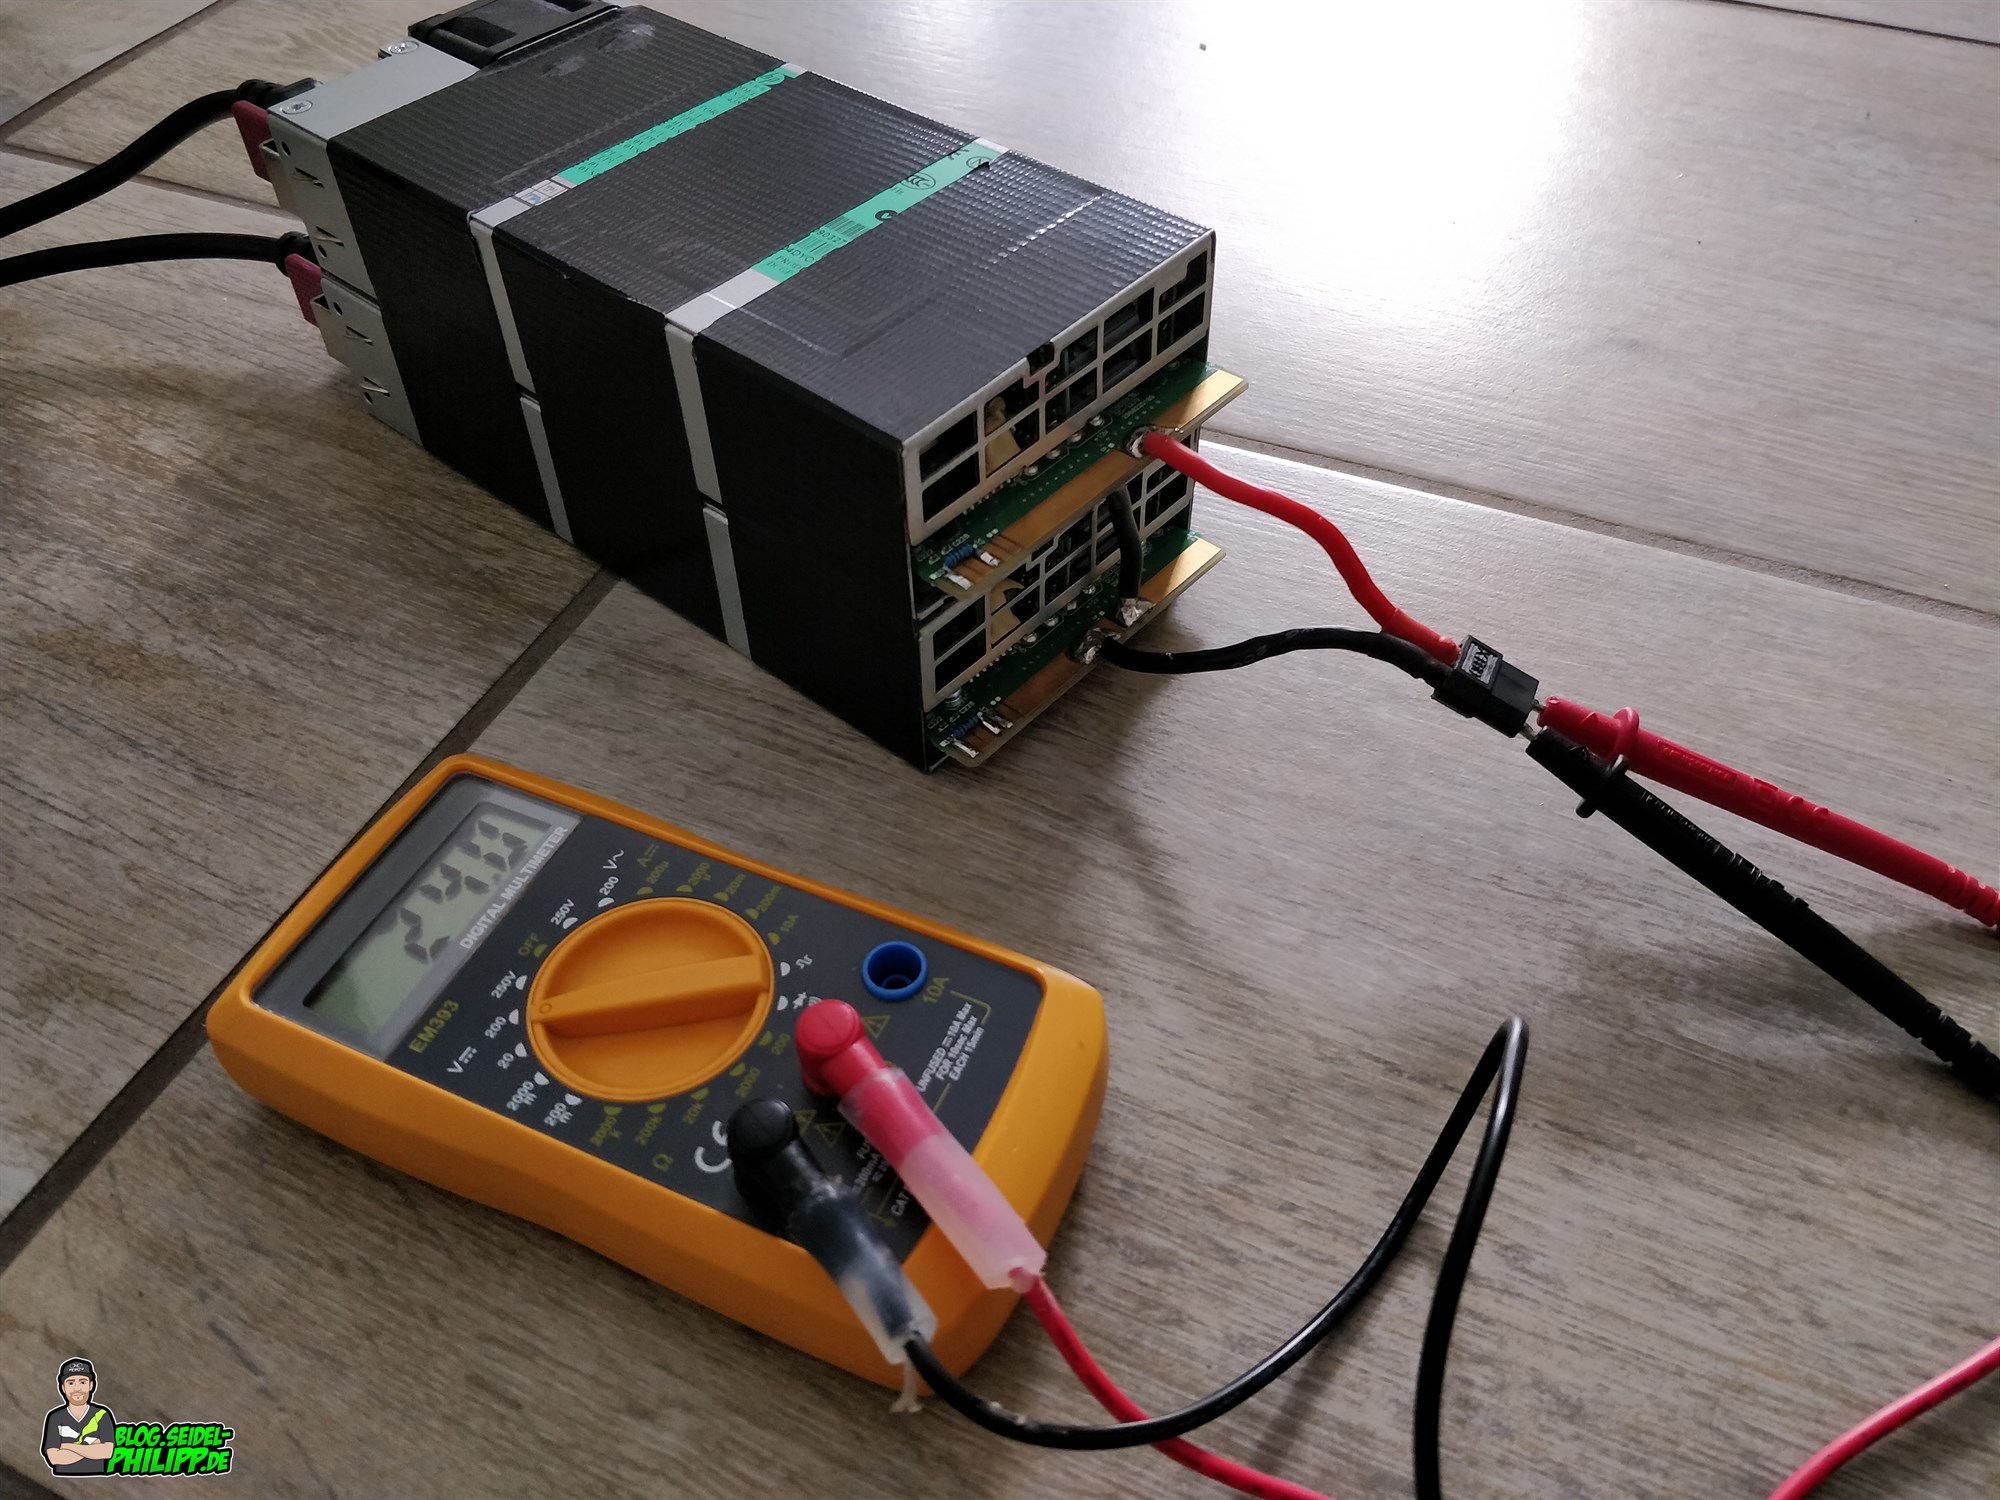
As a last step you solder the cable as in my drawing above. Make sure to connect master and slave correctly. I’ve glued both power supplies together with 3M VHB and also connected them with duct tape.

Now you can measure the voltage and should have about 24V. Your 2400W 24V power adapter is now ready.
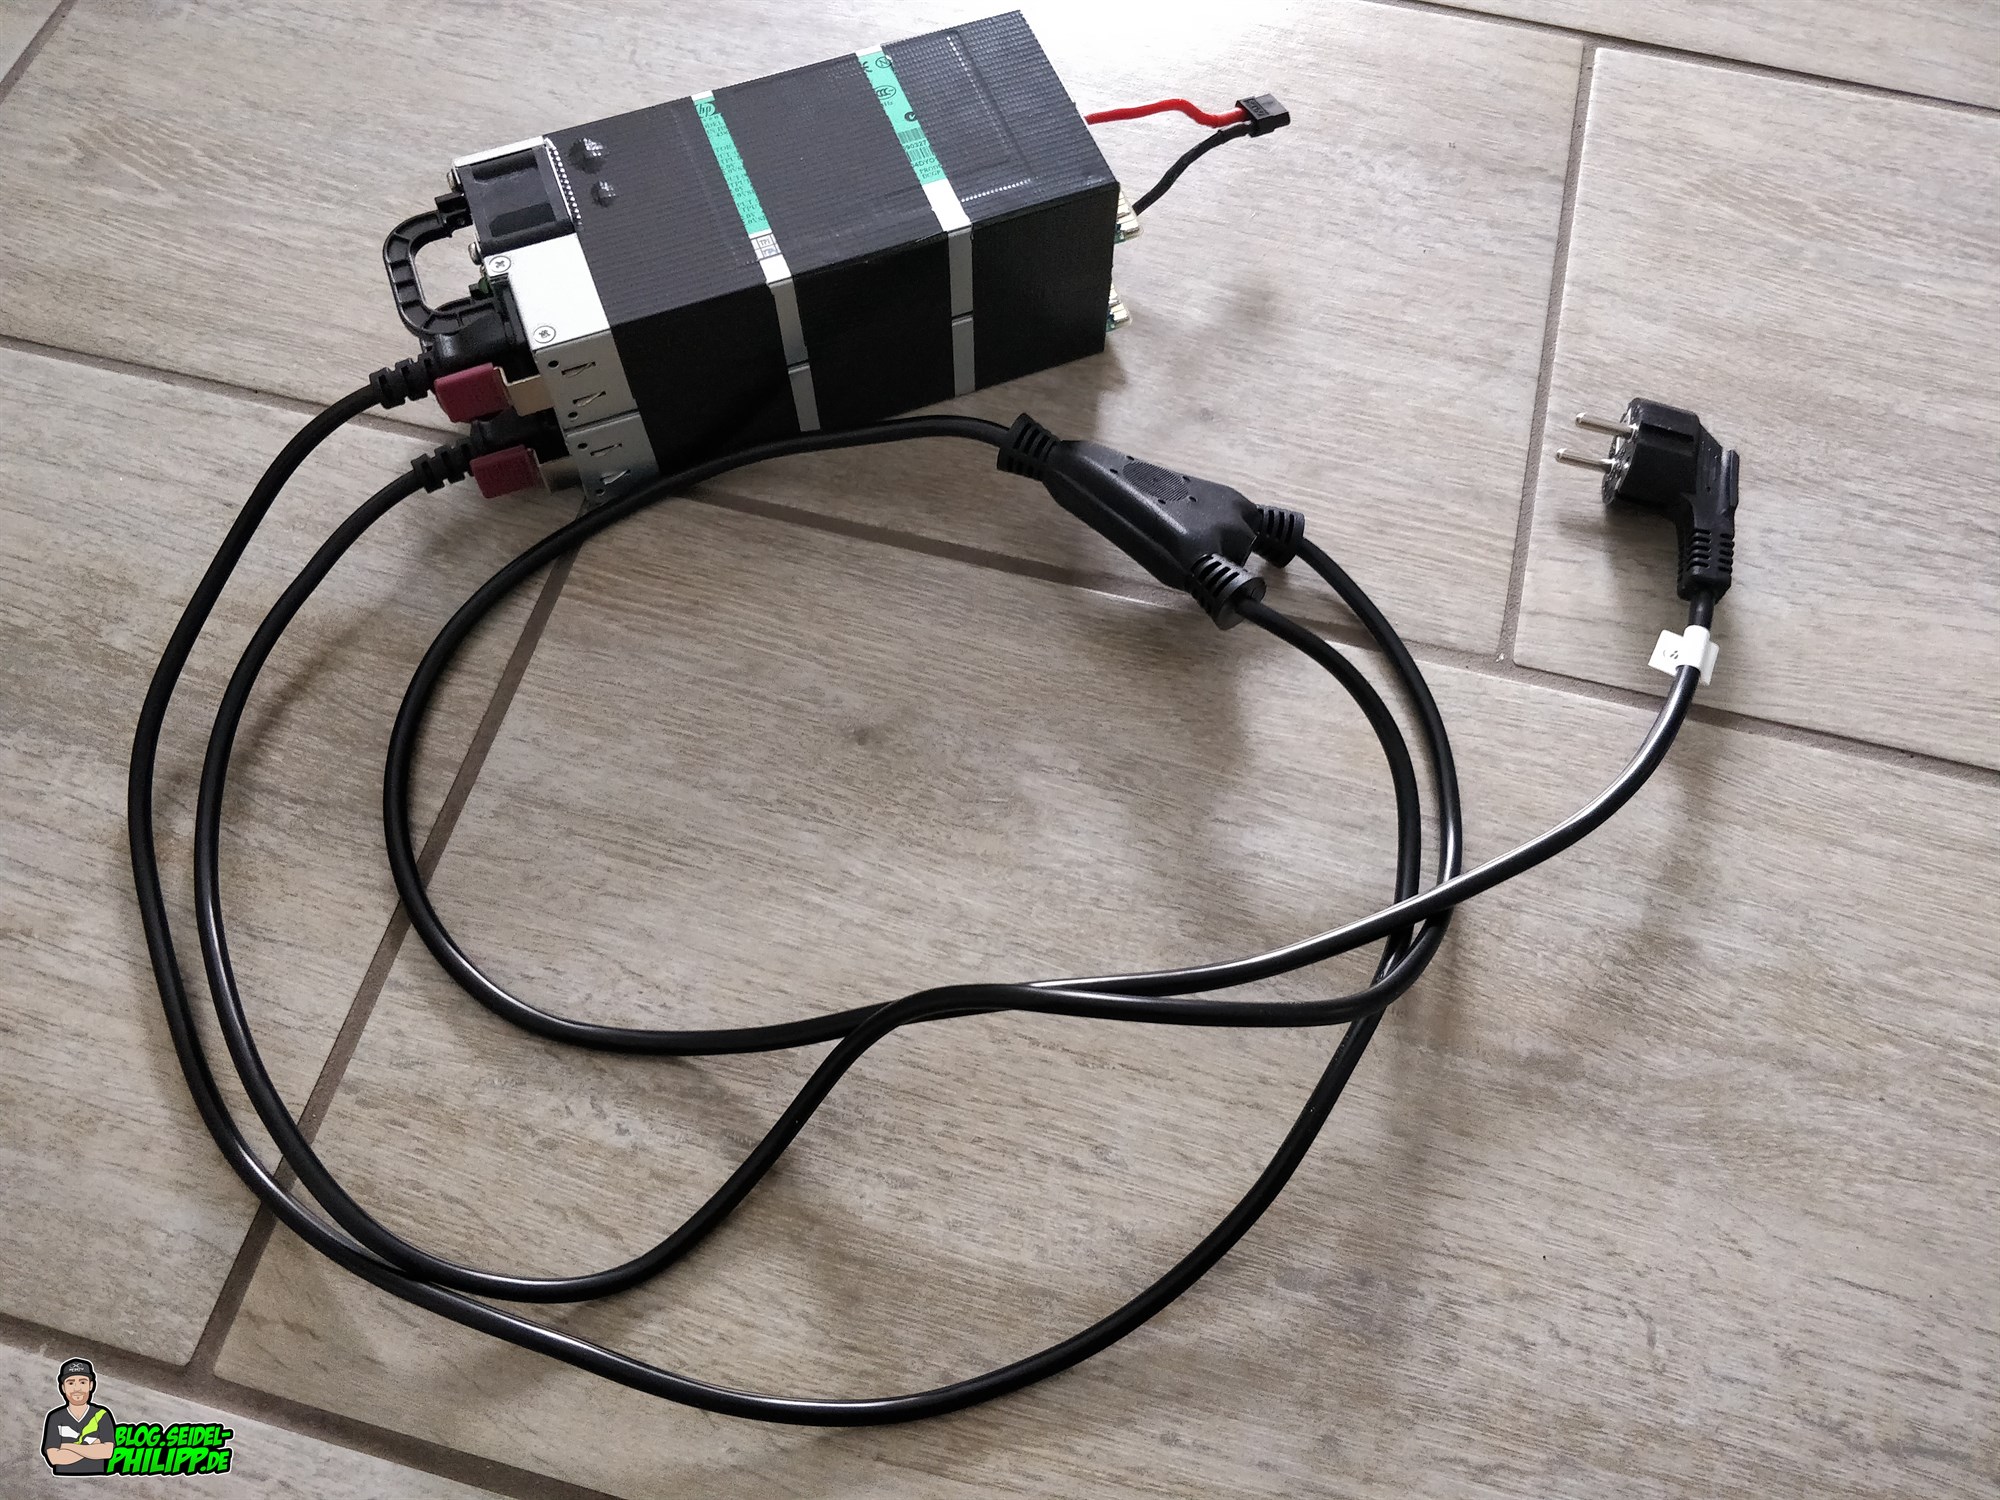
In order to supply both power supplies with only one cable, I recommend the following cable: Netz-Y-Kabel 1x Schutzkontaktstecker auf 2X Kaltgerätestecker 1,8m

I got 3pcs HP PSU DPS1200FB-1A (HSTNS-PD19), 2 of them are connected in series with mod as per your guideline. That would be a PS for a battery charger. I would like to mod the 3rd one to increase the out voltage to 14.6V. That will be used as a charger for a battery pack 4S2P LiFePo4 with BMS built-in. I search everywhere, but could not find the hacking info for this model. What I find is only tune up max 13.8V. I would appreciate it if you could share with me. Thanks !
Usually these power supplys only supply 12V. You can calibrate them, to be spot on 12V but you cant increase the voltage to 14.6 Volts.
Do you know how to do it with HP DPS-1200FB-1 A (HSTNS-PD19)?
On wiring resistor between pin-outs 33 and 36: does this work for both 115 and 220Vac inputs? If yes, do I assume this power supply self-sets for Vac inputs 100 thru 220 Vac?
Excellent article, btw!
Hi Paul,
the resistors to start the power supply have nothing to do with the input Voltage of the power supply.
You can hook this power supply to any Voltage between 110 and 240 V (AC).
Greetings,
Phil
Hi,
Can I power on the power supply without using the resistor?
I saw a few people just use a bare wire between the two pads (33 to 36)
Asking this because the only resistor I have is 150 ohm.
Hey Eden,
it could work without a resistor. But 150 ohm should just work too. You could also wire some resistors in series to get the Power Supply start.
Greetings,
Phil
Timucin KANATLI Alot of us would be interested in the 14.6 volt out.
would like info and making the power supply operate at 14.4 or so….Thank You
T Ross
Two considerations:
1) are you sure your cheap multimeter is more accurate to measure 12v than the HP server power supply factory calibrated ?
2) you measure 12v with no load attached to the power supply: typically when you attach something to it, the voltage decreases a little bit… maybe that amount you adjusted… so the tuning should be done under load….
Hi,
1) You’re right, its a very cheap one!
2) You’re also right, better calibrate with load.
Ich habe mit Interesse deine Auseinandersetzung gelesen, weil ich die hp astn 1000watt 700 für meinen Spotwelder einsetzen wollte.
Ich habe leider noch keine forum gelesen wo so deutlich alle Schritten beschieben wurde.
Doch bei meinem hp ist kein einzige option vorhanden.
Weissen Sie etwas näher?
Hi man,
If you don’t mind, lets talk english! What exactly are you looking for?
Grettings,
Phil
Did you ever get the info to fool the ovp for 14.6v? I have been loking for that info for a long time, can you enlighten my as what to do to achieve this?
Thanks so much
What are the other 2 pots for?
Pinout:
1: +12V Power out
14: GND Power out
27, 28, 29: I2C slave address selection pins.
30: GND (for I2C and I2C slave address selection, I guess)
31: I2C SCL
32: I2C SDA
33: ENABLE#
34: LOAD SHARE
35: STATUS
36: PRESENT
37: +12V stand-by
38: PSALARM
SOURCE: https://github.com/slundell/dps_charger and http://colintd.blogspot.com/2016/10/hacking-hp-common-slot-power-supplies.html
Hi,
Got help a lot from your article and wanted to give some back: I managed to fool OVP a bit an could get 14.6V out of it.
Can provide some more details if it is still current and/or interested
Regards
Hi Timucin,
yea please, i am interested into that info!
Greetings,
Phil
I am very interested in that info as well. I am hacking/documenting this PSU at https://github.com/slundell/dps_charger . I aim to rebuild it to a fully fledged lab-PSU or charger using an arduino/esp. I have (somehow) managed to work around the UVP. I have some spare cells from an EV project so I tested charging a 16s 20Ah GBS LiFePO4 pack. It happily puts 125A 3.6V through the pack!
Hi Simon,
awesome project you got there! I will keep an eye on that! =)
Phil
Is 13.8v possible. Pleas send me info thank you